

You can specify a crop rotation for each field, that is, crops that were cultivated in the past or are being cultivated in the field at the present moment. You can also indicate the crops which are planned to be grown in the field.
Make sure to create a crop catalogue to be able to indicate a crop rotation.
You can specify a crop in the following ways:
- quickly specify a crop using the icon
 (available upon pointing to the list of fields or in the field menu on the map);
 - specify a crop on the Crop rotation tab in the properties of the field (the icon
 from the list of fields or from the field menu on the map);
 - activate the Add to crop rotation option when registering a cultivation.
The colour of the field on the map corresponds to the colour of the crop that is currently being cultivated.
Several crops cannot be cultivated in one field at the same time, that is, the periods of their cultivation cannot overlap.
Specifying a crop quickly
This way allows you to quickly specify crops which are now being cultivated in one or more fields. You can specify crops in this way only if there are no crops in the selected fields in Hecterra yet.
To specify a crop quickly, follow the steps below.
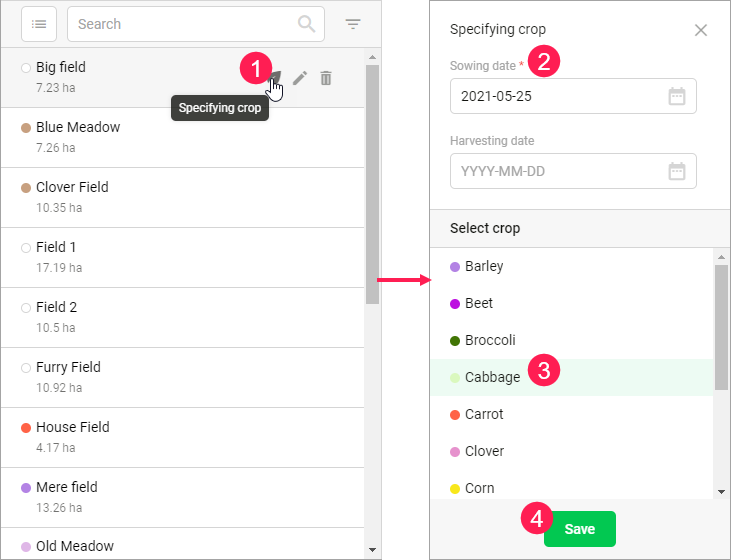
- On the Fields page, click on the icon in the row of the required field in the list or in the field menu on the map.
- Indicate the sowing and harvesting dates of the crop (if there is any).
- Select the crop that should be cultivated in the field.
- Save the changes.
January 1 of the current year is automatically indicated as the sowing date, and December 31 of the current year, as the harvesting date. When editing the dates, consider the following rules:
- the sowing date can be a past or current date;
- the harvesting date (optional) can be a current or future date.
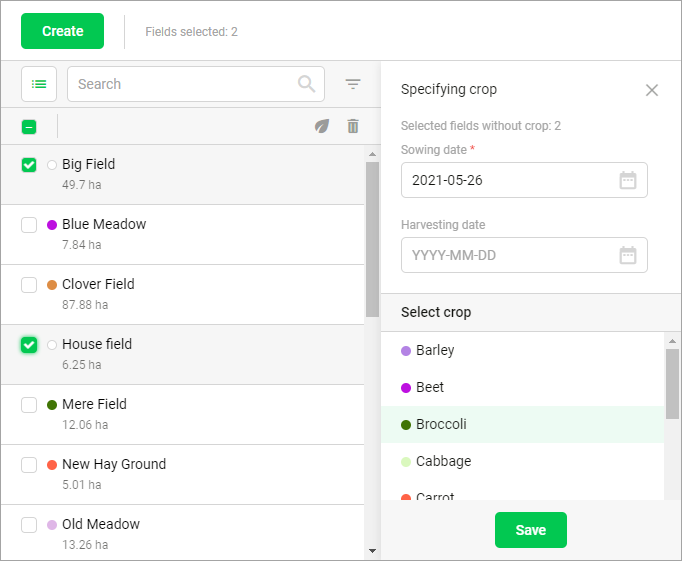
To indicate the same crop for several fields at once, click on the icon ![]() , select the fields, click on the icon
, select the fields, click on the icon ![]() and follow steps 2—4 from the guide above.
and follow steps 2—4 from the guide above.
Specifying a crop on the Crop rotation tab
After opening the field properties (the icon ![]() ), follow the steps below.
), follow the steps below.
- Go to the Crop rotation tab.
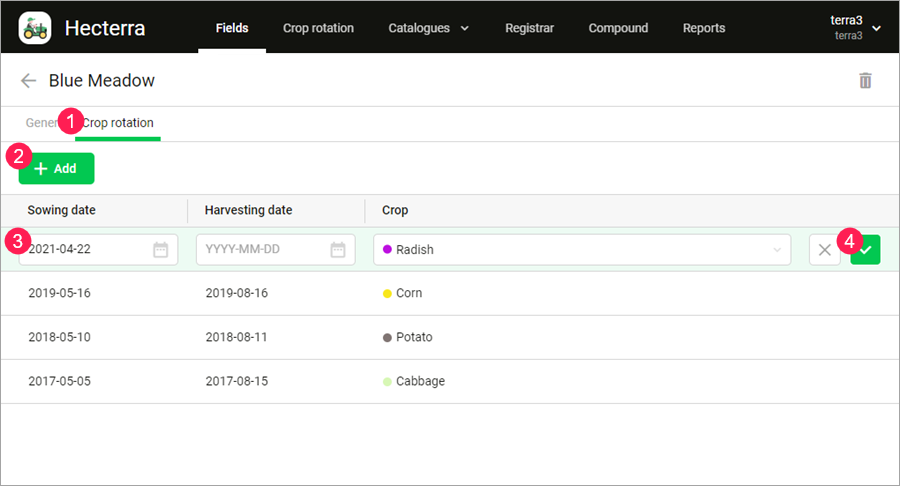
- Click on the Add button.
- Specify the following parameters:
- sowing date,
- harvesting date (if there is any),
- crop.
- Save the changes.
The harvesting date is optional. If the date is not added, but the next crop is specified for the same field, it is considered that the previous crop was cultivated before the sowing date of the next one.