

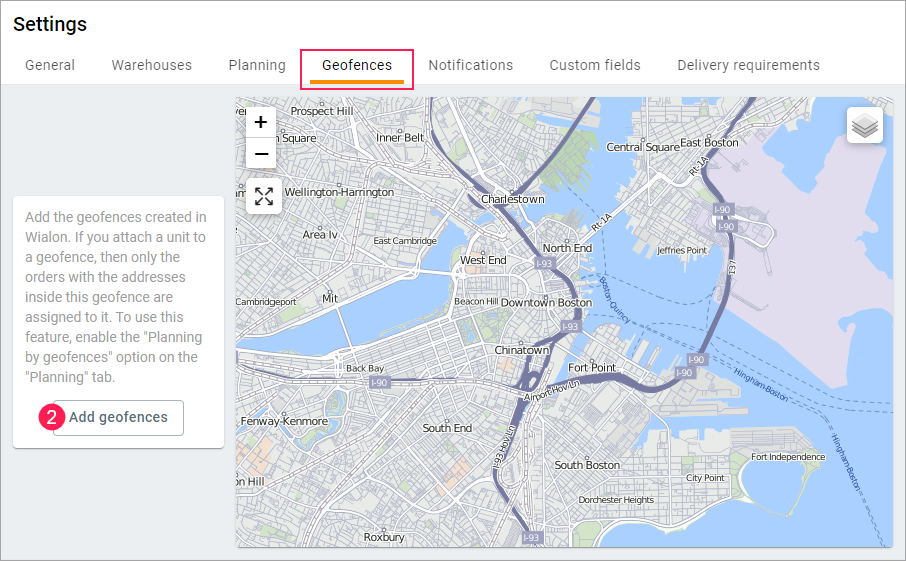
If you want units to fulfil orders only within certain areas, attach the units to geofences and enable the Planning by geofences option in the settings. On the Geofences tab, you can add and delete the geofences created in the monitoring system, and attach units to them.
The tab displays the list of geofences and the map. By default, the list contains all the geofences attached to warehouses. The following items are shown above the list:
- filter by geofence group;
- search by geofence name;
- button for adding geofences (
 ).
).
In the list, the row of every geofence displays the number of units and warehouses attached to it. When you point to the row, the icons for attaching units (![]() ) and deleting the geofence (
) and deleting the geofence (![]() ) are shown. Click on the row to see the selected geofence on the map. By default, the list consists of the geofences attached to warehouses.
) are shown. Click on the row to see the selected geofence on the map. By default, the list consists of the geofences attached to warehouses.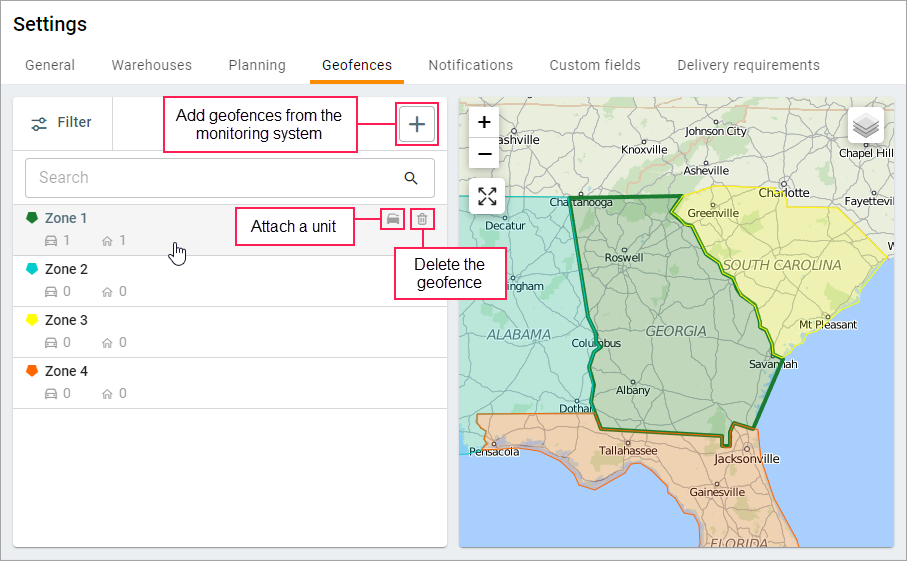
On the map, you can see the borders of all the geofences from the list. The tooltip of the geofence shows its name, address, and the number of the attached units and warehouses. After clicking on the geofence, the icons for attaching units (![]() ) and deleting the geofence (
) and deleting the geofence (![]() ) become available.
) become available.
Adding geofences
To add geofences, follow these steps:
- If necessary, first create geofences in the monitoring system in the resource that you use to work with Logistics. For convenience, you can combine the created geofences into groups.
- Click Add geofences on the Geofences tab of the application settings. If the tab already contains geofences, click on the button
 .
.
- Select the geofences or the group of geofences you want to add to the application.
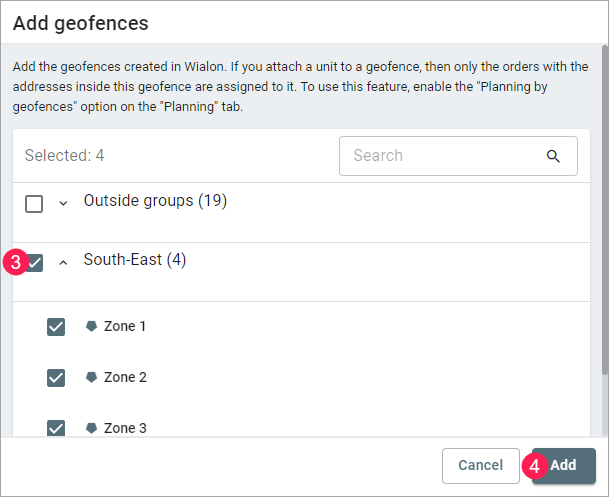
- Click Add.
- Click Save to apply the changes on the tab.
The added geofences are displayed in the list and on the tab. Also, they become available in the window of attaching geofences to the warehouse.
Deleting geofences
To delete a geofence, point to its row or click on it on the map and click on the icon ![]() . Then, click Save to apply the changes on the tab. The geofences are removed only from the application.
. Then, click Save to apply the changes on the tab. The geofences are removed only from the application.
Attaching units
If you want a unit to fulfil orders only within a certain geofence, you should attach it to this geofence. You should also enable the Planning by geofences option on the Planning tab.
To attach a unit to a geofence, follow these steps:
- Point to the row with the geofence or click on it on the map and click on the icon
 .
. - Select the unit or units you want to attach to the geofence. To select all the units, use the Available option.
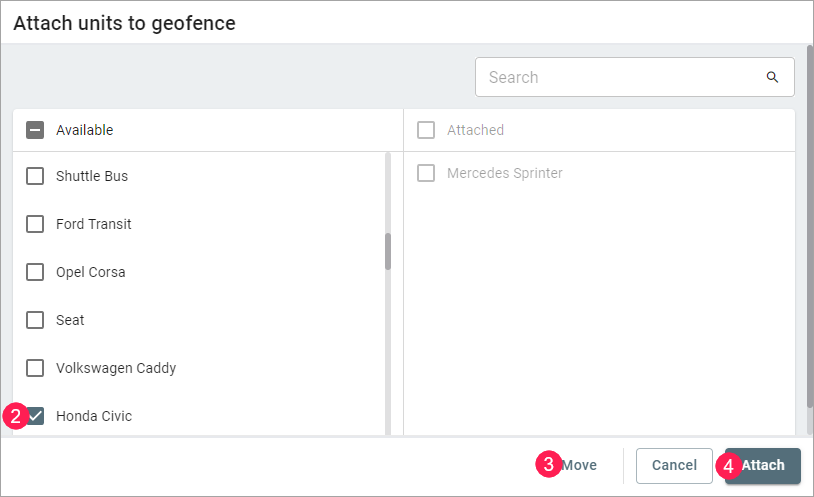
- Click Move. The units which are already attached or should be attached to the geofence are displayed in the list on the right. To remove units from this list, select them and click Move.
- Click Attach.
- Save the changes on the tab.
You can also attach the unit to geofences in the window of editing unit properties.