

You can not only create orders manually, but also import them from files containing tables with data on the orders. XLSX and CSV (in UTF-8 encoding) files are supported.
For correct import, the date and time format should be the same in the imported file, application settings, and user settings in the monitoring system. In addition, when importing from a CSV file, the column separator in the file should be the same as in the application settings. To separate several delivery requirements or several tags in the file, use the character |.
To import orders, follow the steps below.
- Select Import orders after expanding the Planning item in the navigation bar.
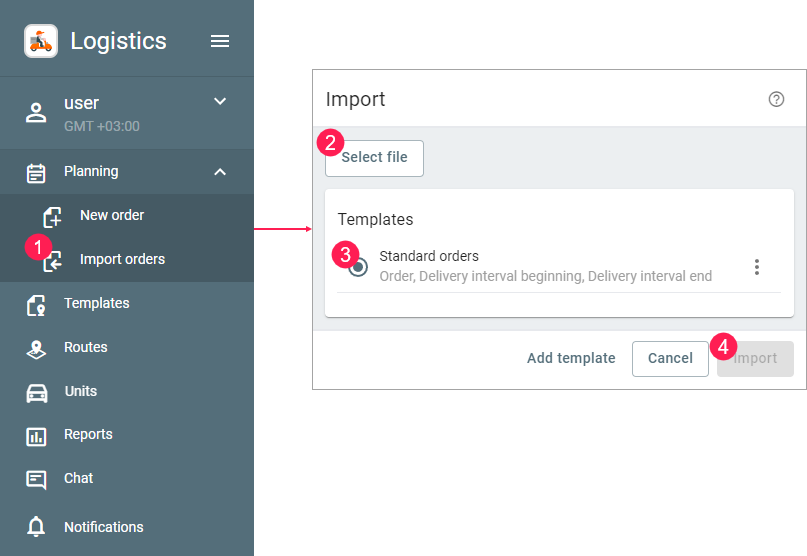
- Click Select file and select the file from which you want to import data.
- If necessary, select the existing template or create a new one (the Add template button).
- Click Import.
- Enable the Exclude first line option in the table of orders if the file has its own column headings.
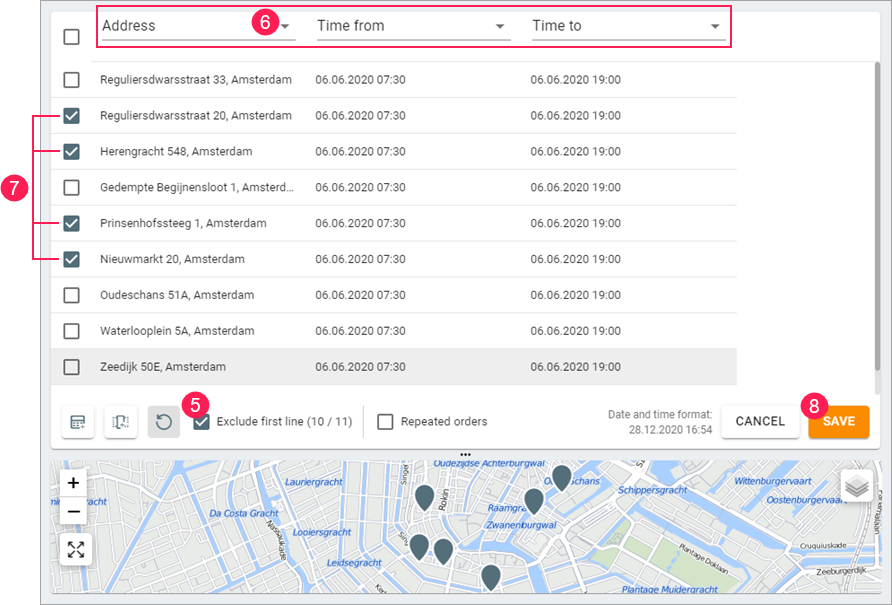
Select column headings in the drop-down lists. The Address (or Latitude and Longitude), Time from and Time to columns are required.
If you have created custom fields in the settings, you can also select their names as column headings and save the template.
Select the orders you want to import. To edit a cell, click on it, make changes, and save them. Enable the Repeated orders option if these orders should be fulfilled several times.
To edit several orders simultaneously, select them in the list, click on the cell you want to edit, and make changes. After saving the changes, they will be applied to all the selected orders.
- Click Save.
Import templates
Import templates are column headings saved in a certain sequence. They are required so as not to select column names in the import table manually. You can create templates in the window of selecting a file for import (the Add template button) or in the table at the next stage of import (the icon ![]() in the lower-left corner). In the template creation window, specify the template name, edit the set of columns if necessary and save the changes.
in the lower-left corner). In the template creation window, specify the template name, edit the set of columns if necessary and save the changes.
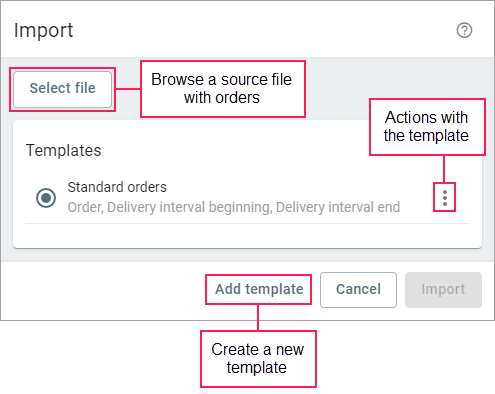
The list of the created templates is shown in the window of selecting a file for import. Here you can also copy, edit and delete templates (the icon ![]() opposite the template name)
opposite the template name)
Import table
After the import, the data from the file is shown in a table. In the table, you can select orders and edit their data. The names of the columns and their contents correspond to the fields of the order creation/editing window, that is, these fields will be filled in after you save the imported orders. If some data is missing in the import table, the fields in the orders are filled in automatically with the values specified on the General tab of the settings (the Order parameters section). In the empty Time from and Time to columns, the time is automatically indicated for permanent orders, while the date of the next day and time is indicated for single ones.
If the Not to confirm orders outside the radius option is enabled in the Order parameters section on the General tab of the settings, it is also applied to all the imported orders.
The Exclude first line option allows hiding the first line of the file if it has its own column headings.
If quotation marks are used in the text of the Note column, this text cannot be imported to orders.
If the table contains orders with incorrect address information, the lines with such orders are highlighted in red and placed at the beginning of the table after selecting the Address column.
