At the first stage of planning, you should select orders to plan a route or routes for the day.
To do this, follow the steps below.
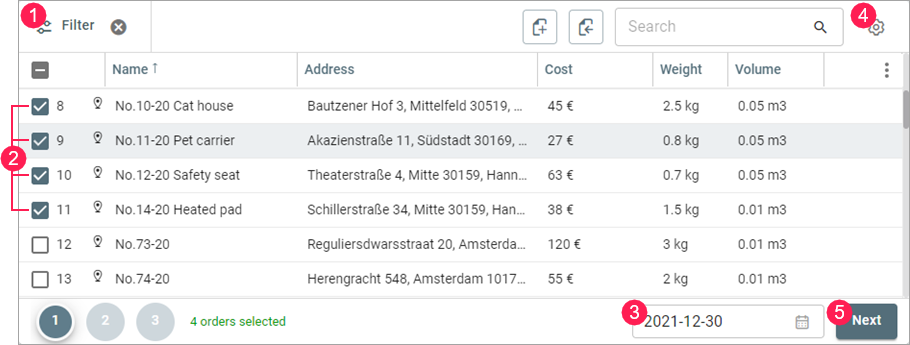
- If needed, customize the filter to see only the required orders in the table.
Select orders in the list. To do this, check the box next to the order number or click on the line while holding down Ctrl. To select a group of several orders arranged one after another, select the first order in the group, hold down Shift, and select the last order. To select all the orders, check the box in the table header or click on any of the fields while holding down Ctrl.
You can also select orders on the map. To do this, hold down Ctrl and click on the order markers, or hold down Shift and select the area within which the markers are located.
For permanent orders, select the date of delivery in the calendar that opens after clicking on the icon
 . Below the calendar, you can activate the Templates creation option (see the Templates section).
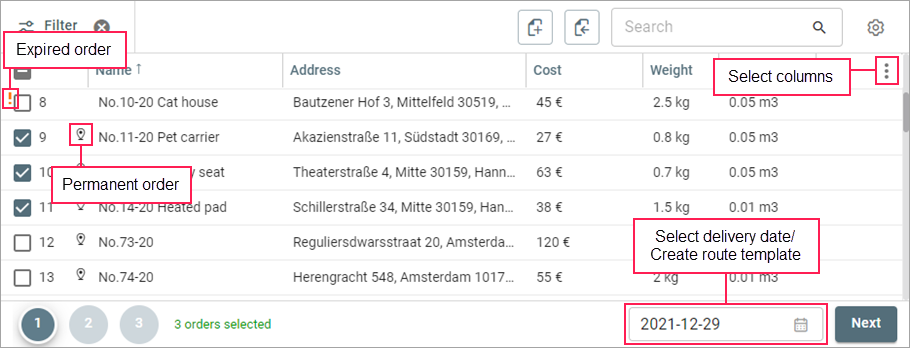
If the order is overdue, the date selection is not available for it.
- Change the planning settings (icon
 ) if necessary. These settings are the same as those on the Planning tab, but are applied only one time to the routes planned at this stage. When you go to another page, the settings are reset.
 - Click Next to go to the unit selection.
The interface components available at this stage are described in detail below.
Table of orders
By default, the table displays all permanent orders and the single orders in which the delivery date coincides with the current one. Overdue orders, that is, those in which the delivery time has expired, are marked with an exclamation sign. The maximum number of orders the table can display is 16 457.
The names and contents of the columns correspond to the order parameters specified when creating or editing the orders.
You can select the columns that should be displayed in the table. To do this, click on the icon ![]() in its upper-right corner. To hide or show a column, click on its heading. To change the sequence of the columns, drag a line with a column heading to the required place.
in its upper-right corner. To hide or show a column, click on its heading. To change the sequence of the columns, drag a line with a column heading to the required place.
The columns with custom fields are not shown in the table by default, but you can select them in the menu (icon ![]() ). The names of such columns are marked with a number sign (#).
). The names of such columns are marked with a number sign (#).
When you point to a line with an order, the following actions are available:
 : change the order parameters;
 : copy the order;
 : delete the order.
Search and filters
There is a filter and a dynamic search in the toolbar above the table to facilitate the search of the items.

The dynamic search allows you to search for orders by any cell of the table.
Using the filter, you can sort the orders according to various criteria. To use the filter, click on the icon ![]() and configure the required parameters. To reset the filter, click on the icon
and configure the required parameters. To reset the filter, click on the icon ![]() .
.
Below are parameters available in the filter.
| Parameter | Description |
|---|---|
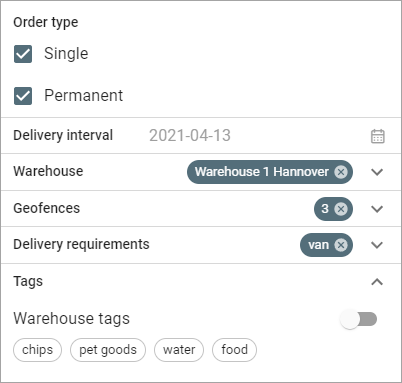
| Order type | A filter which allows you to show the orders of a certain type. The available options: single, permanent, or both types. |
| Delivery interval | A filter which limits the orders by the time of delivery. |
| Warehouse | The selection of a warehouse. Enables filtering by the geofences attached to the selected warehouse and by the warehouse tags. |
Geofences | A filter which allows you to select the orders the address of which is within the selected geofence. The list shows the geofences that are attached to the warehouse selected above. |
| Delivery requirements | A filter which contains all the requirements specified in the order parameters. Click on a requirement to show orders with this requirement in the list. If you select several requirements, all orders that have at least one of them are shown. |
| Warehouse tags | A switch which allows you to select the orders the tags of which coincide with the tags of the selected warehouse. |
Tags | A filter which shows the orders with the selected tag. |
Information block
If you click on an order in the table, the information block displays the following parameters:
- order name and address;
- delivery interval;
- cost, weight, and volume;
- note;
- comment;
- client's name and contact details (phone, email).
Using the buttons in the lower-right corner, you can edit the data of the order, copy or delete it.

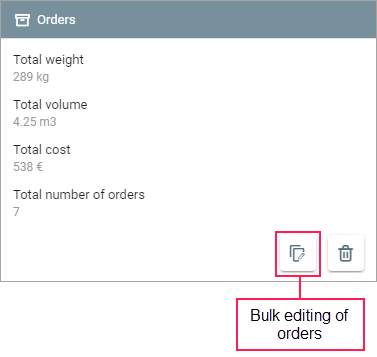
Bulk editing is available for the selected orders. In this mode, you can:
- change the delivery interval, service time, and priority of orders;
- change the weight, volume, and cost of goods in orders;
- specify delivery requirements and tags (the old ones are deleted, if any);
- enable and disable the Not to confirm orders outside the radius, Strict delivery interval and the Service within delivery interval options.
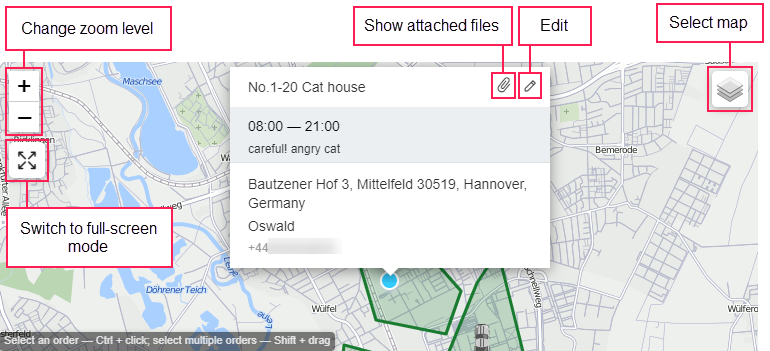
Map
To the right of the information block, there is a map where the order addresses from the table are shown with markers. The markers of the selected orders are dark blue, while the markers of those which are not selected are light blue. Click on a marker to open the window with information about the order (delivery interval, address, client's name and contact details) and an icon for editing it.
Gurtam Maps and OpenStreetMap are available by default. To use Google Maps, the Google (standard) service should be activated in Wialon. Use the icon ![]() in the upper-right corner to select a map.
in the upper-right corner to select a map.