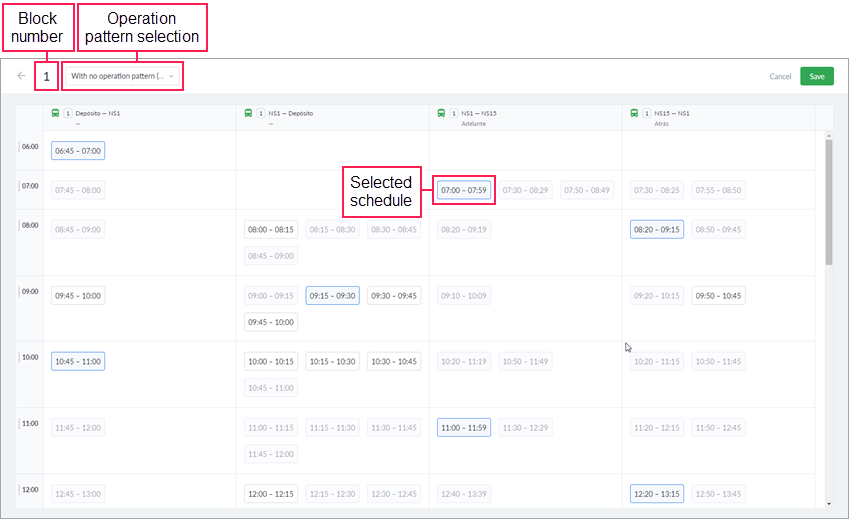
Creating Blocks
To create a block, follow the steps described below.
- Click on the Create block button () located at the end of the line with the required collection of routes. A similar button is located on the page with the blocks of each collection of routes ().
- In the block creation window, specify its number (required field). The maximum length of the block number is 8 characters (numbers and letters).
- Select the operation pattern in the drop-down list to the right of the number. As a result, the routes that form the collection are displayed below with a list of their schedules that correspond to the specified operation pattern. You can see only those routes that are switched on and have at least one schedule.
- Specify the schedules that should be included in the block. To do this, successively click on the required schedules. The selected schedules have a light blue background and a blue frame. The schedules that cannot be selected due to the time intersections become inactive.
- Save the block. The Save button becomes active only after selecting at least one schedule.
Deleting all the schedules of a block leads to automatic removal of the block itself from the system.
The schedules of which the block consists should meet the following requirements:
- The operation pattern should not be specified for schedules, or it should be uniform for all.
- One schedule can be included only in one block within a depot.
- There should not be any time intersections in the blocks of one route: the program does not allow you to save the created or edited block which overlaps other blocks.
Was this helpful?
Download
All pages
Only this page


