

This guide describes how to configure data sending from Wialon to the Wasl platform in Saudi Arabia. It also contains information about how to deactivate this feature and activate it again if necessary.
Data sending configuration
You can configure data sending from Wialon to Wasl only for trucks. The configuration process consists of the following stages:
Hardware configuration
Configure the device considering the following requirements:
- It should send coordinates only in chronological order.
- It should send data every two minutes when the vehicle is moving.
- It should send data every hour when the vehicle is parked and the ignition is off, and every two minutes if the vehicle is parked and the ignition is on.
- It should report ignition status changes, sensor failures, and traffic accidents immediately or 30 seconds after they occur. If such configuration is not possible, the device should send data every 30 seconds.
Token generation
The token is required for the service configuration. To generate the token, follow these steps:
1. Follow the link.
2. Authorize with the top user’s credentials.
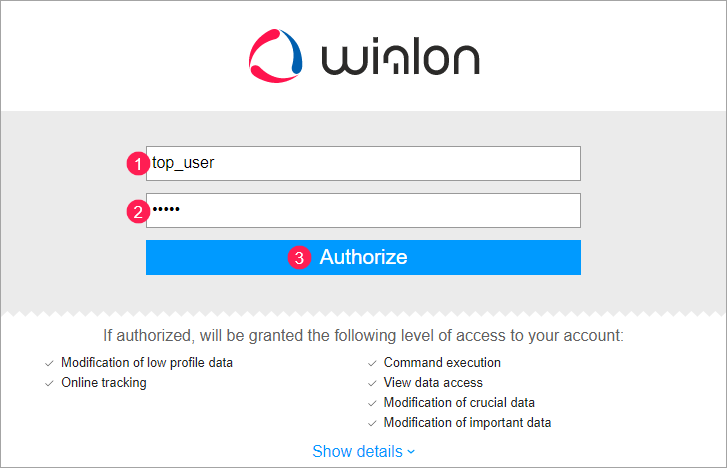
3. Copy the token from the access_token parameter in the address bar of the browser.
4. Send the token to your Gurtam manager.
Wialon configuration
For sending data from Wialon to Wasl, you should configure your client’s account, units, and drivers in Wialon.
Account configuration
To configure your client’s account, follow these steps:
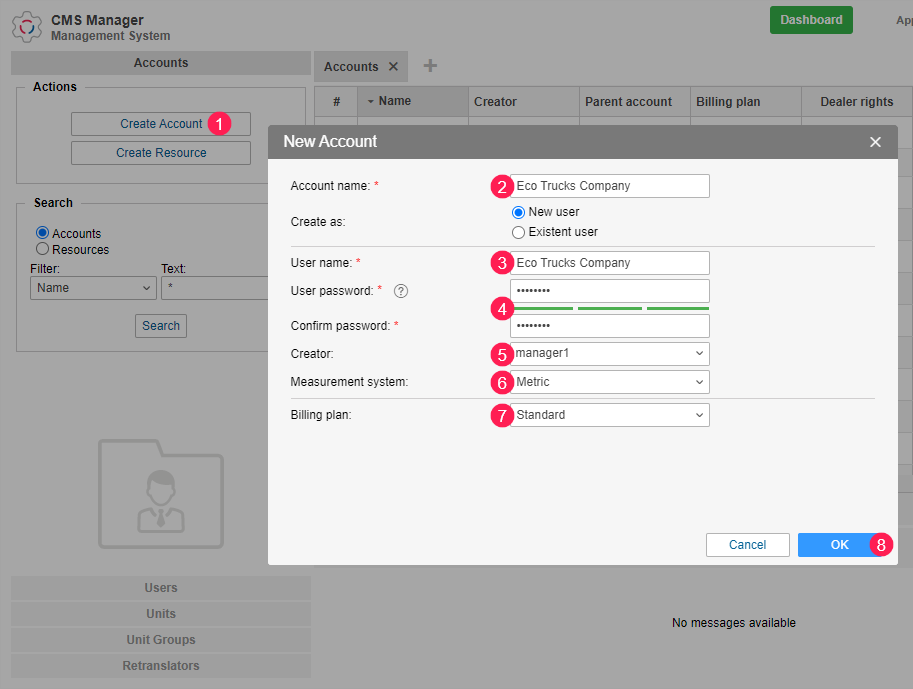
1. In CMS Manager, create an account for your client if it hasn’t been done yet. To do this, click Create account on the Accounts tab, specify the account name, user name and password, select the creator, measurement system, billing plan, and click OK
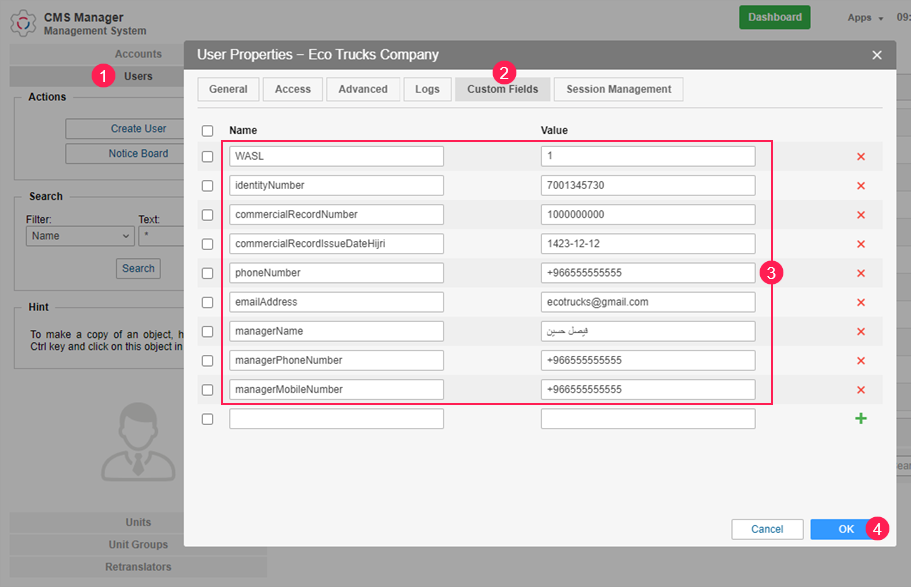
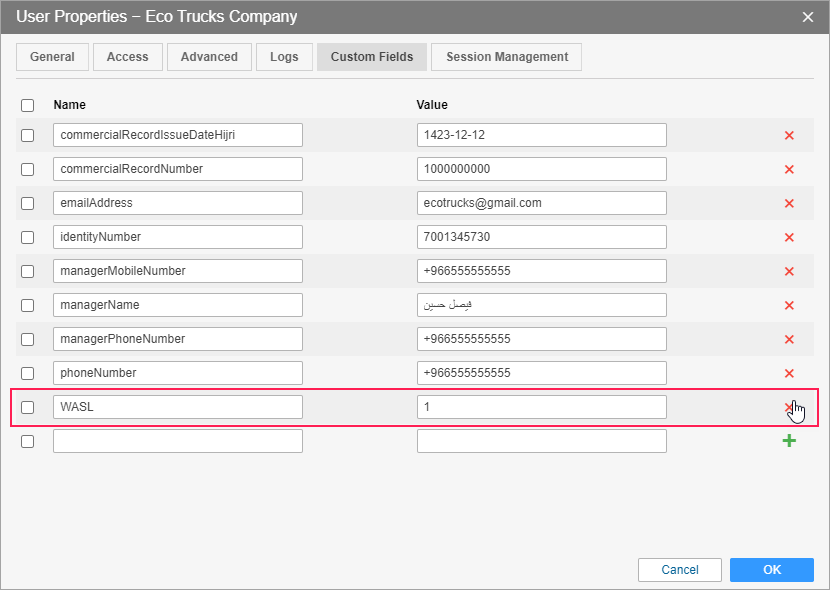
2. Add the client’s organization details to the properties of the created account user. To do this, go to the Users tab, open the user properties by clicking on the user name, go to the Custom fields tab, create the custom fields listed below using the icon ![]() , fill in their values, and click OK.
, fill in their values, and click OK.
| Custom field | Description |
|---|---|
Wasl | The field which indicates that sending data to Wasl is configured for the user. Specify 1 as the field value. |
identityNumber | Organization identity number. It is the unique number provided to companies or individual enterprises by the Ministry of Interior. It usually starts with 700 or 10. |
commercialRecordNumber | Commercial registration number of the organization. It is the unique number provided to companies or individual enterprises by the Ministry of Commerce. It is indicated in the upper-left corner of the commercial certificate. |
commercialRecordIssueDateHijri | Issue date of the organization's commercial registration in accordance with the Hijri calendar. |
phoneNumber | Phone number of the organization. It should start with +966 and contain 13 characters, including the plus sign. |
emailAddress | Email address of the organization. |
managerName | Name of the organization manager. |
managerPhoneNumber | Phone number of the organization manager. |
managerMobileNumber | Mobile number of the organization manager. |
Instead of creating the custom fields, you can import them using the WLP file.
Unit configuration
To configure your client’s units, follow these steps:
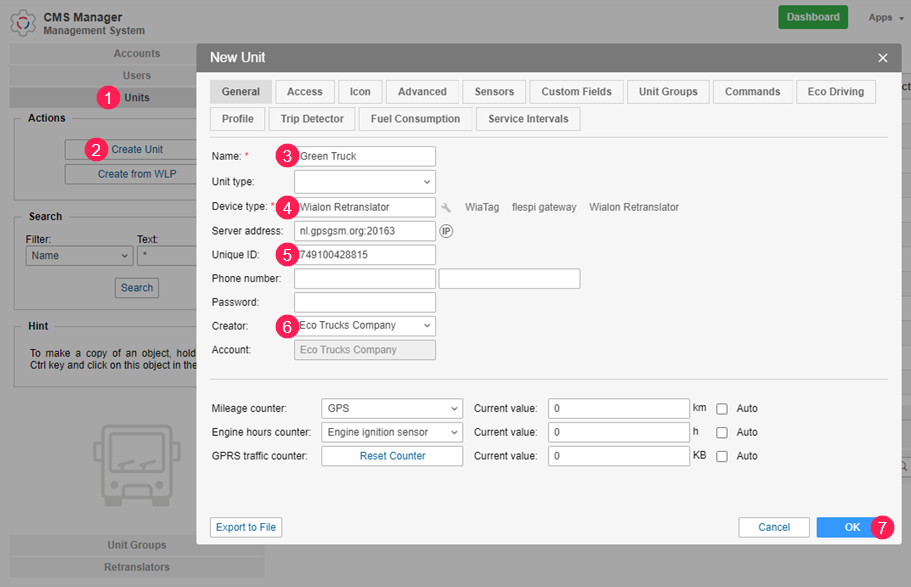
1. In CMS Manager, create units for your client if it hasn’t been done yet. To do this, open the Units tab, click Create unit, specify the unit name, device type, unique ID, indicate the client as a creator, and click OK.
If your client already has units in Wialon, make sure that the unique ID is specified for each of them.
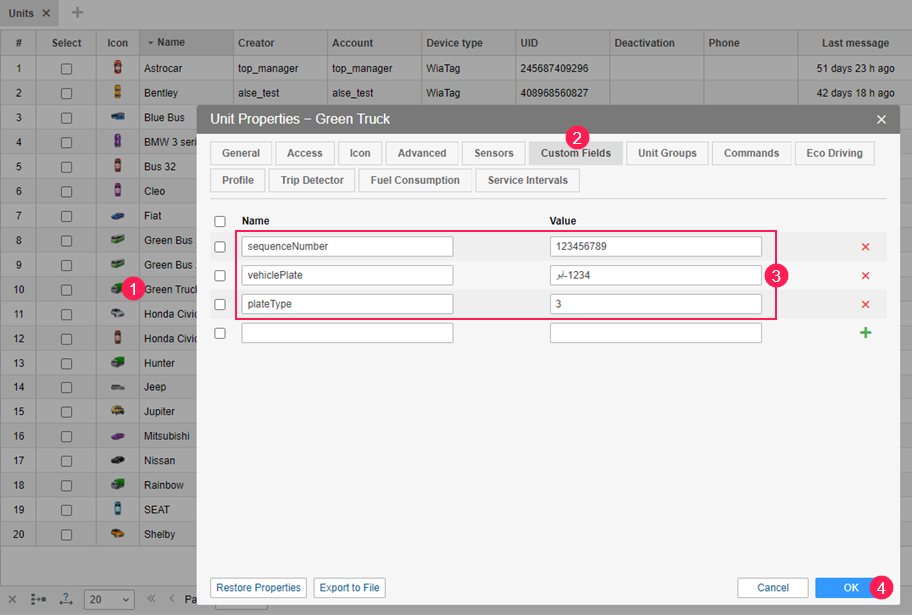
2. Add the vehicle details to the unit properties. To do this, open the properties by clicking on the unit name on the Units tab, go to the Custom fields tab, create the custom fields listed below using the icon ![]() , and fill in their values.
, and fill in their values.
| Custom field | Description |
|---|---|
sequenceNumber | Vehicle sequence number. It is a serial number of 8-9 digits indicated in the lower-right corner of the vehicle licence card. |
vehiclePlate | Vehicle plate number. The order of letters and numbers depends on the language of the plate number. If the letters are Arabic, use the following order: [left_letter][middle_letter][right_letter]-number. If the letters are English, use the following order: number-[right_letter][middle_letter][left_letter]. |
plateType | Code which corresponds to the plate type (from 1 to 11): 1 — private car; 2 — public transport; 3 — private transport; 4 — public minibus; 5 — private minibus; 6 — taxi; 7 — heavy equipment; 8 — export; 9 — diplomatic; 10 — motorcycle; 11 — temporary. |
Instead of creating the custom fields, you can import them using the WLP file.
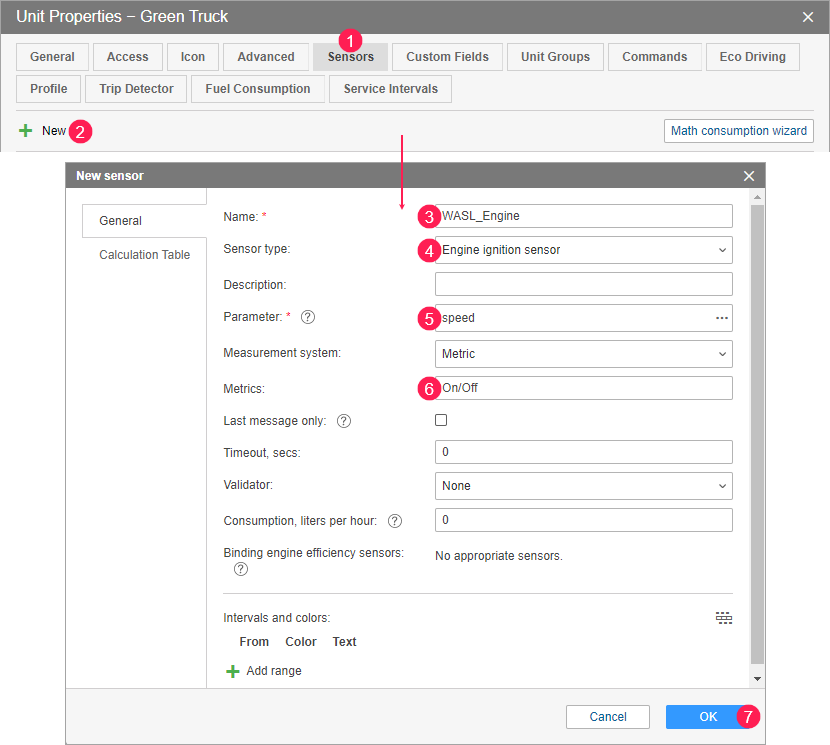
3. For each unit, create the sensors listed below in order to send additional data to Wasl. To do this, go to the Sensors tab of the unit properties, click New, specify the required sensor name and type, indicate the parameter, metrics, and click OK.
| Sensor name | Sensor type | Description |
|---|---|---|
Wasl_Engine | Engine ignition sensor or custom digital sensor | The sensor detects the ignition status (on/off). |
Wasl_Move | Real-time motion sensor or custom digital sensor | The sensor detects if the unit is moving (on) or parked (off). |
Wasl_Weight | Weight sensor or custom sensor | The sensor detects the total weight of the vehicle and freight in kilos. |
Wasl_Disconnected | Custom digital sensor | The sensor detects external power cut-offs. In case of a cut-off, the DEVICE_NOT_WORKING status is sent to Wasl. |
Wasl_Accident | Custom digital sensor | The sensor detects traffic accidents. In case of an accident, the ACCIDENT status is sent to Wasl. |
Wasl_Temperature | Temperature sensor or custom sensor | The sensor is optional and detects the temperature value. If you configure the calculation table for this sensor, set 0 as the lower bound and 101 as the upper one, and activate the Apply after calculation option. |
Wasl_Humidity | Custom sensor | The sensor is optional and detects the humidity value. |
Instead of creating the sensors, you can import them using the WLP file.
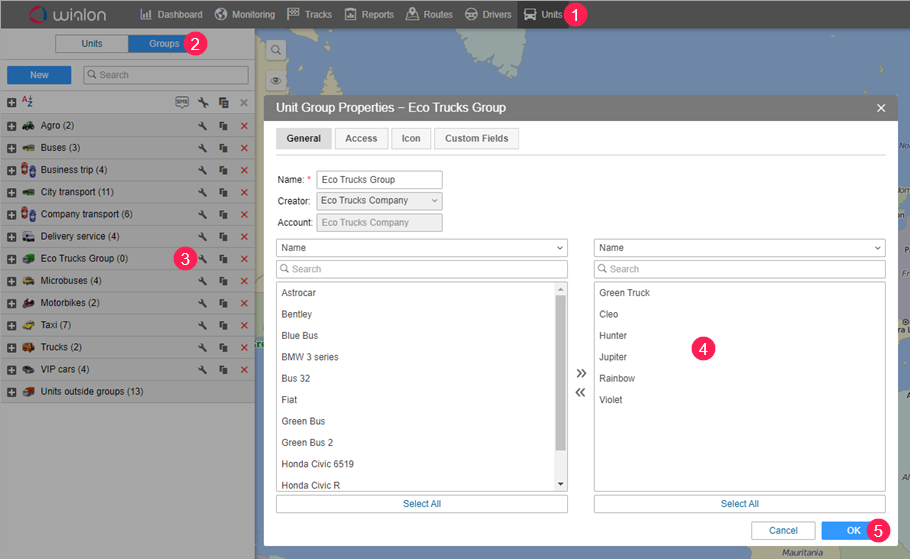
4. Create a unit group for your client if it hasn’t been done yet. To do this, open the Unit groups tab, click Create unit group, specify the group name, indicate the client as a creator, and click OK.
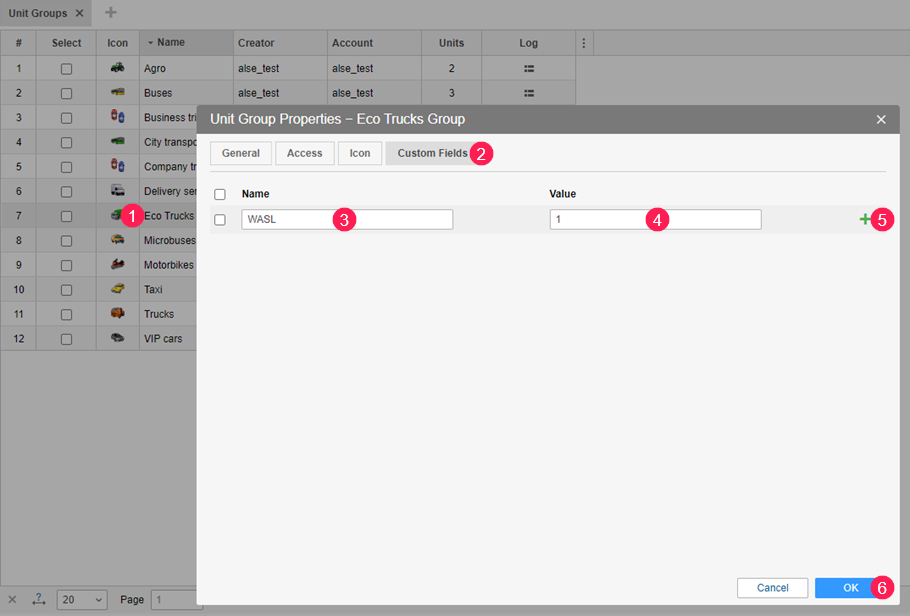
5. Create the Wasl custom field in the unit group properties. To do this, open the properties by clicking on the group name on the Unit groups tab, go to the Custom fields tab, create the Wasl field using the icon ![]() , specify 1 as its value, and click OK
, specify 1 as its value, and click OK
Driver configuration
To configure your client’s drivers, follow these steps:
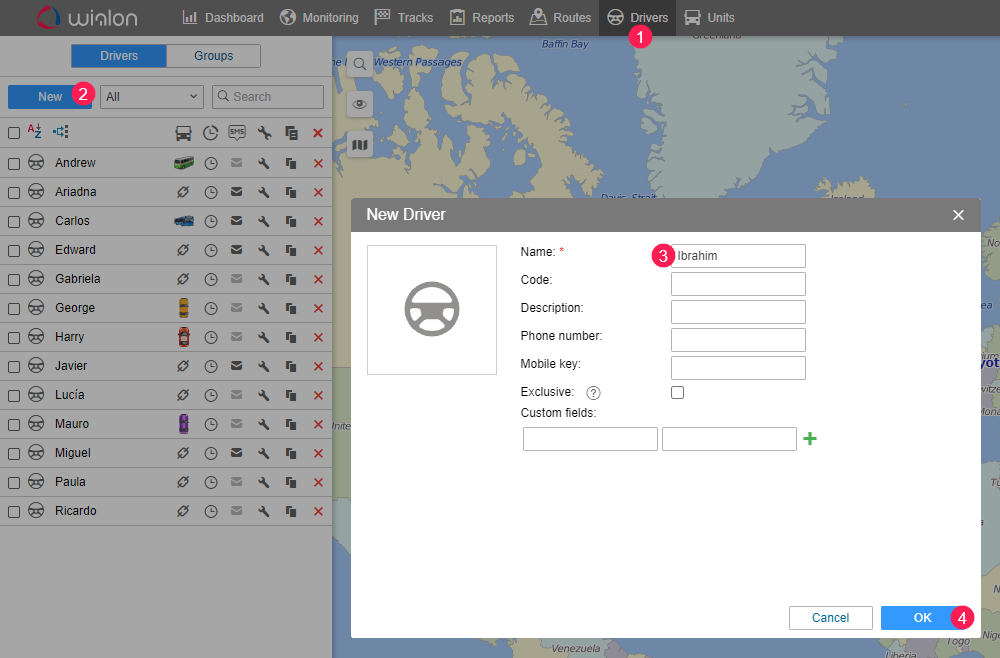
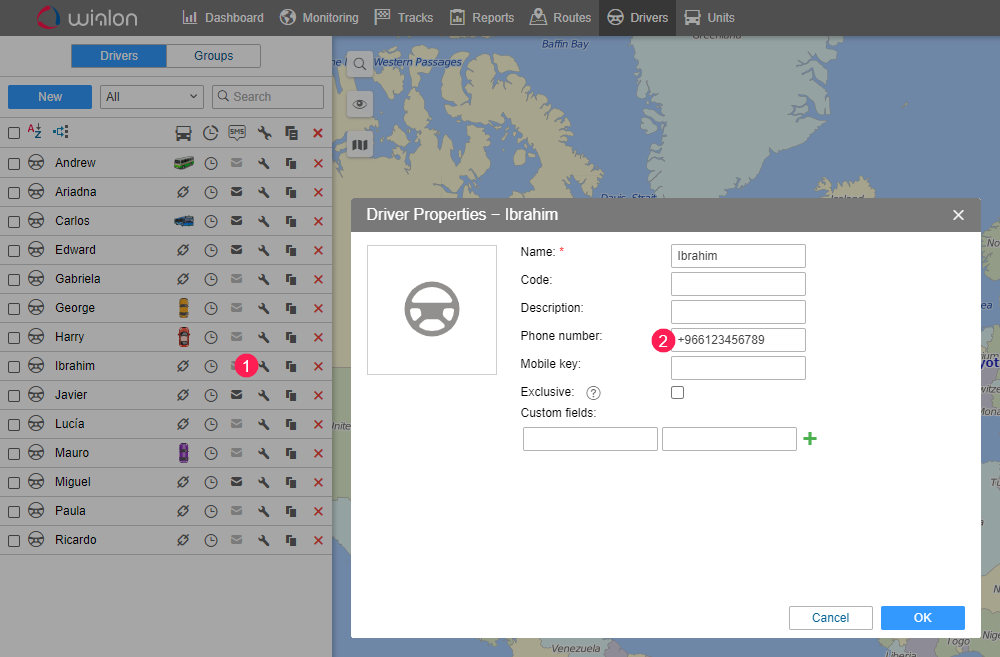
1. In the monitoring system, create drivers for your client if it hasn’t been done yet. To do this, open the Drivers tab, click New, select the client’s resource, specify the driver’s name, and click OK.
2. Specify the driver’s phone number. To do this, click on the icon ![]() opposite the required driver’s name in the work list of the Drivers tab and fill in the Phone number field.
opposite the required driver’s name in the work list of the Drivers tab and fill in the Phone number field.
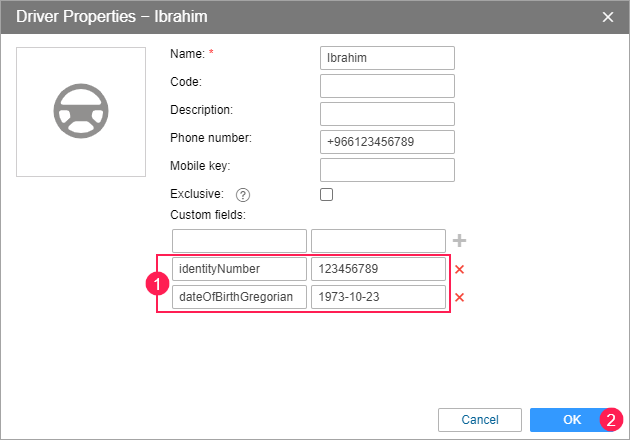
3. Add the driver’s ID and date of birth to the driver’s properties. To do this, create the custom fields listed below using the icon ![]() , fill in their values, and click OK.
, fill in their values, and click OK.
| Custom field | Description |
|---|---|
identityNumber | Driver’s ID. |
dateOfBirthGregorian or dateOfBirthHijri | Driver’s date of birth in accordance with the Gregorian or Hijri calendar, respectively. |
Instead of creating the custom fields, you can import them using the WLP file.
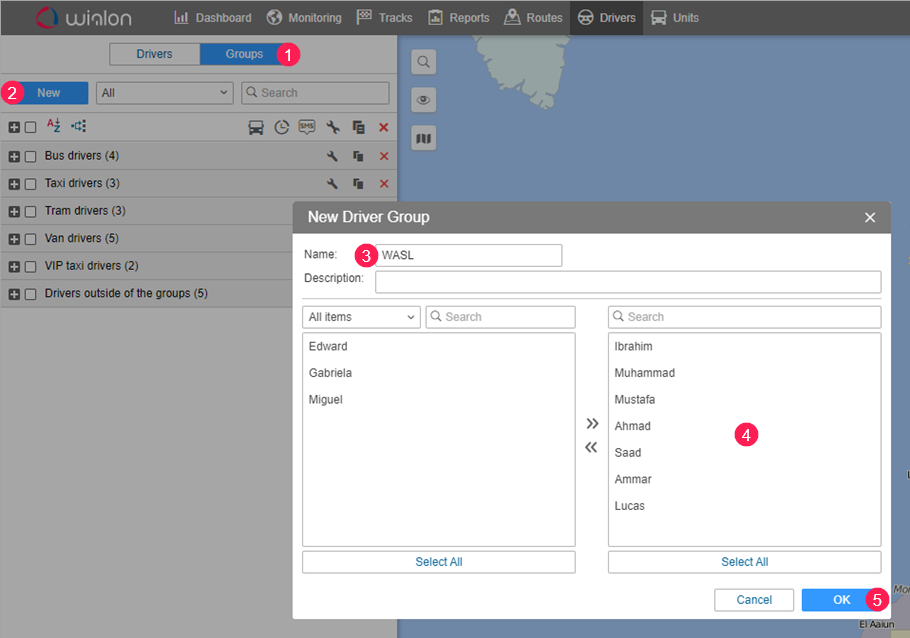
4. Create a driver group. To do this, switch to the Groups mode, click New, select the client’s resource, indicate Wasl as the group name, add the drivers to the group, and click OK.
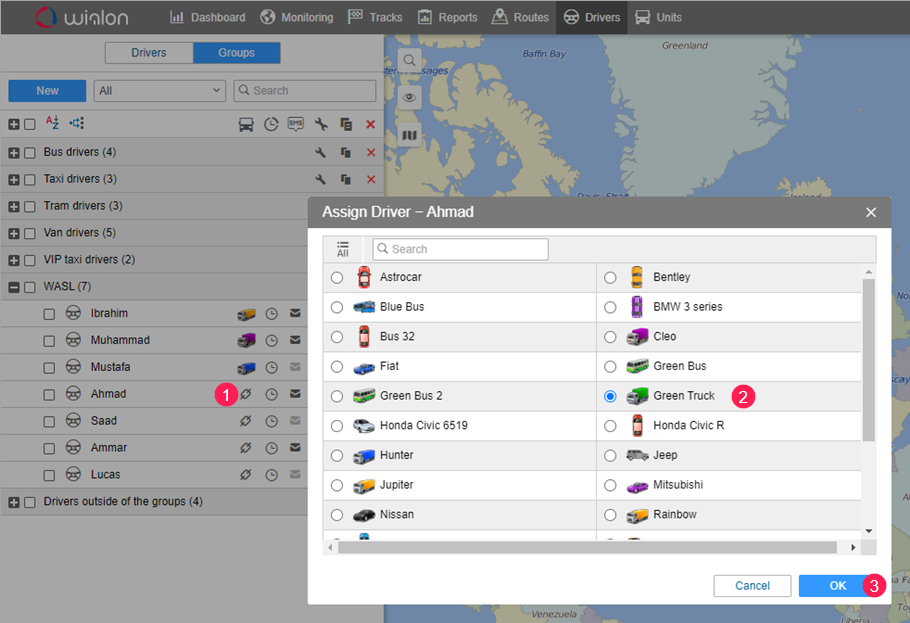
5. Assign the drivers to the configured units. To do this, click on the icon ![]() opposite the driver’s name, select the required unit, and click OK.
opposite the driver’s name, select the required unit, and click OK.
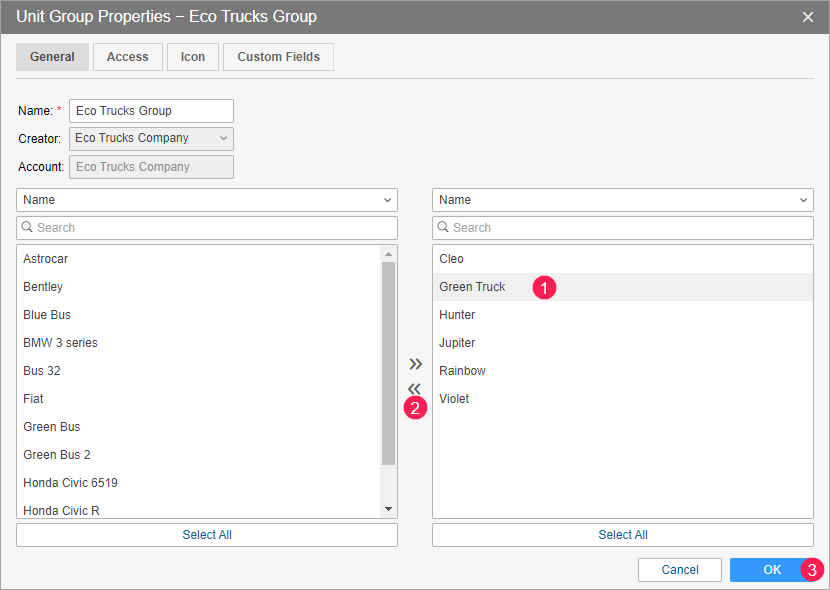
6. Add the client’s units to the created unit group. To do this, open the Units tab, switch to the Groups mode, open the properties of the group by clicking on the icon VVV opposite its name, add the configured units to the group, and click OK.
Data sending deactivation
You can deactivate data sending from Wialon to Wasl for your client completely, or disable it only for the units and drivers which are no longer used.
To deactivate data sending for your client completely, delete the custom field named Wasl on the Custom fields tab of the user properties.
To disable data sending for a certain unit or driver, remove the required item from the created unit or driver group, respectively.
To activate data sending for your client again, make sure that the configuration of units, drivers and their groups hasn’t been changed, and create the Wasl custom field in the user properties. To enable data sending for certain units or drivers again, make sure that they are configured correctly and add them to the groups.