Unit is a vehicle, equipment, person, animal or other moving or stationary object that is being monitored.
Make sure that the GPS equipment installed on a unit is listed in the supported equipment and pointed to Wialon. This is required for the system to correctly identify the data sent by the equipment.
Creating a unit
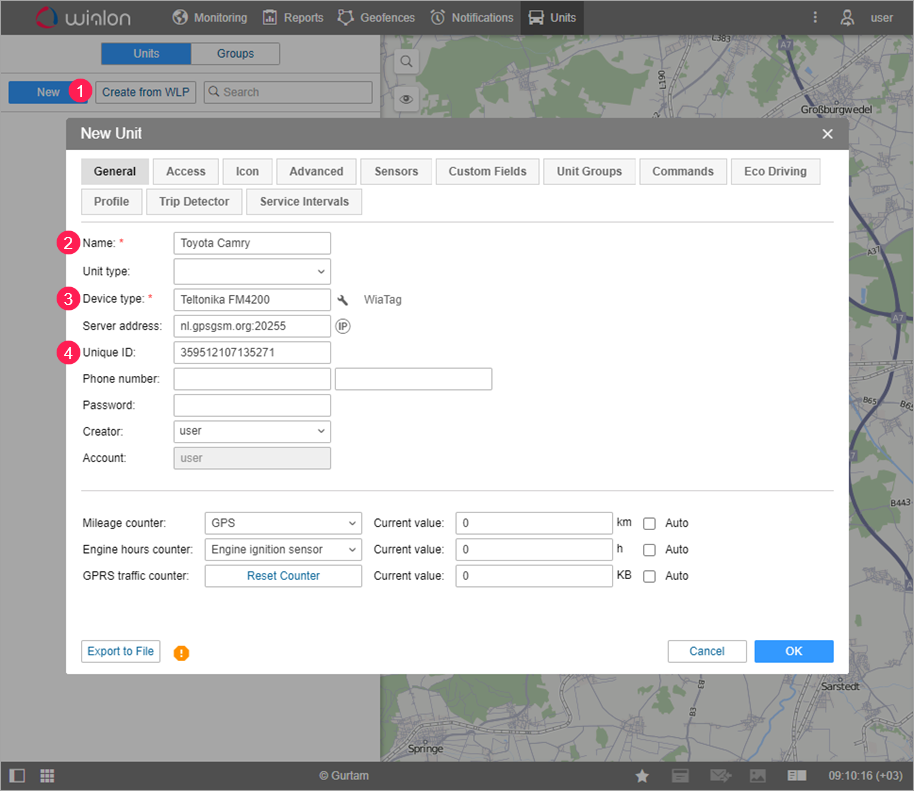
- Click on the Create button on the Units tab.
- Indicate the name of the unit.
- Select the device type (the Server address field is filled in automatically).
- Specify the unique ID of the device so that the system can identify the unit. Some device types can have two IDs (additional field appears on the right).
To learn what serves as an identifier for the device, find the latter in the Integrated Devices section of our website. For each device compatible with Wialon, the Unique ID field specifies what information should be used as the identifier. It can be the IMEI of the device, serial number, or a custom numeric value that should be entered by the user. For instance, for Teltonika FMB630 the following information is displayed:
IMEI and serial number are usually listed on the tracker case. If the ID is custom or unknown, use the Device Unique ID Checker.
Creating a sensor
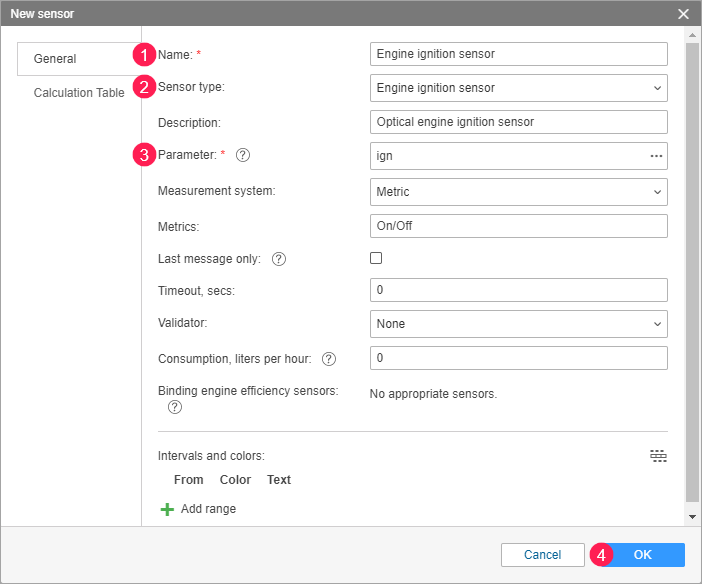
On the Sensors tab of the unit properties, you can create, edit and delete sensors. For example, let us create the sensor of the Engine ignition sensor type, which is used for detecting trips and parkings, as well as in the mileage and engine hours counters.
- Indicate the name of the sensor.
- In the drop-down list, select the type Engine ignition sensor.
- Specify the parameter of the sensor.
- Click ОК.
Creating a command
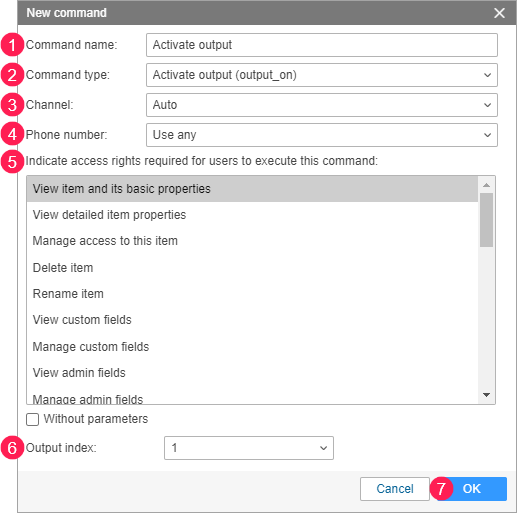
On the Commands tab of the unit properties, you can create, edit and delete commands (requests to perform some actions sent to the unit). The set of the commands supported by the unit depends on the equipment in use and its settings. For example, let us create the Activate output (output_on) command, which can, for instance, turn on the fuel pump of the unit.
- Indicate the following: command name (1); command type (2); channel (the type of connection) (3); phone number to which the command should be sent (4); access rights the user requires to execute the command (5); output index that should be activated (6).
- Click ОК (7).
The new command appears in the list on the Commands tab of the unit properties, as well as on the Monitoring tab, where you can activate execution of the command.
After filling all the tabs, click ОК to create a unit. The unit appears in the list in the workspace and is automatically added to the work list on the Monitoring tab.
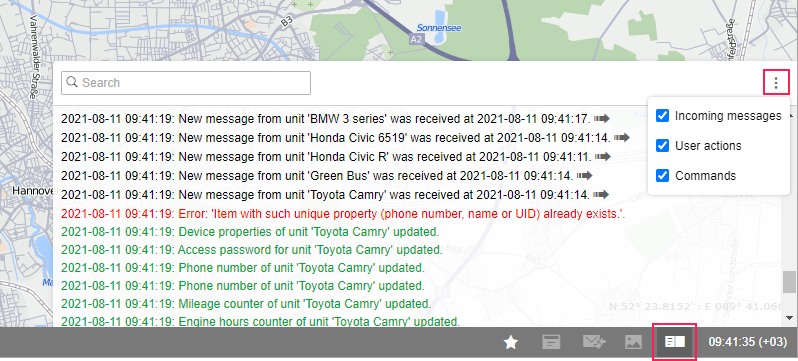
After creation, the unit starts sending messages to the system (provided that the tracker on the unit works correctly). Each new message is displayed in the log.
In addition to incoming messages from units, the log also displays other user actions (creating, editing, and deleting elements, etc) and commands sent to units.


