To work with jobs, the Create, edit, and delete jobs access right is required.
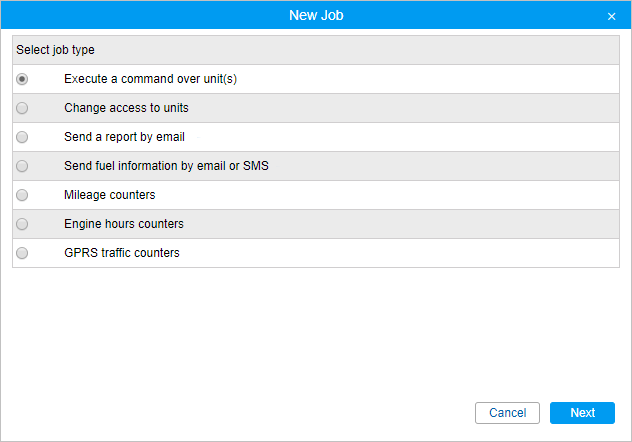
To create a new job, press the New button. In the dialog box that opens select the job type:
- Execute a command over unit(s),
- Change access to units,
- Send a report by email,
- Send fuel information by email or SMS,
- Mileage counters,
- Engine hours counters,
- GPRS traffic counters.
Then select units to apply this job to and set the basic parameters (activation time, schedule, and so on). In addition, for each type of job, adjust individual parameters described below.
Selecting units for jobs and notifications
The creator of the resource to which the job belongs must have the Use unit in jobs, notifications, routes, retranslators access right to the units.
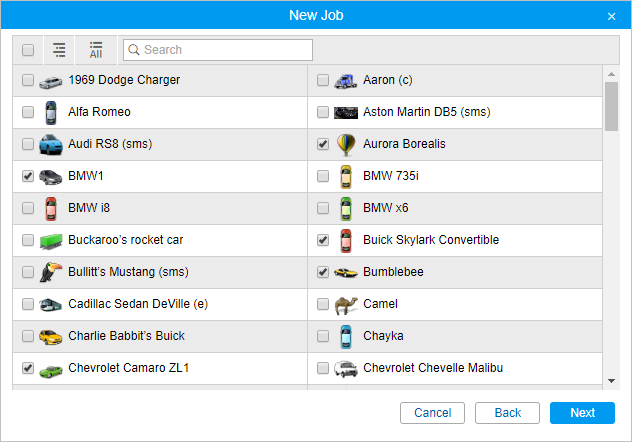
Only those units that are currently in the work list of the Monitoring panel are displayed on the page for selecting units for a job or notification.
If no units are displayed, click on the Display all button . If the units do not appear, check if you have access right to units.
You can switch between the units and groups modes by clicking the switch-button /. If a unit group is selected, the job or notification will be applied to all the units that are included in the group at the time the job is executed or the notification is sent. The list of units that are currently in the group can be found in the group's tooltip.
Check the boxes of units or groups you want to apply the job or notification to. To select all items, check the box in the header of the table.
Please note that if there are more than 100 units on this page, their icons are not displayed.
When editing a job or a notification or viewing the properties, the unit selection dialog box contains units selected for a job or a notification and units currently displayed in the work list. If necessary, you can add or remove units. To be able to do so, make sure you have the Use unit in jobs... access right to these units. If a job or notification that you are editing contains units to which you do not have enough access rights, you will be warned about it. In case you save such job or notification, the units will be lost.
Parameters for jobs
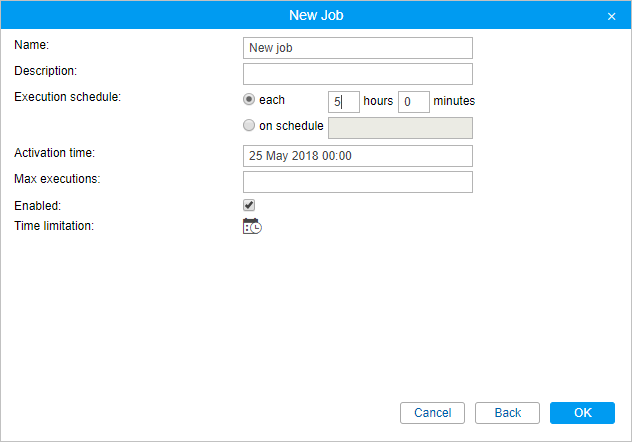
Parameters for jobs are set in the last dialog box.
Name
The name of the job that will be used in the list of jobs or the subject of the letter if the job is to send some information by email.
Description
The job description is optional. If available, it is used in the tooltip to the job. The text should not contain more than 10,000 characters.
Execution schedule
Use one of two ways to set the job's schedule:
- You can specify the frequency (interval) of execution — every nth number of hours and minutes.
- You can create a schedule of execution within a day. The time is set in the 24-hour format hours:minutes or just hours. As separators, use spaces.
Example:
8:00 22:00
In this case, the job will be executed at 8 a.m. and 10 p.m. daily (if other conditions concerning execution days are not set on the Time Limitation tab).
Activation time
Date and time when the job will be activated.
Maximum executions
The number of job executions after which the job will be disabled. If you leave this field empty, the job will continue running until you delete or disable it manually.
Enabled
This check box indicates whether the job is enabled or not. When creating a job, enable this check box to activate the job immediately after its creation. If this check box is not marked, the job will still appear in the list, and you can activate it later.
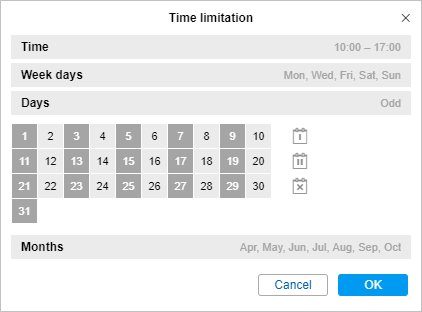
Time limitation
You can set time limitation for a job. This means that it will be carried out at certain hours of the day, or on certain days of the week, or only on working days from 9 a.m. to 6 p.m. For instance, if you want to reset the traffic counter, it is convenient to make a time limit on the first days of the month. In such a case, after the first day of each new month, the counter will automatically reset to zero.
To get the daily report, select the For previous 1 days interval of the report and enter some night time, for example, 3 am, in the execution schedule. Then, when you come to work, all the necessary reports for the previous day will already be in your email box.
If the workday ends after midnight, as some cars may arrive late, the daily report can be configured in the following way. Select the For previous 24 hours interval of the report, and enter 4 a.m. as the activation time for the job. Then the report will automatically be executed once a day, at 4 a.m., and will contain the analysis of the data for the past day. In this case, the trips that end after midnight will not be split into two parts.
To receive a weekly report, select the For previous 1 weeks report interval, enter some night time in the execution schedule, and in the time control limit, select Monday. Thus, by Monday you will have reports for the past week.
To receive a monthly report, select the For previous 1 months report interval, specify the time in the execution schedule, and in the time control limit, check the box of the first day of the month. Thus, the corresponding report will arrive on the first day of each month for the previous month.


