Fleetrun
Hecterra
NimBus
Other apps
Wialon for Android/iOS
Logistics
Wialon Local
Wialon Hosting
Distance Tag
WiaTag
Configurator
LeaseControl
en
en ru es
Contents
How to Configure Authorization with a Google Account
  • authorization

This guide describes the sequence of steps you should follow if you want to use your Google account to log in to the monitoring site.

  1. Go to Google Cloud Platform and sign in to your Google account. The Dashboard tab is open by default.
  2. Click Create project.

  3. Specify the project name, organization, and the project location. If you use a personal account, the Organization field is not displayed.
  4. Click Create.

  5. Open the OAuth consent screen tab.
  6. Select the External user type.
  7. Click Create.

  8. Specify the application name and the user support email.

  9. At the bottom of the page, indicate the domain name of the monitoring site and the email address to which you want to receive Google notifications.
  10. Click Save and continue.

  11. If necessary, configure scopes and click Save and continue.

  12. If necessary, add test users who should be able to access the project before its publication. 
  13. Click Save and continue.

  14. Open the Credentials tab.
  15. Click Create credentials to specify authorization data.
  16. Select Oauth client ID.

  17. Select the application type and specify its name.
  18. Type the monitoring site URI (should be https) in the Authorized JavaScript origins and Authorized redirect URIs fields.
  19. Click Create.

  20. Copy the client ID from the Your Client ID field.

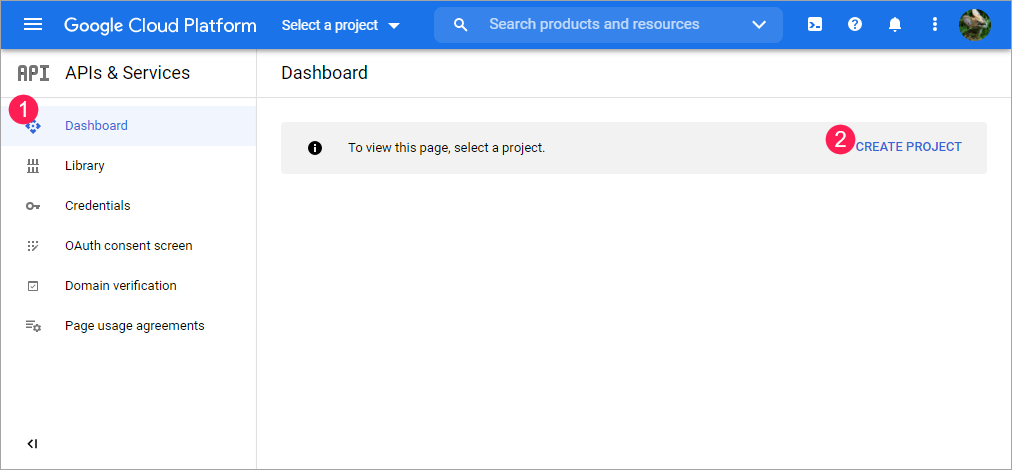
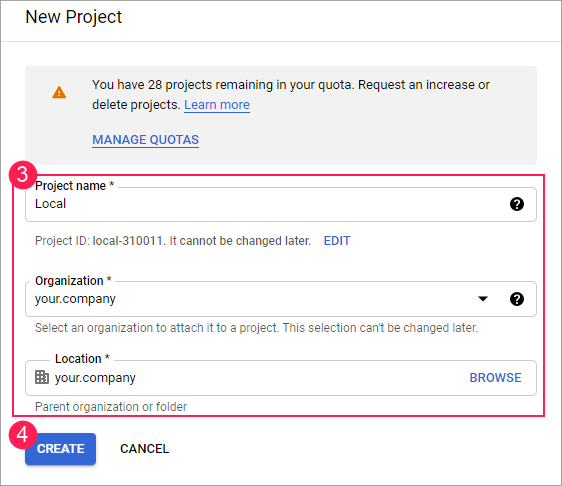
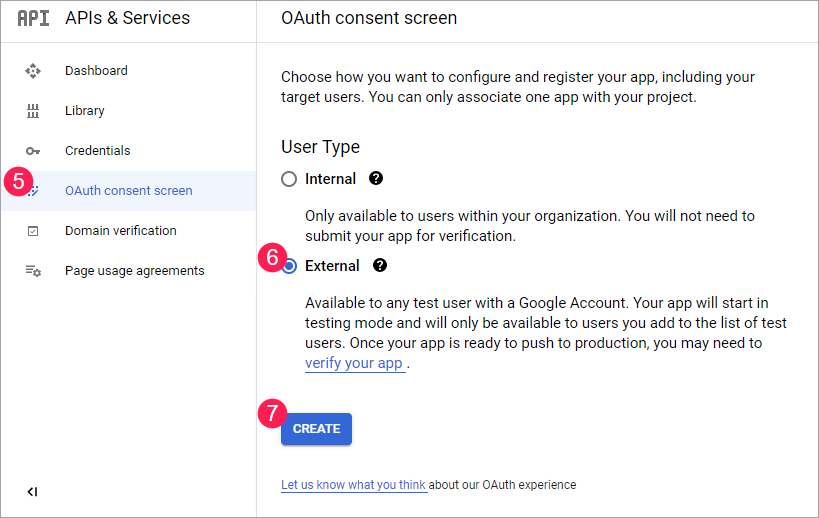
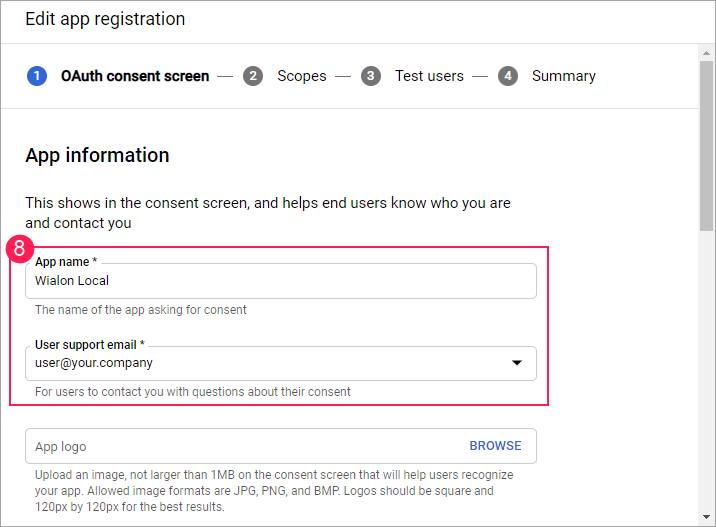
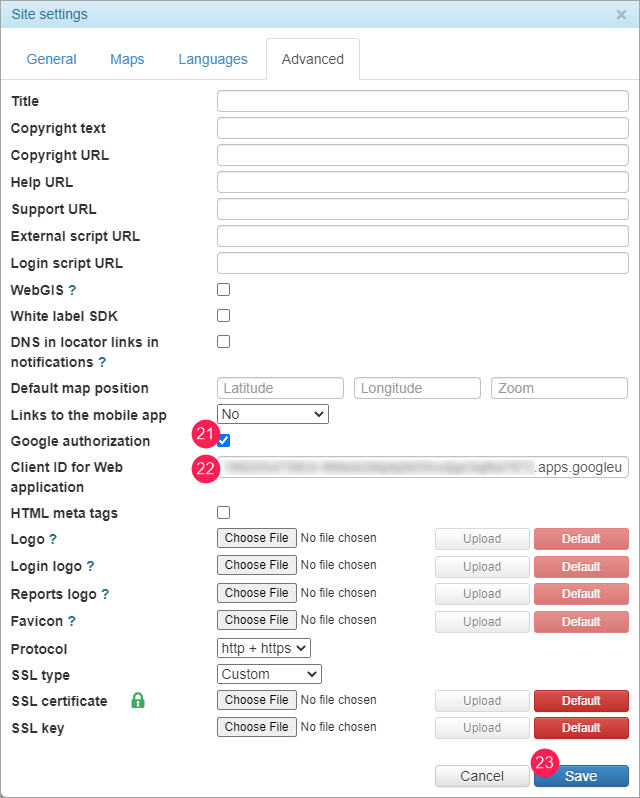
  21. On the Wialon tab of the administration system, find the monitoring site (Wialon Web type) which you want to access using Google authorization and click Change next to its name. On the Advanced tab of the site settings, enable the Google authorization option.

    The https protocol should be used for the selected monitoring site.

  22. Insert the copied client ID in the Client ID for web application field.
  23. Click Save.

  24. Log in to the monitoring site as the user for whom you want to configure Google authorization. Click Connect with Google on the Security tab of the user settings.

  25. Select the Google account you want to use for authorization and click OK.

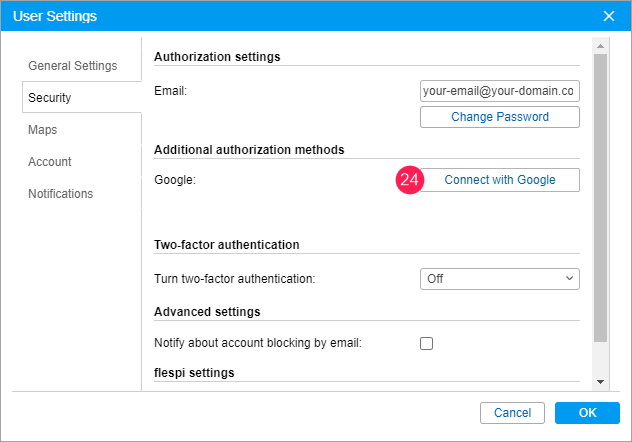
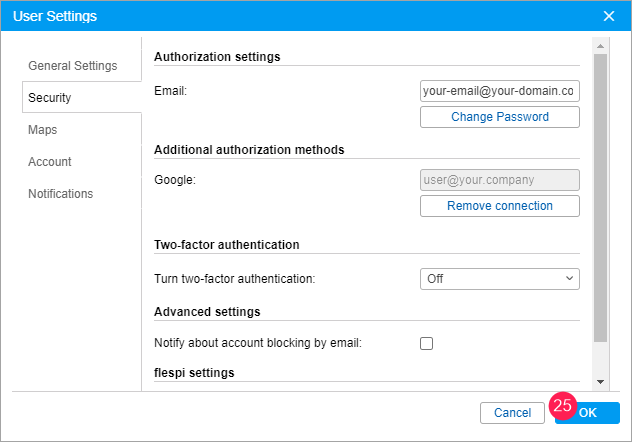
As a result, the Log in with Google caption is displayed on the login page of the monitoring system. It allows logging in to the system using the connected Google account.

How to Upgrade Wialon Local from v1704 to v1804
  • upgrading_wialon_local

This guide describes the sequence of steps you should follow if you want to upgrade Wialon Local from version 1704 to version 1804.

In order for Wialon local version 1704 and above to function correctly, the Node.js 6.x package is required. Support for older versions of Node.js, starting with the release of 1804, is discontinued.

The official Debian 8 and Debian 9 repositories include earlier versions of packages. When installing from our distribution package, the required Node.js version is installed automatically.

  1. Upgrade Node.js to the version 6.x if you receive a notification that the version of Node.js that is used on your server is out of date. To do this, follow the steps below.
    • Log in to the terminal on behalf of the main user (root) and run the following commands:

      cd /home/wialon/wlocal/
      service wlocal stop
      ./adf_script stop
      apt-get install -y curl
      curl -sL https://deb.nodesource.com/setup_6.x | bash -
      apt-get install -y nodejs
      npm -g install forever
      npm install
      chown -R wialon:wialon /home/wialon/
      service wlocal restart
      
    • Check the availability of your sites after they restart.
  2. Install the version 1804 of Wialon Local.


How to Upgrade Wialon Local from v1804 to v1904
  • upgrading_wialon_local

When upgrading Wialon Local from version 1804 to version 1904, follow the steps below.

  1. Make sure that the Debian operating system has been upgraded to version 9 (Stretch).
    • When updating from Debian 8 to Debian 9, add a line “include /etc/nginx/modules-enabled/*.conf” to the file  /etc/nginx/nginx.conf . Here is an example of the received file:
    user www-data;
    worker_processes  2;
    worker_rlimit_nofile 65535;
    include /etc/nginx/modules-enabled/*.conf;
    
    error_log  /var/log/nginx/error.log;
    pid        /var/run/nginx.pid;
    
    events {
           worker_connections  65535;
    }
    
    http {
           include       /etc/nginx/common/*;
           include       /etc/nginx/conf.d/*;
    }
  2. Add additional options (listed below) to the nginx configuration files for the admin site (/etc/nginx/conf.d/lcm.conf). Add the options to the location element of the server section of the lcm.conf file and to the configuration of other nginx involved in proxying requests. This is required to activate work using web sockets.

    proxy_set_header Upgrade $http_upgrade;
    proxy_set_header Connection "Upgrade";
    

    Example of the lcm.conf configuration file:

    server {
        listen        80;
        server_name    10.10.10.10;
        client_max_body_size 10000m;
        proxy_read_timeout 500;
        location /50x.html {
            root /home/wialon/wlocal/nginx/www/nginx-default;
        }    
        location / {
            if ( $args ~* dns-test ) {
                echo 1;
            }
            proxy_set_header Upgrade $http_upgrade;
            proxy_set_header Connection "Upgrade";       
            proxy_pass         http://localhost:8080;
        }
        access_log /var/log/nginx/lcm.access.log;
    }
    
    
  3. Install the ripgrep utility. It is required for quick reading of statistical information about the status of the server.

    wget --no-check-certificate http://ftp.br.debian.org/debian/pool/main/r/rust-ripgrep/ripgrep_0.10.0-2_amd64.deb -O /tmp/ripgrep.deb
    dpkg -i /tmp/ripgrep.deb
    
  4. Install the version 1904 of Wialon Local.


How to Upgrade Wialon Local from v1904 to v2004
  • upgrading_wialon_local

To upgrade Wialon Local from version 1904 to version 2004, follow the steps below.

  1. Upgrade the operating system Debian to the version 10 (Buster).
  2. Install the pigz and curl utilities. To do this, log in to the terminal on behalf of the main user (root) and run the following command:

    apt-get install pigz curl
    
  3. Upgrade Node.js to the version 10.x, by running on behalf of the main user (root) the following commands:

    cd /home/wialon/wlocal/
    service wlocal stop
    ./adf_script stop
    apt-get install -y curl
    curl -sL https://deb.nodesource.com/setup_10.x | bash -
    apt-get install -y nodejs
    npm -g install forever
    npm install
    chown -R wialon:wialon /home/wialon/
    service wlocal restart
    

    Check the availability of your sites after they restart. To update Node.js, you can also contact technical support. In this case, in the letter specify SSH credentials (IP, login and password) to access the server console. The instruction is also located on the official site of the Node.js developer.

  4. Install the version 2004 of Wialon Local.


10
  • 10
  • 25
  • 30
Thank you for your feedback!
Report a mistake
Text with the mistake Comment
Maximum 500 characters