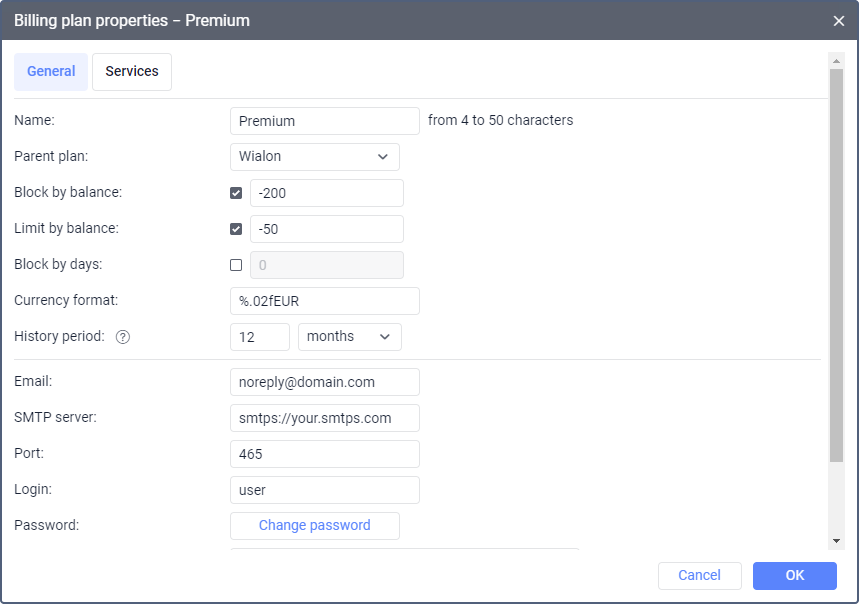
To open the billing plan properties, click on its name in the table.
On the General tab, you can specify the basic settings of the billing plan related to the blocking of accounts, data storage and so on. Some of these settings you can specify manually for each separate account. Also, here you can configure email parameters for sending various system messages (notifications, reports, and so on).
The table below shows the properties available on this tab.
| Property | Description |
|---|---|
| Name | The name of the billing plan (4–50 characters). See more about the input rules here. |
| Parent plan | The parent (recursive) billing plan (optional). If it is assigned, the current billing plan inherits all its properties. These properties can be changed later but considering that the capabilities of a filial billing plan cannot exceed the capabilities of the parent one. |
| Block by balance | The balance state (amount of money) at which the users of accounts with this billing plan cannot log in to the system. |
| Limit by balance | The balance state at which some services and access to CMS Manager should be disabled for accounts with this billing plan. This option works similar to the same-name option in the account properties. |
| Block by days | The number of remaining days at which access to the system is blocked. Five days before the blocking, the user begins to receive a warning message when logging in to the system, which contains the number of days before the account is blocked. Blocking by days doesn't depend on the balance state. If the values for blocking by days and by balance are specified at the same time, then the account is blocked according to one of these conditions which comes first. If necessary, you can enable or disable the three options mentioned above. If enabled, they are usually set to 0. You can find and change the balance state (money and days) in the account properties. |
| Currency format | The symbol of currency. It is specified before or after %.02f. For example, %.02f$. |
History period | The time period during which the unit history (the database with messages from the unit), the user logs and the unit log are stored in the system. You can specify the data storage period in days or months (select in the drop-down list). All messages older than the storage period are deleted from the database automatically. You can also specify this property for each account individually, but its value cannot be greater than the one set in the billing plan. |
You can enter the email address from which system messages should be sent. If the field Email is not filled in, the address from the Administrator's email field is used. If it is also not specified, noreply@gurtam.com is used as the sender's address. Most mail systems perform special checks for spam messages. They compare the original IP address from which the message is sent with the MX records of the sender's domain. If the MX record is not found, the mail system may suspend sending messages, or add the sender's address to the grey list. | |
SMTP server | System messages can be sent using your SMTP server. To adjust this setting, enter the email address in the field above and the SMTP server address in this field. Make sure that the protocol (SMTP or SMTPS) is specified (for example, smtp://server.com). Next, specify the port, login, and password. You can also configure the SMTP server in the administration system. The SMTP server settings in the billing plan have priority over the settings in the administration system. |
| Port | The server port. Usually, ports 25 and 587 are used for SMTP, and 465 for SMTPS. |
| Login | The account that should be used to log in to the mail system. |
| Password | The password for logging in to the mail system. |
| Map tags | In this field, you can specify the tags of the maps that should be used for the billing plan. The tags should be separated by commas. If the field is empty, it assumes that all default maps will be available. Tags are indicated in the following way:
|
| Description | The description of the billing plan (optional). |


