

Click on the Create interval button to add a new interval. The window that opens contains the following tabs:
- General;
- Line items;
- Assigned service objects.
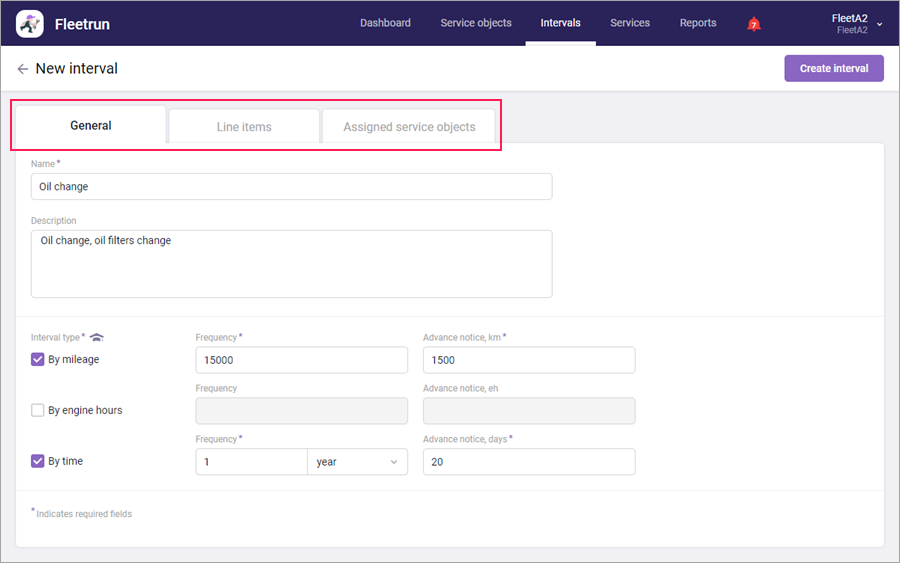
General
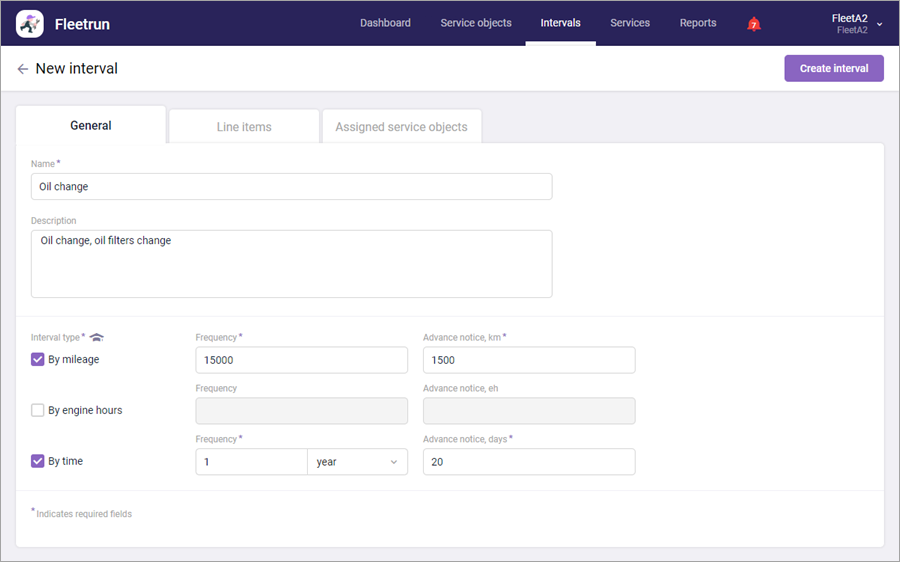
The basic properties of the service interval are indicated on the General tab: its name, description, frequency and terms of advance creation of its services. The required fields are marked with an asterisk (*).
| Property | Description |
|---|---|
| Name* | The required field. The maximum length is 128 symbols. |
| Description | The description of the service interval. The maximum length is 512 characters. |
| Interval type* | The criterion that defines the frequency of service intervals. Three options are available: by mileage, by engine hours, by time. For each service interval, you can indicate several types. |
Type of interval is an essential property of the interval, so at least one type should be indicated.
For each type of interval, the frequency is indicated, that is, how often services should be created for it. In the Advance notice field, specify how many kilometers (miles)/engine hours/days in advance the upcoming service should be created based on this interval.
If 0 is indicated in the Advance notice field, the service is created when the mileage/engine hours/days value specified in the Frequency field is reached.
If several types of intervals are indicated, the service is created based on the type whose value is reached first.
To receive notifications about the upcoming services, check the corresponding item in the Notifications block in the user settings.
If any of the required fields on the General tab are not completed, it is not possible to save the interval: the error message shows up and red prompts appear pointing at the fields that must be filled in.
Line items
On the Line items tab, you can indicate the cost of spare parts and labour for the service interval.
The cost can be specified in two ways: by entering the total cost or list the cost of all the parts and types of labour. In the latter case, the total cost of maintenance is calculated automatically.
To specify the total cost of maintenance, enter it in the Total cost field.
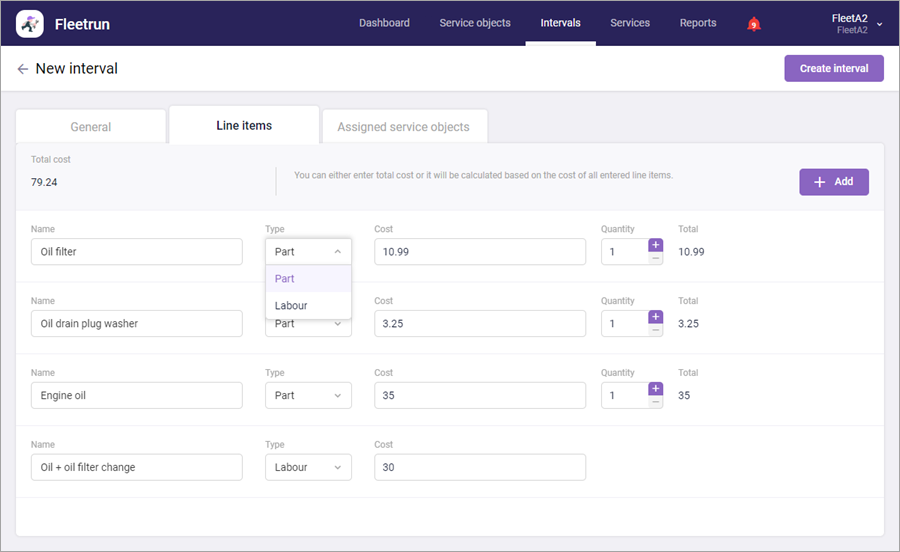
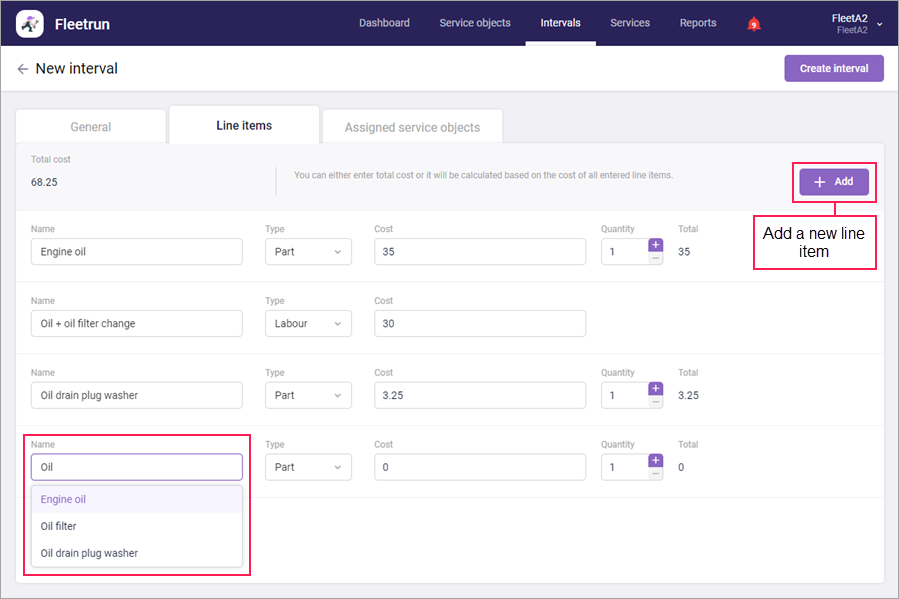
Use the button in the upper right corner if you need to enter the cost of all parts and labour. Clicking on it adds one line item. For each line item, specify the properties described below.
| Property | Description |
|---|---|
| Name | Click on this field to see the list of previously created line items from the library. The field itself works as a dynamic filter, which allows you to quickly find the required item in the list. The filter shows only those line items that correspond to the specified type. Once the line item is selected, the Type and Cost fields are filled in automatically (can be edited if necessary). You can also enter a new line item manually. In this case, the line item is added to the library after saving the service interval. |
| Type | Select one of the available options: Part or Labour. Part is selected by default. |
| Cost | Enter the cost (up to 10 characters). The point (.) is used as a separator. |
| Quantity | Specify the quantity of parts using the keyboard or buttons +/-. To the right, in the Total field, you can see the total cost of parts that is calculated automatically. |
To delete a line item, press the icon ![]() that appears at the end of the line when pause on it.
that appears at the end of the line when pause on it.
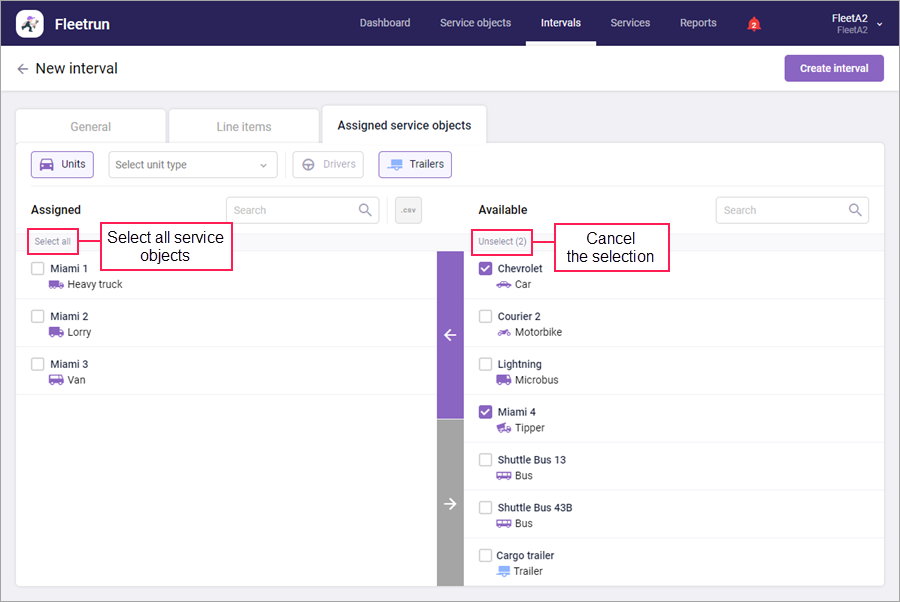
Assigned service objects
Here you can assign available units, trailers, or drivers to the service interval. If a unit, trailer, or driver is assigned to the service interval, services are created for it automatically based on the interval.
There are two lists on the Assigned service object tab: the left one displays the objects assigned to the interval, the right one shows all objects of the fleet.
To assign units, trailers, or drivers to the service interval, select the required ones in the list Available and press the left pointing arrow. To quickly find the required item, use the Units, Drivers, and Trailers buttons or dynamic filter above.
To check all the service objects in the list, use the Select all button. The check boxes can be cleared manually or with the help of the Cancel button (removes the selection from all service objects).
Service objects are removed from the service interval in the same manner.
For each assigned service object, the following information is presented: its name, frequency of completion, and the data (mileage, engine hours, date — depending on the interval settings) on the next service. If the service is overdue, it is coloured in red.
The timing of the next service is calculated according to the formula:
Next service = (Last service + Frequency) - Current mileage/engine hours/date.
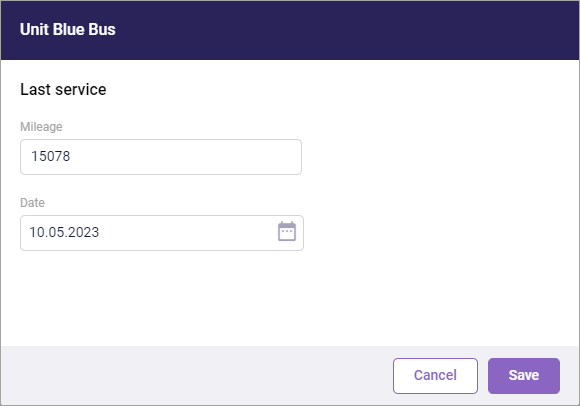
By default, the actual data at the time of assigning is used for the Last service value. To specify this data manually, click on the icon ![]() that appears at the end of the line with the interval when you pause on it. In the window that opens, for a unit, indicate mileage, engine hours and/or date at the time of the latest service interval; for trailers and drivers specify the date. Click Save.
that appears at the end of the line with the interval when you pause on it. In the window that opens, for a unit, indicate mileage, engine hours and/or date at the time of the latest service interval; for trailers and drivers specify the date. Click Save.
The data on the next services can be exported to a CSV file. To do this, click the button ![]() located above the list of service objects assigned to the interval.
located above the list of service objects assigned to the interval.
To save the created service interval, press the Create interval button in the upper right corner of the window. To cancel the changes, return to the list of the intervals by clicking on the arrow pointing left in the upper left corner.
You can also create intervals on the Service objects page.