

Managing tasks involves the following actions:
You can change the priority, status, and assign an employee to multiple tasks at once.
You can also open task information. When viewing it, you can add and edit comments, send messages to the driver, go to the unit properties and use other features. Read more on the Task information page.
Information about changing priority, status, assignee, and adding comments is shown in the following locations:
- in the log available in the bottom panel if the User actions option is selected (shows real-time data within a session);
- in the table of messages of the Log type;
- in the Log table of a report on a unit;
- in the unit log in the management system.
Searching and filtering tasks
By default, the list shows only tasks for today. To see tasks for another period, specify its beginning and end in the row above the table and click Apply. You can specify the beginning and end of the period manually or using the calendar.
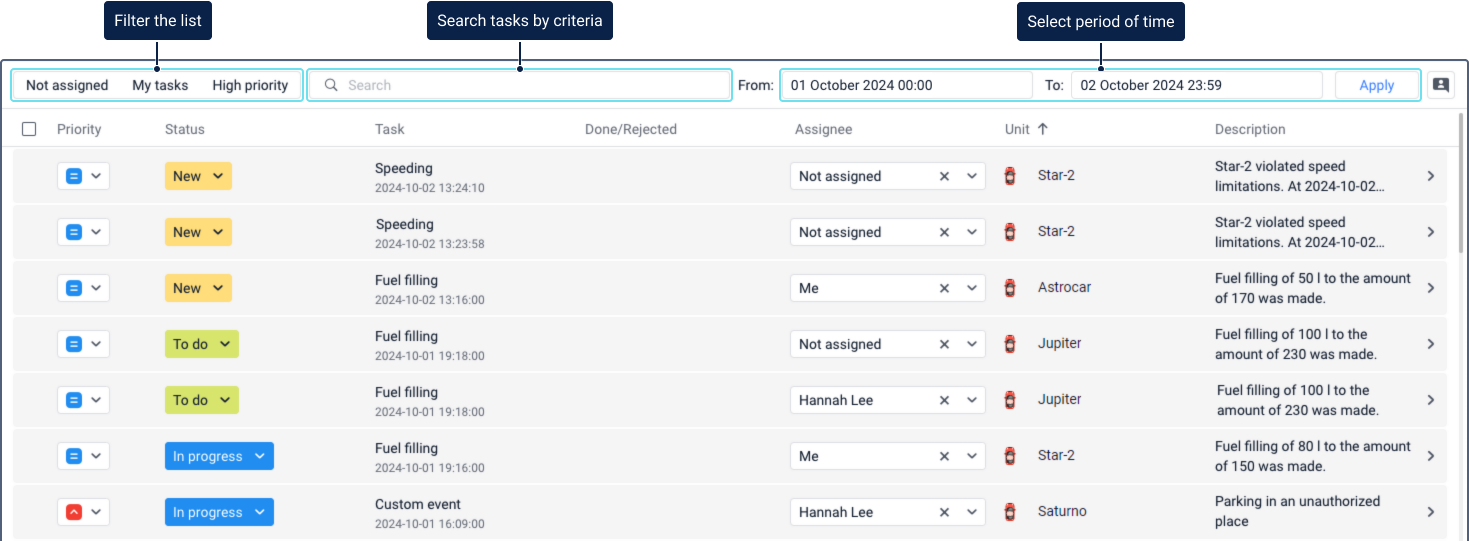
To search for tasks, you can use dynamic search by the following criteria: assignee, unit, status, and priority. This function works the same way as searching for notifications.
You can also filter tasks so that the list shows only those that are not assigned to anyone, are assigned to you, or have a high priority. To do this, select the filter criteria Not assigned, My tasks or High Priority, respectively.
Changing the task priority
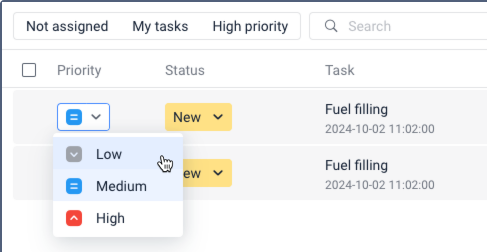
By default, all new tasks have a medium priority. You can change the priority of one task or several tasks at once.
To change the priority of a single task, click on the field in the Priority column and select the necessary option: low, medium or high.
You can also change the task priority in the task information.
To change the priority of several tasks at once, follow the steps below.
- Select the required tasks. To do this, point to a task and check the box in its row. To select all tasks at once, check the box in the table header.
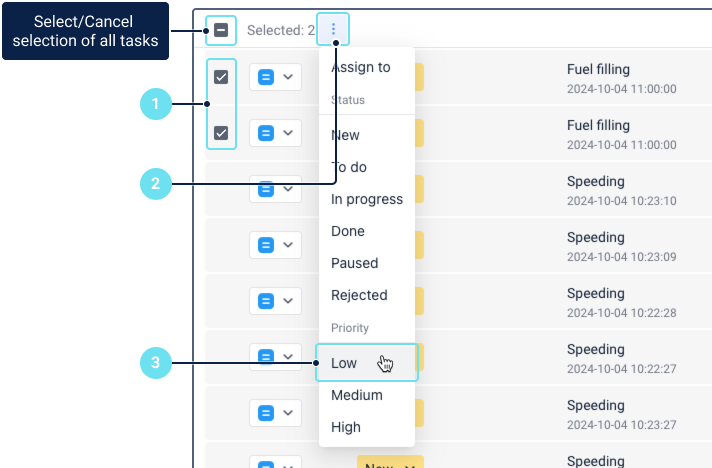
- Click on the icon
 .
. - In the menu that opens, select the necessary priority.
Changing the task status
After the event is registered, the task appears in the list of tasks with the New status. You can change the status of one task or several tasks at once.
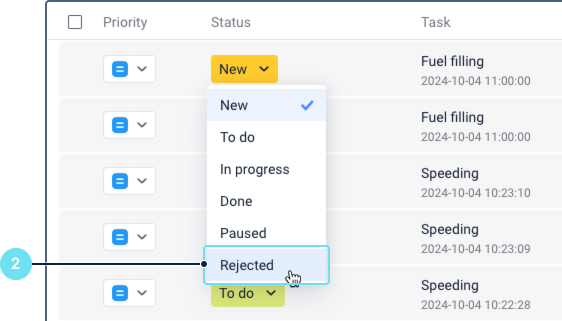
To change the status of a single task, follow the steps below.
- Click on the field in the Status column.
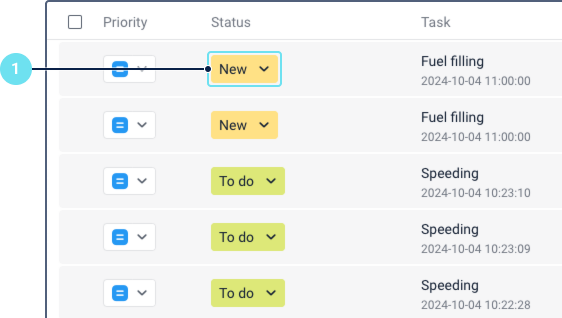
- Select one of the available options:
- new;
- to do;
- in progress;
- done;
- paused;
- rejected.
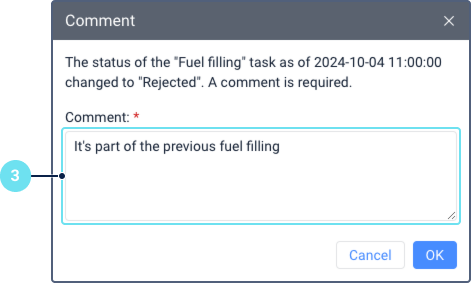
- If you selected Done, Paused or Rejected, leave a comment and click OK.
You can also change the status and leave or edit a comment in the task information.
To change the status for multiple tasks at once, follow the steps below.
- Select the required tasks. To do this, point to a task and check the box in its row. To select all tasks at once, check the box in the table header.
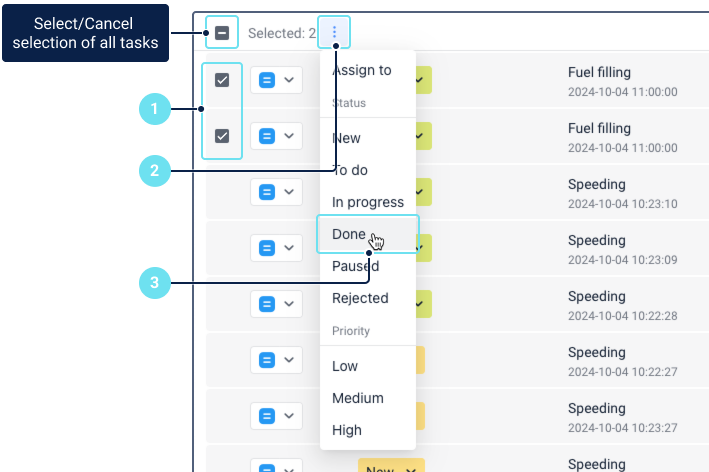
- Click on the icon .
- In the menu that opens, select one of the available options:
- new;
- to do;
- in progress;
- done;
- paused;
- rejected.
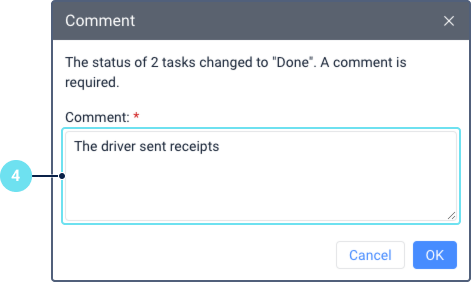
- If you selected Done, Paused or Rejected, leave a comment and click OK.
For completed and rejected tasks, the time of the status change is shown in the Done/Rejected column.
Assigning an employee
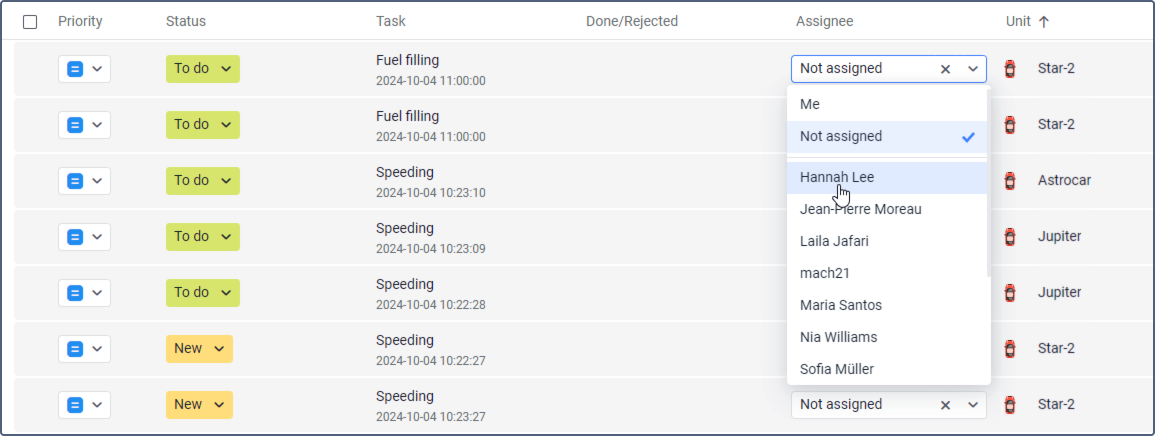
New tasks don't have an assignee by default. You can assign the task to yourself or to another employee. To do this, select the required user in the Assignee column.
You can assign several tasks to one employee at once. To do this, follow the steps below.
- Select the required tasks. To do this, point to a task and check the box in its row. To select all tasks at once, check the box in the table header.
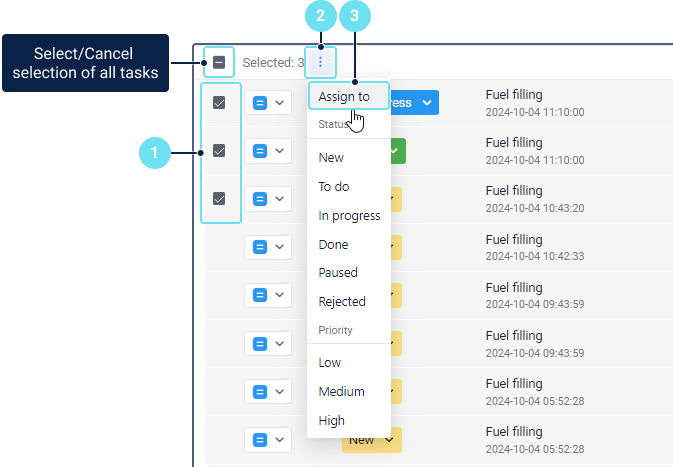
- Click on the icon .
- In the menu that opens, select Assign to.
- Select the user to whom you want to assign the tasks.

- Click OK.
After that, the Assignee column shows the name of the user to whom the task is assigned. If you want to cancel the selection, click on the icon ![]() in the field or assign another employee.
in the field or assign another employee.
To unassign an employee from multiple tasks at once, follow steps 1-3 of the previous instructions, select Not assigned in the window that opens, and click OK.
An employee can see the tasks assigned to them by applying the My Tasks filter.