Task Information
From the list, you can go to the task information. To do this, click on the icon  at the end of the row with the required task.
Information about the task is shown in three sections:
- basic information and actions
- additional information and actions
- comments
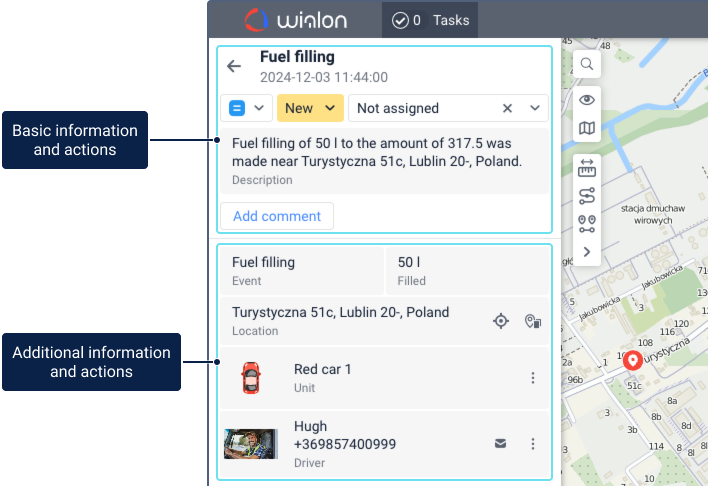
The location of the event related to the task is shown on the map if the coordinates are available.
Basic information and actions
The section of basic information and actions contains the following items:
- icon to go to the task list (
 )
) - task name and event registration time
- task priority
- task status
- assigned employee
- task description

All items are also available in the task list. Read more about them here.
Additional information and actions
The section contains the blocks described below.
Block | Description |
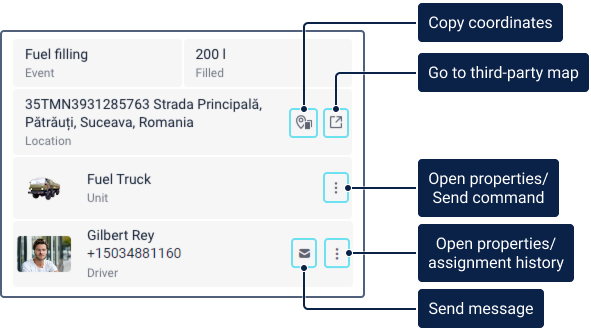
Event | If a task is created on the basis of a triggered notification with the Create task action, this block shows the type of notification. For some types of events, another block with additional information may be shown next to the Event block. |
Location | This block shows the address where the unit was located at the time of the event. Icons for copying coordinates ( ) and navigating to a third-party map ( ) may be available in this block. For the icons to be displayed, the Location option must be enabled in the user settings. To copy coordinates, click on the icon . The coordinates are copied with degrees as a decimal fraction, using a comma as the latitude and longitude separator. Navigating to a map of a third-party source is described on the Additional unit information page. |
Unit | The following access rights to the unit are required to work with this block:
This block shows the icon and the name of the unit. Point to the icon to see the unit tooltip. You can also open the unit properties or send a command to the unit. To do this, click on the icon and select the required item. |
Driver | The block is available if the Drivers service is enabled in the properties of your account or billing plan. In addition, you must have the following access rights to the resource where the driver is located:
This block shows the icon, name and phone number of the driver assigned to the unit at the time of the event. You can also use the iconwhich allows you to open the SMS tool. You can use it to send SMS messages to the phone number specified in the driver properties.The icon is inactive if the requirements for sending SMS messages from the monitoring system are not met or the phone number is not specified in the driver properties. You can also open the driver properties or the history of assignments. To do this, click on the icon and select the required item. |
Comments
In the Comments section, you can add, edit and delete comments on the task.
Adding a comment
To leave a comment on the task, follow the steps below.
-
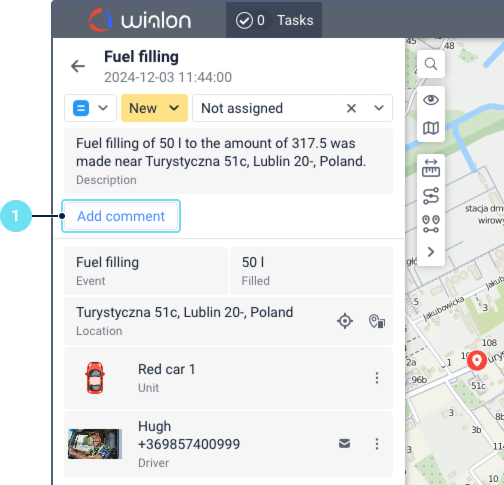
Click Add comment.
-
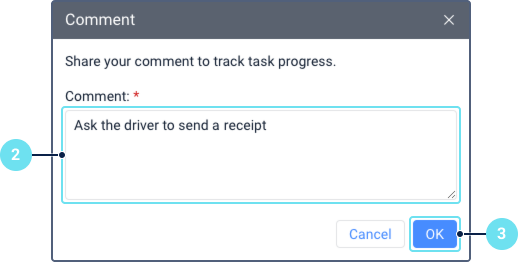
Enter the text.
-
Click OK.
After that, the comment is shown in a separate block. In addition to the comment text, the block contains the date and time it was added, the name of the user who left this comment, and the menu () from which the Edit and Delete options are available.
Editing a comment
To edit a comment, follow the steps below.
-
Click on the icon .
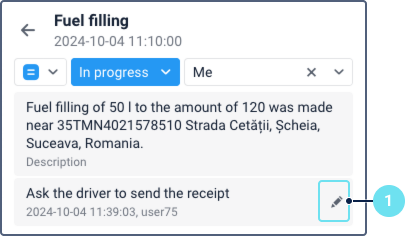
-
Select Edit.
-
Edit the text of the comment.

-
Click OK.
After that, the comment block shows the following information:
- edited comment
- date and time the initial comment was added
- name of the user who added the initial comment
- date and time the comment was edited
- name of the user who made the changes
Deleting a comment
To delete a comment, click on the icon and select Delete.