How to add custom Mapbox Maps to the monitoring system
This guide describes how to create a custom map in Mapbox and add it to the monitoring system.
This method is suitable for you if:
- you only want to visualise the data;
- you have source data for the map;
- you plan to edit the map in the future;
- you want to customise the data style yourself.
For example, in this way you can add a map of logistic squares, additional administrative division of a country, land use map, topographic survey, development plan, quarry scheme, field map, aerial photo, etc.
This method is not suitable if you need geocoding or speed limits. In this case, contact technical support, describe what kind of map you need and provide the source data.
If you have any questions while creating the map, please contact technical support.
Creating a custom map in Mapbox Studio
-
Sign up at www.mapbox.com
-
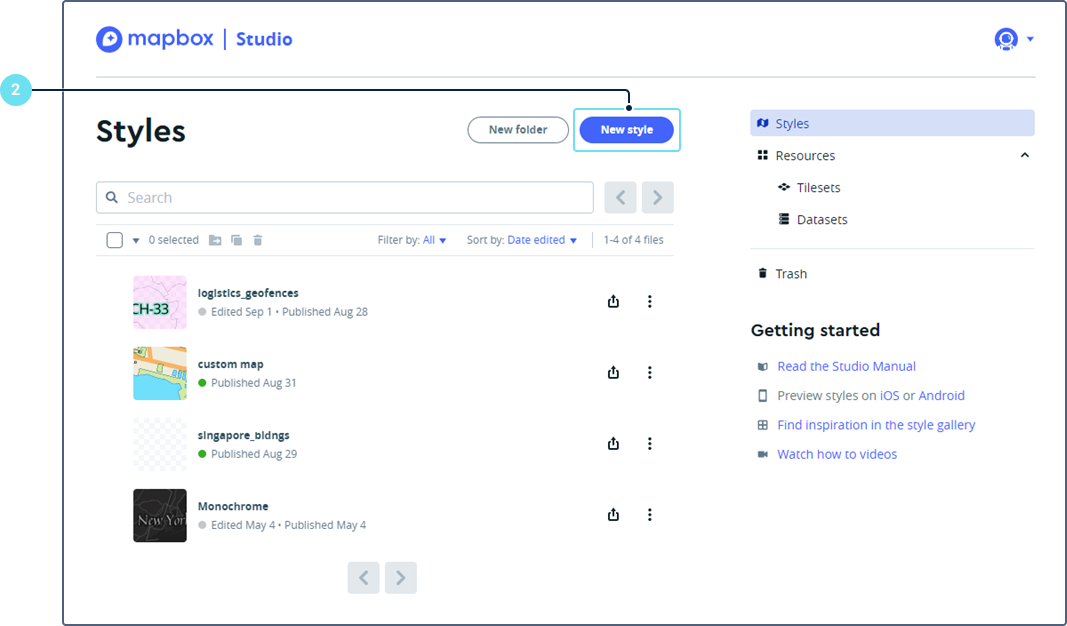
Go to studio.mapbox.com and click New Style.
-
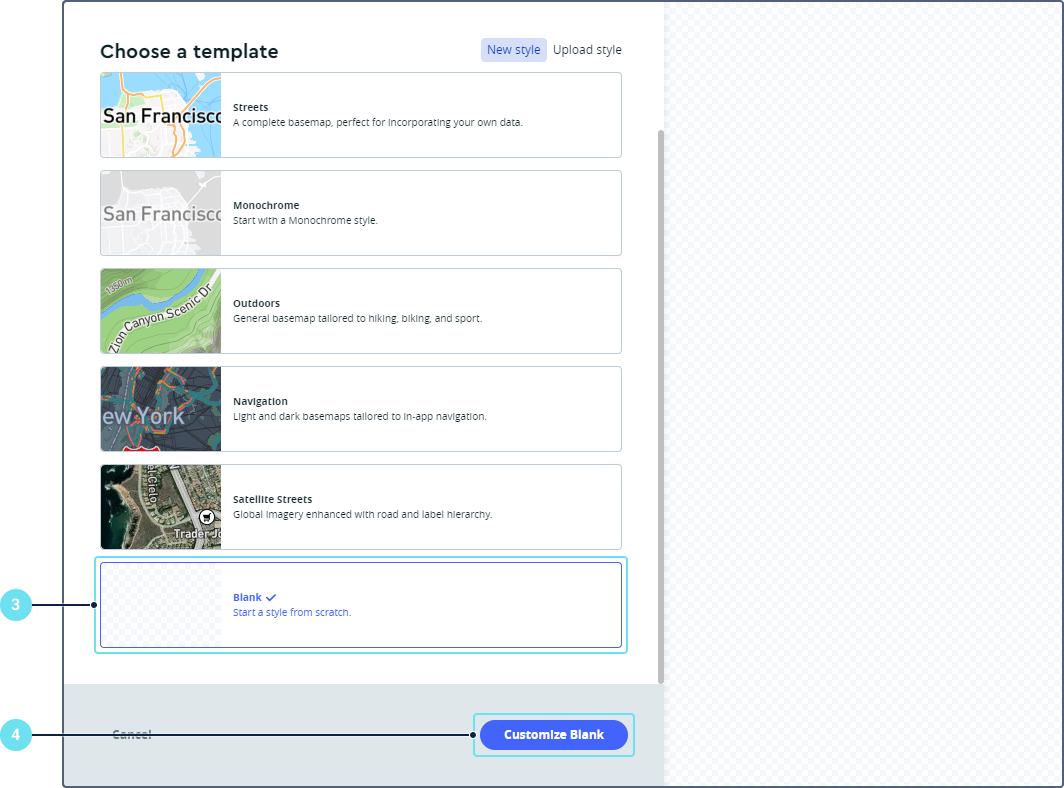
Select the style Blank.
-
Click Customize Blank.
-
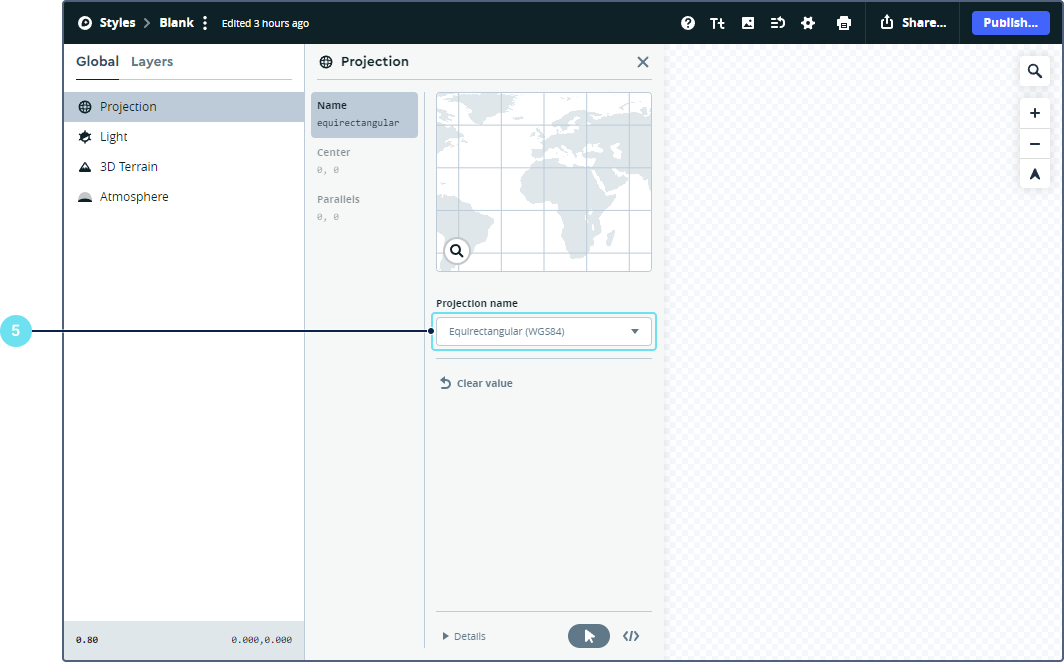
In the Projection section of the Globe tab, select the Equirectangular (WGS84) projection.
-
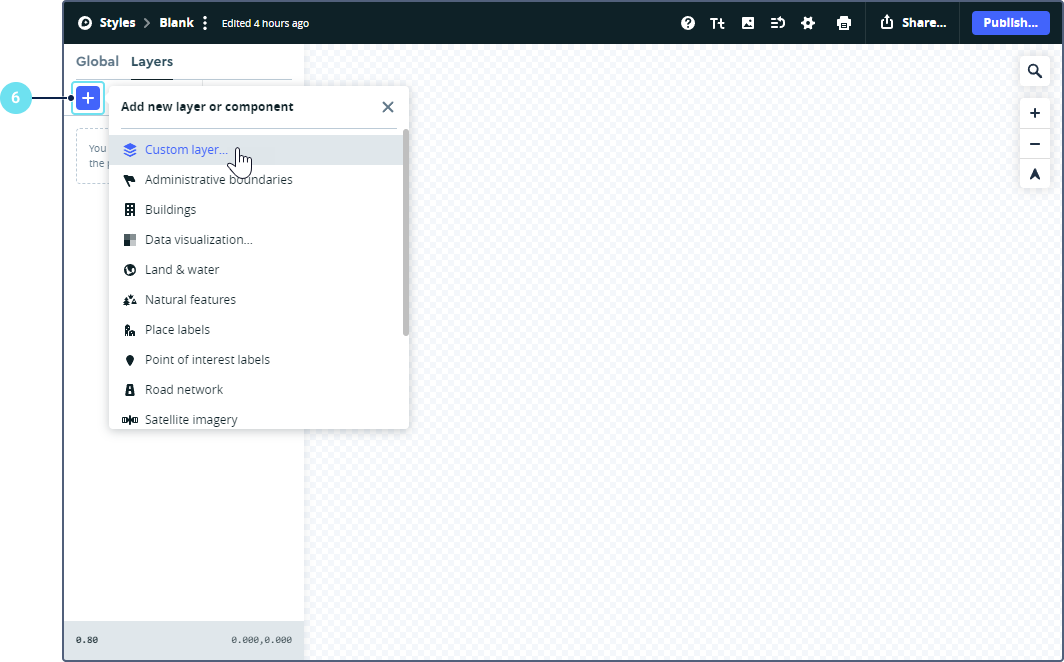
On the Layers tab, click on the button
 and select Custom layer…
-
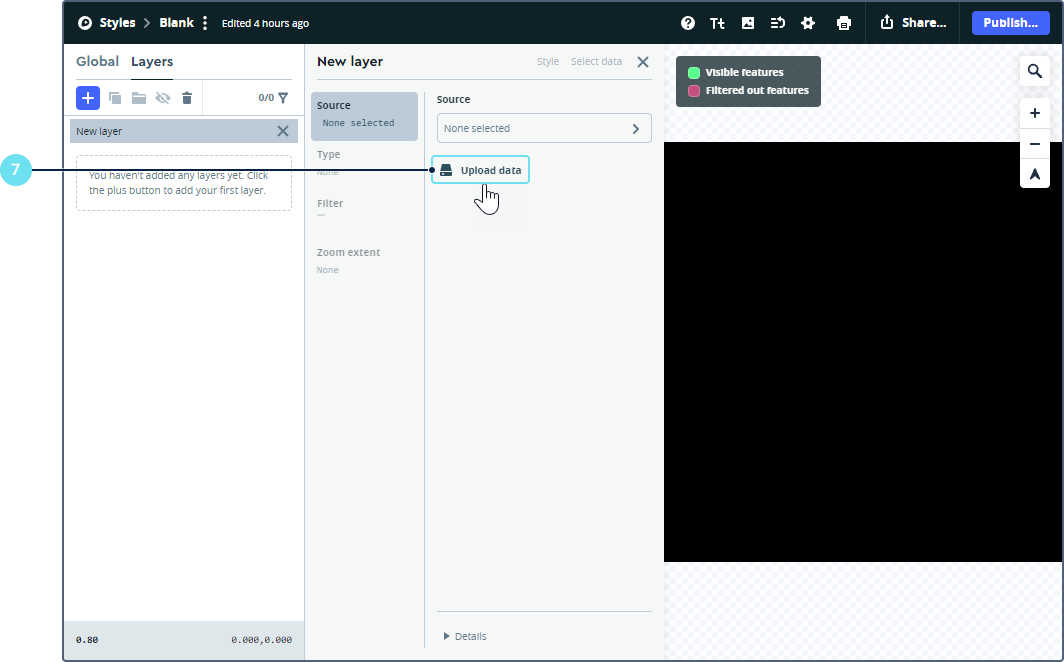
Click Upload data and upload your data.
-
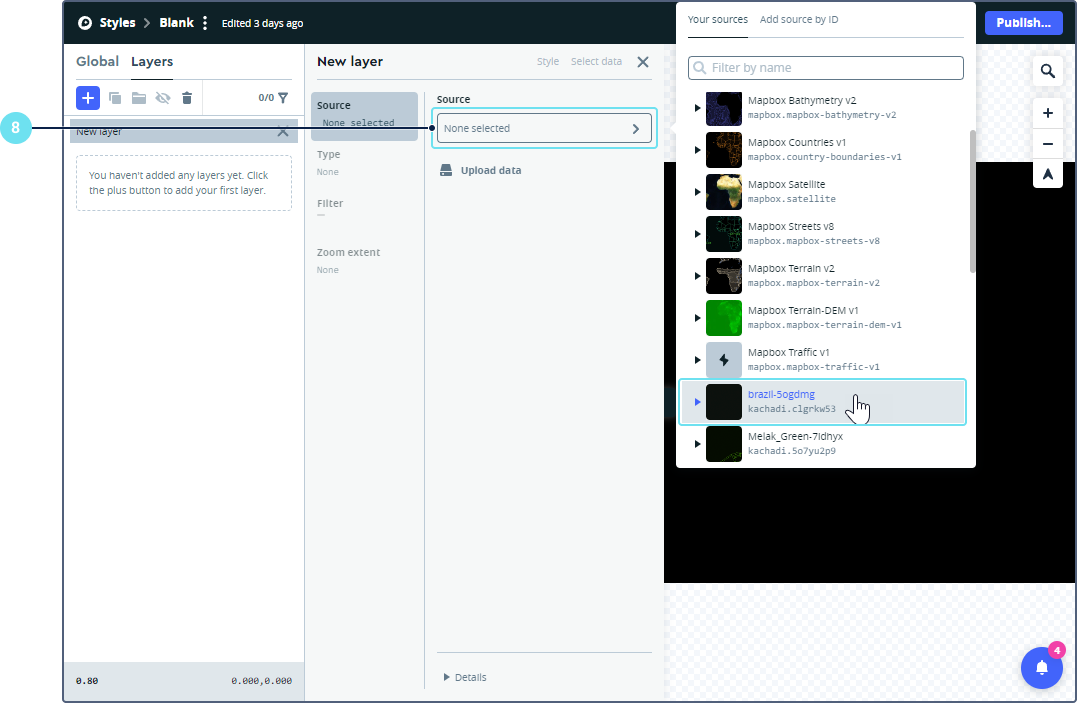
Select the uploaded file in the Source list.
-
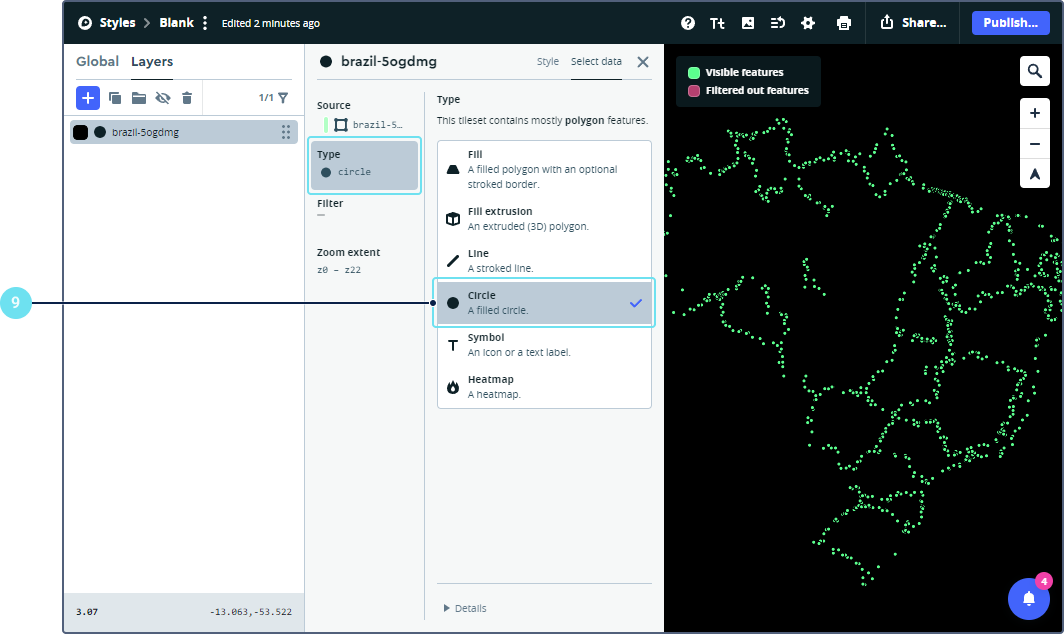
In the Type section, select the data type, if necessary.
-
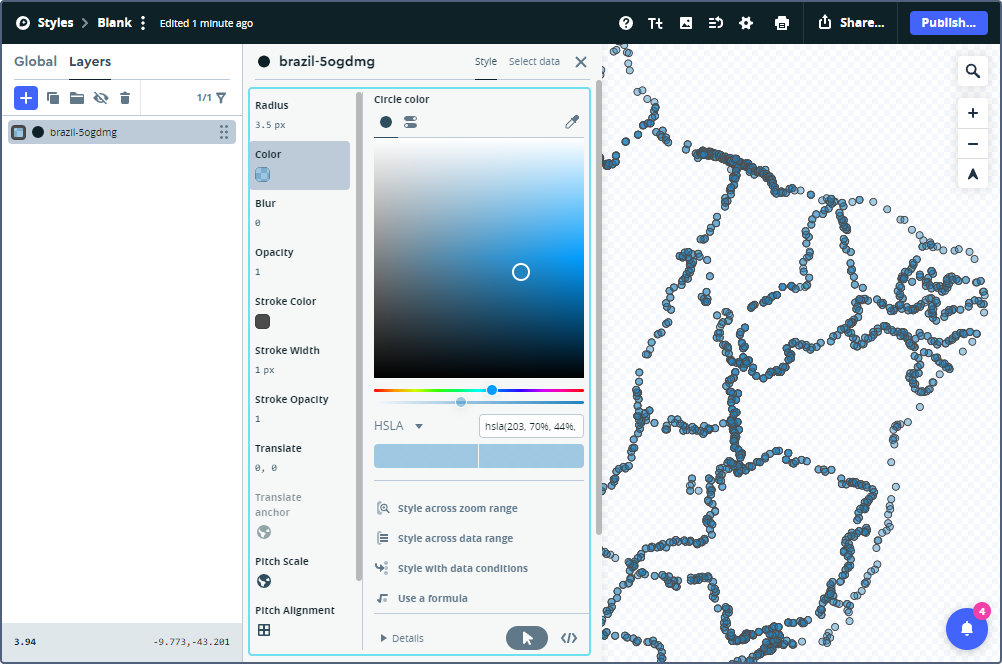
If necessary, edit the style of the selected layer on the Style tab. You can add multiple layers, captions, adjust color, stroke, borders, font, etc.
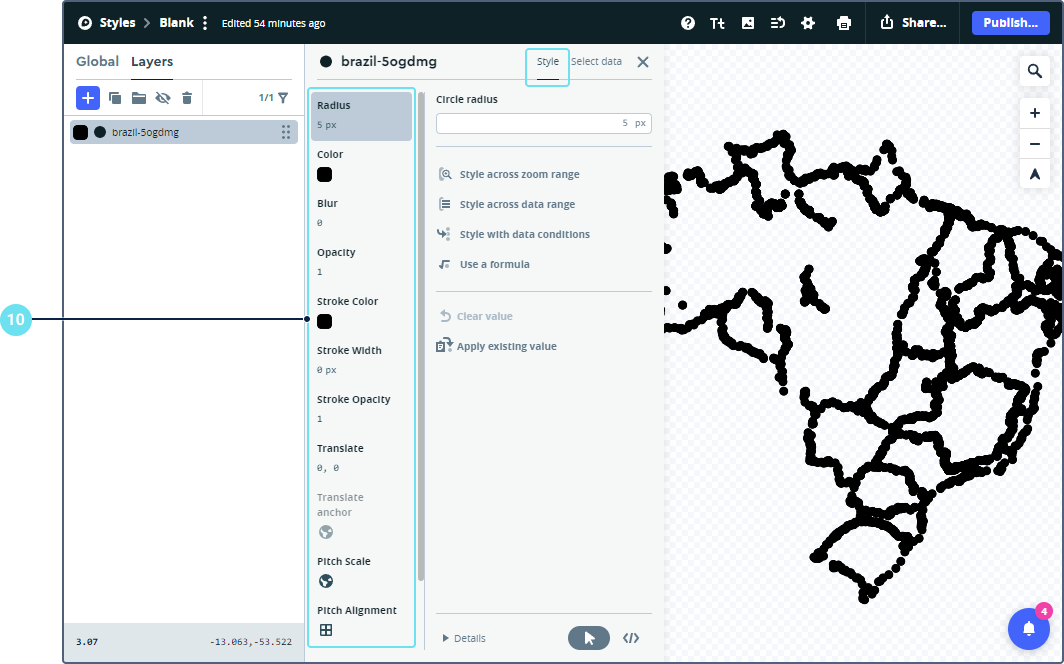
Example of customizing the style of a point layer
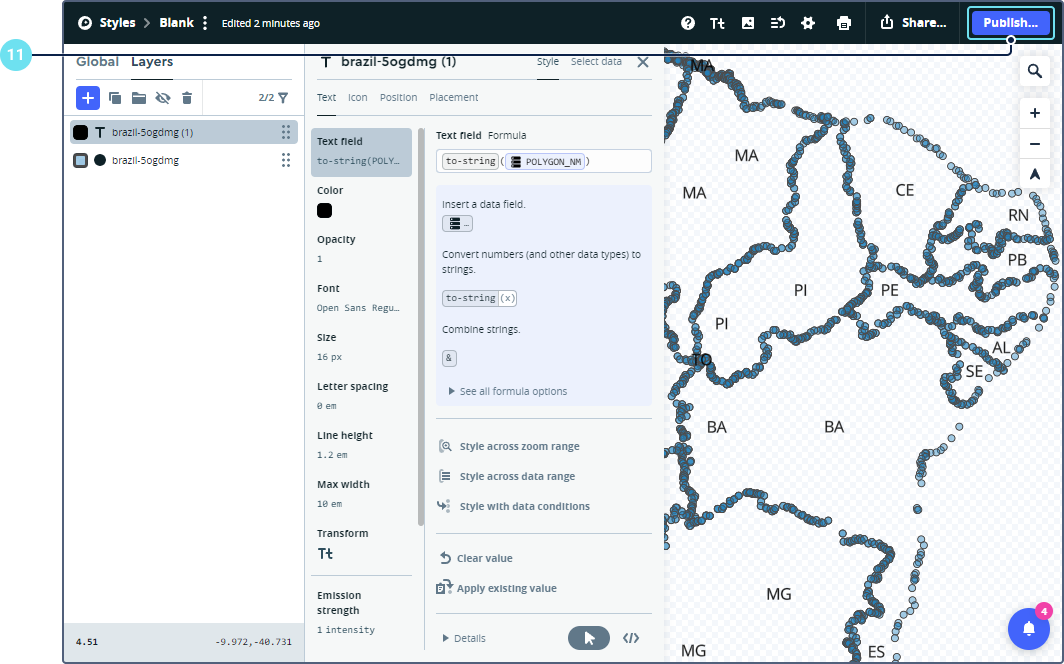
 Example of adding and customizing captions
Add the same or a different layer which contains a table of attributes with the fields required for captions. Select the Symbol type.
 In the Text field section of the Style tab, click Insert a data field and select the required field (in the example, this is POLYGON_NM).
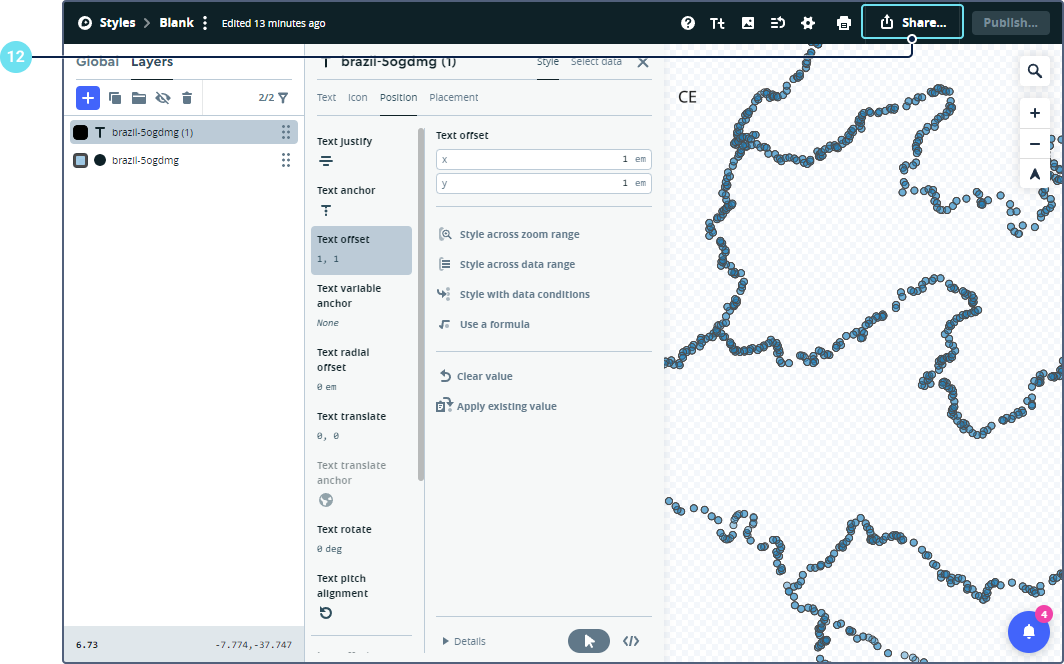
 Customize the captions on the Text, Icon, Position and Placement tabs.

-
Click Publish to save the changes.
-
Click Share…
-
In the Developer resources section of the Third party tab, select CARTO.
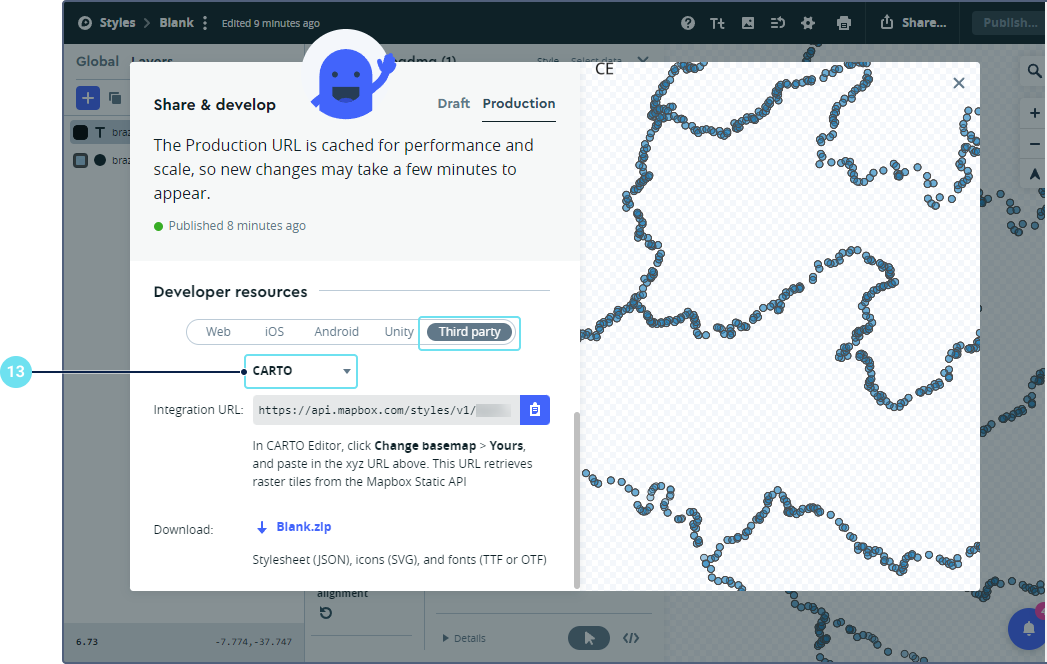
-
Copy the link.
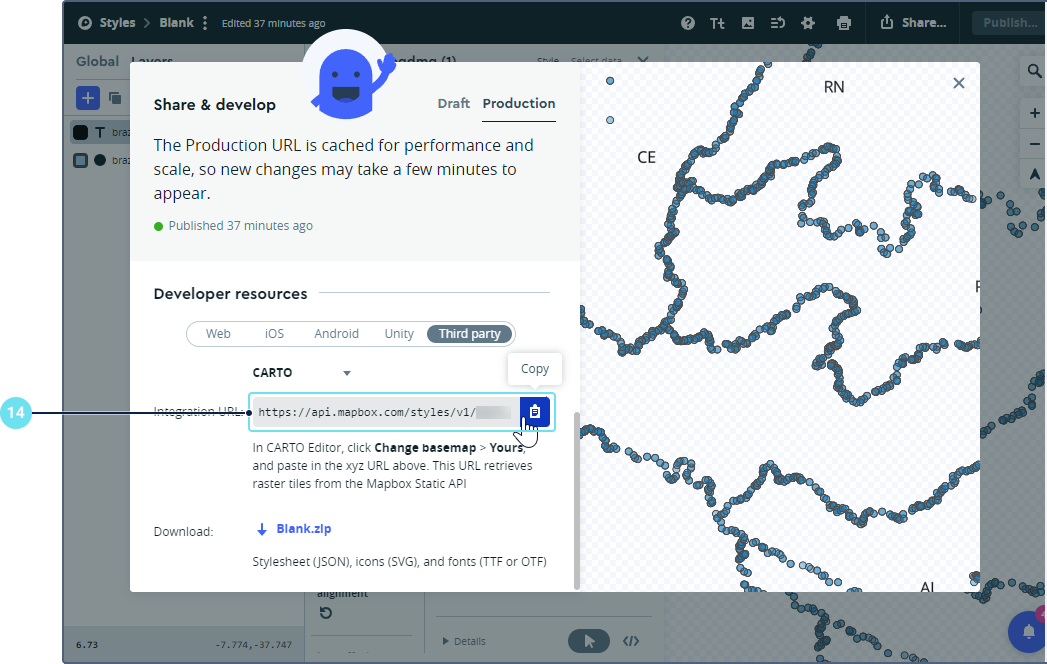
The link should have the following format:
https://api.mapbox.com/styles/v1/user_name/ID/tiles/256/{z}/{x}/{y}?access_token=TOKENwhere user_name, id, TOKEN are custom parameters.
Later you can edit the created map, add new data, change the style, etc. Remember to use the Publish button to save the changes.
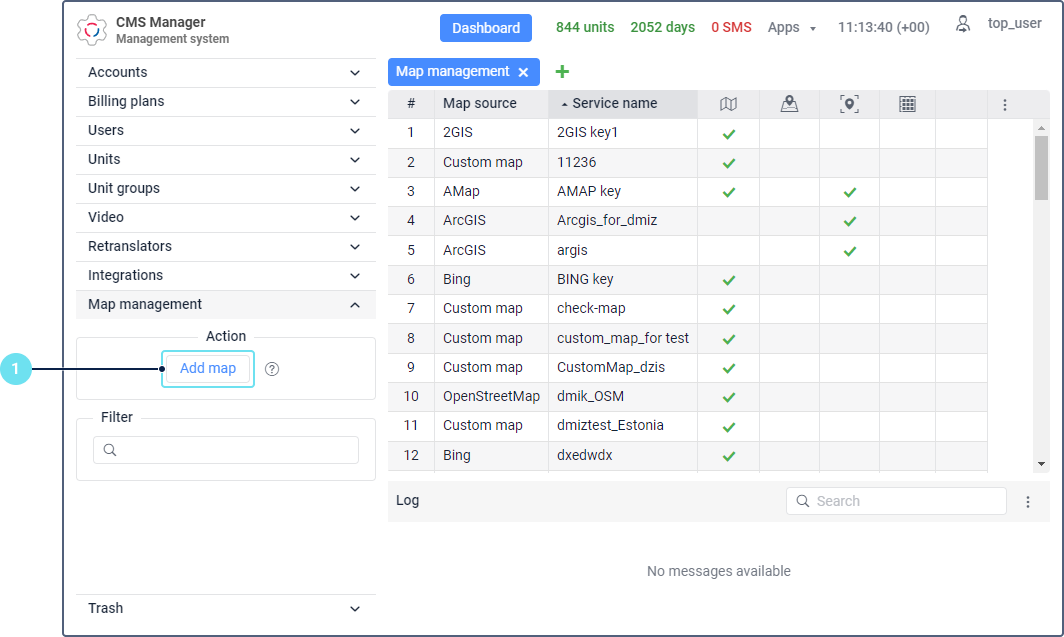
Adding a custom map in Wialon Hosting
-
In the Map management section of CMS Manager, click Add map.
-
Specify the following basic settings:
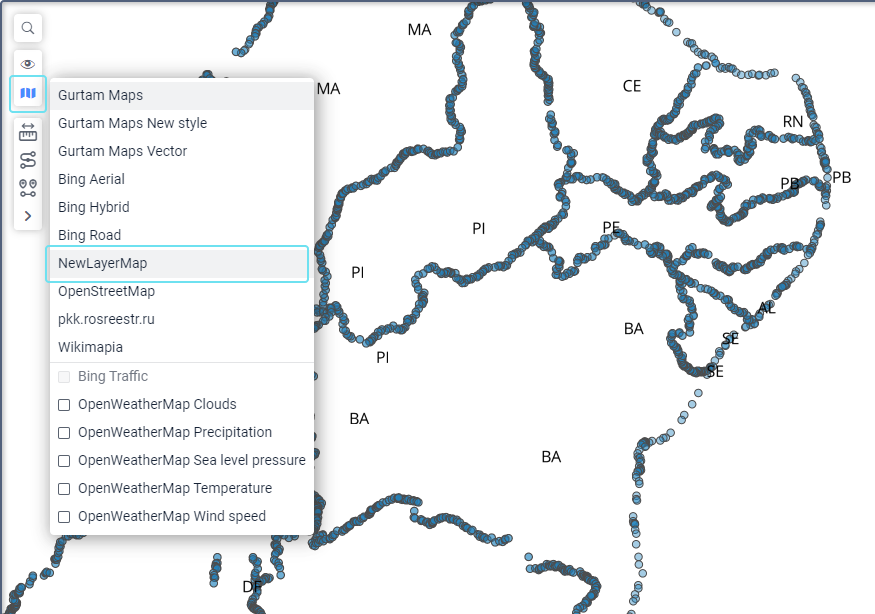
Setting Description Map source Select the Custom map source. Service name Specify a custom name (for example, NewLayerMap). 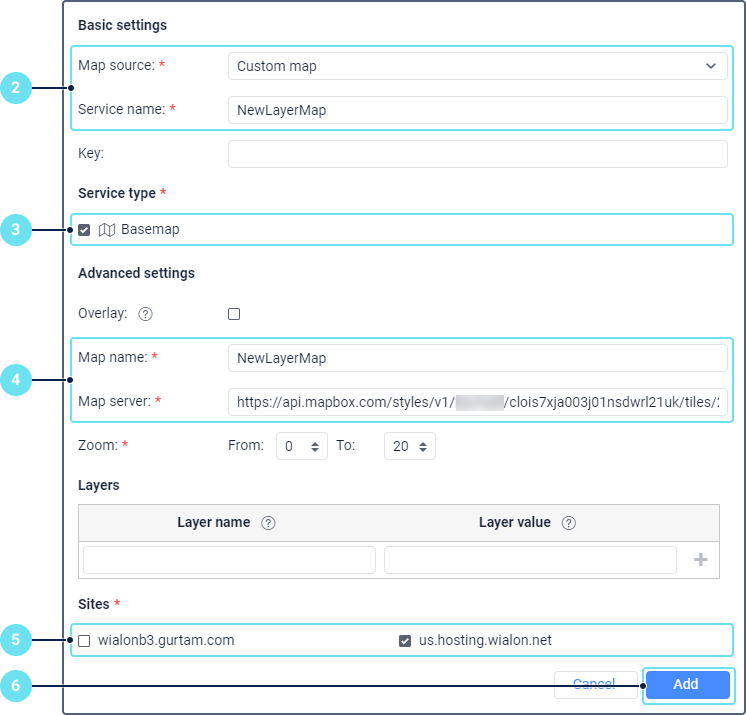
-
Select the Basemap service type.
-
Specify the following advanced settings:
Setting Description Map name Specify a custom name (for example, NewLayerMap). Map server Paste the link copied from Mapbox Studio. -
Select the sites where the new map should be available.
-
Click Add.
-
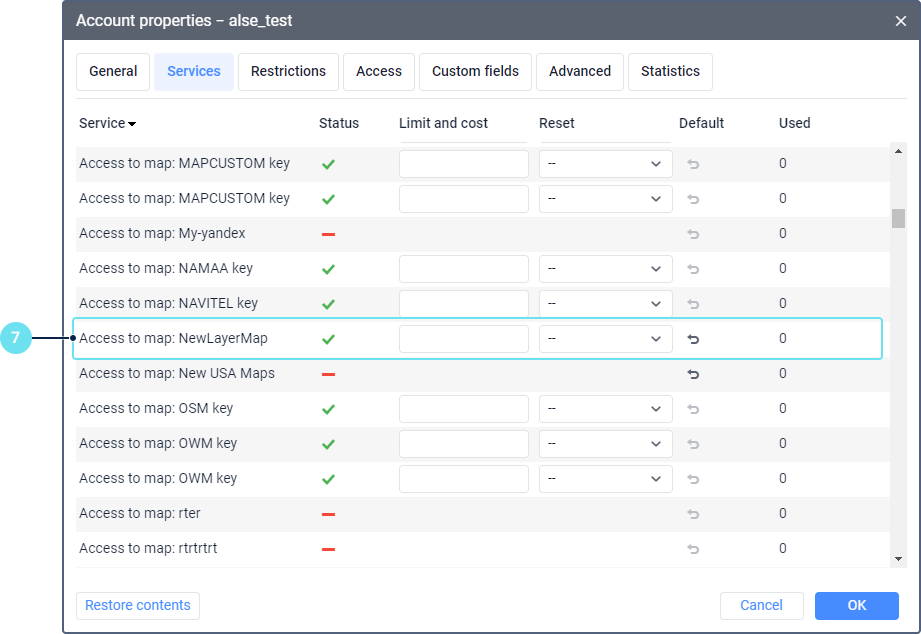
Make sure the Access to map: NewLayerMap service is activated in the required account and all the parent accounts.
-
Log in to the monitoring system using the site selected in step 5.
-
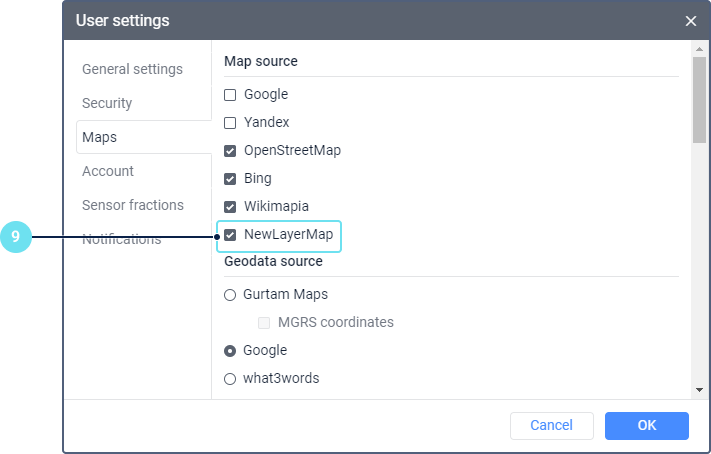
Enable the new map in the user settings.
The configuration is complete. To use the custom map, select it in the map selection menu.