Custom video storages
By default, all video files from units are stored in the standard Wialon storage. You can configure the system to use your own custom storage instead.
Custom storage is particularly useful when you need to customize storage limits per unit or meet specific data residency and compliance requirements for your clients.
This page describes the complete process of managing custom storages, including how to:
- Configure a new custom storage and test its connection
- Assign a custom storage to an account
- Update and delete existing storages
Configuring a custom video storage
To create a custom video storage, you need to add your external storage details to the system.
- Open the Video tab in CMS Manager.
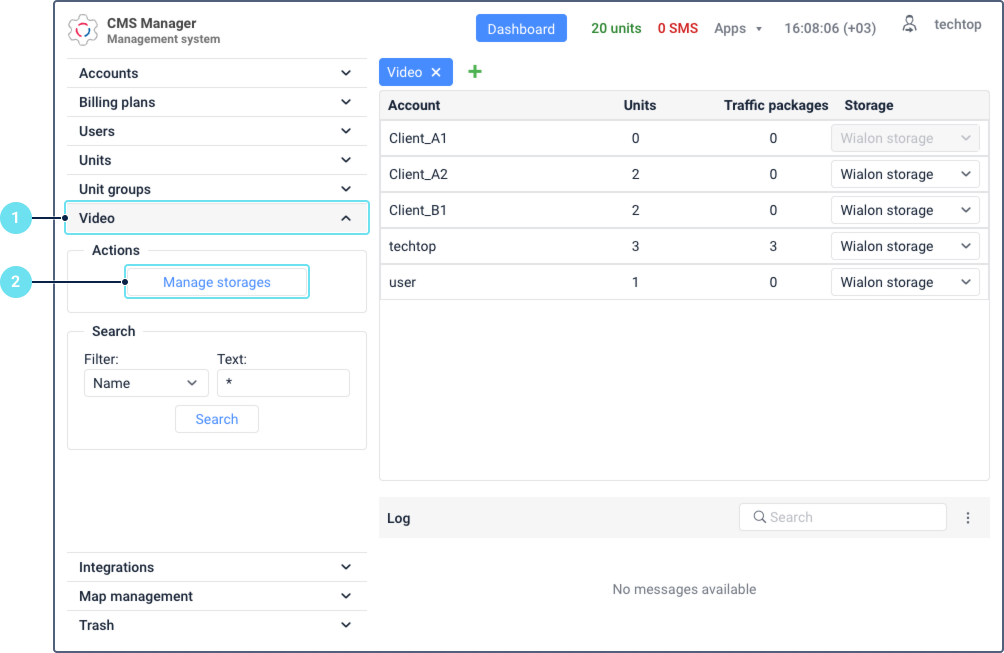
- In the Actions section, click the Manage storages button.
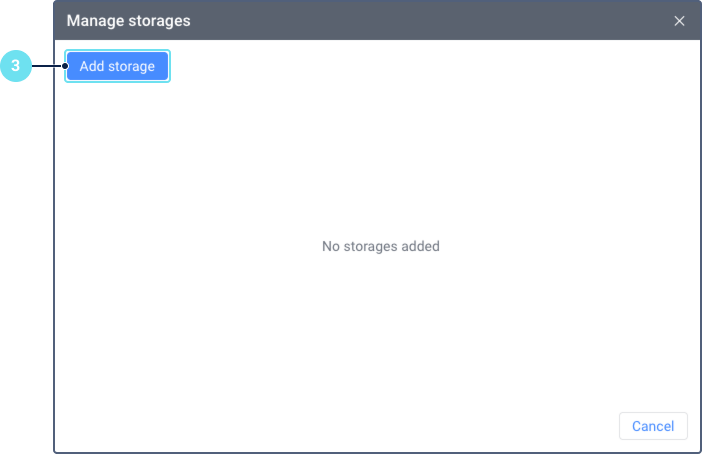
- Click the Add storage button.
-
In the New custom storage window, fill in the required details:

- URL: Enter the endpoint URL provided by your storage provider. The URL must start with
https://. - Storage name: Create a descriptive name for your storage to easily identify it later (for example, “EU clients storage”).
- Bucket: Enter the exact name of the bucket you have created with your storage provider.
- Region: (Optional) If your provider uses specific regions, select the correct region name here.
- Access key: Enter the access key ID for your bucket. You can use the icon
 to show or hide the key.
 - Secret key: Enter the secret key associated with your access key. This field is also masked by default.
- Limit per unit: Specify the storage limit for each unit in gigabytes (GB). Enter a whole number between 1 and 1000. The default value is 5 GB. If the limit is reached, the oldest files for that unit are removed to make space for new ones. Files marked as important won’t be removed. Learn more about video storage rules.
- URL: Enter the endpoint URL provided by your storage provider. The URL must start with
-
Click the Test connection button. This will verify if the credentials you entered are correct and can successfully connect to your storage bucket.
- A green success message confirms the connection is working.
- A red failure message indicates an issue with the provided credentials or network access. Correct the details and test again.
-
Once the details are correct and the connection test is successful, click Save.
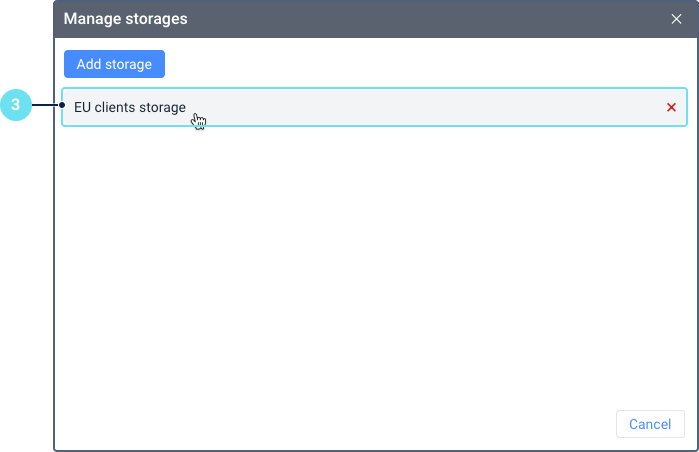
Your new storage is now created. It will appear in the Manage storages window and is available for selection in the account table.
Assigning a custom storage to an account
By default, video data from units is stored in the Wialon storage. To direct files to a custom storage, you must assign that storage to the account that the units belong to.
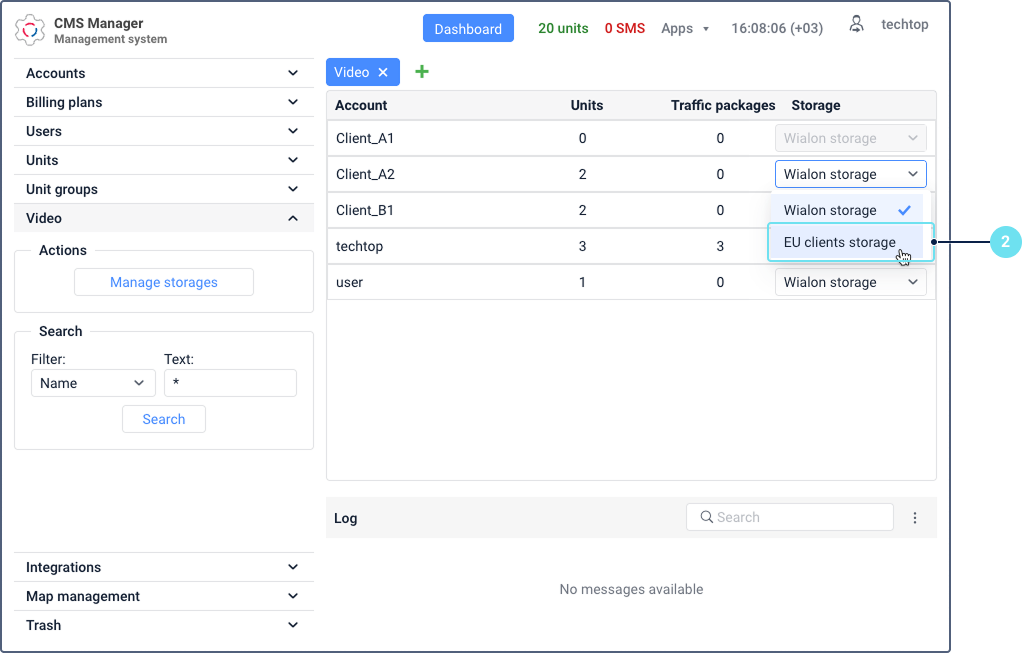
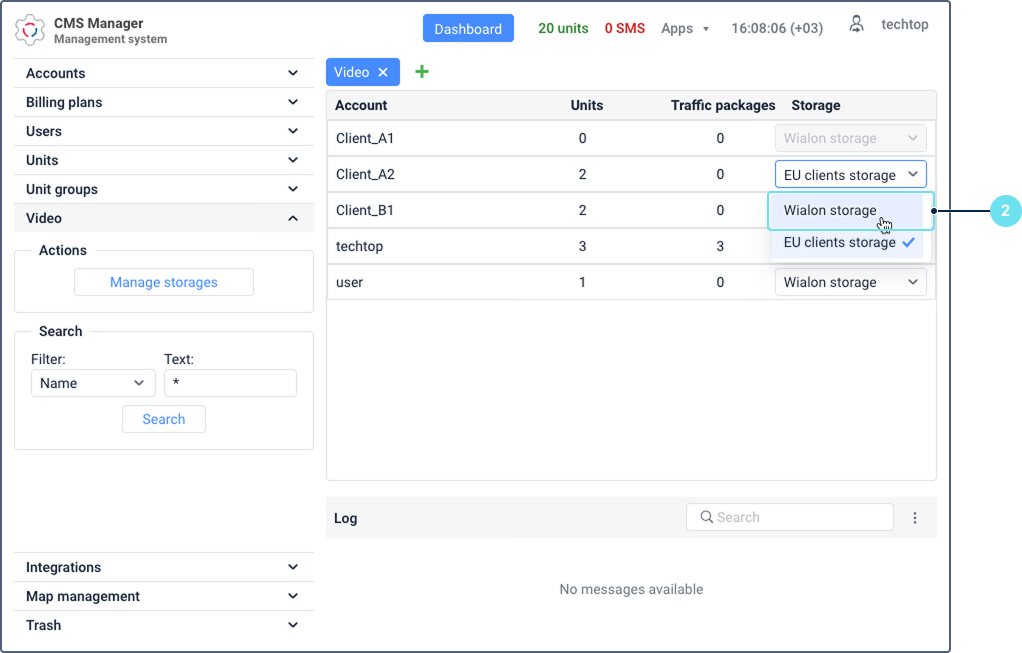
- On the Video tab in CMS Manager, find the required account in the account table. The table shows only accounts with the Video monitoring service enabled.
- In the Storage column for that account, select the custom storage from the list.
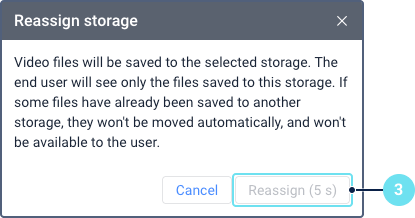
- In the confirmation window, read the warning carefully. After the 10-second safety timer reaches zero, the Assign button becomes active. Click it to confirm.
The selected storage is now linked to the account.
- All new video files recorded by units within this account will be sent to the assigned custom storage.
- All new units added for video monitoring in this account will also use this custom storage.
Once you reassign an account to a new storage, all older files will become inaccessible through the Wialon interface. If your old files were saved in a custom storage, you can still access them directly from your external storage provider.
Questions and answers
Updating an existing custom storage
You can modify the details of any custom storage you have configured. This is useful for rotating security credentials, adjusting storage limits, or changing other configuration details.
- Open the Video tab in CMS Manager.
- In the Actions section, click the Manage storages button.
- From the list of your configured storages, click on the row of the storage you wish to update.
-
The storage details will open in an editable form, similar to the creation window.

You can modify any of the fields:
- URL
- Storage name
- Bucket
- Region
- Access key
- Secret key
- Limit per unit
Make the required changes to the fields. The Update button will become active only after a change has been made.
- Click Test connection to verify that the new details are correct.
- A green success message confirms the connection is working.
- A red failure message indicates an issue with the provided credentials or network access. Correct the details and test again.
- Click Update to save your changes.
The storage configuration is now updated with the new details. The system will use these new settings for all future file uploads to this storage. If you updated the credentials, existing files will remain accessible as long as the bucket name and location have not changed.
Consequences of invalid details
If you update a storage with incorrect details (such as a wrong key, URL, or bucket name), it will cause a connection failure with significant consequences:
- In the monitoring system (Video tab > Files tab), users will see a “Service error” message for any units assigned to this storage.
- No previously saved files will be displayed.
- Saving new files will also fail.
To resolve this issue, you must return to the storage settings, correct the invalid information, and click Update again. Once a valid connection is re-established, your files will become visible in the interface, and normal operation will resume.
Unassigning a custom storage (reverting to default)
To revert an account from a custom storage back to the default Wialon storage, follow these steps:
- On the Video tab in CMS Manager, find the required account in the account table.
- In the Storage column for that account, select Wialon storage from the dropdown list.
- In the confirmation window, wait for the 10-second safety timer to expire, then click the Assign button to confirm the change.
The account is now unassigned from the custom storage. All new video files from account units will be saved to the default Wialon storage.
Once you reassign an account to the default Wialon storage, all older files will become inaccessible through the Wialon interface. You can still access the old files saved in a custom storage directly from your external storage provider.
Deleting a custom storage
You can permanently delete a custom storage configuration that you no longer need.
- Open the Video tab in CMS Manager.
- In the Actions section, click the Manage storages button.
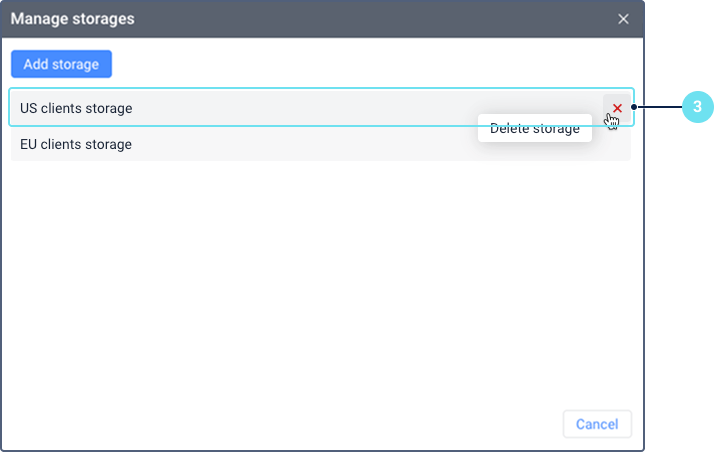
- Hover your mouse over the storage row you need to remove and click the icon
 .
.
- Confirm the deletion after the safety timer.
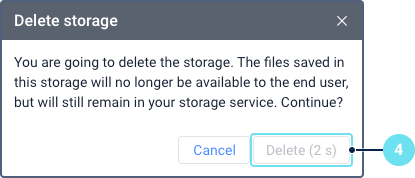
Deleting a storage configuration is irreversible and has the following consequences:
- The storage configuration is permanently removed from the system.
- Any accounts that were assigned to the deleted storage are automatically reassigned to the default Wialon storage.
- Files in Wialon associated with the deleted storage will be removed. This means the files will no longer be viewable or accessible from the Wialon interface.
- The action doesn’t delete the actual video files from your private bucket. You are responsible for manually deleting these files from the external storage.