How to merge unit video and location data using flespi
Among video devices, some can transmit geolocation and other useful data, while others send only video. When working with the latter in the telematics field, integrators typically pair the video device with a separate tracker. To use such a system in Wialon, it’s necessary to combine the data from both the video device and the tracker within a single unit. In these cases, you can use flespi to perform the required configuration while preserving full video functionality such as livestreaming, video downloads, and more.
The configuration process consists of the following steps:
- Creating and configuring devices in your flespi account
- Configuring a msg-copy plugin on flespi
- Creating a stream to Wialon Hosting
- Subscribing the video device to the stream
- Configuring settings in Wialon Hosting
Creating and configuring devices in your flespi account
First of all, you should create and configure devices in your flespi account. If you already have a flespi account with created devices, you can skip this step.
- Register a flespi account at https://flespi.io according to the instructions.
- Create separate channels for both the video device and the GPS tracker. Point your trackers to the host and port indicated in each created channel. Follow the instructions for creating channels on flespi.
- Create two devices: one for the Video device and one for the GPS device (without video). In this example, let’s call them Video device and GPS device. Follow the instructions for creating devices on flespi.
As a result, you should have two devices created — Video device and GPS device. The Video device will be used as the main tracker, and the GPS device will serve as the secondary device which provides data that is copied to the main one.
In case of any questions about creating channels and devices, you can use flespi AI assistant.
Configuring an msg-copy plugin on flespi
To copy data from one device to another, you must create a special plugin and attach it to the GPS device.
Creating the plugin
To create the required plugin, follow the steps below.
-
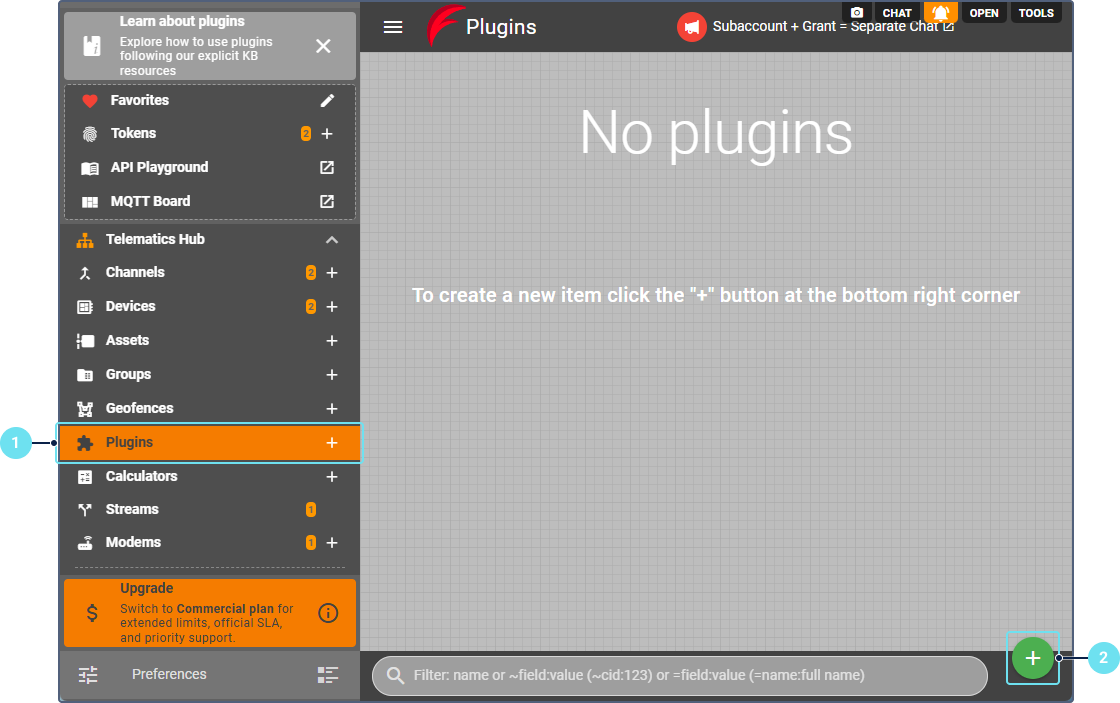
In the Telematics hub, select Plugins.
-
Click the button
 .
. -
Enter the plugin name. For example, Duplicate messages.
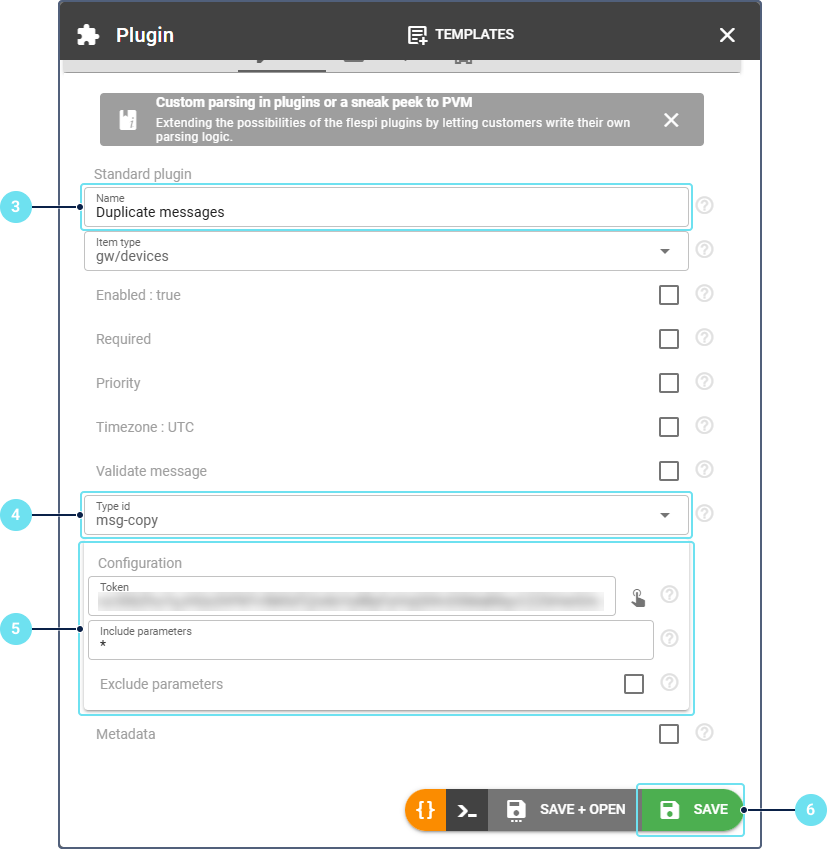
- In the Type id field, specify msg-copy.
- In the Confiuration section, specify the following settings:
• Token: use any token that has ‘POST gw/devices/{id}/messages’ access to the Video device (destination). You can create a new token in advance or choose among existing ones with the button
 .
• Include parameters: specify * to copy all parameters.
• Exclude parameters: leave empty or list the parameters you don’t want to copy.
.
• Include parameters: specify * to copy all parameters.
• Exclude parameters: leave empty or list the parameters you don’t want to copy. - Save the plugin.
Attaching the plugin to the GPS device
To attach the plugin to the GPS device, follow these steps:
- In the Telematics hub, select Devices.
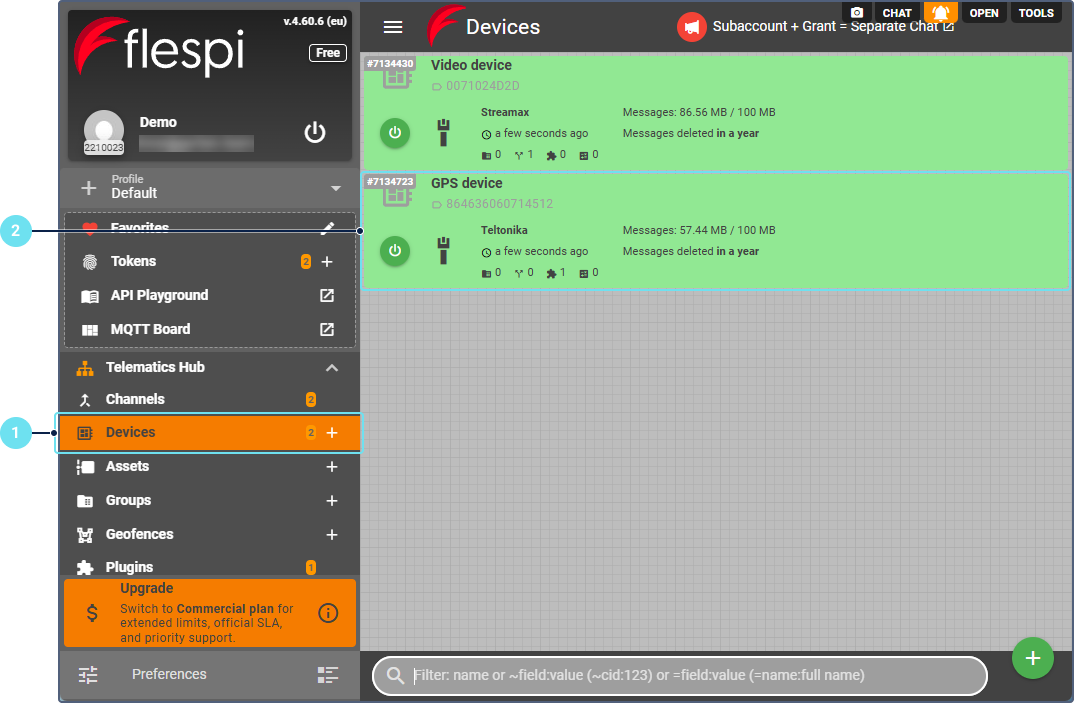
- Select the GPS device.
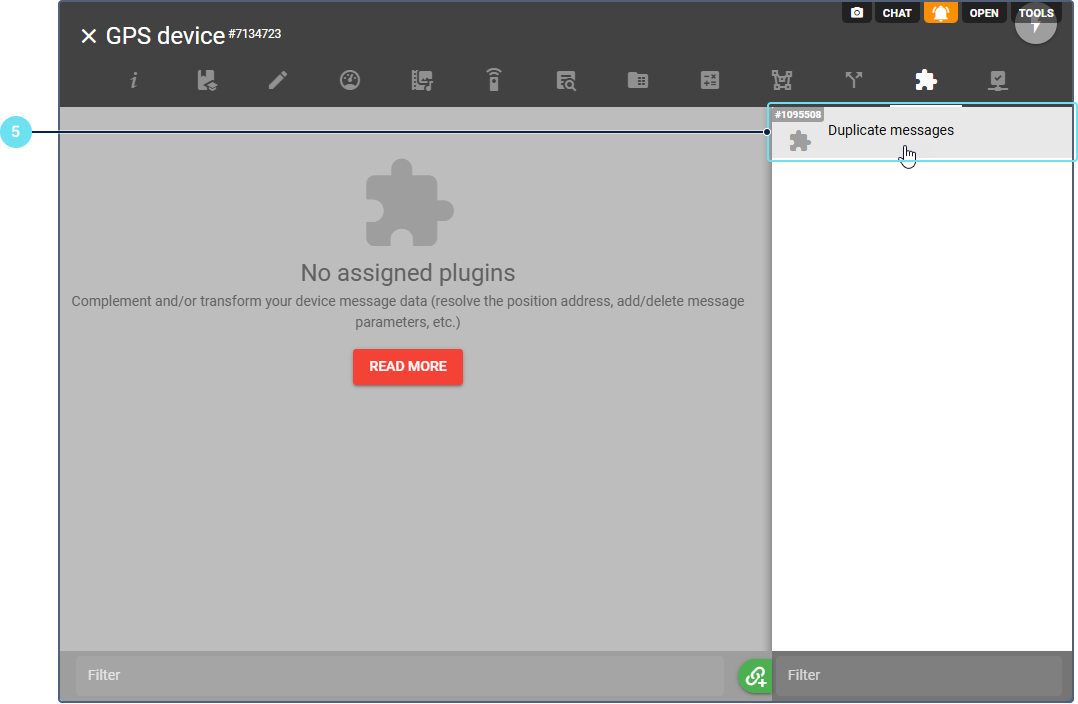
- Go to the Plugins tab.
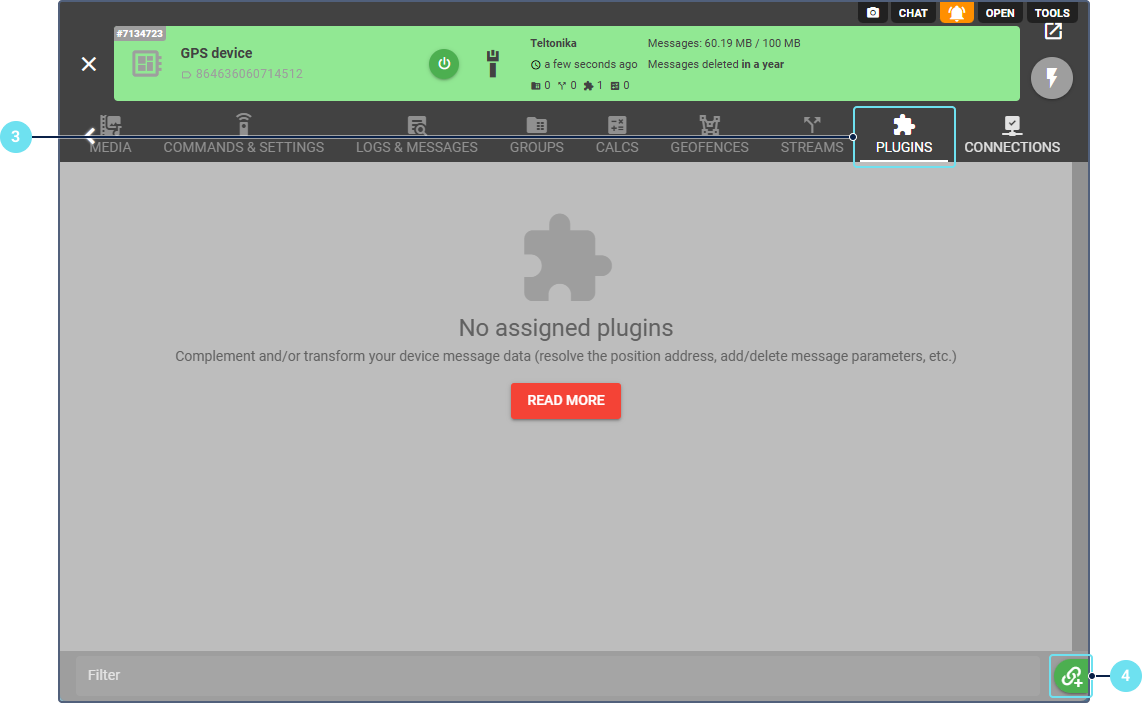
- Click the clip button in the lower-right corner.
- Select the created plugin.
- In the Device ID where to copy messages field, specify the ID of the video tracker.
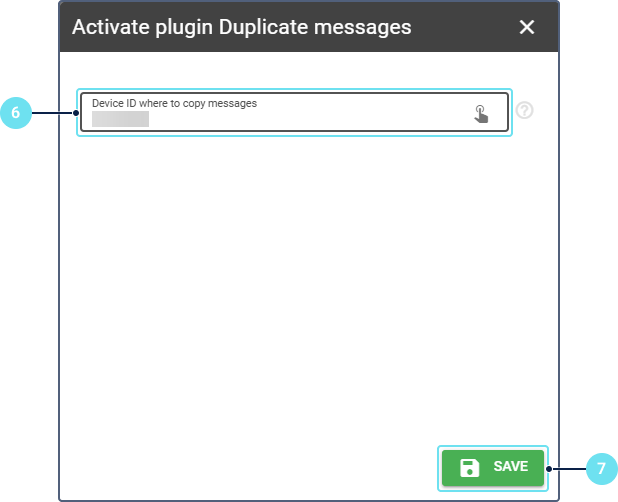
- Click Save.
The created plugin must be used only in the GPS device.
After that, every new message from the GPS device instantly appears in the video device history.
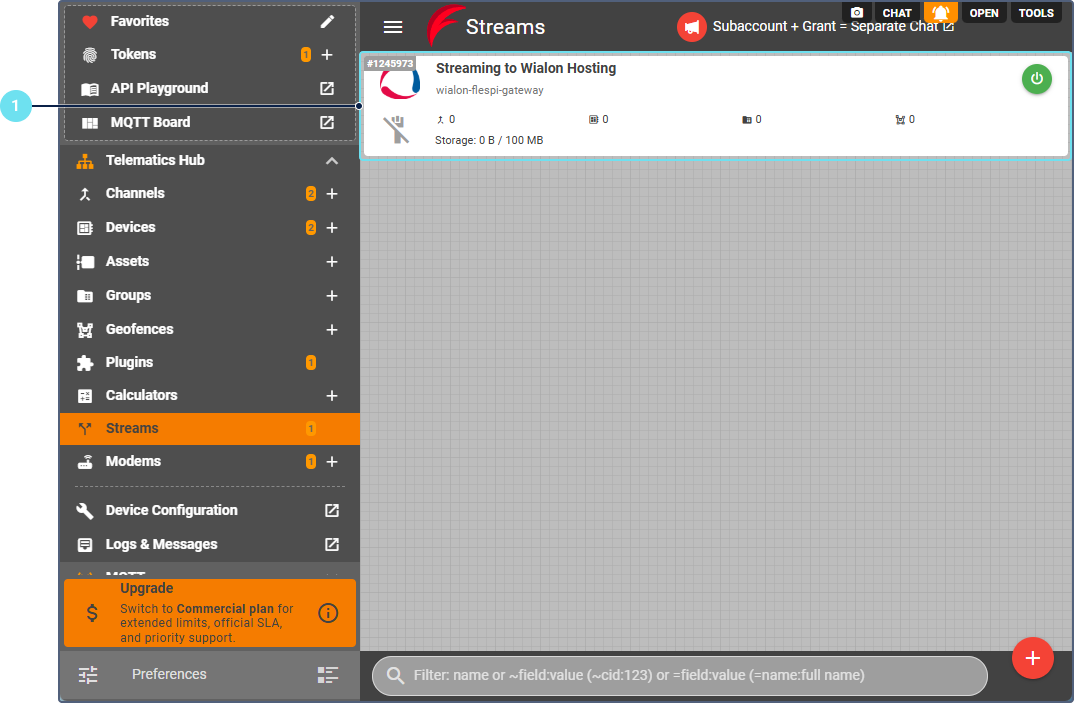
Creating a stream to Wialon Hosting
To create a stream for transmitting device data to Wialon Hosting, follow these steps:
- In the Telematics hub, select Streams.
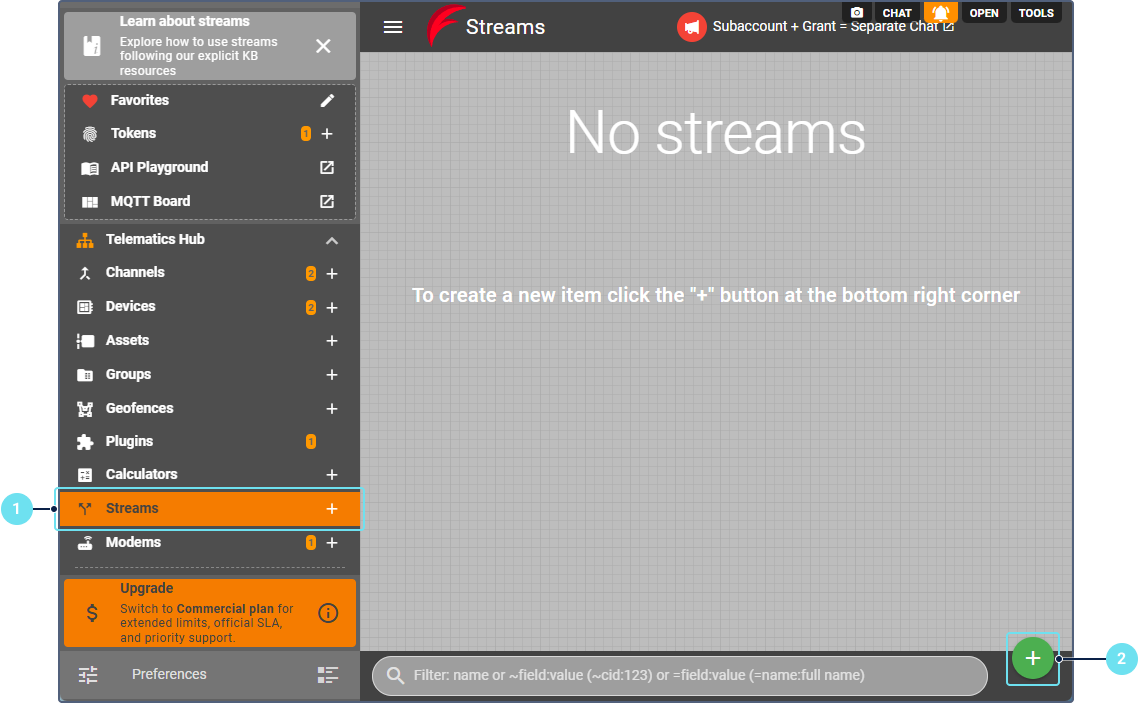
- Click the button to create a new stream to Wialon Hosting.
- Specify the stream name.
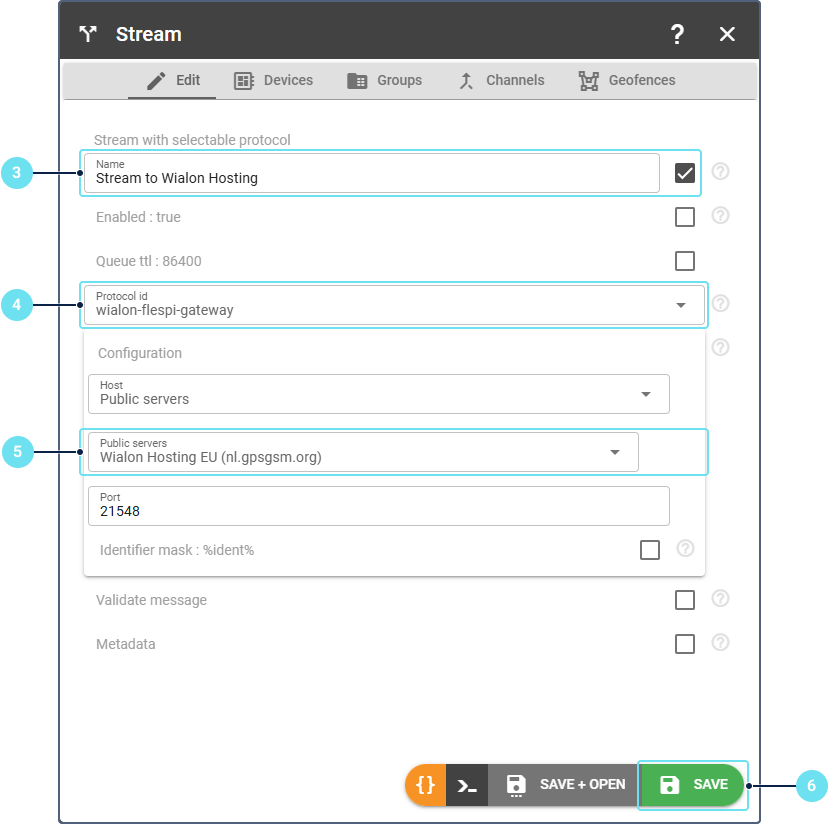
- In the Protocol id field, specify wialon_flespi_gateway.
- In the Configuration section, select the appropriate Wialon Hosting datacenter. You can find the required address in the Server address field on the General tab of the unit properties.
- Click Save.
Assigning the video device to the stream
To assign the video device to the stream, follow these steps:
- Select the created stream.
- Open the Devices tab.
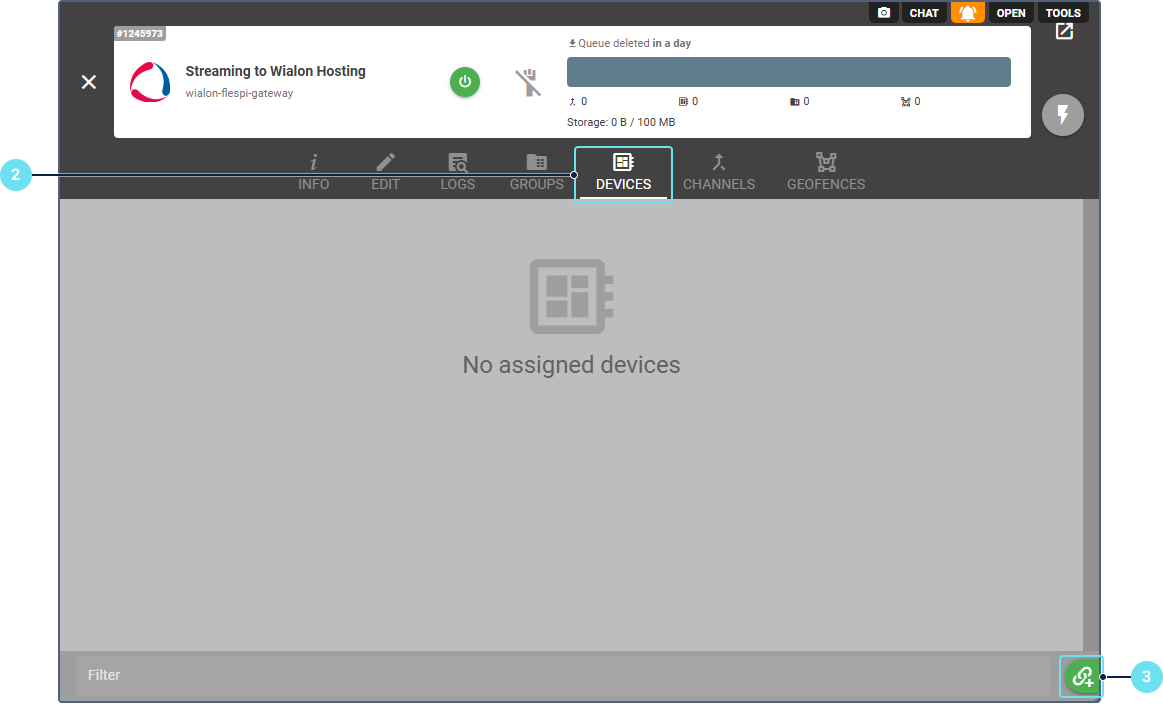
- Click the clip button in the lower-right corner.
- Select the video device.
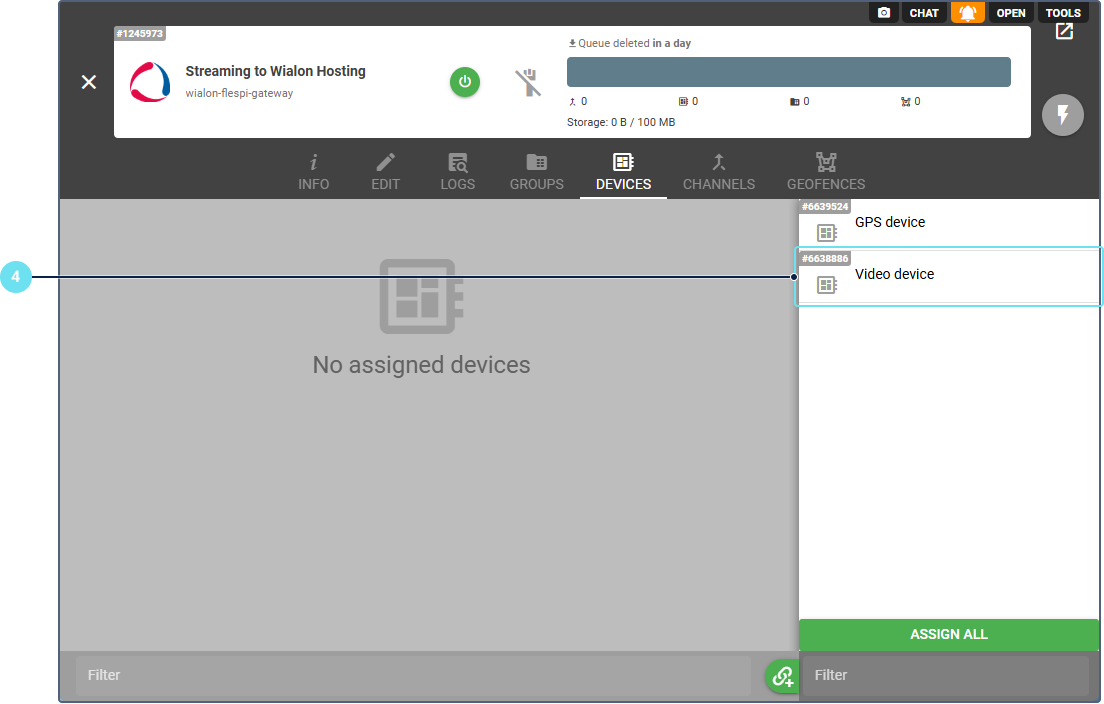
Only the video device must be assigned to the stream.
Configuration in Wialon Hosting
To enable commands, settings, and video control from Wialon Hosting, follow these steps:
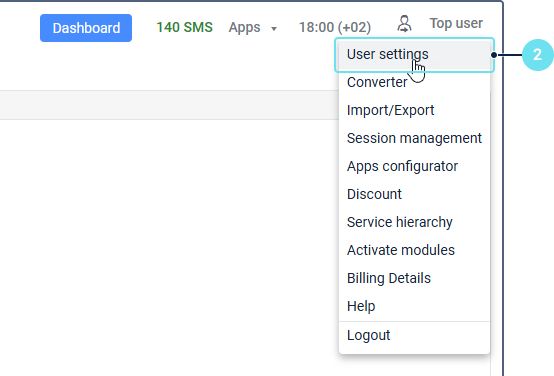
- Log in to your top account in Wialon Hosting.
- Open the user settings.
- Go to the Security tab.
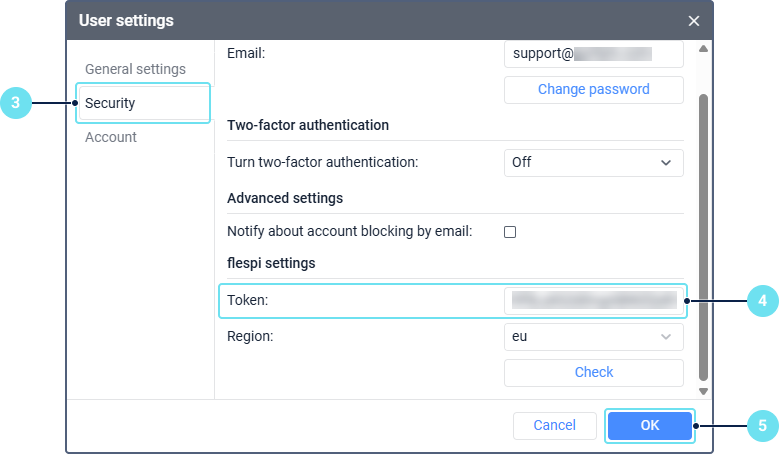
- In the Token field of the flespi settings section, enter a flespi Master token.
- Click OK.
- Create a unit with the following settings:
- Device type: your video tracker model with the (flespi) suffix. In this example, we use Streamax (flespi).
- Unique ID: video tracker identifier (the same as you used on flespi).
- Creator: select a user who should be considered the unit creator.
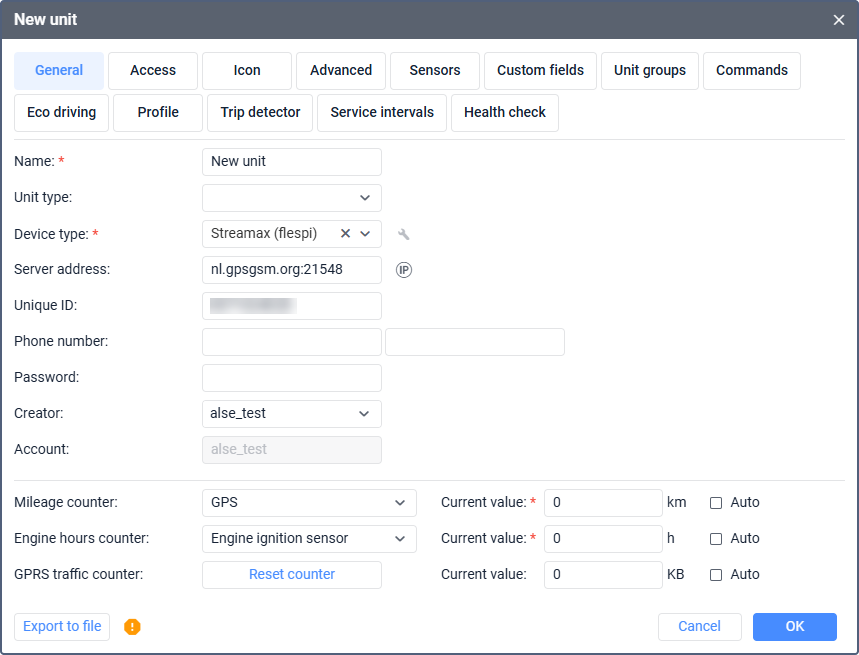
As a result, the created unit displays combined telemetry from both trackers and retains full video functionality, while the original devices remain separate on flespi for diagnostic purposes.