Unit activation codes
Unit activation codes are a subscription-based system for managing your units. Units remain available in Wialon only while they have a valid activation code. This system provides better control over creating, deleting and deactivating units in your service accounts and simplifies billing sub-dealers and end users.
On this page you will find information on how to manage unit activation codes, covering the following topics:
- How to start using unit activation codes
- Code validity period
- Activating units with codes
- Reassigning a code to another unit
- Tracking code expiration
- Exporting activation codes
- Searching and filtering activation codes
- Sorting activation codes
- Sharing a code with a subordinate account
- Bulk sharing of unit activation codes with a subordinate account
- Unsharing a code from a subordinate account
- Managing code expiration notices
- Generating activation code reports
How to start using unit activation codes
To enable the activation of units by codes for your service, send a request to your Partner Success Manager and purchase the required number of codes. After this, the Activation codes item becomes available on the navigation panel in CMS Manager.
The feature of activating units by codes applies to all accounts within the service.
To manage codes in the Activation codes section (for example, to view, share, or unshare them), you must be the creator of the top account or of an account with dealer rights.
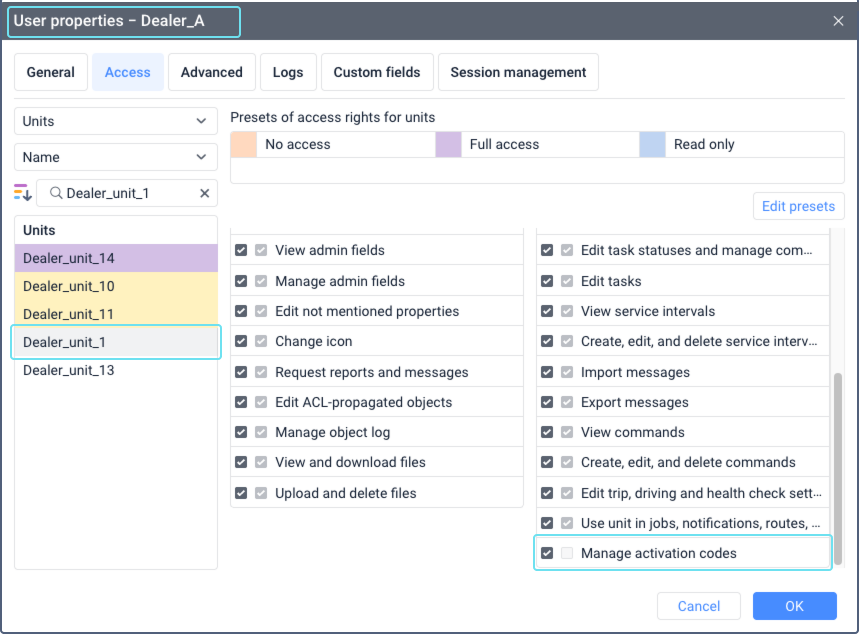
To assign a code to a specific unit, you must have the Manage activation codes access right to this unit.
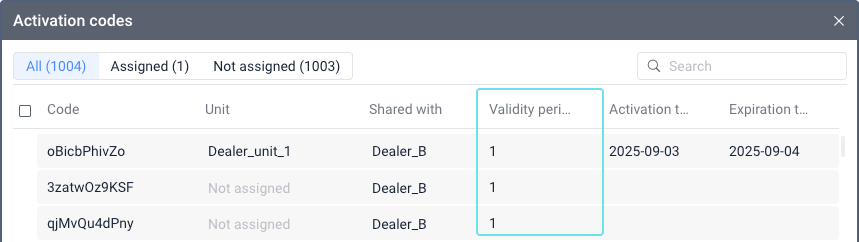
Code validity period
The validity period of a code starts counting down after this code is assigned to a unit for the first time. The countdown continues even if the code is reassigned to another unit or is temporarily not in use. After the validity period expires, the unit with the assigned code is automatically deactivated. The validity period in days is displayed in the Activation codes section.
To keep the unit active, you must purchase and assign a new code when the previous one expires. The activation time is displayed in the Activation codes section. See Tracking code expiration.
Activating units with codes
If the feature of unit activation codes is enabled in the service, units can only be available in the monitoring system while a valid code is assigned to them. If a unit is created without a code or if its code has expired, the unit is automatically deactivated.
If a unit is deactivated in a service that uses the unit activation code system, the unit can’t be used in the monitoring system, but its properties can still be edited in CMS Manager.
You can assign unit activation codes in one of the following ways:
- from the “Activation codes” section
- from the unit properties
- during import from CSV or XLSX. You can specify an activation code for each unit in the import file so that units are created and activated in one step.
Assigning a code from the “Activation codes” section
This method can be used by users that are creators of top accounts and accounts with dealer rights.
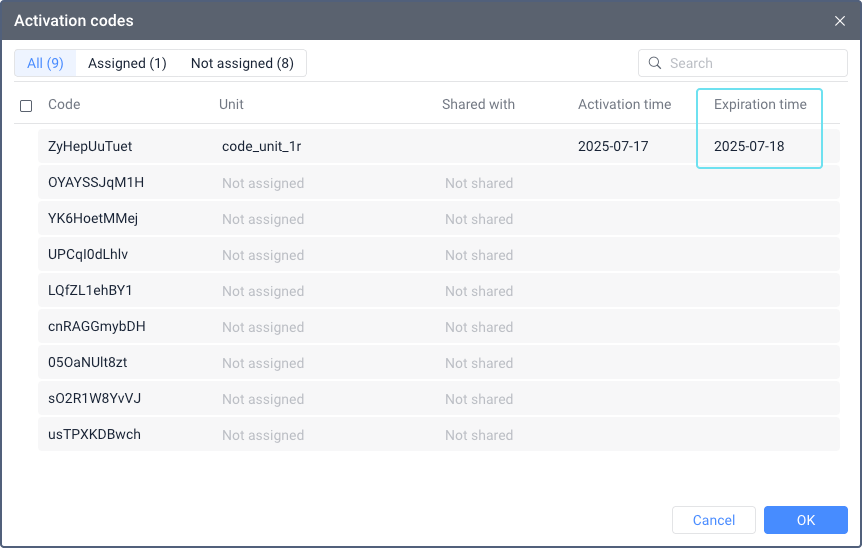
To assign a code to a unit from the Activation codes section, follow these steps:
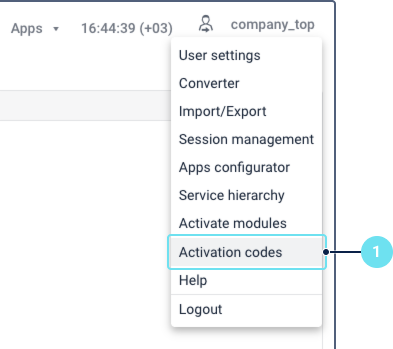
-
In the CMS Manager navigation panel, select Activation codes. If this item is not available, see the requirements above.
-
In the row with the code you want to assign, start typing the unit name in the Unit column or select it from the list. If you are not a top account user, the list shows only the units to which you have the Manage activation codes access right.
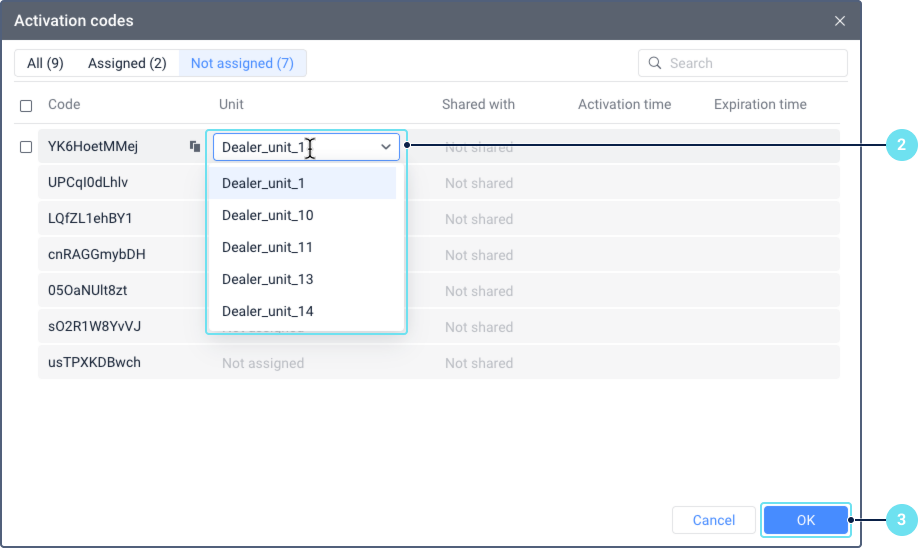
If a valid code is successfully assigned to the unit, the unit becomes active and can be used in the system.
Assigning a code from the unit properties
This method allows a user to activate a single unit by pasting a code directly into its properties. It is useful for users who don’t have dealer rights but need to activate a specific unit.
Prerequisites
-
The user assigning the code must have the Manage activation codes access right to the unit.
-
The user without dealer rights must first obtain a valid unassigned code.
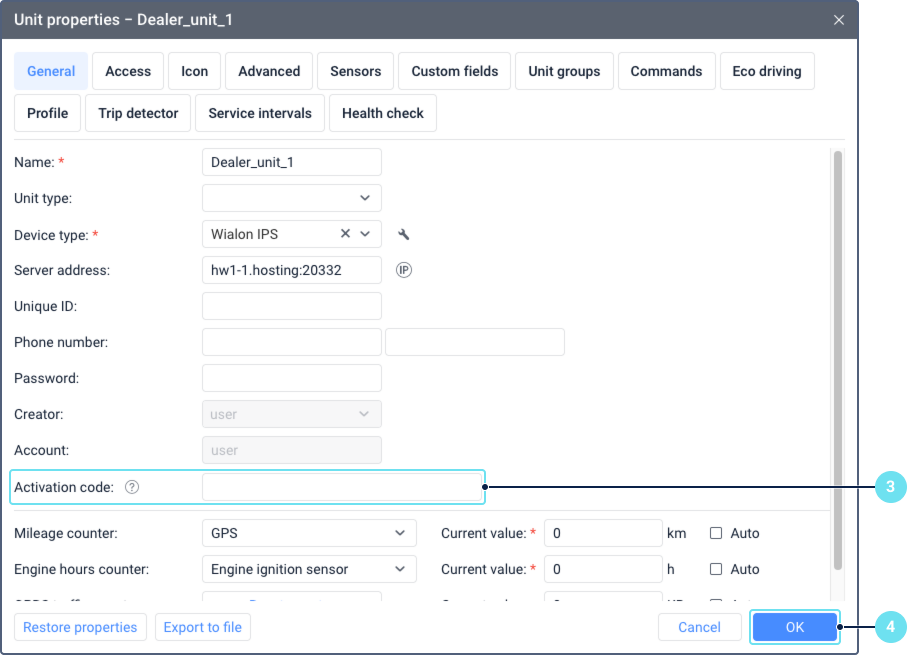
To assign an activation code from the unit properties, follow these steps:
-
Select Activation codes in the navigation panel in CMS Manager and copy the code you want to assign to a unit.
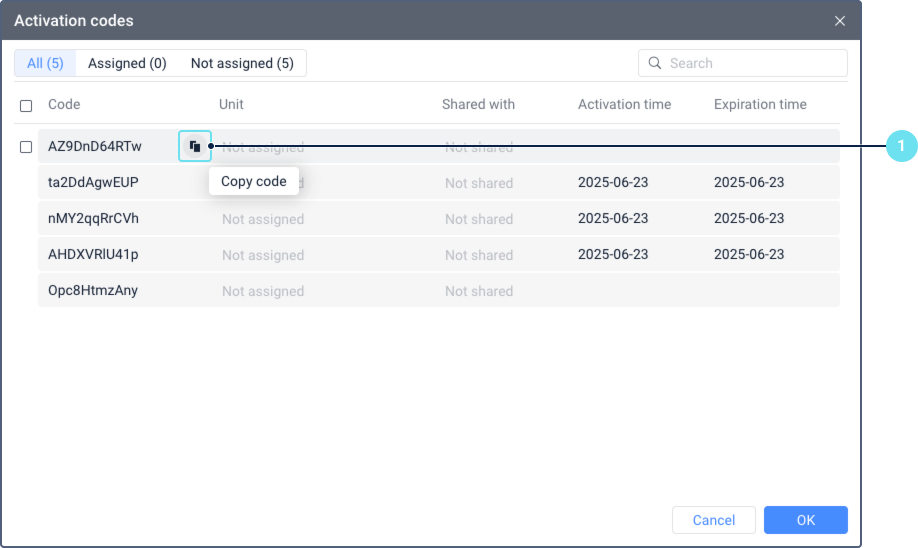
If you are a user without dealer rights, obtain a valid code from your administrator or service provider.
-
In the monitoring system or CMS Manager, open the properties of the unit you want to activate.
-
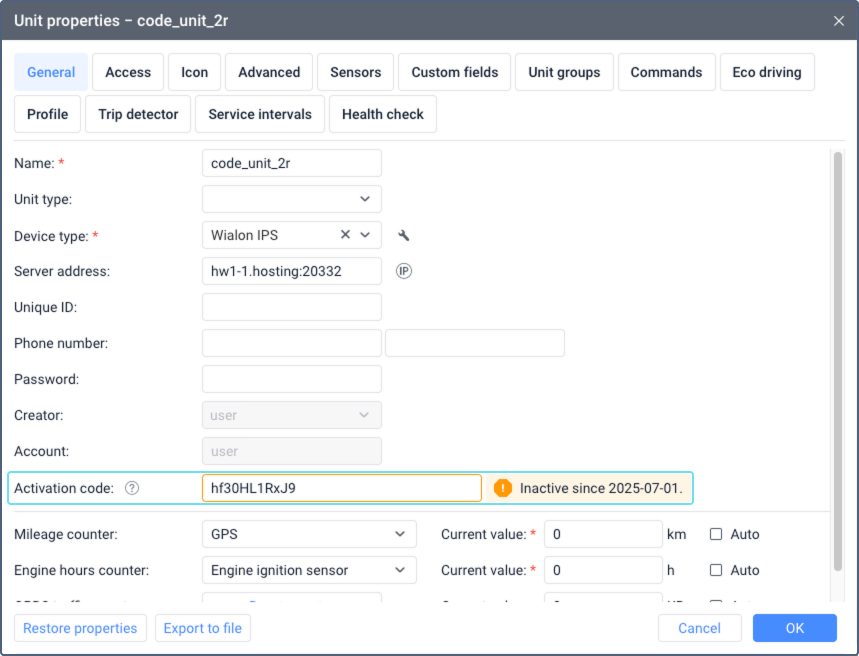
Paste the code into the Activation code field. After that, the system checks if the code is valid and unassigned. If the check fails, you will see an error message.
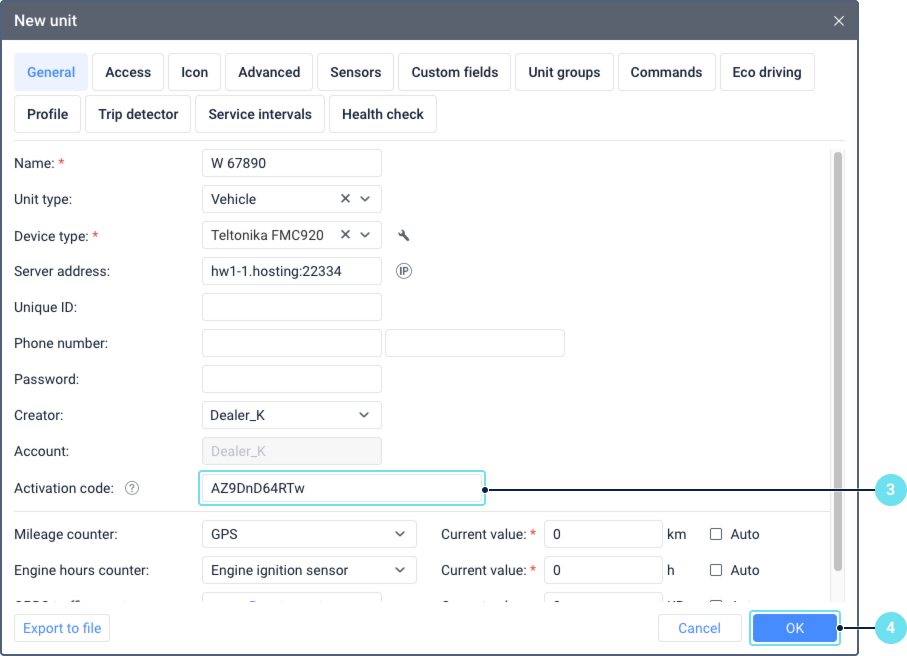
-
Save the change.
If the code is successfully assigned to the unit, the unit becomes active and can be used in the system.
Reassigning a code to another unit
If, after assigning a code to a unit, this unit is no longer in use and should be deactivated, you can use its code for another unit. Keep in mind that in this case, the code validity period continues to count down. To reassign the code, follow these steps:
-
On the navigation panel, select Activation codes.
-
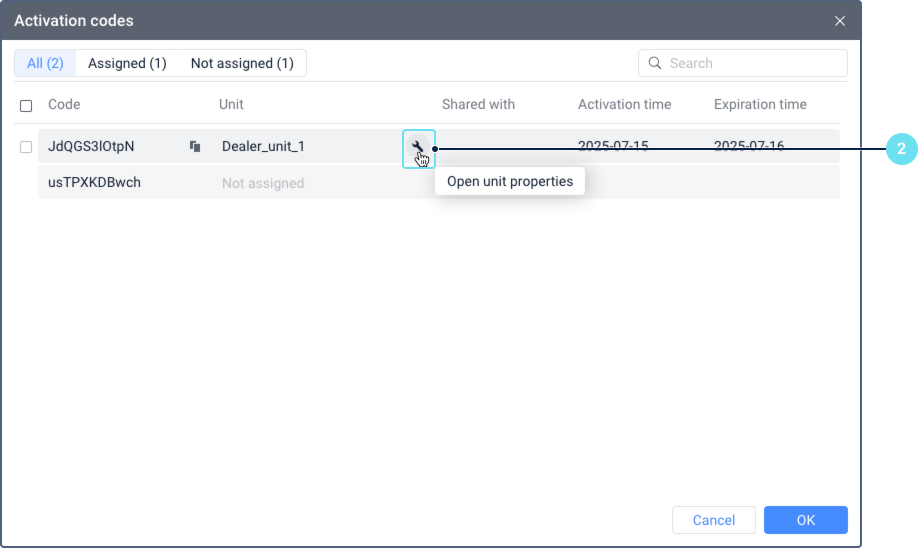
Find the code you want to reassign and click on the icon
 in its row.
You can also access the unit properties directly from the monitoring system or CMS Manager.
-
In the unit properties, clear the Activation code field.
-
Save the changes.
-
Assign the free code to another unit you want to activate. You can do it from the other unit properties or from the “Activation codes” section.
As a result, the unit from which the code was removed is deactivated. The unit to which the code is assigned is activated and can be used in the system.
Tracking code expiration
To prevent units from deactivation, you should replace the activation code with a new one when its validity period expires. To do this, track the expiration date in the following places of the interface:
-
in the Estimated expiration column of the Activation codes section in CMS Manager;
-
next to the Activation code field of the General tab in the unit properties;

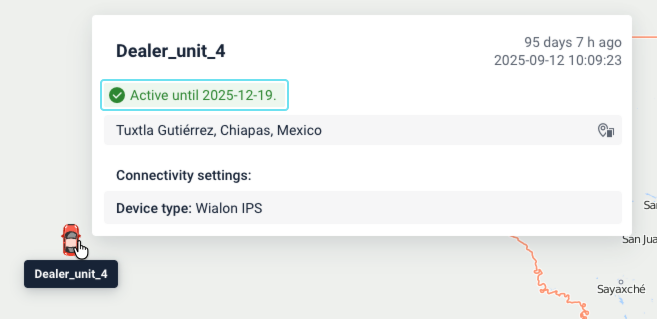
-
in the unit tooltip or worklist in the monitoring system (requires the Deactivation date option to be enabled in the user settings);
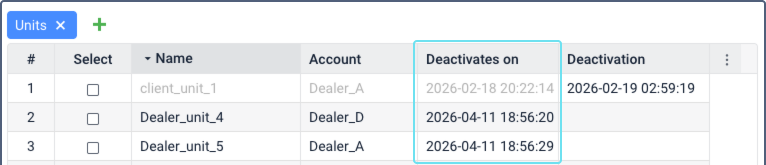
-
in the Deactivates on column of the Units section in CMS Manager.
You can also set up code expiration notices to automatically alert users when their codes are about to expire.
If the validity period of a code has expired, it continues to be displayed in the unit properties along with its expiration date. Deactivated units are available only for viewing in CMS Manager.
Exporting activation codes to Excel
You can export the activation codes displayed in the Activation codes section to an Excel file for further analysis, record-keeping, or sharing with other users.
To export activation codes to Excel, follow these steps:
- In the CMS Manager navigation panel, select Activation codes.
- (Optional) Apply sorting or filters to display only the codes you want to export. The export will include only the rows currently visible in the table.
- Click the button
 in the toolbar.
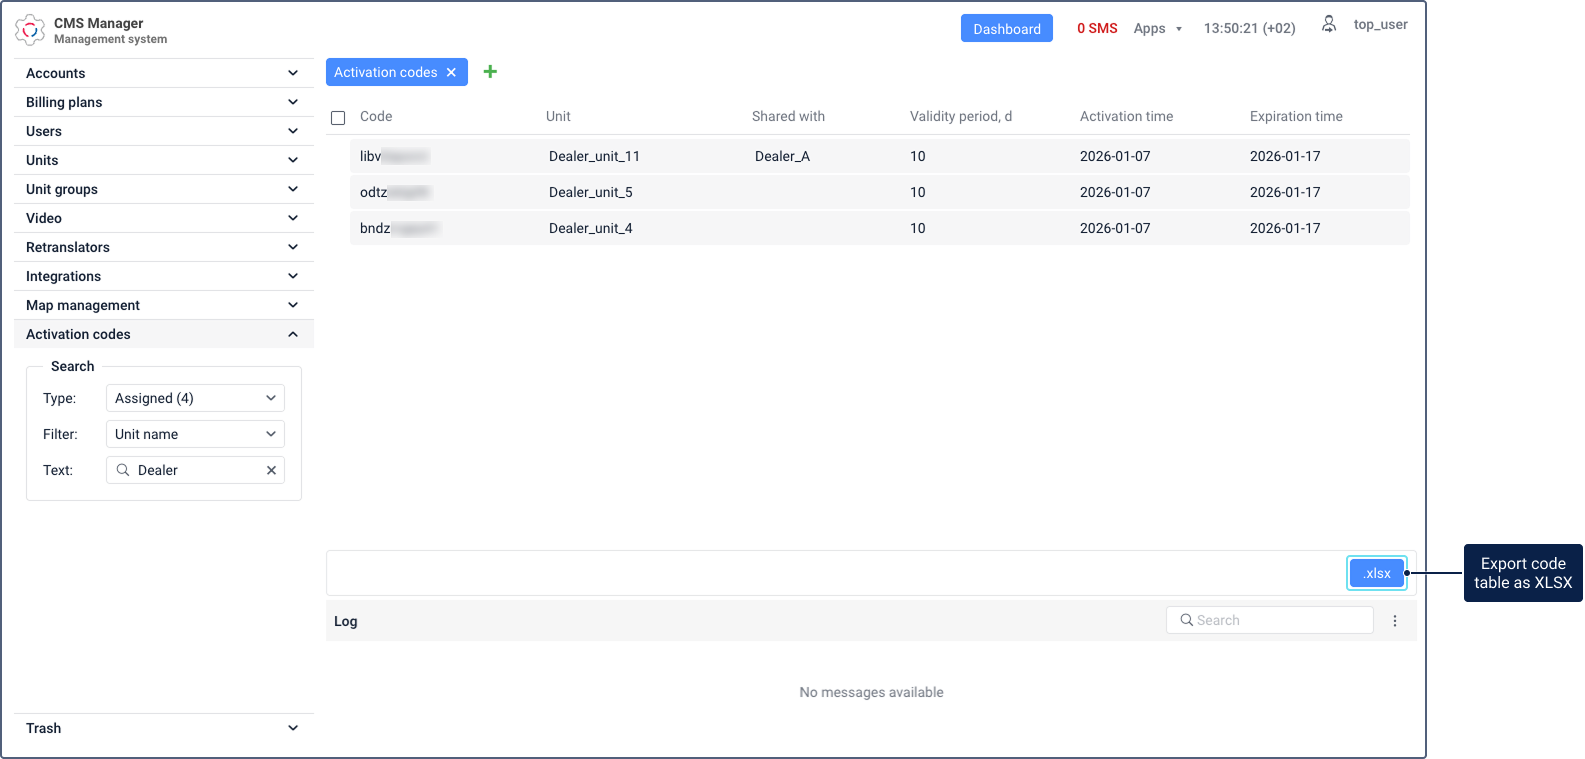
After clicking the button, an Excel file with activation codes is downloaded to your computer. The default file name follows the format: export_file_yyyy-mm-dd_hh-mm.xlsx, where yyyy-mm-dd_hh-mm is the current date and time.
Searching and filtering activation codes
The Activation codes section provides search and filter features to help you quickly find specific codes.
-
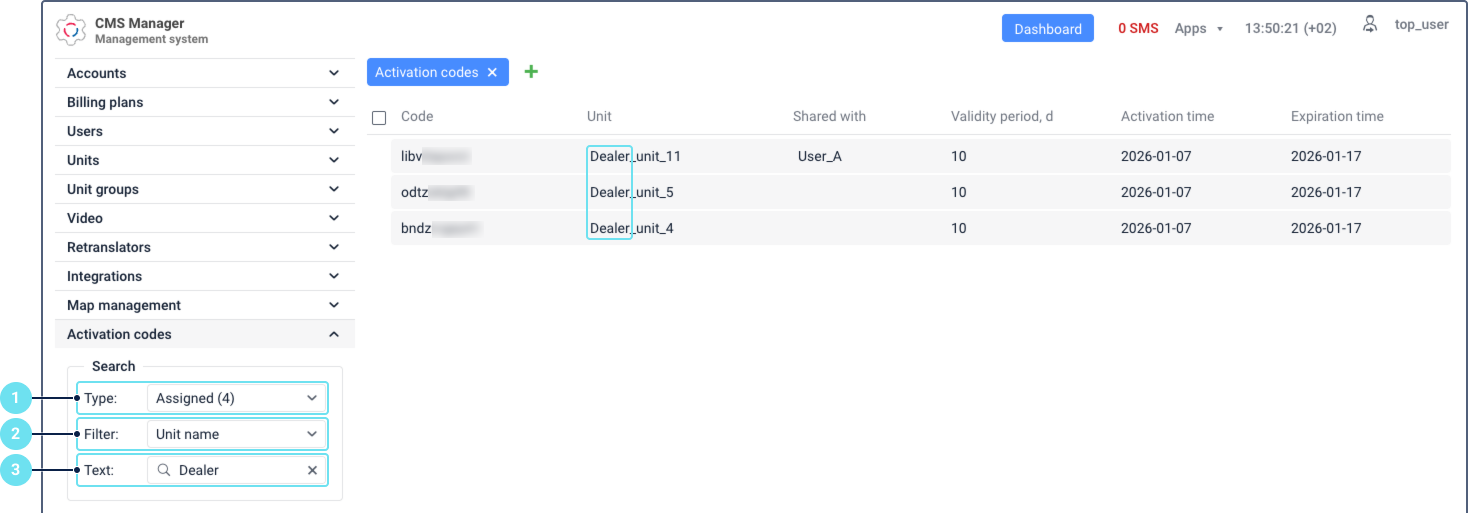
Use the Type dropdown to select which codes to display:
- All: All activation codes available for your account.
- Assigned: Codes currently assigned to units.
- Not assigned: Codes not assigned to any unit.
-
In the Filter dropdown, select a field to search by:
- Code: Activation code value.
- Unit name: Unit to which the code is assigned.
- Shared with: Account the code is shared with.
- Activation: Code activation date. When selected, the From and To fields become available. The codes activated within the specified date range are displayed.
- Estimated expiration: Estimated code expiration date. When selected, the From and To fields become available. The codes with estimated expiration dates within the specified range are displayed.
-
For text-based filters (Code, Unit name, Shared with), enter your search text in the Text field. For date-based filters (Activation, Estimated expiration), select the date range using the From and To fields.
The table updates automatically to show only the codes matching your criteria.
The search doesn’t support wildcard characters (such as
*or?). The system finds all entries containing the text you enter.
If the From date is later than the To date, the values are automatically swapped.
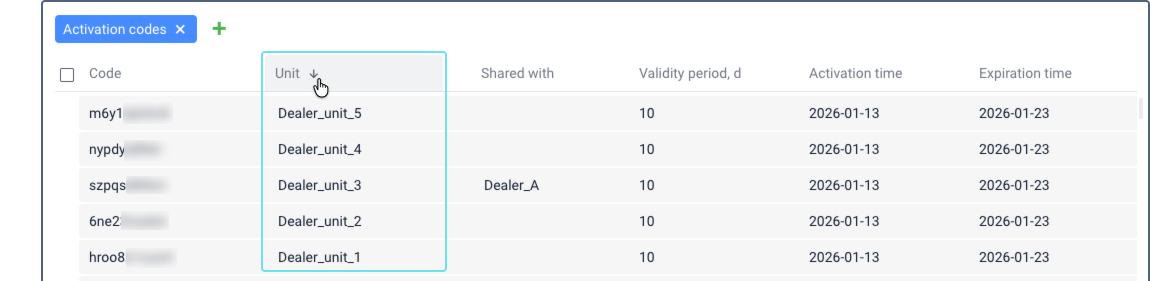
Sorting activation codes
You can sort the Activation codes table by any column to organize the data according to your needs.
To sort the table, click on any column header.
The icon next to the column header indicates the sort order:
 Ascending (from A to Z or from 0 to 9).
 Descending (from Z to A or from 9 to 0).