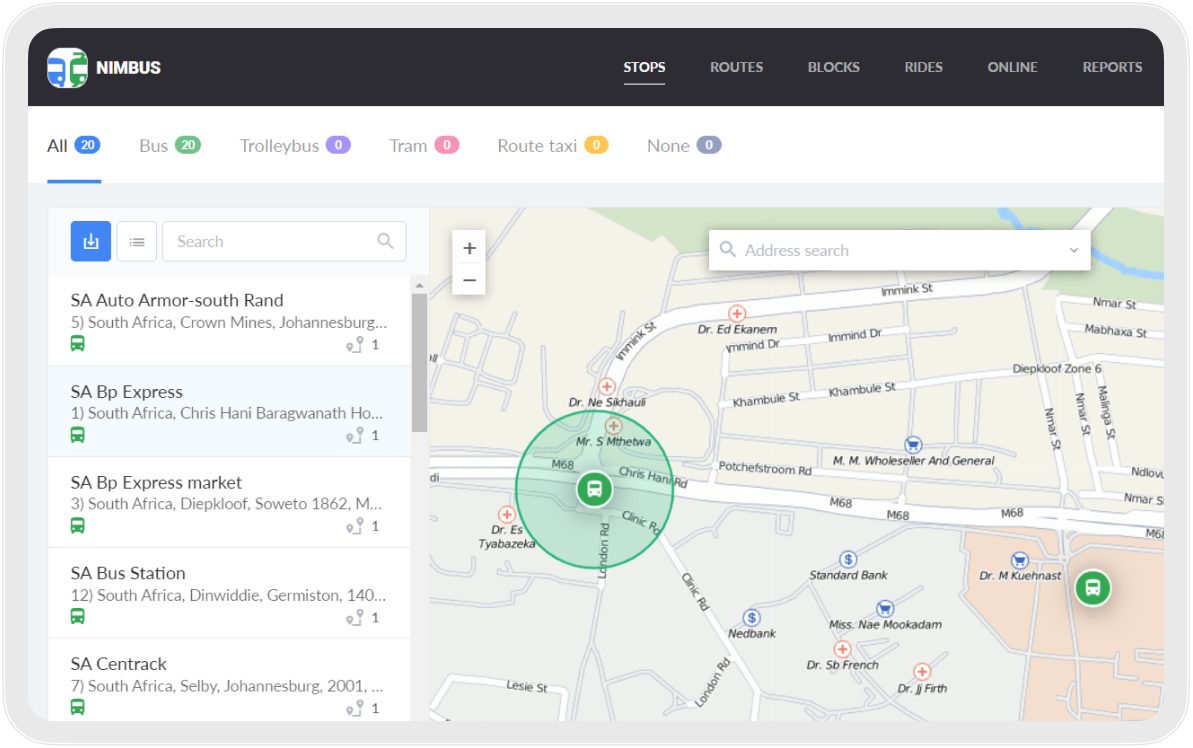
Fleetrun
Hecterra
NimBus
Other apps
Wialon for Android/iOS
Logistics
Wialon Local
Wialon Hosting
Distance Tag
WiaTag
Configurator
LeaseControl
How-Tos

All How-Tos
How to Configure a Hierarchy for Working with NimBus
  • hierarchy

This guide describes how to configure a hierarchy of accounts for working with NimBus.

To work with NimBus, you should configure the hierarchy correctly because the application provides different types of interfaces for users who perform different roles. To configure the hierarchy, follow the steps described below.

  1. In CMS Manager, create a new account for the service administrator.

  2. On the Restrictions tab of the account properties, give dealer rights to the service administrator and select the billing plans that they can assign to the users below in the hierarchy.

  3. Create an account for the top dispatcher specifying the service administrator as their creator.
  4. Repeat step 2 for the account of the top dispatcher.
  5. Create accounts for other dispatchers specifying the top one as their creator.
  6. Authorize in NimBus using the administrator username and password.
  7. On the Activation page, activate depots for the top and other dispatchers. If you do not activate a depot for the top dispatcher, he or she can work only with the administrator interface.

In this way, you can create several service administrators and subordinate accounts. After authorization in the application, the administrator interface is displayed for the service administrator, and the user interface with the Activation and Administration items in the main menu is available to the top dispatcher. The user interface is displayed for the subordinate accounts that do not have dealer rights.

After configuring the hierarchy, you can get started with NimBus.

How to Create Blocks in NimBus
  • blocks

This guide describes how to work with blocks in NimBus beginning from the creation of the routes.

Let us take as an example the following situation: a bus should leave the bus depot at 09.50, execute the route 12 times in both directions and return to the depot by 18.00.

  1. On the basis of the prepared stops, create four routes:
    • from the depot to the first stop of the main route (you can indicate from the depot  in the description);
    • from the first to the last stop of the route (forth);
    • from the last to the first stop (back);
    • from the first stop to the depot (to the depot). 

    All the routes should be of the same name and type. In our case, the type is Bus.

  2. Make sure that the switch of automatic creation of rides is activated for all the routes.

  3. Add schedules on the Schedules tab of the route properties. Repeat this step with each route. The same operation pattern (or none) should be applied to all the schedules.

  4. On the Blocks page, where the four created routes have already been combined into a collection of routes, click on the icon .

  5. Select the schedules that should be included in the block. Click Save.

  6. On the Rides page, select Blocks in the drop-down list. Click on the necessary block and assign the unit that should execute rides. Click  Save.

The block is ready. Now you can track it on the Online page and, if necessary, execute reports on a collection of routes.

How to Export Stops from OpenStreetMap and Import Them to NimBus
  • exporting_stops

This guide describes how to export stops from OpenStreetMap to a KML file and add them to NimBus subsequently. 

To export data from OpenStreetMap, we use the third-party site https://export.hotosm.org. You can also use other similar services (https://extract.bbbike.org, https://overpass-turbo.eu, etc.).

  1. After logging in to the account on the page https://export.hotosm.org, click Start Exporting.

  2. Go to the Describe tab.
  3. In the Name field, type the name of the file to which the stops should be exported.
  4. On the map, select the area of export using one of the available tools.
  5. Click Next.

  6. Go to the Formats tab.
  7. Select Google Earth KML as the format of the file to which the data should be uploaded.
  8. Click Next.

  9. Go to the Data tab.
  10. Click on the YAML button.
  11. In the Feature Selection field, replace the text with the following:

    planet_osm_point:
      types:
        - points
      select:
        - highway
        - name  
      where:
        - highway = "bus_stop"
  12. Click Next.

  13. Go to the Summary tab.
  14. Clear all the checkboxes.
  15. Click Create Export.

  16. Make sure the export is completed successfully (the Status field says Completed).
  17. Click on the link and save the file on your computer.
  18. On the Stops tab in NimBus, click on the button  and select the saved file.

  19. Select the required stops in the list.
  20. Select the type of transport.
  21. Click Import.

The stops have been added. Now you can use them for further work.

How to Choose your Way of Using NimBus
  • rides

This guide combines the main use cases of the application depending on the possible objectives. Guided by the given action scheme, you can quickly determine which case is suitable for solving your tasks.

In NimBus, you can assign a unit to the ride it performs in three ways:

To choose the appropriate way, use the following algorithm:

  1. Find out whether the carrier has fixed schedules. The schedules can be different: for weekdays or weekends, for certain seasons, etc. It is only essential to have them. In NimBus, schedules with a fixed start time are called schedules by time.
  2. If there are fixed schedules (the left part of the scheme), find out how the schedules and vehicles (units) are connected.
    • If the same units often perform the same rides, use schedules by time and the assignment of units directly to the schedules. In this case, all rides for a specific schedule are created with the same assigned unit every day. You should only control the fulfilment of rides and make changes if necessary.
    • If units for the same schedule are often changed, find out whether it is known in advance the time and schedules according to which the units perform rides. 
      • If there is a plan for changing units, you should assign units on the Rides page, where you can specify a date and assign different units to the same schedule on different days.
      • If there is no plan for changing units and it is unknown which unit will be performing the ride, use schedules by time and the automatic assignment* of units to the ride. To do this, select several units for the route. As soon as one of them visits the first stop of the route, the system automatically assigns it to the upcoming active ride.
  3. If there are no fixed schedules (the right part of the scheme), use relative schedules and the automatic assignment* of units to the ride. To do this, associate several units with the route. As soon as one of the associated units visits the first stop of the route, the system creates and activates a ride.

    If different routes have the same first stop, you should associate different units with them. Otherwise, the system will not be able to determine along which route the unit started to move.

*The automatic assignment of units to rides is available only in the Online 2.0 mode.

Expert articles

All Expert articles