Server Notifications
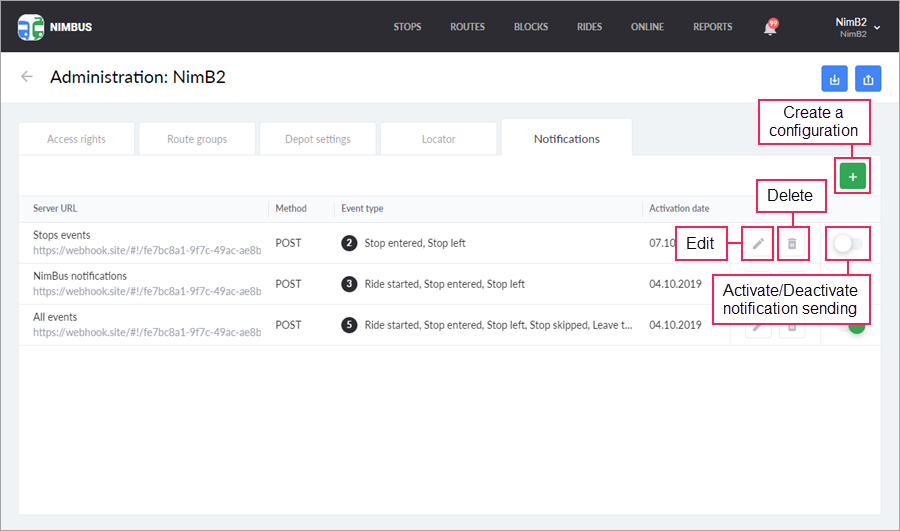
On the Notifications tab, you can configure notifications about the events in NimBus to be sent to external servers. This option is useful, for example, when developing custom solutions based on NimBus data.

To create a new configuration, follow the steps below.
- Click on the Configure notifications button (
 ) in the upper-right corner of the Notifications tab.
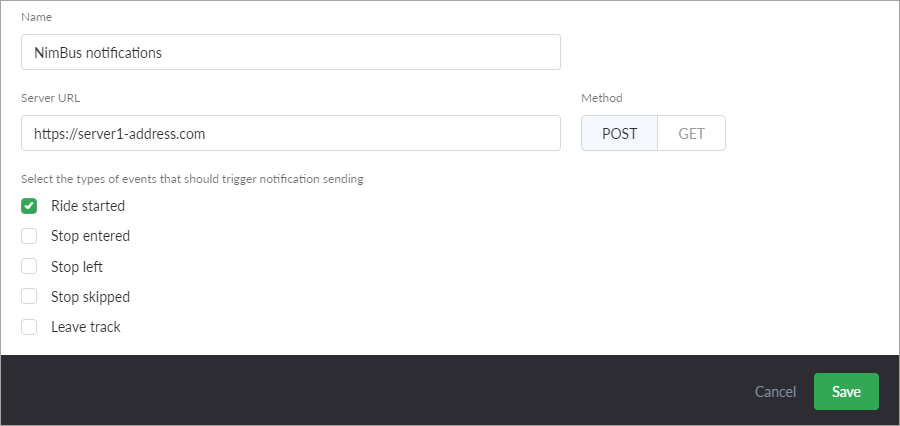
 - Specify the following:
- configuration name (NimBus notifications by default);
- URL of the server to which the notifications should be sent;
- method (POST or GET);
- types of events that should trigger notification sending (ride started, stop entered, stop left, stop skipped, leave track). You can select several types.
- Click Save.

The saved configurations of server notifications are available in the table where you can edit or delete them. You can activate and deactivate the notification sending using the switch at the end of the line.
A message sent to the server can contain the following variables:
- “tid”: schedule ID;
- “pos”: position data;
- “u”: unit ID;
- “rid”: ride ID;
- “tp”: type of event in the system (see below);
- “i”: stop index;
- “tm”: timestamp of the event.
Possible values of the variable “tp” (type of event):
- 1: ride started;
- 32: stop entered;
- 128: stop left;
- 256: stop skipped;
- 2048: leave track.
Below is a message example.
{
      "tid":29535,"pos":{"x":30.1256633333,"c":324,"y":59.580005,
"s":19},"u":17073454,"rid":12768022,"tp":32,"i":9,"tm":1570095574
}