Campaigns
Here you can plan the upcoming work by creating campaigns, and monitor the plan execution using charts. You can create a campaign when the same operation should be carried out on several fields over several days.
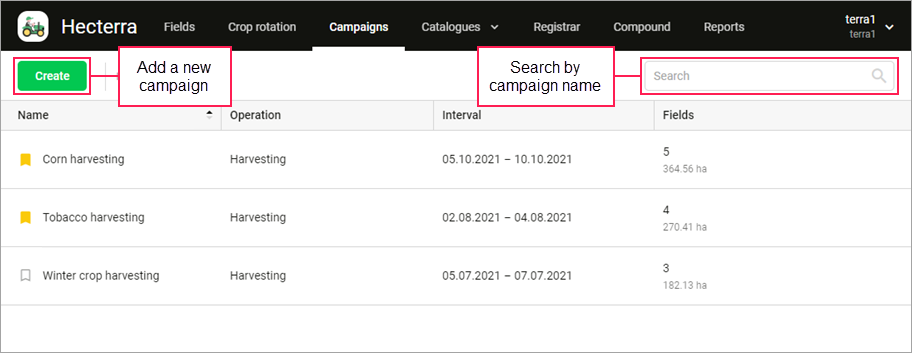
At the top of the page, there is a button which allows you to go to the campaign creation window, and a dynamic search which works by campaign name.
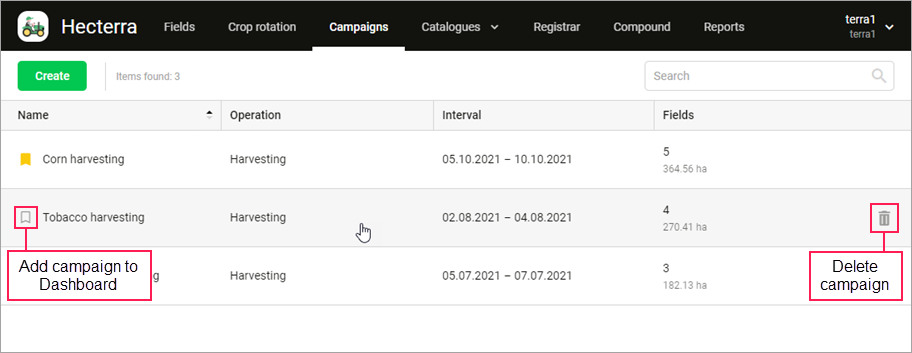
On the main part of the page, you can see a list of all the created campaigns in the form of a table. You can sort data in the table by any column in direct or reverse order.
Creating a campaign
To create a campaign, follow these steps:
-
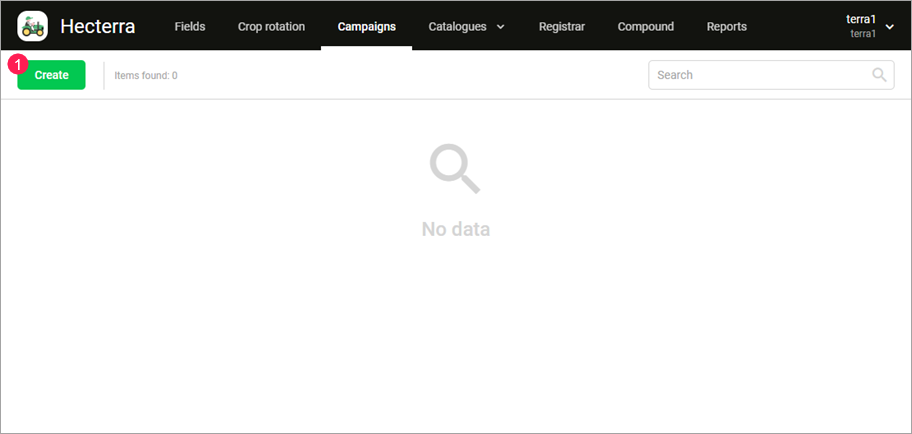
Click Create on the Campaigns page.
-
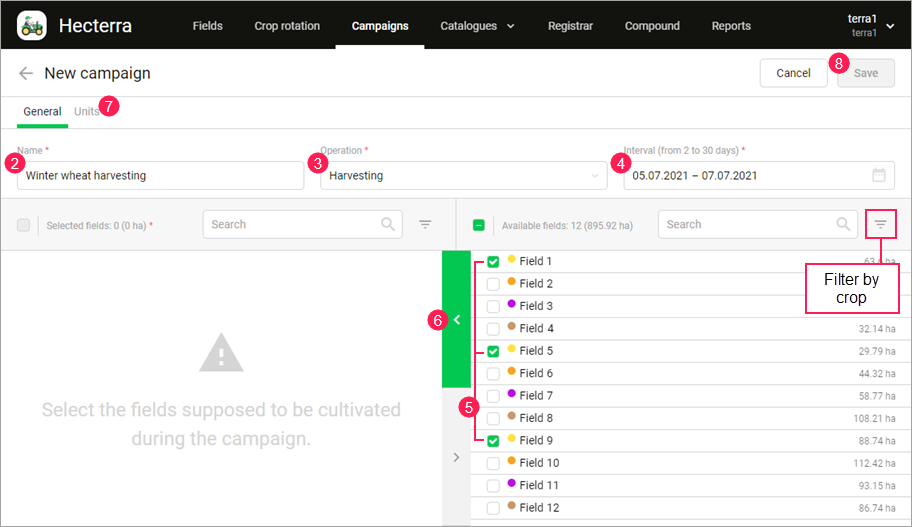
Specify the campaign name on the General tab.
-
Select an operation in the drop-down list. If the list doesn’t contain the required operation, add it on the Operations page (the Catalogues item).
-
Specify the interval during which the campaign should be carried out. It can last from 2 to 30 days.
You can create campaigns for the past periods.
- Select fields on the right side of the window. To find the required fields, use the dynamic search and filtering by crop.
- Click on the button with an arrow (
 ) to move the selected fields to the left side of the window.
 - If necessary, go to the Units tab and select units which should be used to carry out the campaign. See more here.
- Click Save.
Managing campaigns
All the created campaigns are listed on the page. To edit a campaign, click on its row and go to the General tab.
A click on the campaign row opens its properties, which are shown on three tabs: Progress, General, and Units. On the General tab, you can change the campaign name, dates, and other properties (see the Creating a campaign section).
To delete a campaign, point to its row and click on the icon  .
.
You can add information about the progress of the campaign to the Dashboard page. To do this, click on the icon next to the campaign name.