Geofences
Two modes are available on the tab: Geofences and Groups. In the Geofences mode, you can create geofences and perform the following actions with them: editing, copying, deleting, creating notifications about crossing geofence borders. You can also show and hide geofences on the map.
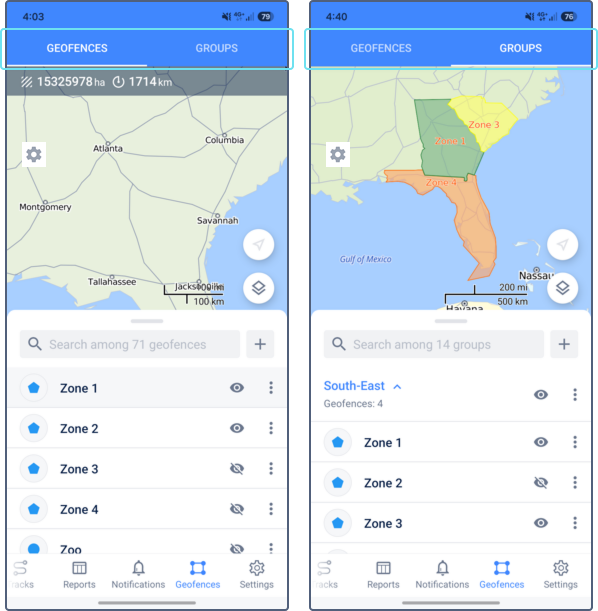
In the upper-left corner of the map, you can see the area and perimeter of the selected geofence. Drag the top border of the list to expand it to full screen.
Creating geofences
You can create only circle-shaped geofences in the application. To create a geofence, follow these steps:
- On the Geofences tab, navigate to the approximate location on the map where you want to create the geofence.
- Tap the icon
 to the right of the search bar or select Create geofence in the menu that opens after a long tap on the map.
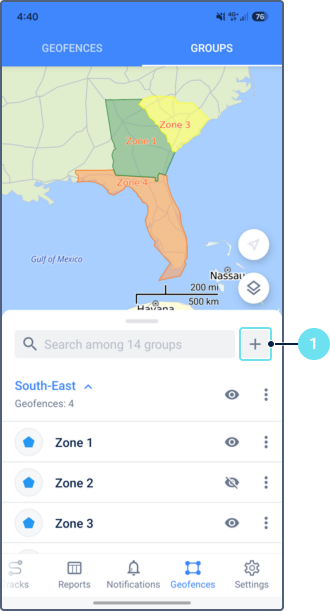
- Adjust the location and the size of the geofence moving and scaling the map.
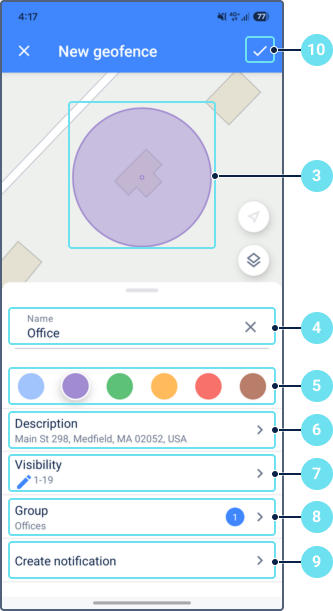
- Edit the geofence name if required. By default, the geofence name is the address of its central point. If the address isn’t available, coordinates are used instead.
- Select the colour.
- If necessary, specify the description. By default, the address of the central point of the geofence is specified.
- Specify the visibility value of the geofence (from 1 to 19). See more.
- If necessary, select the group to which the geofence should belong.
- If necessary, tap Create notification to set up a notification for this geofence. See Creating notifications for geofences.
- Save the changes.
Managing geofences
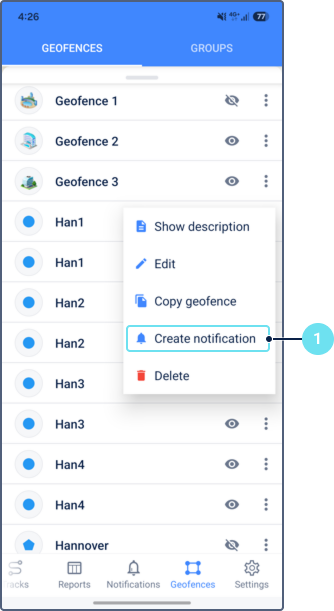
A tap on the icon  or a long tap on the geofence in the list opens its menu. Depending on the access rights and the shape of the geofence, the menu can contain the following actions:
| Icon | Action | Description |
|---|---|---|
 |
Show description | Show or edit the geofence description. To edit the description, tap the icon  in the upper-right corner. in the upper-right corner. |
|
Edit | Edit the geofence properties. The set of editable properties depends on the shape of the geofence and the access rights of the user. For polygons and lines, you can edit their name, colour, description, visibility, and group. Besides, you can edit the description using the Show description action. For circles, you can also change their location and size. |
 |
Copy geofence | Copy the geofence. Available only for circle-shaped geofences. When performing this action, colour and size are copied. As well as when creating a geofence, you can change its size, select the location and specify the properties. |
 |
Create notification | Create a notification template of the Geofence type. See the details below. |
 |
Delete | Delete the geofence. |
Showing and hiding geofences
To show or hide a geofence on the map, tap the icon  next to its name in the list.
To show a geofence, you can also select (tap) it in the list. When a geofence is selected, it is displayed in the center of the map.
next to its name in the list.
To show a geofence, you can also select (tap) it in the list. When a geofence is selected, it is displayed in the center of the map.
To show or hide all geofences at once, use the Geofences option in the settings.
Creating notifications for geofences
To create a notification for a geofence, follow the steps below.
- Select the Create notification action in the menu of the geofence.
- Type in the notification name.
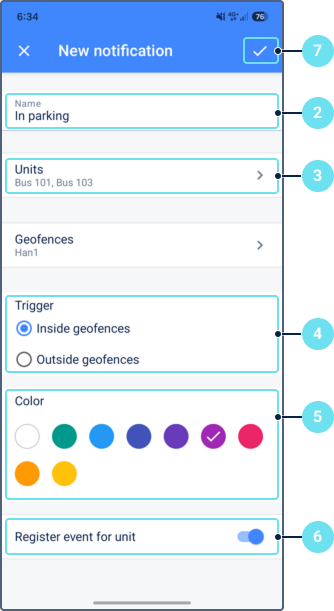
- Select the unit or unit group for which you want to create a notification.
- Specify the trigger condition: when the unit is inside the geofence or outside it.
- If you want to visually distinguish this notification from others, select a color in the Color section. A colored indicator is displayed on the left edge of notification cards on the History tab and in the notification detail view.
- If necessary, activate the Register event for unit option. The option allows you to register the triggered notifications as events that can be available on the History tab of the unit and or in reports.
- Save the notification.
You can also create notifications for geofences in the properties on the Notifications tab.