 Contents
This guide describes how to assign a unit to the rides of a certain schedule for a long period so as not to do it manually every time in the future.
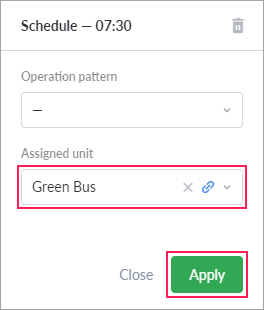
From now on, when rides are created for this schedule, the indicated unit will be assigned to them automatically.
To replace the unit for one time (for example, in case of a breakdown) you can assign another unit on the Rides page.
This guide describes how to configure a hierarchy of accounts for working with NimBus.
To work with NimBus, you should configure the hierarchy correctly because the application provides different types of interfaces for users who perform different roles. To configure the hierarchy, follow the steps described below.
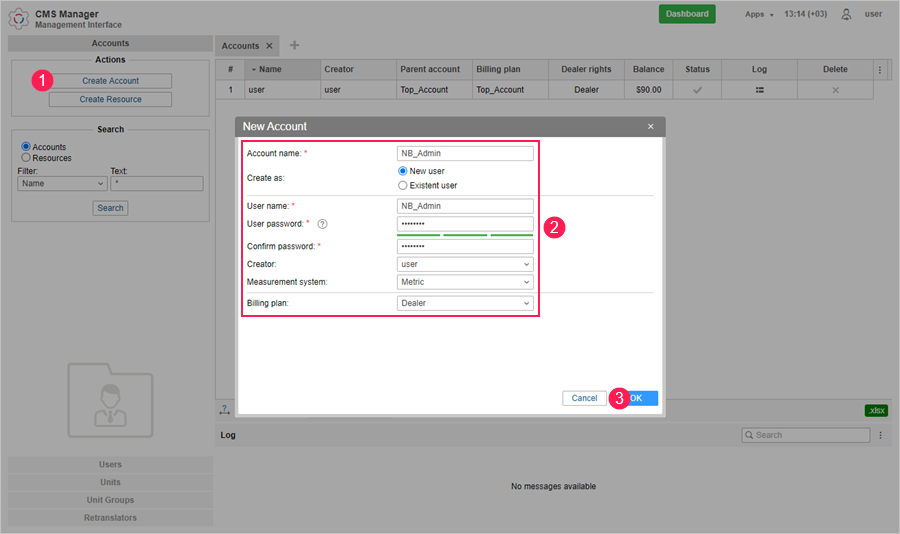
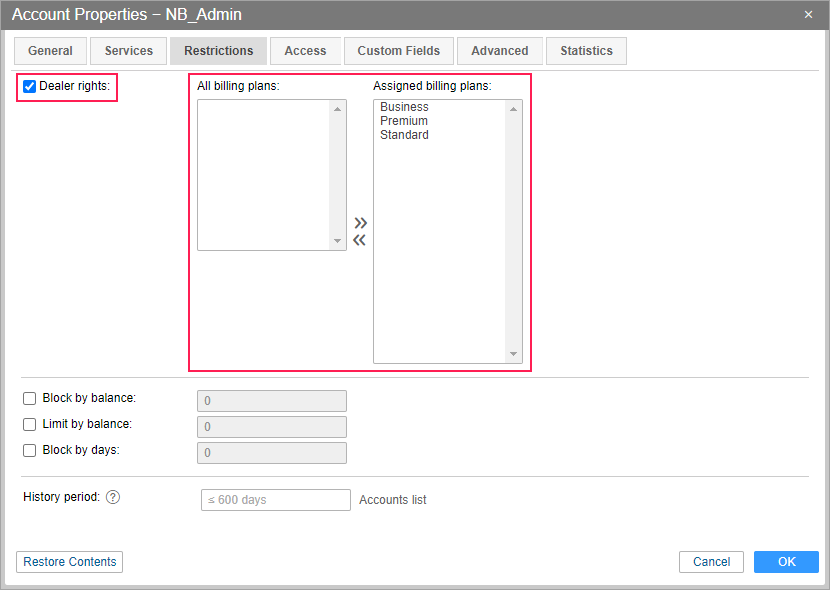
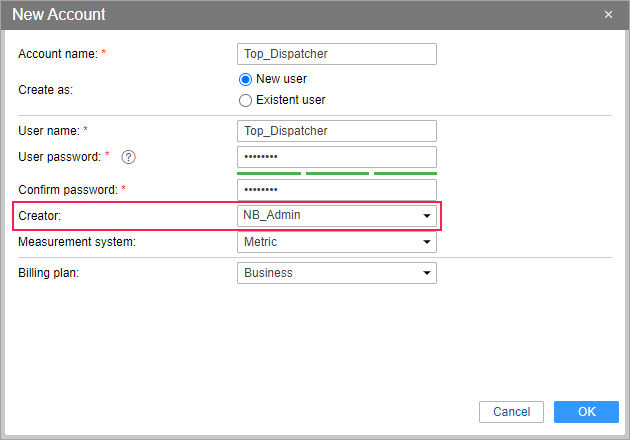
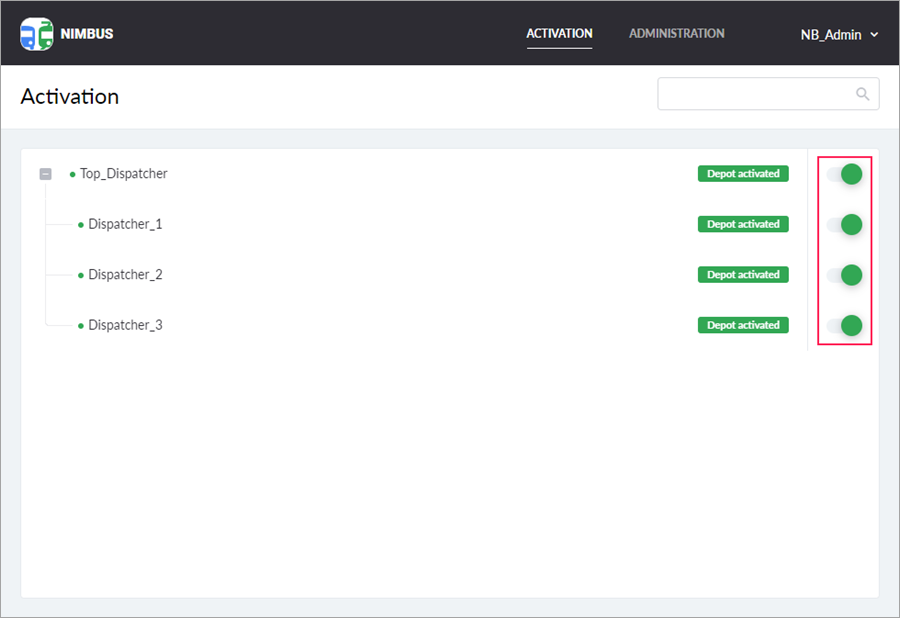
In this way, you can create several service administrators and subordinate accounts. After authorization in the application, the administrator interface is displayed for the service administrator, and the user interface with the Activation and Administration items in the main menu is available to the top dispatcher. The user interface is displayed for the subordinate accounts that do not have dealer rights.
After configuring the hierarchy, you can get started with NimBus.
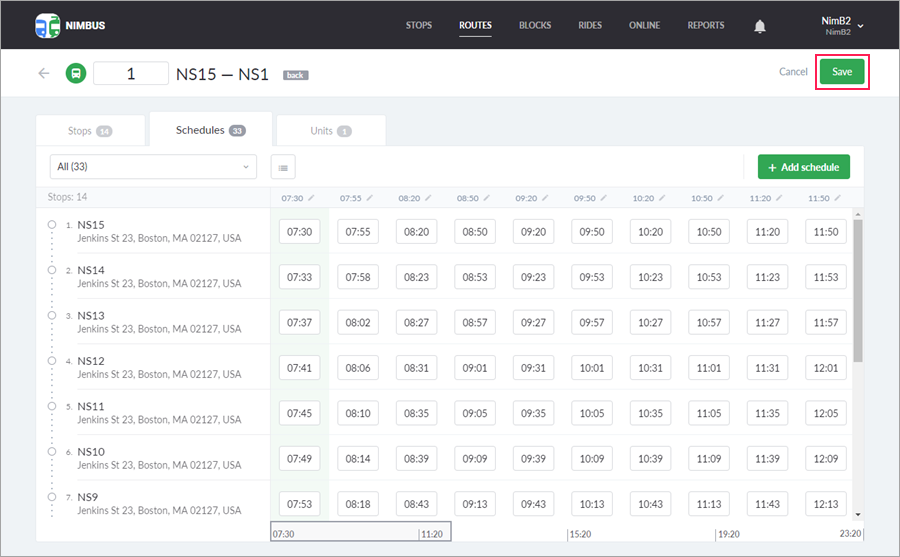
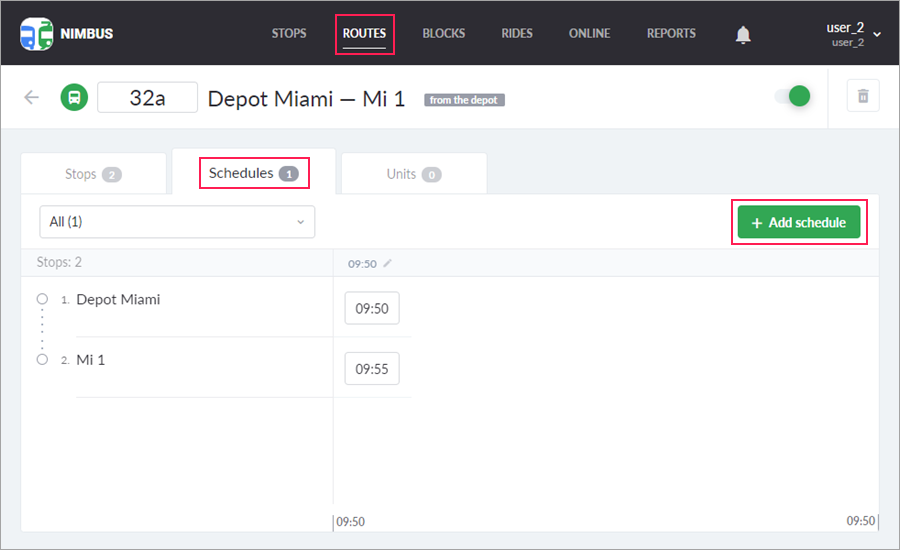
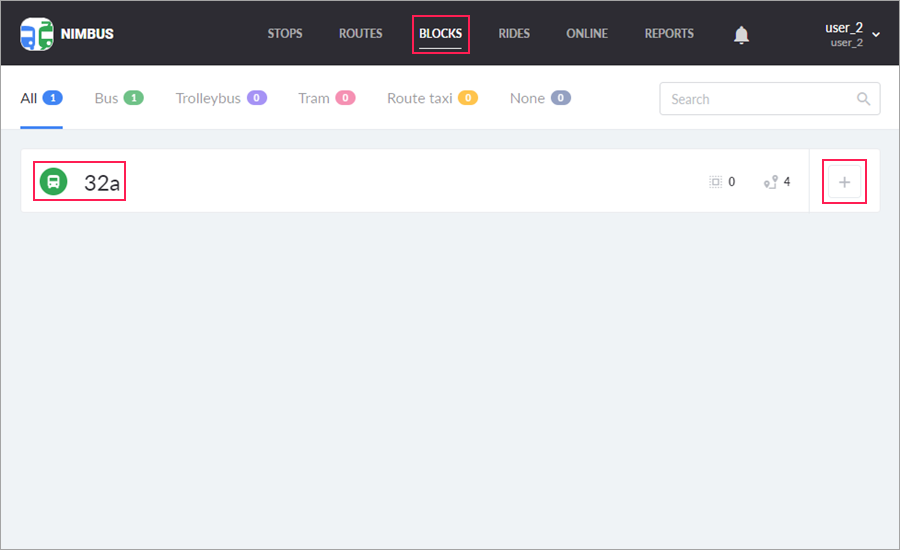
This guide describes how to work with blocks in NimBus beginning from the creation of the routes.
Let us take as an example the following situation: a bus should leave the bus depot at 09.50, execute the route 12 times in both directions and return to the depot by 18.00.
All the routes should be of the same name and type. In our case, the type is Bus.
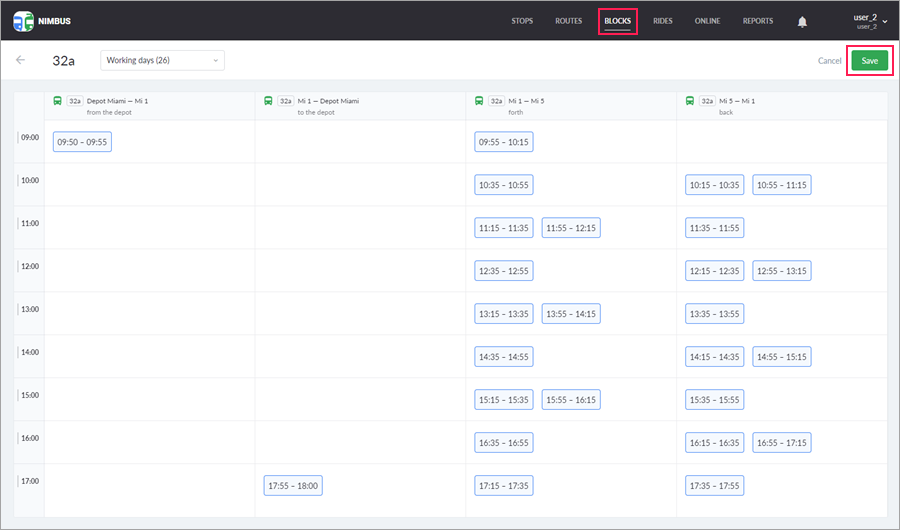
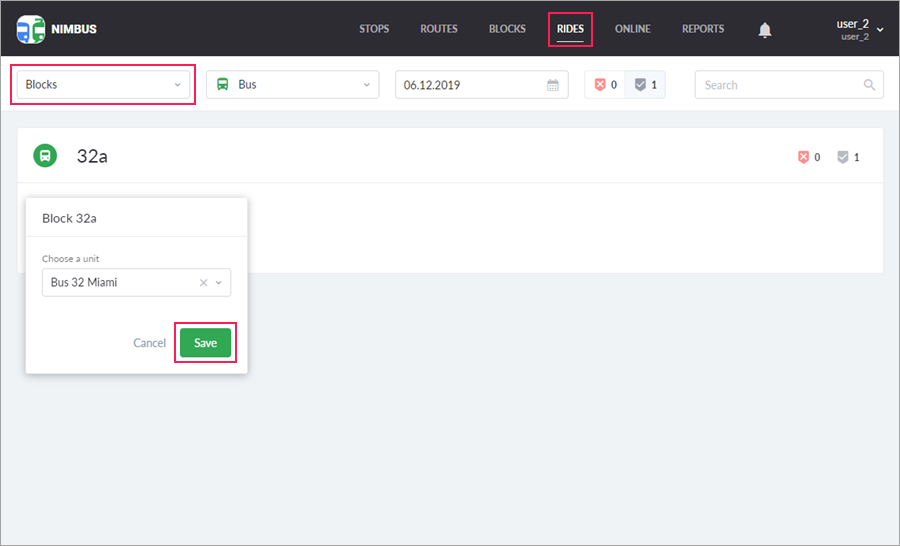
The block is ready. Now you can track it on the Online page and, if necessary, execute reports on a collection of routes.
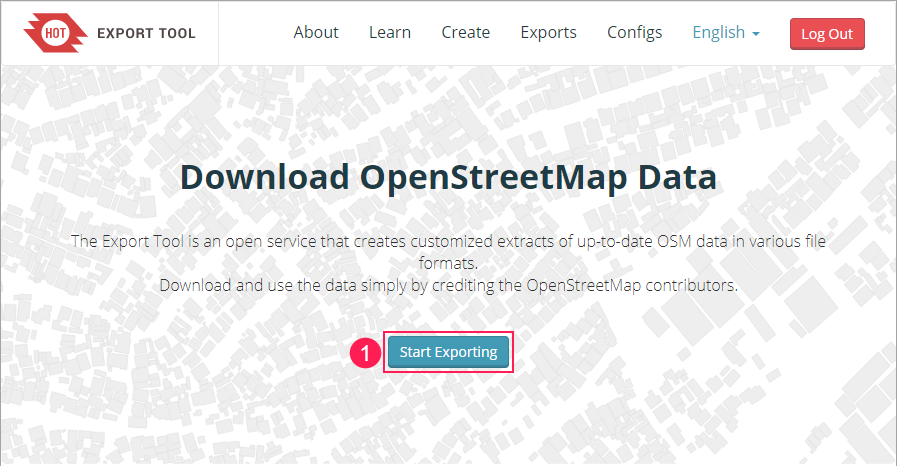
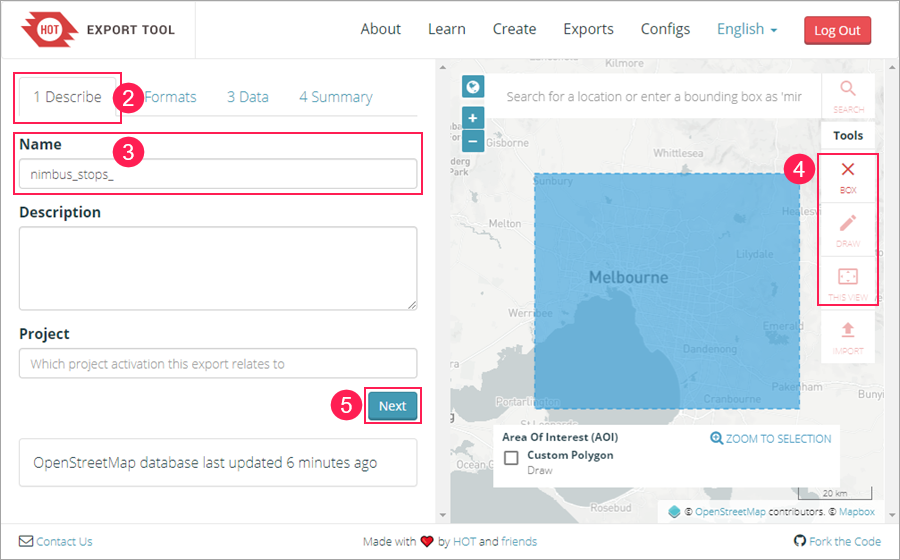
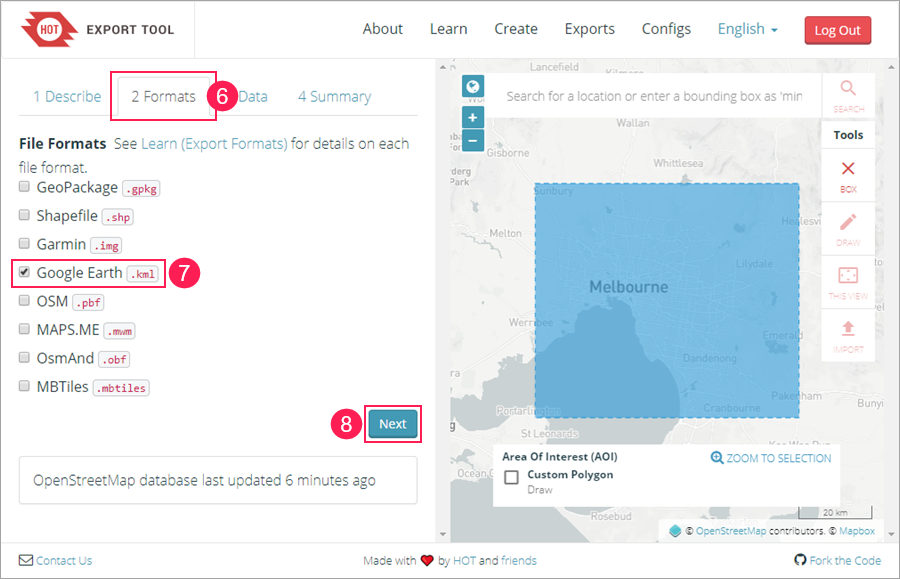
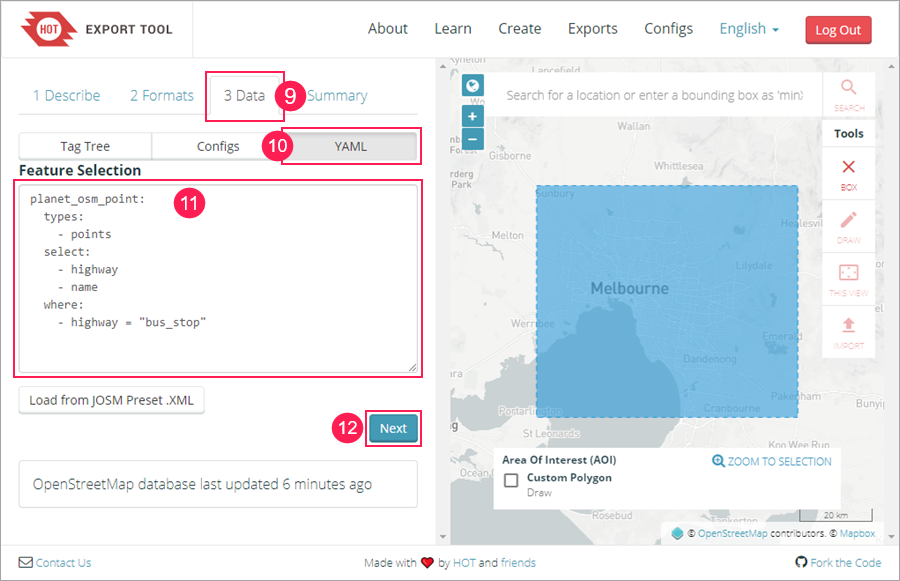
This guide describes how to export stops from OpenStreetMap to a KML file and add them to NimBus subsequently.
To export data from OpenStreetMap, we use the third-party site https://export.hotosm.org. You can also use other similar services (https://extract.bbbike.org, https://overpass-turbo.eu, etc.).
In the Feature Selection field, replace the text with the following:
planet_osm_point:
  types:
    - points
  select:
    - highway
    - name
  where:
    - highway = "bus_stop"
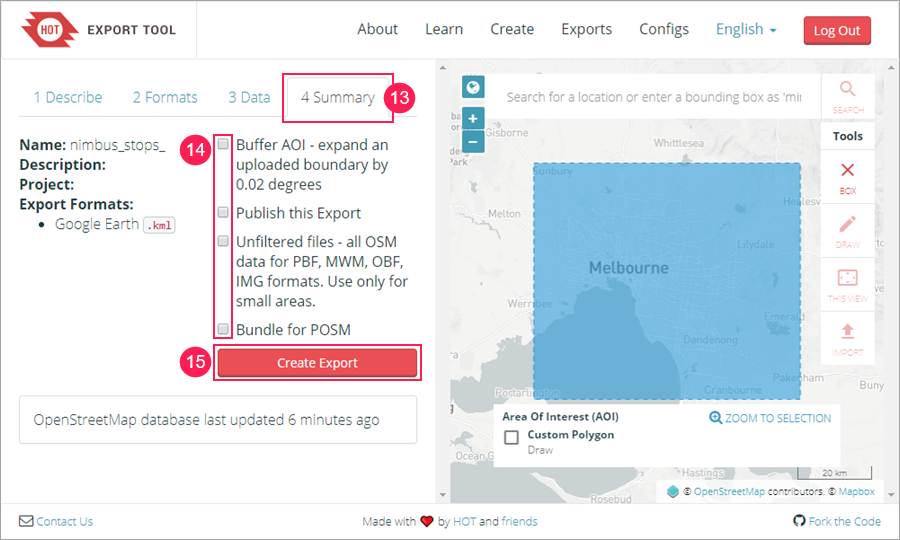
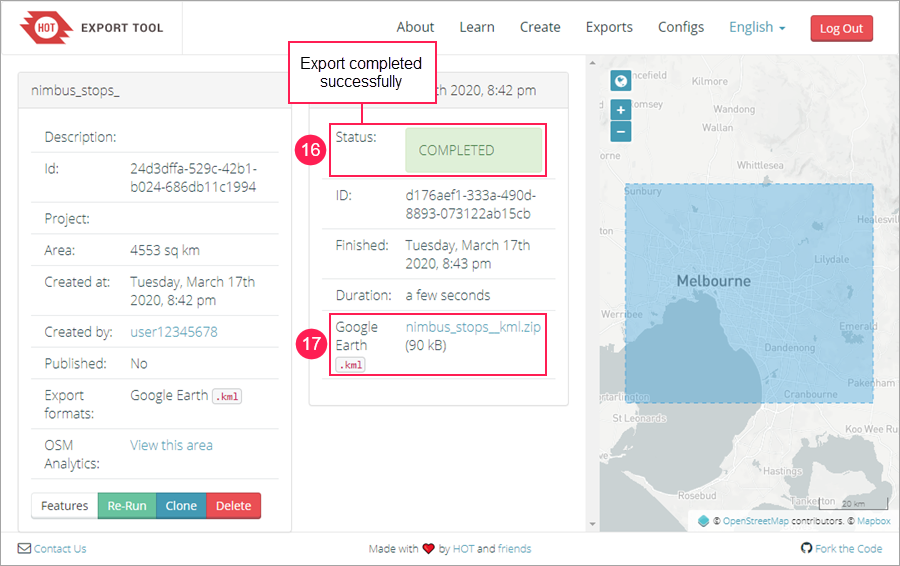
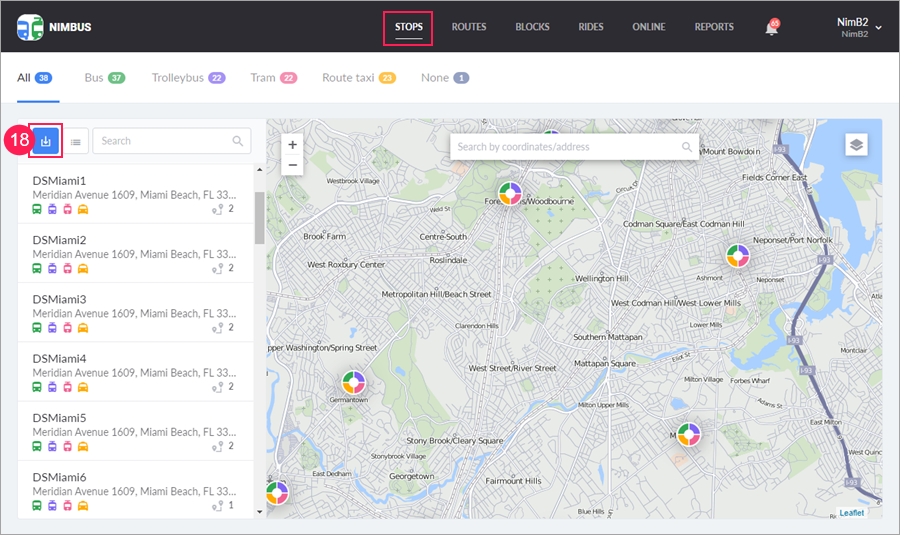
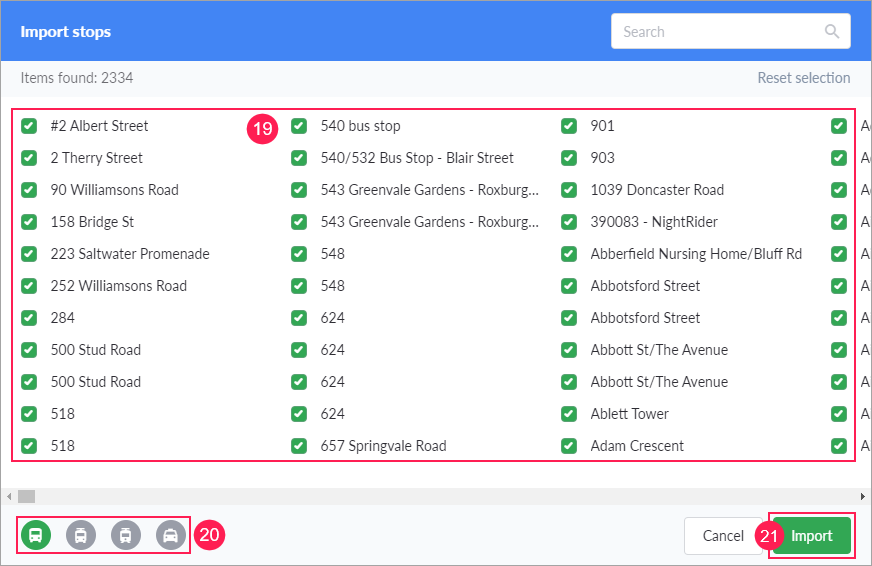
The stops have been added. Now you can use them for further work.
This guide combines the main use cases of the application depending on the possible objectives. Guided by the given action scheme, you can quickly determine which case is suitable for solving your tasks.
In NimBus, you can assign a unit to the ride it performs in three ways:
To choose the appropriate way, use the following algorithm:
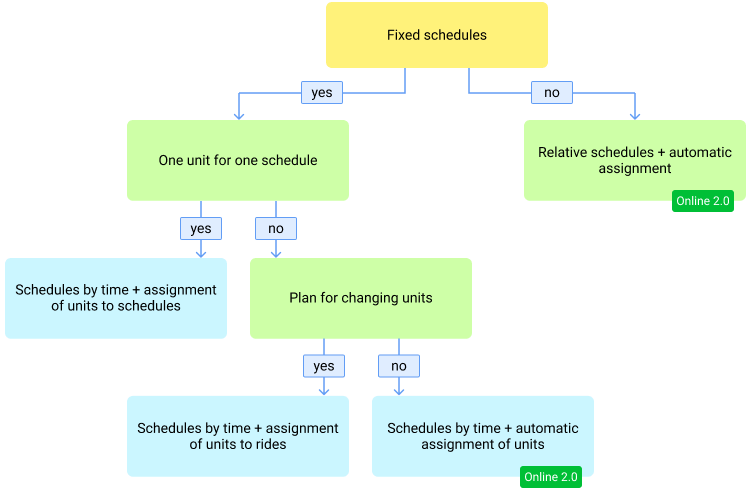
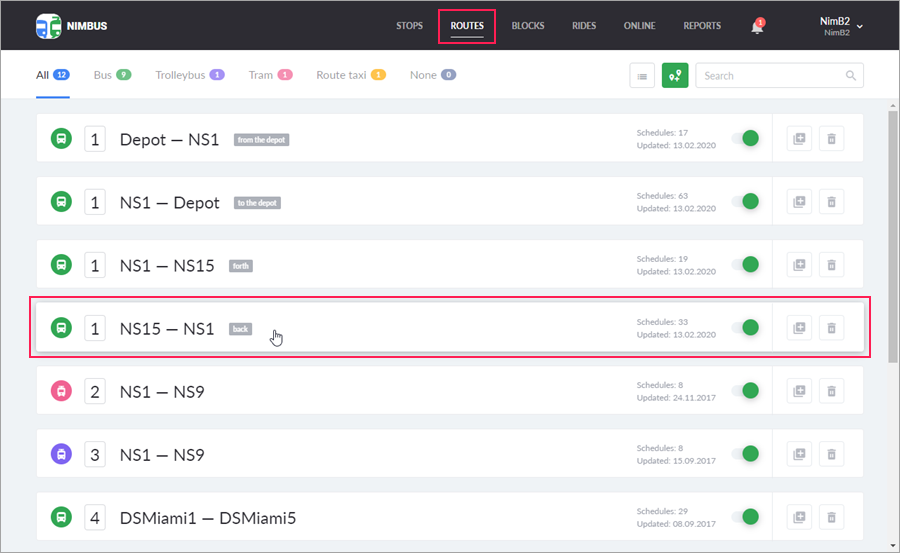
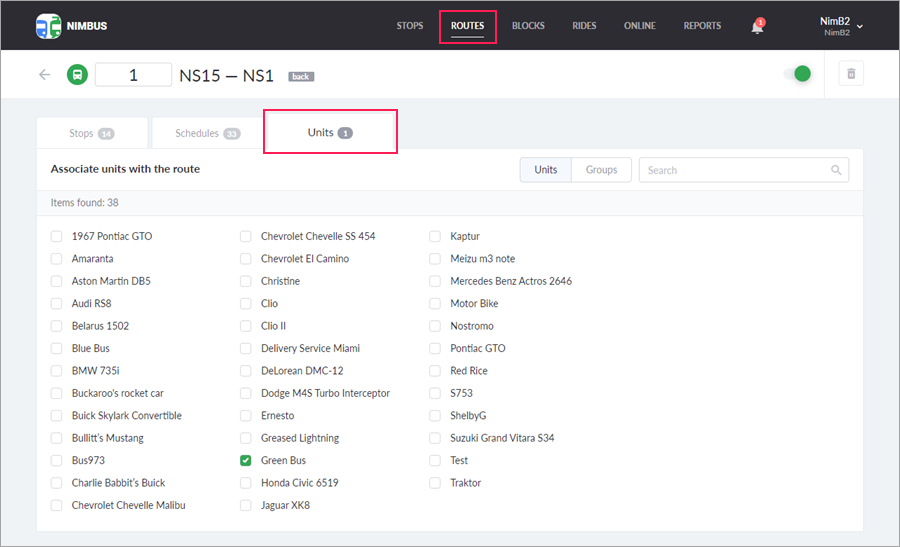
If there are no fixed schedules (the right part of the scheme), use relative schedules and the automatic assignment* of units to the ride. To do this, associate several units with the route. As soon as one of the associated units visits the first stop of the route, the system creates and activates a ride.
If different routes have the same first stop, you should associate different units with them. Otherwise, the system will not be able to determine along which route the unit started to move.
*The automatic assignment of units to rides is available only in the Online 2.0 mode.
