Work List
The Request reports and messages access right is required.
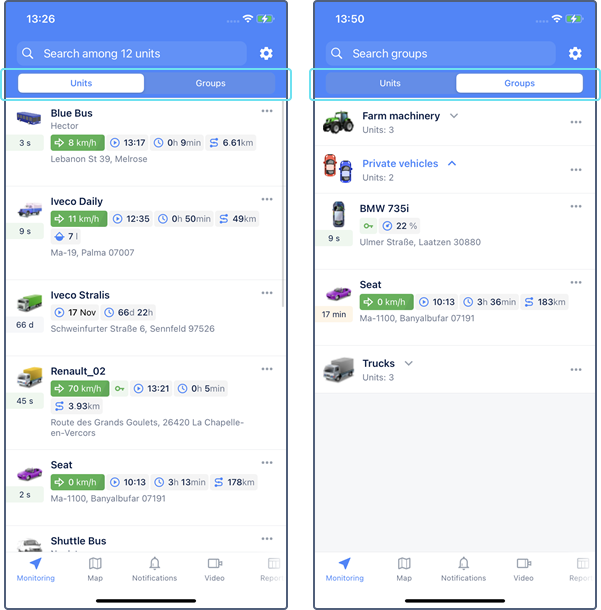
The work list displays the units that are being monitored. Two view modes are available: Units and Groups. In the Groups mode, you can see the group names and the number of units included in it. Tap the line with the name of the group to see the list of units.

Units are created in the web version of Wialon and in CMS Manager. If the unit is deactivated, it is not displayed in the work list.
Work list generation modes
When you sign in to the application, units are automatically added to the work list if it was previously empty. If you have more than 100 units, add the required units yourself.
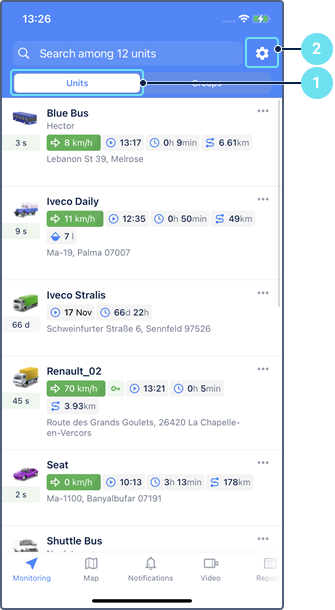
The contents of the unit and group work lists depend on the option selected in the settings (the icon  to the right of the search). You can select one of the following list generation modes:
| Mode | Description |
|---|---|
| Show all | The work list shows all units and unit groups if you have 20 units or fewer. If you have more, the units and groups are not added automatically. You should generate the work list manually. If this option is enabled and you have manually removed units from the list, the next time you sign in to the application, all units are shown again (if there are 20 or less). |
| Synchronize with the web version | The list contains the same units and groups as the work list on the Monitoring tab of the web version. If this option is enabled, you can’t edit the list manually. |
| Configure manually | You add the units that should be displayed in the work list yourself. |
After selecting the mode, click on the icon  for saving the changes.
Adding items to the work list
You can add units or their groups to the work list if the Configure manually option is selected as a list generation mode.
To edit the work list, follow the steps below.
-
Select the Units or Groups tab.

-
Tap the icon
 located to the right of the search and tap Select items.
 -
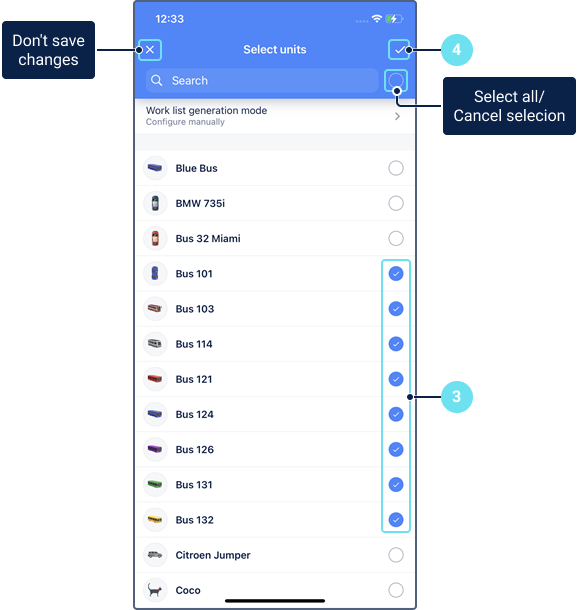
Select the required units or unit groups. When selecting, you can use the search or the Select all button to the right of it. In addition, you can use the Select all button to select all the items filtered by the search.

-
Save the changes.
Removing items from the work list
You can remove units and their groups from the work list if the Configure manually option is selected as a list generation mode.
Use one of the following methods to remove a unit or group from the list:
- In the list, swipe left or right on the row of the item you want to remove.
- In the work list settings, similar to the process of adding items, cancel the selection of those items that shouldn’t be displayed in the list and save the changes.
As a result, the item is not shown in the work list, but it is not completely removed from the system.
Unit section
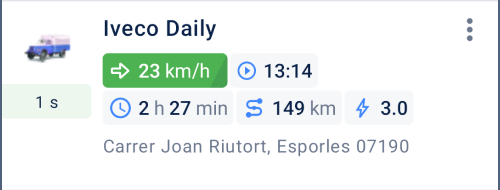
The unit section shows the last unit data.

You can change the way the section looks. To do this, go to its settings in one of the following ways:
- tap the icon
 in the upper part of the Monitoring tab and select Configure unit view;
 - select Unit view on the Settings tab.
The table below lists the components that can be shown in the unit section depending on your selection.
| Component | Content |
|---|---|
| Icon | Unit icon. You can change it in the unit menu or in the monitoring system. |
| Time of the last message | The time of the last message is coloured differently depending on when the message was received:
|
| Title | One of the following items:
You can change the unit name in the unit menu or in the monitoring system. |
Subtitle | One of the following items:
Consider the following particularities regarding the determination of the unit address:
|
| Indicators | Any or each of the following items:
If the last unit message was received 7 or more days ago, the indicatiors are not shown. Consider the following particularities regarding the fuel level and battery level data:
|
| Sensors | The unit section can show the values of the sensors created in the monitoring system. To see them, you must have the Request reports and messages access right to the unit. You can select up to 10 sensors you want to see in the unit section. If a unit has several sensors with the same names, the section shows only the value of the first of these sensors. The icon corresponding to the sensor type is shown next to the value:
|
| Bottom row | One of the following items:
The particularities regarding the determination of the unit address are listed above. |
Unit menu
A tap on the icon  or a long tap on the unit opens an additional menu with the following options:
| Option | Description |
|---|---|
| Send command | Sending the commands created in the web version of Wialon. |
| Share location | Sending the locator link which allows you to monitor a unit on the map during the selected validity period. The available intervals: 1 hour, 3 hours, day, week, or a custom interval. |
| Navigation apps | Planning a route using other navigation applications installed on a mobile device. |
| Copy coordinates | Copying the coordinates of the unit to the clipboard. |
| Execute report | Going to the Reports tab with the unit or group field already filled in. |
| Edit | Changing the name and icon of the unit. |
In the Groups mode, this menu contains only the Send command, Share location, and Execute report options. Tap the icon  to open the menu.
Changing the unit name
To change the name, you should have the Rename object access right to the unit.
The name shouldn’t contain “(double quotes), {} (curly braces), \ (backslash). Permissible length: 4–50 characters.
Changing the unit icon
To change the unit icon, you should have the Change icon and Edit not mentioned properties right to the unit.
You can select one of the standard icons. For some of them, different colours are available. They are shown after clicking on the icon. The icons pointing upwards (for example, ![]() or
or ![]() ) are automatically rotated according to the unit direction.
) are automatically rotated according to the unit direction.
Sending commands
You can send the command only to those units that have it configured in the unit properties. To see the list of the units that do not support the command, tap the icon  .
.
To work with commands, the View commands and Execute commands access rights are required.