Sensors
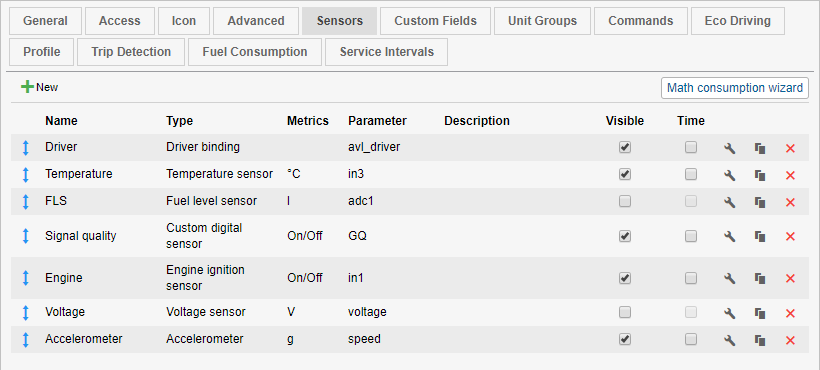
On the Sensors tab of the unit properties, displays a list of all the sensors created for this unit. The table shows the name of the sensor, its type, unit of measure, the parameter on which the sensor is based, description, visibility and time checkboxes. On this tab, you can view, create, configure and delete sensors.
To create a new sensor, press the New button ( ), fill in the fields and press OK. If you use similar devices for different units, it is convenient to configure sensors once, and then import them to other units.
Such buttons as Properties, Copy, and Delete are used to work with the created sensors, and located at the end of the line of the sensor name. To quickly create a sensor with similar settings, press Copy in the line of a template sensor. To edit a sensor or just view its settings, press Properties. To delete a sensor, press Delete.
To make any alterations on this tab, you need the Create, edit, and delete sensors access right. Otherwise, you can only view existing sensors and their settings.
There is a Visible checkbox in the line with each sensor. It controls whether the sensor is shown or hidden. By default, depending on sensor type the checkbox is enabled or disabled. However, you may want to hide or show some particular sensors. Hiding is reasonable if a sensor is used as a validator and does not have its proper value.
If a sensor is visible, then the Time checkbox may become enabled for it. If this box is checked, in the additional information about the unit, in addition to the value of the sensor in parentheses, it can also be specified how long the value of the sensor parameter remains unchanged. For example, Ignition: On (15 minutes 35 seconds ago).
Some limitations are applied to this feature. The sensor should have no calculation table, validators, custom intervals, and the parameter of the sensor should not contain any references to other sensors. In these cases, the Time checkbox is unavailable. Besides, it is not possible to activate the Time option for the ignition sensor if there is a bitwise control indicated in its parameter.
The order of the sensors can be changed manually. To place sensors in a required order, just drag them up and down holding the arrow-shaped icon on the left. The order, as well as visibility, is taken into account in the unit tooltip, extended unit information, track player, track hittest, and on the Messages tab. Only visible sensors are shown, and they are displayed in the order as given here, in the unit properties.