Creating jobs
To create jobs, you should have:
- the service of the required type (Jobs: Send a command to units, Jobs: Send a report by email) enabled in the account or billing plan properties;
- full access to the resource and to units.
The creator of the resource in which the job is stored should also have full access to the units.
If after creating the job the necessary access rights to the unit have been disabled or the unit has been deactivated, then the job stops working for such units. In both cases, while editing it, you can see a warning about the lack of the required access rights to the unit.
To create a new job, follow the steps below.
- Click New on the Jobs tab.
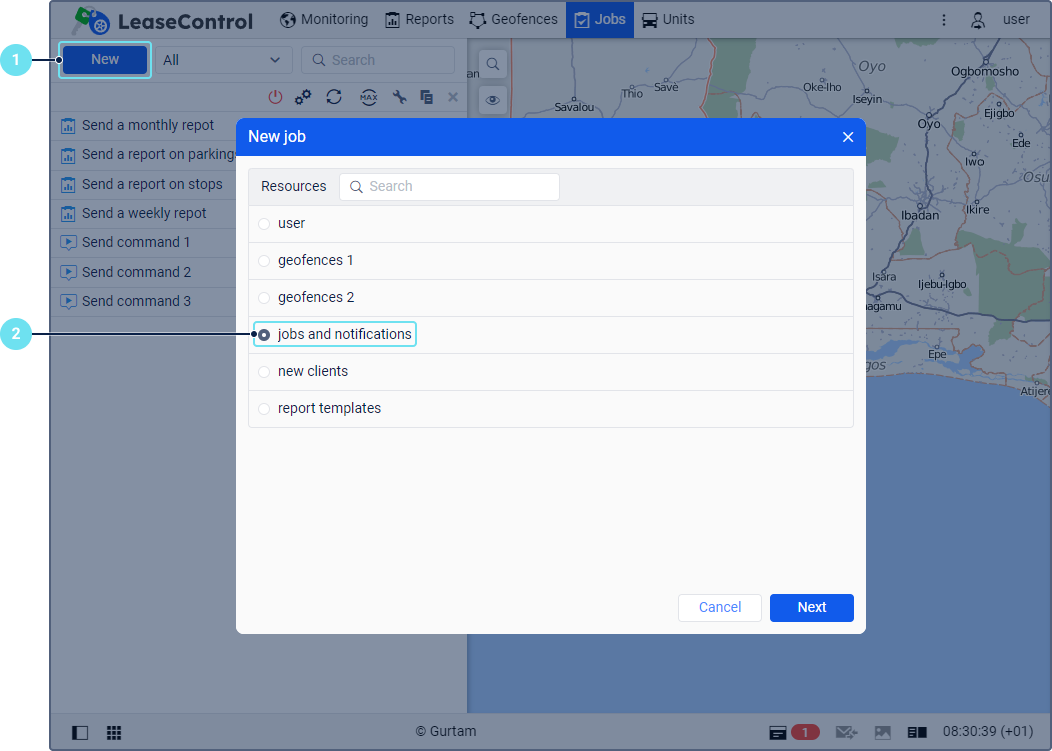
- Select the resource in which the job should be stored.
If you want to use a resource of another user’s account, it is necessary that the service that allows creating jobs of the required type should also be enabled for this account.
- Select the job type.
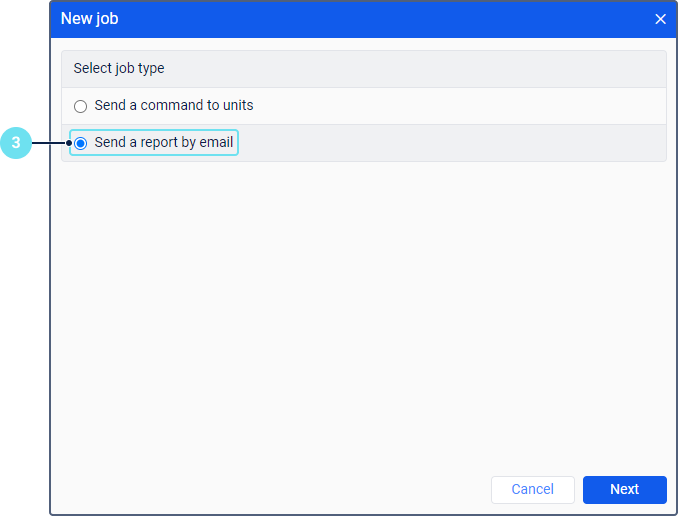
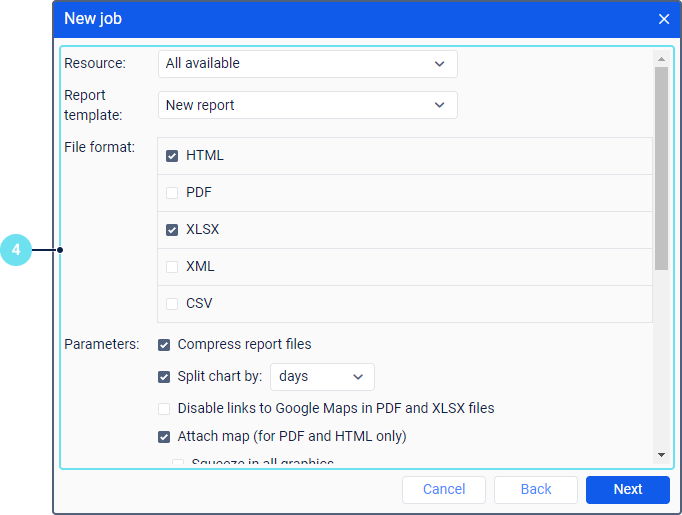
- Set the parameters which depend on the selected job type and are described in the Job types section. In the case of the Send a command to units job, this step goes after the unit selection.
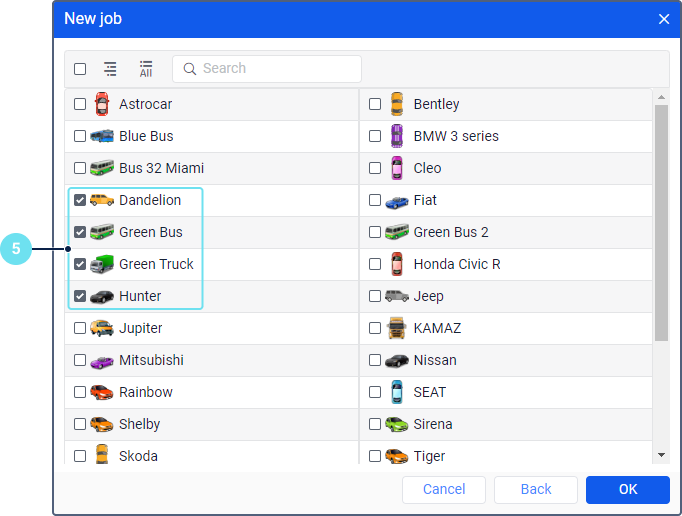
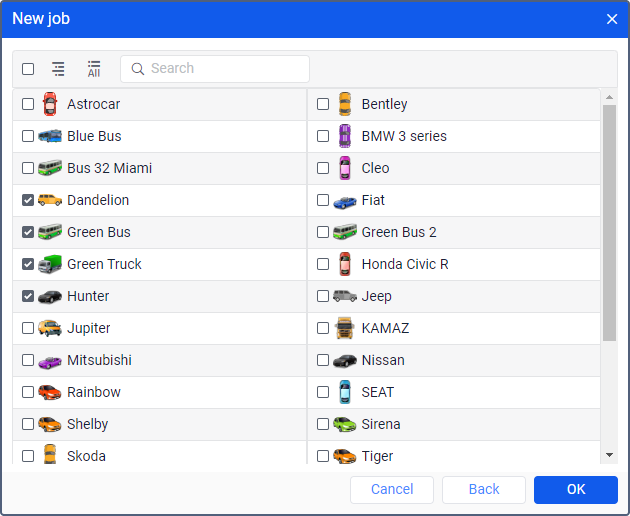
- Select the unit or units for which you want to create the job. In the case of the Send a report by email job, you can select other system objects (users, resources, etc.) depending on the report type.
- Specify the job execution parameters. Click OK.
Selecting units
The window of unit selection displays the units from the work list on the Monitoring tab. If the window doesn’t display any units, click on the button  . If no units are shown after that, it means that you don’t have access rights to them.
The unit icons are not displayed if the list contains more than 100 units.
Using the button  /
/ , you can switch between the lists of units and their groups. You can see what units belong to a group in the tooltip to the group icon. If a unit group is selected, the job is applied to all the units that belong to the group at the moment when the job is carried out.
To select units or groups for which you want to create a job, mark them in the list. To select all the items at once, mark any of them holding down the Ctrl key, or select the checkbox in the table header.
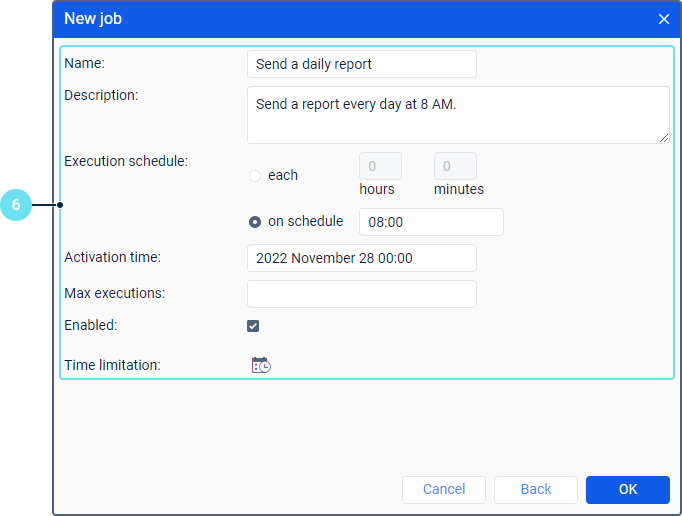
Job parameters
The parameters of job execution are specified at the last stage of job creation.

The required parameters are marked with an asterisk (*).
| Parameter | Description |
|---|---|
| Name* | The job name. It is displayed in the list of jobs and as a subject of the email if the job is related to sending information by email. |
| Description | The job description. The text shouldn’t contain more than 10,000 characters. If a job has a description, it is displayed in the job tooltip. |
| Execution schedule* | The schedule according to which the job should be carried out. To specify the schedule, use one of the options:
|
| Activation time | The date and time when the job should begin to be carried out according to the schedule. |
| Max executions | The maximum number of the job executions after reaching which the job is automatically disabled. If this field is empty, the job is carried out until it is deleted or disabled manually. |
| Enabled | The job state. If the option is activated, the job is enabled after its creation, if not, disabled.You can enable the disabled job in the list of jobs. |
| Time limitation | The setting which allows specifying the time and selecting the days and/or months during which the job execution schedule should be fulfilled. For example, it may be fulfilled only on weekdays and within working hours, or only on odd days, and so on. For example, to reset the GPRS traffic counter, you can select the first day of each month, so that the counter is reset automatically at the beginning of each month. You can learn how to set a time limitation here. |