Import from CSV/XLSX
The Import from CSV/XLSX feature allows you to import units in bulk from CSV and XLSX files into the system.
The import process consists of the following steps:
- uploading the required file;
- preparing a table with data to be imported;
- adding a template (optional);
- completing the import and checking the results.
Read more about each step below.
Uploading the file
To upload the file from which you want to import data, follow the steps below:
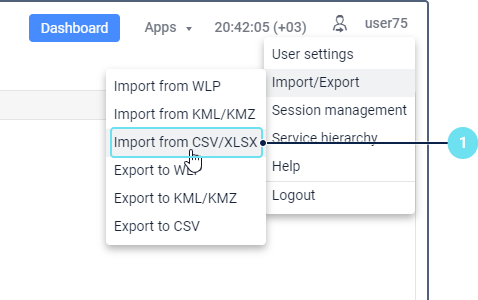
- In the user menu, select Import/Export and then select Import from CSV/XLSX.
- Click on the Browse button and select the file you want to upload.
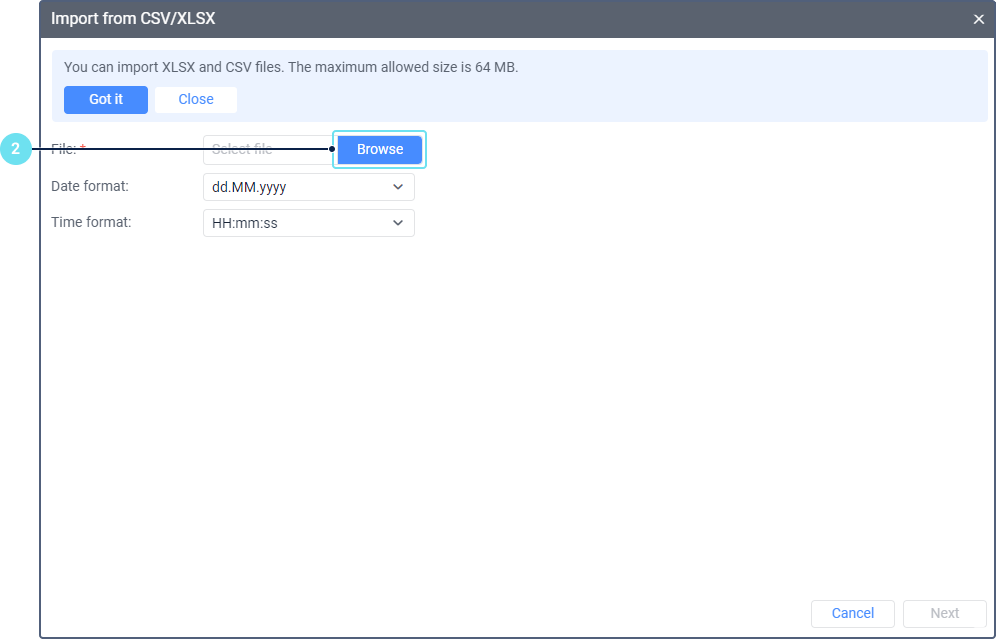
- Click Upload.

- Select the date and time format used in the file. If there are no such fields in the file, skip this step.
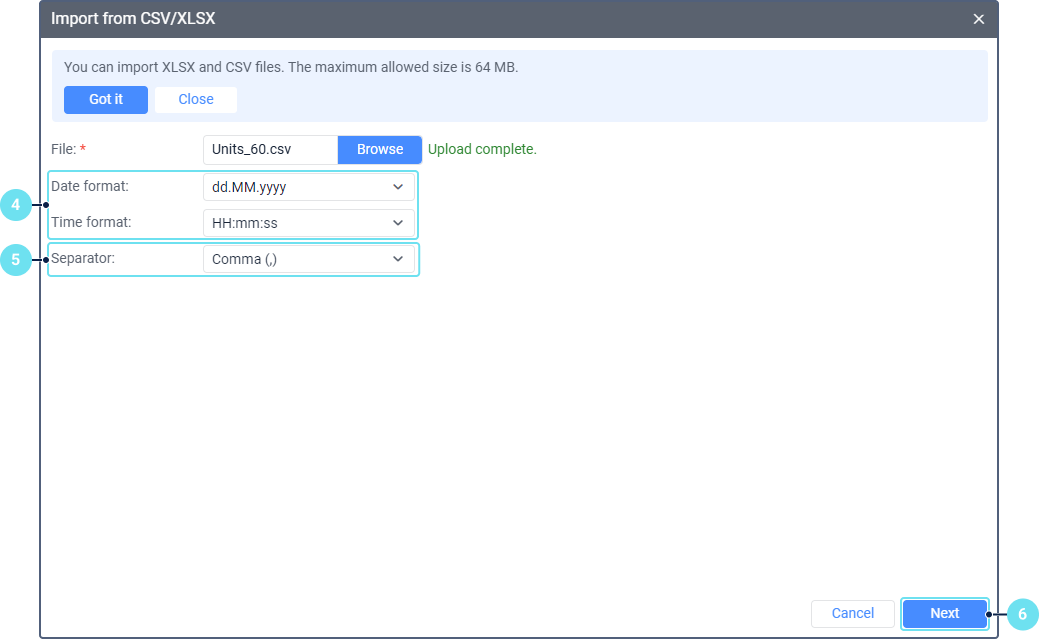
- For a CSV file, specify the separator: comma, semicolon, colon, or tab.
- Click Next.
The data from the file is then shown as a table which you should prepare for import.
Preparing the table for import
To prepare the uploaded data for import, follow the instructions below.
-
Select Units as the type of items you want to import. The import of drivers and fuel fillings is not available.

-
Specify the headings of the columns. To do this, you can apply a previously saved template or select headings from the drop-down lists above the columns. Mandatory headings are marked with an asterisk (*). For a description of all available columns, see the Unit import table section.
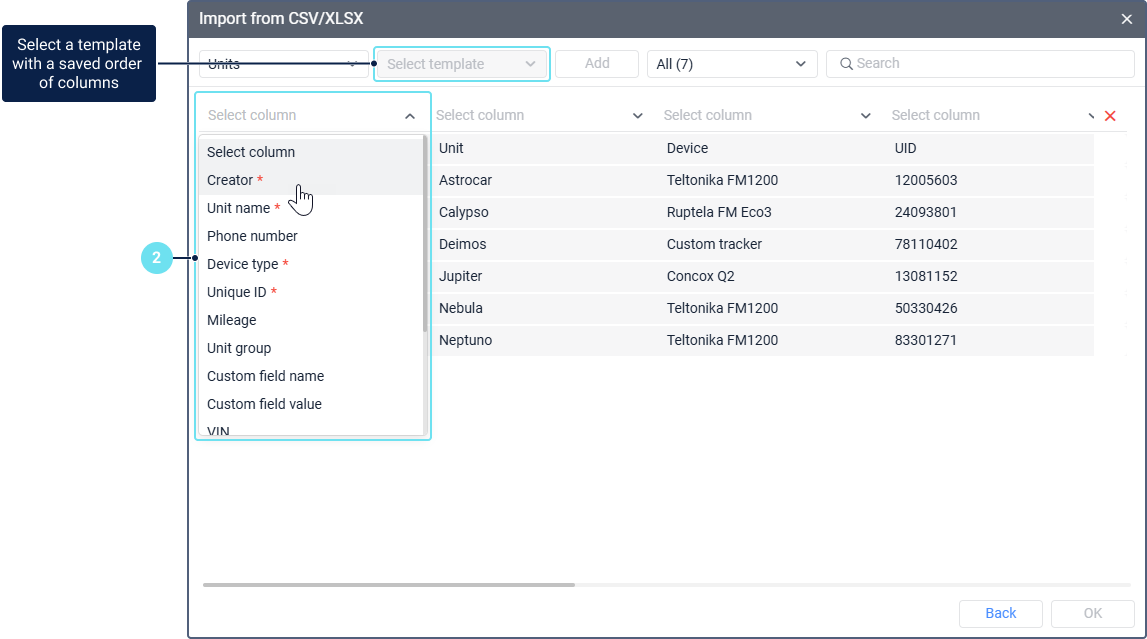
If no name is selected for a column, its contents are not imported into the system.
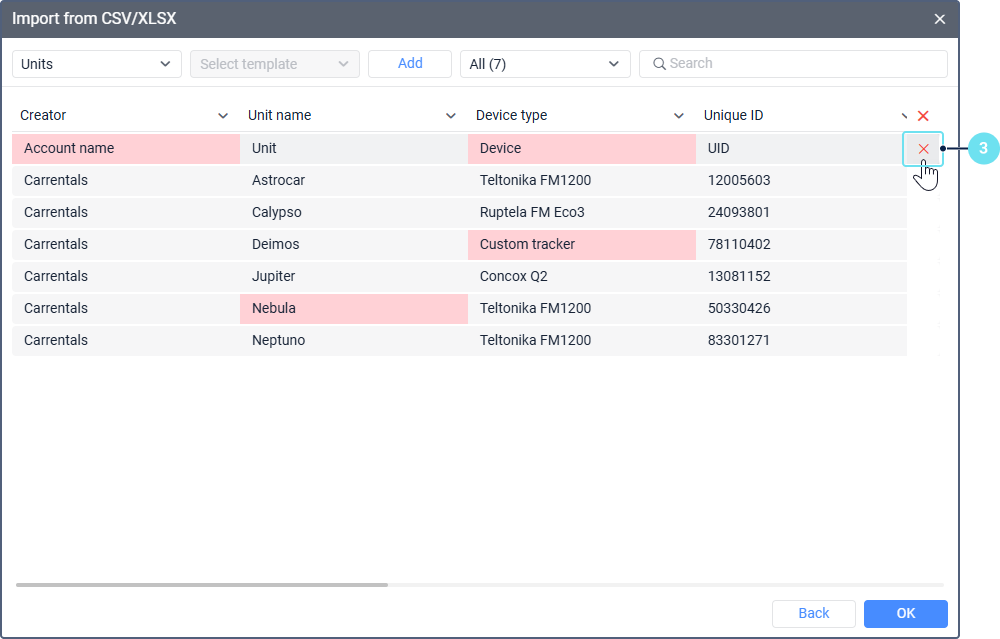
- If necessary, delete the first line and other unnecessary lines. To do this, point to the line and click on the icon
 at the end of the line.
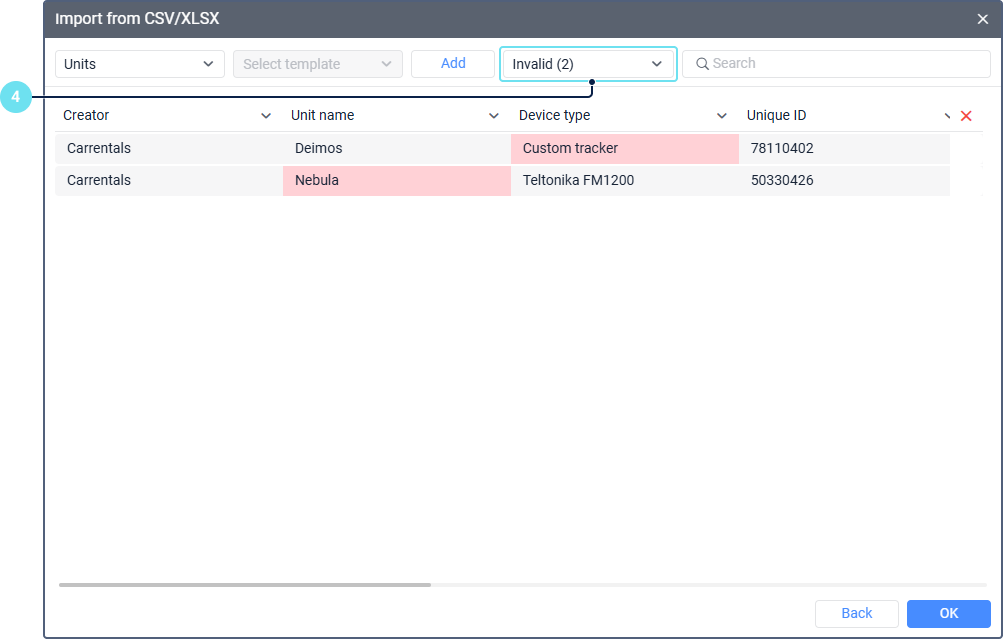
- Make sure the table shows valid data. To do this, select Invalid in the filter. If nothing is found by the filter, all rows are valid. If invalid data is found, edit it.
- If necessary, save the template so that you can immediately apply the same column order the next time you import data.
Unit import table
In the table for importing units, you can select the columns listed below. Here you can find their description and the requirements that must be met so that the data in these columns is considered valid.
Mandatory columns are marked with an asterisk (*).
| Column | Description | Requirements |
|---|---|---|
Creator* | The user on whose behalf the unit will be created in the system. After import, the unit will belong to the account of this user. | The user-creator must already exist in the system. It must not be a top-level user. The Can create objects option must be enabled in the properties of this user. In addition, the Units: Access service must be enabled for their account. |
Unit name* | The name under which the unit will be created in the system. | The name of the unit must be 4-50 characters long. |
Phone number | The phone number of the SIM card installed in the device. You can select this name for two columns to specify two phone numbers for one unit. | The phone number must start with + and consist of 7-16 digits. The phone number must not match the number of another unit in the table or in the system or the number of any driver in the system. |
Device type* | The type of the device installed on the unit. | The specified device type must be supported in the system. See the list of supported device types in the Hardware section of the Wialon website. |
Unique ID* | The unique ID of the unit. Read more about the unique ID here. | The unique ID must not be longer than 100 characters. |
Mileage | The value of the mileage counter. | Only whole numbers are allowed. In addition, the value must not be negative. |
Unit group | The name of the group to which the unit will belong after import. | The name of the unit group must consist of 4-50 characters. |
Custom field name | The name of the custom field that will be shown on the Custom Fields tab in the unit properties. You can select this heading for three columns. | No import requirements. |
Custom field value | The value of a custom field that will be shown on the Custom Fields tab in the unit properties. You can select this heading for three columns. | No import requirements. |
VIN | Not applicable. | This column can't be imported. |
Vehicle type | Not applicable. | This column can't be imported. |
| Registration plate | Not applicable. | This column can't be imported. |
Brand | Not applicable. | This column can't be imported. |
Model | Not applicable. | This column can't be imported. |
Year | Not applicable. | This column can't be imported. |
Searching and filtering data
You can search the data in the table and filter it by validity.
To find a specific item in the table, use the dynamic search. You can search for units by name. If the Unit name column is not selected in the table, the search is not available.
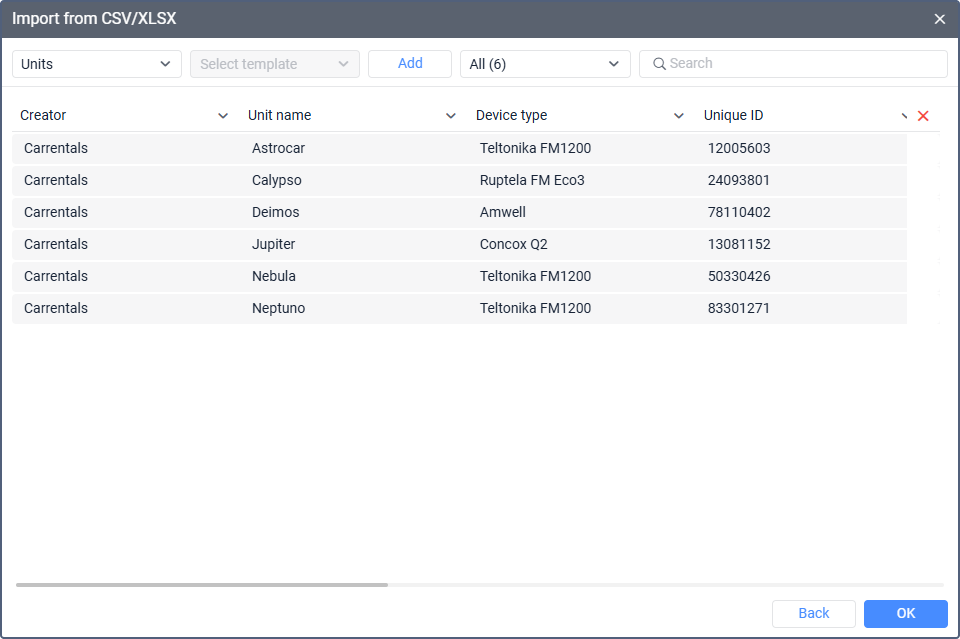
To the left of the search bar, there is a filter that allows you to choose which rows you want to see in the table: all, valid, or invalid. By default, all rows are shown. To the right of the All option, you can see the total number of rows in the table.
If a number other than zero is shown in brackets to the right of the Invalid option, select this option and edit the found rows. Otherwise, they will not be imported.
Editing data
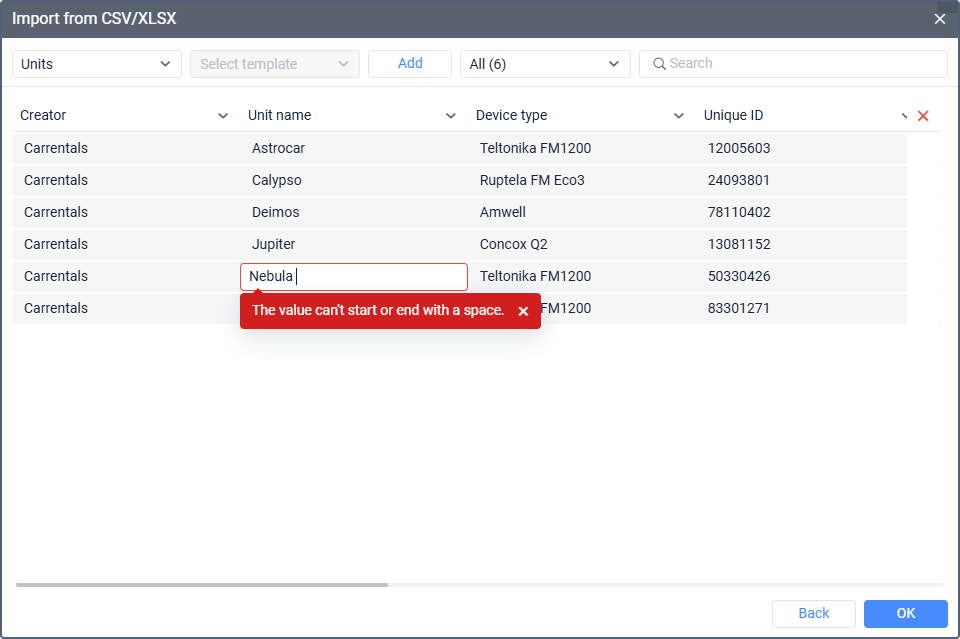
Cells with invalid data are highlighted in red color in the table. It is impossible to import items with such cells.
You can correct invalid data as follows:
-
Click on a red cell.

-
Read the tooltip to find out why the error occurred.
-
Enter the correct data.

-
Click outside the cell to save the changes.
When editing data in most columns, you must take into account special requirements. They are described in the Unit import table section.
Adding a template
Once you have selected the column headings, you can add a template, that is, save the order of the table columns. This is not a mandatory step, but it will save you time during your next import. Instead of selecting column headings manually, you will be able to select the template and the saved column order will be automatically applied to the table.
Adding a template is only available when all mandatory column headings are selected.
To add the template, follow the steps below.
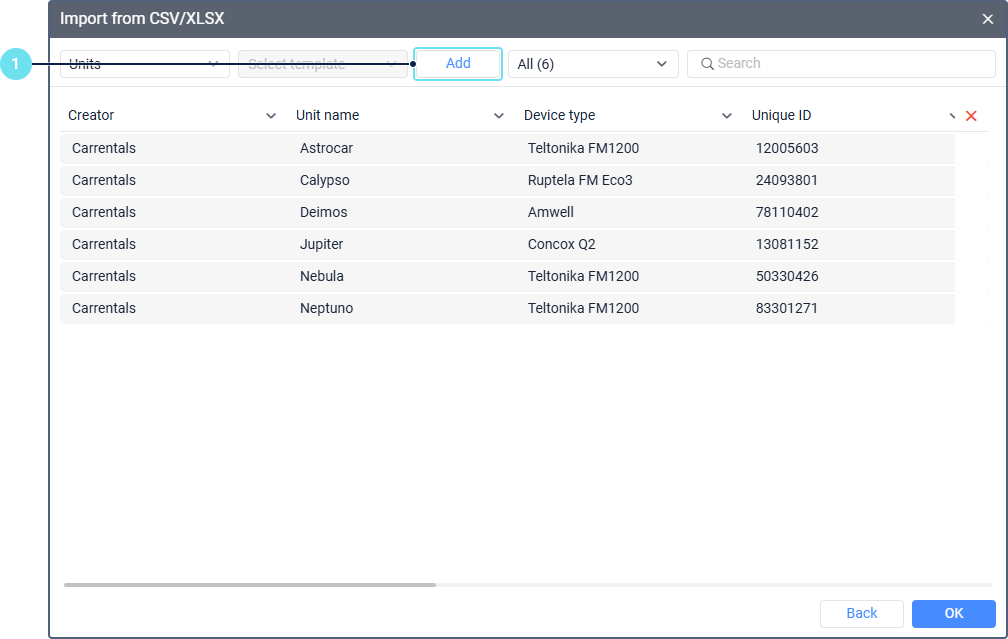
-
Click Add.
-
Specify the template name (max. 50 characters).
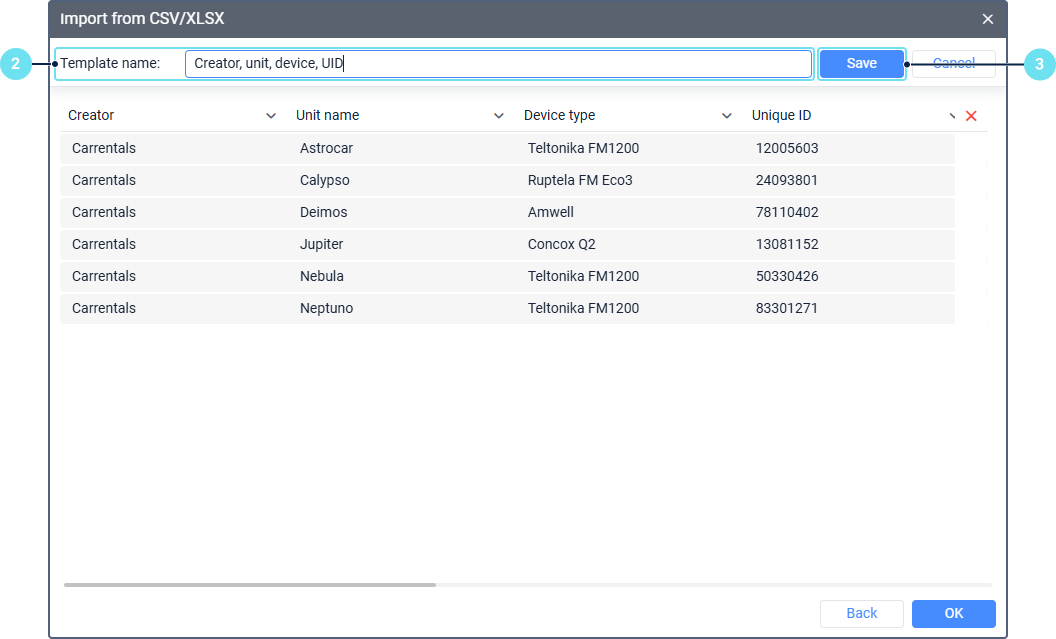
-
Click Save.
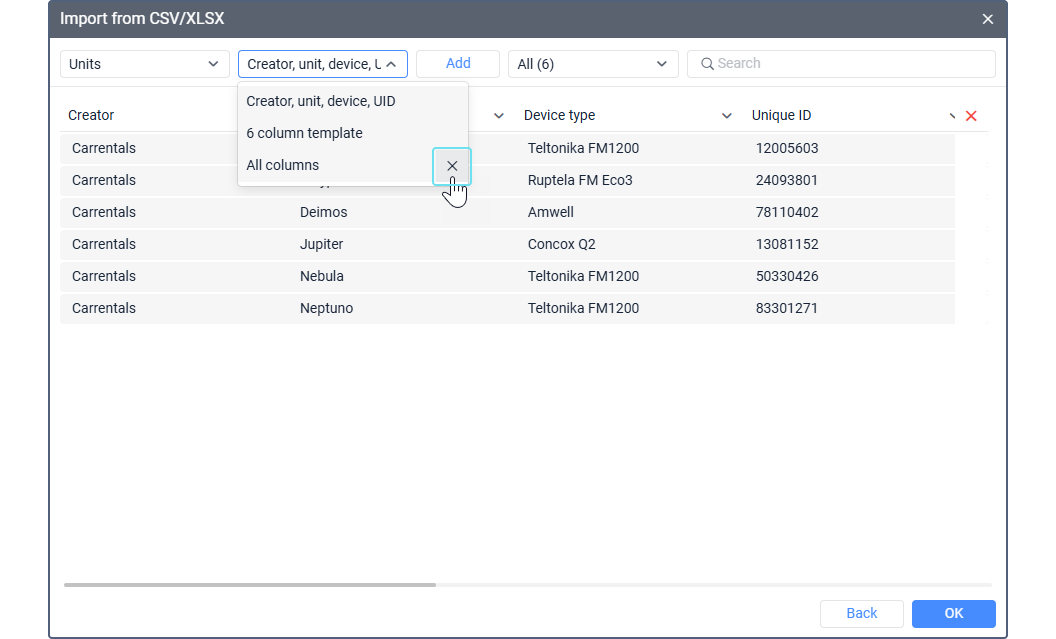
The added template is shown in the list of templates.
To delete a template, hover over its name in the list and click on the icon  .
.
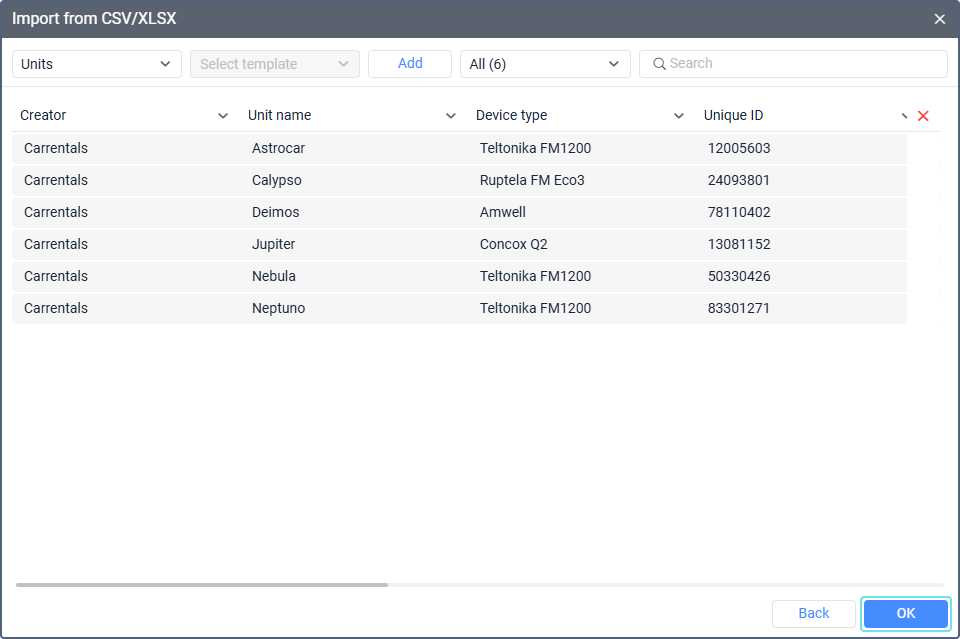
Completing the import and checking the results
To complete the import, click ОК.
Importing a large number of units may take some time.
If the import of at least one unit is successful, the pop-up message Import completed is shown. In the opposite case, you can see the message that the data couldn’t be imported. This message also contains a file with information about the errors that occurred. You can download it.
After import, units are saved in the account of the user specified as their creator.
You can see the imported units in the Units section of the management system and on the Units, Monitoring (if the Automatic addition of units to the work list feature is enabled) and other tabs of the monitoring sytem.