Settings
The following settings are available in this section:
These settings are universal for all the table types. However, individual parameters can be applied to some of them, which is described for each table separately.
Some tables have fields obligatory for submission. For instance, geofences should be marked in the Geofences table. The Settings tab of such tables and the required fields or blocks in it are marked with a red asterisk.
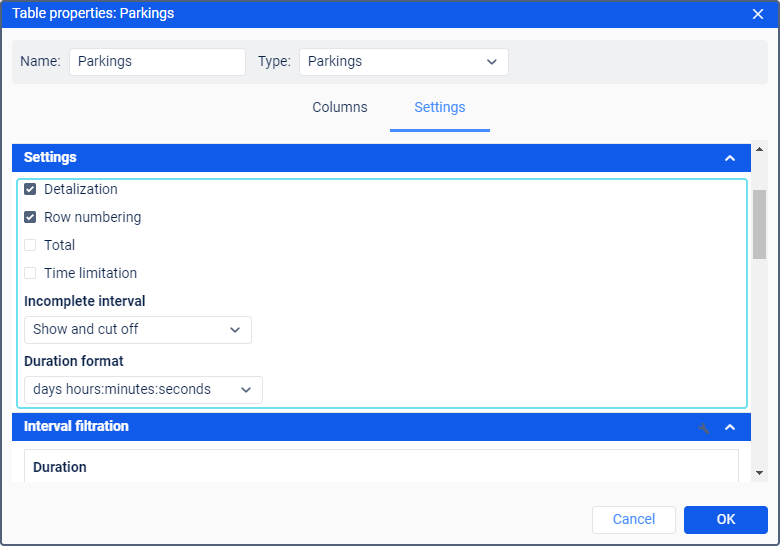
Detalization
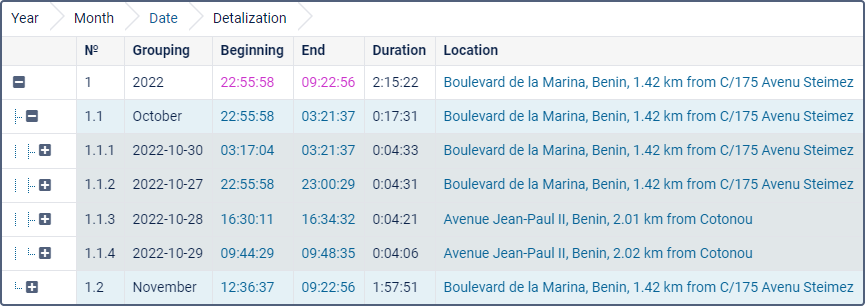
Reports with grouping can be extended using the detalization option. Detalization gives an opportunity to move to a final level of nesting (date and time). To view the final level of nesting, you can open (‘+’ at the beginning of the line) all the previous levels one-by-one, or click on the corresponding level of nesting.
We can add detalization in the report (check the corresponding box in the table parameters), suggested below as an example of grouping and sorting use.
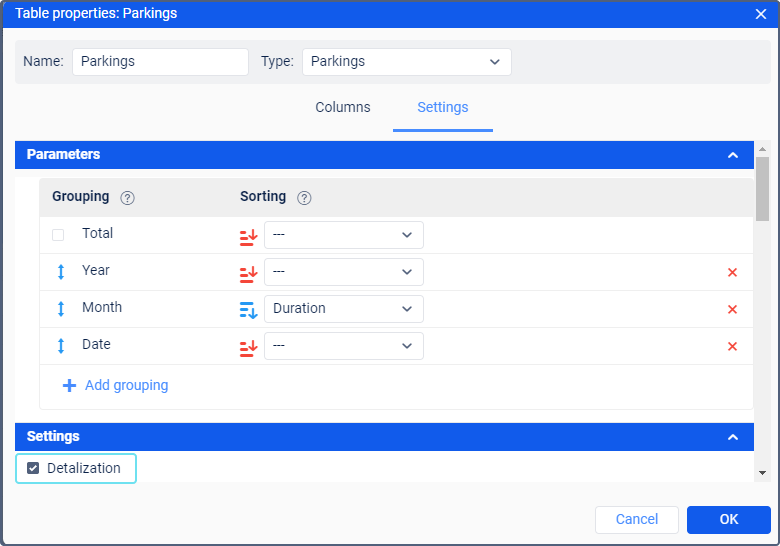
Since in this example we already have grouping by years, months and dates, the detalization will allow us to expand the level of nesting right before the time of the event (hours, minutes, seconds).
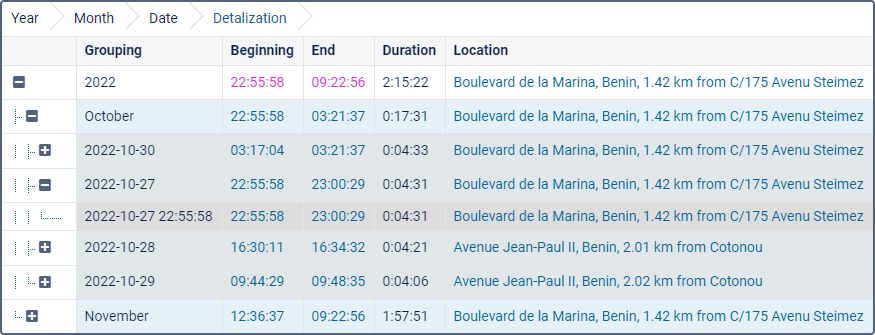
It should be noted that sorting is applied to the nested level. Since the detalization is the final level of nesting, you can also set the sorting for detalization in the list of groupings in a similar way.
The detalization function is applied only to the grouped tables, not the detailed ones. The exception is the reports on groups of units, as the grouping by units is provided in them by default.
Row numbering
Numbering is an additional (always the first) column and can be added to the table of any type.
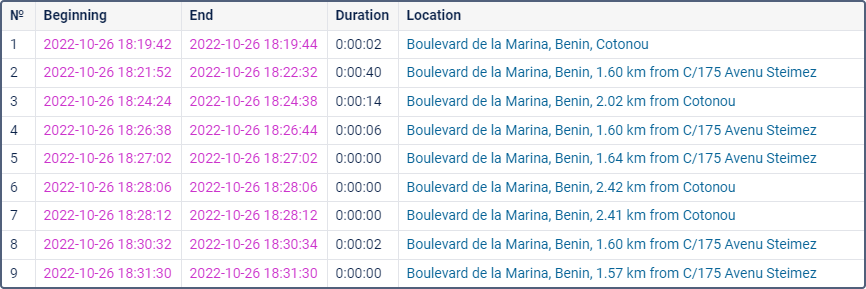
If grouping is used in the table, numbering becomes multilevel. The main level is the numbering of the main lines with the help of integers. The nested level is the numbering of hidden lines according to the number of the main line — point — number of the nested line scheme.
Total
This option allows you to add the last line that contains the resulting data: the total duration of a certain state, the total number of registered events, the maximum, minimum, or average arithmetic value, and so on.
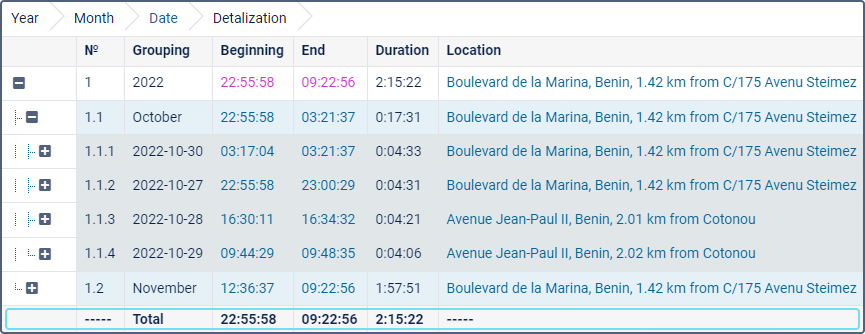
In online reports, the Total line is always at the bottom of the window, regardless of the number of pages in the table and the position of the scrollbar.
The Total line does not display information for fields with text or another type of data which cannot be summarised. The information for the data on location is not displayed either, except for the information about the initial and final location in reports on units. For the initial location, the one that was detected first at the report interval is displayed; for the final location, the one that was detected last.
Time limitation
This function allows indicating which time intervals, days of the week, days, months must be included in the report. For instance, if you check only the working days of the week and working hours or only odd days of the month, etc., only they will be included in the report.
There are two time-limiting algorithms, which depend on the Cut off intervals options.
If the option is not activated, then the state (for example, the parking) that started within the specified interval, but ended beyond its limits, does not terminate. As a result, its duration is fully included in the report.
If the option is activated, then the state (for example, the parking) that started inside the interval, but ended beyond its limits, terminates. As a result, the report includes only its duration within the specified interval, and the rest is ‘cut off’.
Example
The interval from 9:00 to 18:00 is selected as the time limitation interval. Two parkings were registered: the first - from 7:50 to 12:00, the second - from 13:00 to 18:20.
According to the first algorithm (the Cut off intervals option is not activated), only the parking that started within the time limitation interval will be included in the report as a whole. That is, in the report, we get one parking lasting from 13:00 to 18:20.
According to the second algorithm (the option the Cut off intervals option is activated), the report will include two parkings that are on the specified interval - from 9:00 to 12:00 and from 13:00 to 18:00.
To apply a limit equal to the whole day, you need to set the interval from 00:01 to 23:59.
Incomplete interval
The Incomplete interval option does not apply to all intervals of the table, but only the last, since its ending does not always coincide with the end of the reporting period. To display this interval, the following options are provided.
| Option | Result |
|---|---|
| Show and cut off | The interval is displayed in the report and in the ending column has the time of the last message for the reporting period. |
| Do not show in report | The incomplete interval is not displayed in the report. |
| Show and mark as incomplete | The interval is displayed in the report and has the Unknown label in the ending column. |
Duration format
In tables where the duration is encountered, you can select the format for displaying it. The following options are available.
| Option | Result |
|---|---|
| days hours:minutes:seconds | When displayed in the report, it is displayed as follows: 5 days 12:34:56. |
| hours:minutes:seconds | In the report, the duration is displayed as follows: 132:34:56, that is, the hours are not combined in days (if there are more than 24). The option affects not only the cells but also the Total row. |
| hours (with two decimal places) | The duration in the report is displayed as 3.45 instead of 3:27. |