Creating Resources
Resources can be created only in the management system in one of two ways:
- automatically when creating a new account (see more);
- manually using the Create resource button.
The second way is designed for creating additional resources without new accounts. This allows you to place different micro-objects in different resources and configure the required access rights to them. Access to the resource is applied to all micro-objects stored in it.
In order for the user to create resources:
- the Can create objects option should be enabled in the user properties;
- the Resources service should be enabled in the properties of the account in which you want to create a resource.
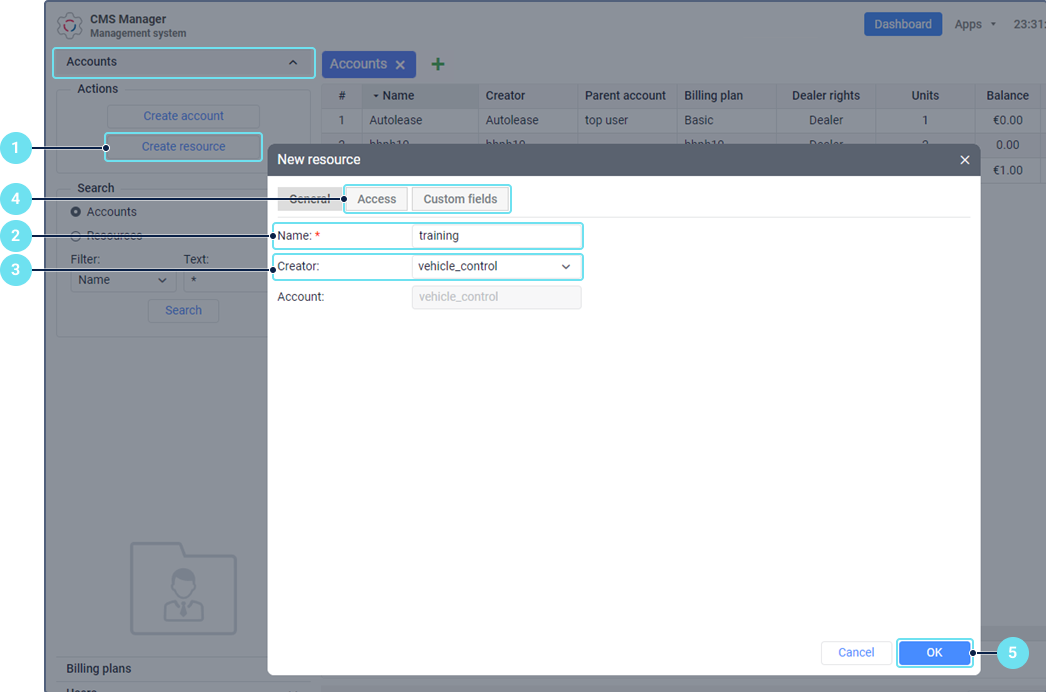
To create a resource, follow the steps below.

- Click on the Create resource button in the Accounts section.
- Specify the name of the resource (4–50 characters). It should be unique in the system. When filling in this field, consider the input rules.
- Select the creator of the resource. After saving the resource, you cannot change this property. The creator of the resource has all access rights to it.
In the Account field, the account to which the selected creator belongs is indicated automatically. Thus, the created resource will belong to this account as well.
- If necessary, configure the Access and Custom fields tabs.
- Click ОК.
By default, the measurement system applied to the resource is the same as the one specified for its creator. If necessary, you can change it using conversion.
To see the created resource in the list, activate the Resources switch in the Search block and click on the Search button.