Unit Groups
You can add the created units to groups. They allow you to group units according to certain criteria. In addition, you can use groups to grant access rights to several units at once. To do this, the creator of the group should have access rights to all the units added to it.
To change the number of units added to a group, you should have the Edit ACL-propagated objects access right to it.
Creating groups
To create a unit group, follow these steps:

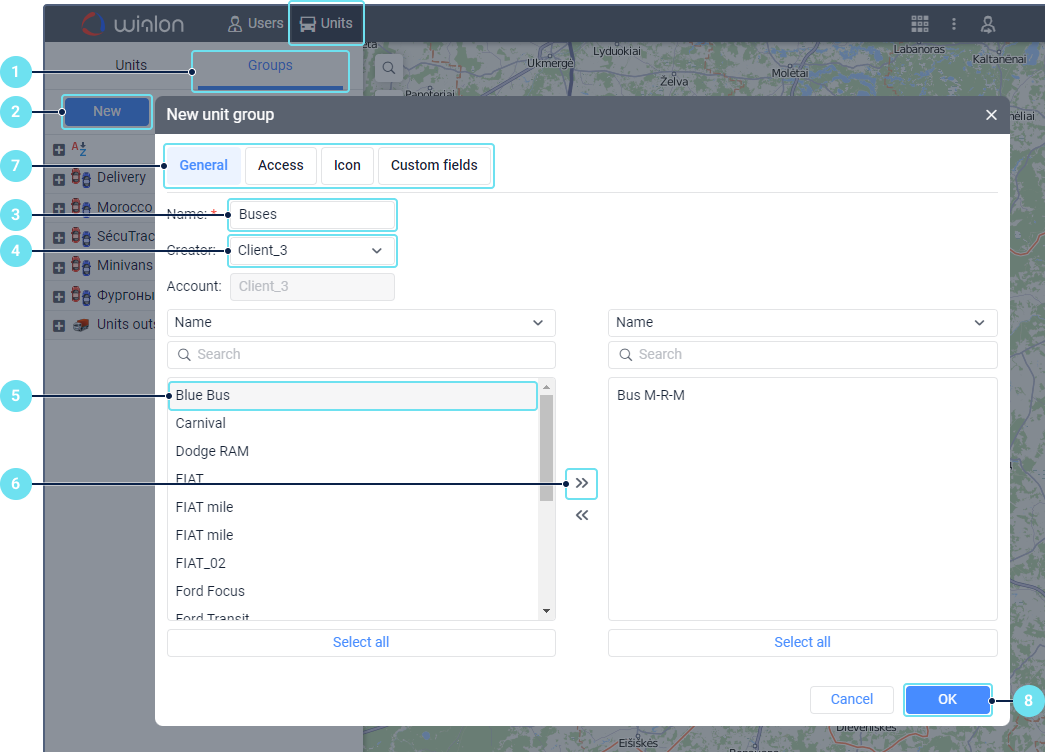
- Switch to the Groups mode on the Units tab.
- Click on the New button.
- Specify the group name.
- If necessary, select the creator of the group in the drop-down list.
- In the left list, select units you want to add to the group. To quickly search for them, use the dynamic filter above the list.
- Move the selected units from the left list to the right one using the icon
 or by double-clicking them.
 - If necessary, configure the Access, Icon, and Custom fields tabs.
- Click OK.
The created group is automatically added to the list of all unit groups and to the work list on the Monitoring tab (the group view) in the account to which it belongs. To search for groups, you can use the dynamic filter.
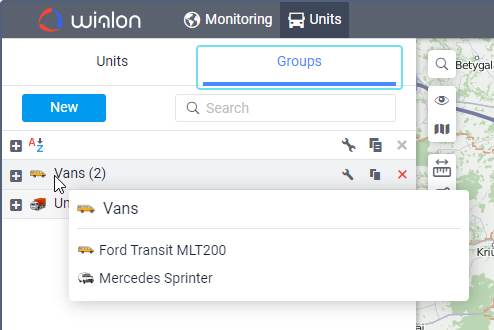
To the right of the name of each group, you can see the number of units added to it. To open their list, click on the icon  to the left of the required group or point to its line.

Units which are not included in any of the created groups are listed in the Units outside groups group.
Actions with groups
When working with a list of unit groups, the following actions are available:
| Icon | Description |
|---|---|
/ | Sort all groups in direct or reverse alphabetical order. |
/ | Show/Hide a list of all the units added to the group. |
| Open the group properties. | |
Create a new group with the same properties. A click on the icon opens the window for creating a new group where you can make changes and save them. | |
Delete the group. Deleting the group does not delete all the units added to it. |
Using groups
You can use unit groups on the Monitoring tab, in reports, jobs, and notifications.
The “Monitoring” tab
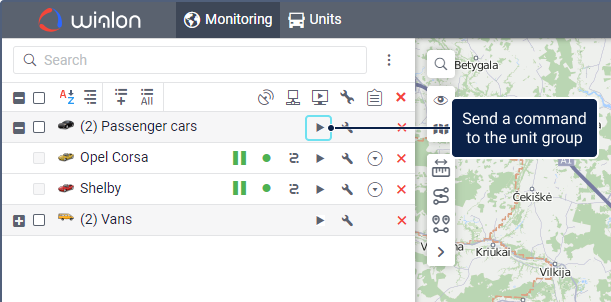
Depending on the options enabled on the Monitoring tab, you can switch to the group view and see the parameters of all the units added to the group (for example, data recency, connection state, etc.) and send a command to all of them at once.

If you select a group in the list, the location of all its units which are online is displayed on the map.
Reports
You can execute an advanced report of the Unit group type. In the report, you can also see the tracks or markers of all the units of the group on the map. To do this, go to the report settings, enable the Trip tracks option in the Map output section, and select the required markers in the Markers section.
Jobs and notifications
When creating jobs or notifications, you can select one or more unit groups for them.
In addition, the Add or remove units from groups notification action is available. The action allows you to add or remove the units from the indicated groups automatically when the notification is triggered.
Read about other possibilities of working with notifications for unit groups in the expert article.