Tables
You can add any number of tables to a report template, including tables of the same type. To add a new table, open the Contents tab in the properties of the required report template and click on the New table button.
In the table properties, specify its name and type and select the columns you want to include in it. If necessary, add custom columns and configure additional settings.
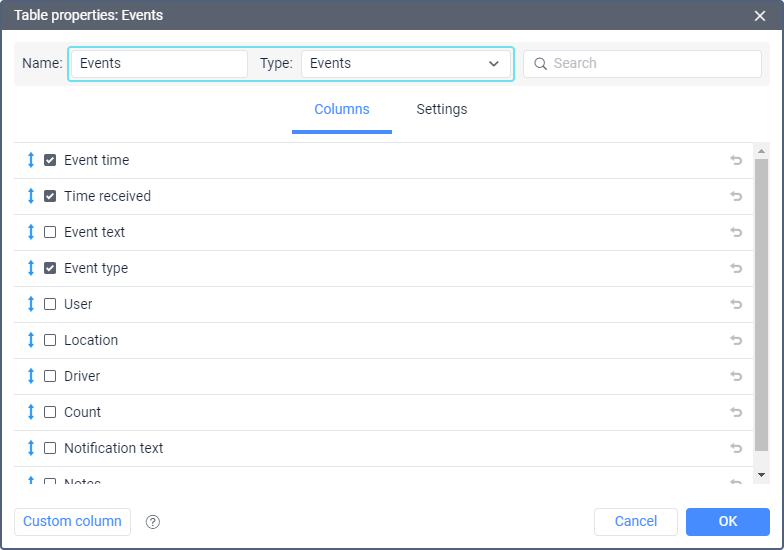
Selecting columns
The set of available columns depends on the selected table type. To add a column to the table, check the box to the left of its name. To add all columns at once, hold down Ctrl and mark any column which is not selected. You can cancel the selection of all columns in the same way. To quickly search for columns, use the dynamic filter in the upper-right corner.
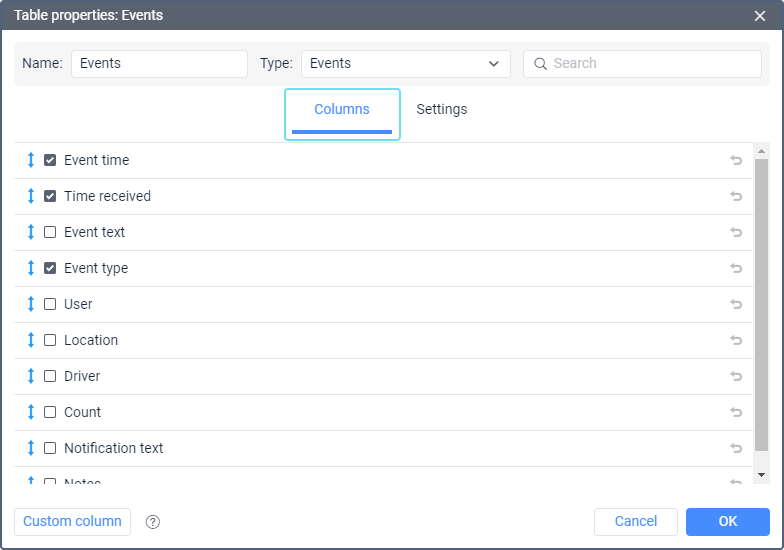
To edit the name of a column, click on it with the left mouse button. To use the default name of the column, click on the icon  in its line. The icon is inactive is the default name is used.
If necessary, you can change the sequence of columns in the table. To do this, click on the icon  to the left of a column and drag it to the required place while holding down the left mouse button.
Setting grouping values
When configuring unit report tables such as Engine hours, Fuel fillings and battery charges, Fuel drains, Sensor tracing, Events, Speedings, Parkings, Stops, Trips as well as the Units table in reports on geofences, you can select a grouping value for most columns. It determines how the data of the column is aggregated and displayed in the grouping and Total rows.
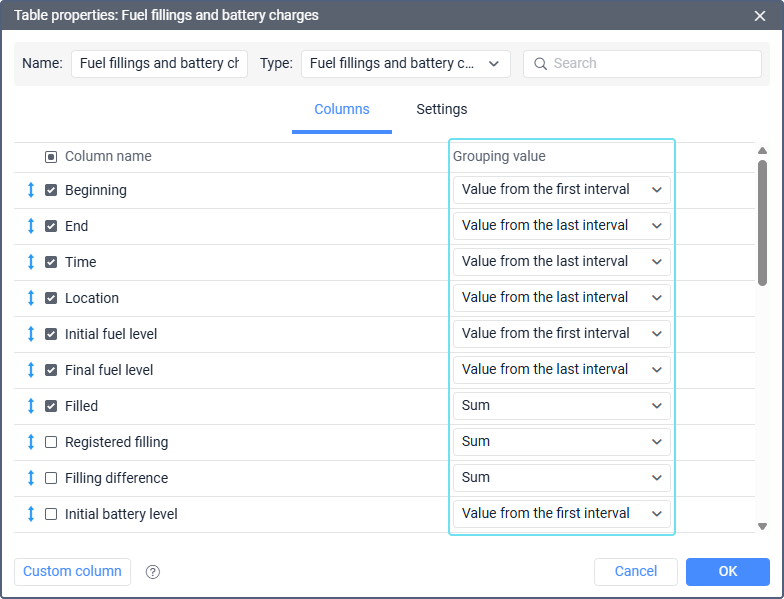
Depending on the column type, the following grouping values are available:
| Grouping value | Description |
|---|---|
| Sum | Calculates the sum of all values in the group. Available only for numeric columns. |
| Average | Calculates the average of all values in the group. Available only for numeric columns. |
| Min. | Displays the smallest value in the group. Sensor errors and empty values (—) are ignored. Available only for numeric columns. |
| Max. | Displays the largest value in the group. Available only for numeric columns. |
| Value from the first interval | Displays the value from the first interval in the group. |
| Value from the last interval | Displays the value from the last interval in the group. |
| Time from the first to the last interval | Displays the time from the first to the last interval in the group. |
| Formula-based calculation | Calculates the value using the formula of the custom column, applied to the values of the grouping or Total row. Available only for custom columns, where it’s selected by default. Example. A custom column with the formula C5/C7*const100 calculates the fuel consumption per 100 km, where C5 is the Fuel consumed column and C7 is the Mileage column. If the grouping row shows 40 l and 500 km for these columns, the custom column shows 8 l (40 / 500 * 100). |
| Do not calculate | Displays a dash (—) in the grouping row. No calculation is performed. |
Adding custom columns
You can add custom columns to all the tables except for Images and Video. They are used to calculate values on the basis of data from other columns, unit parameters, the report interval, and so on. Custom columns can also display text values such as the unique ID, profile properties of the unit, and text values of custom fields.
To add a custom column to the table, follow the steps below.
-
On the Columns tab of the table properties, click on the Custom column button.
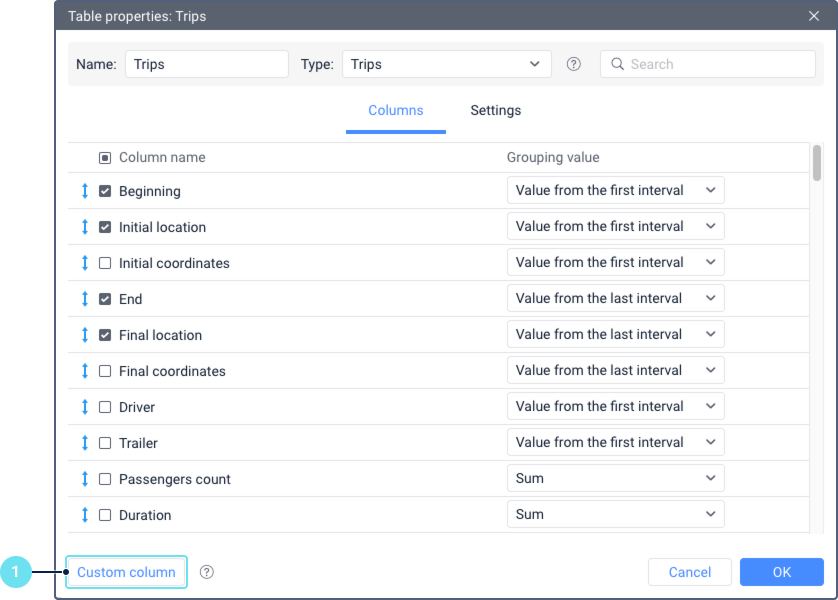
-
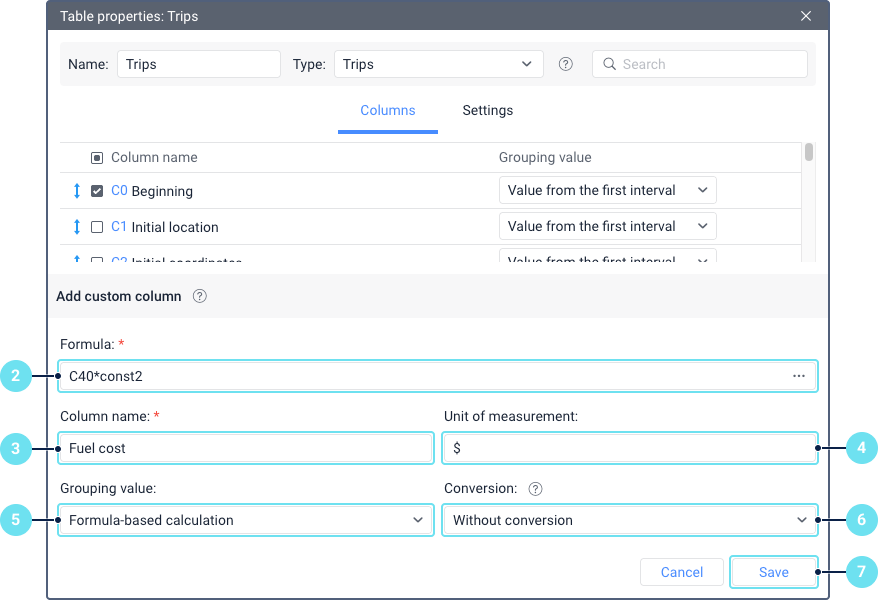
Specify the formula for calculating the column value. See the description of the available formula components.
-
Specify the name of the custom column.
-
Indicate the unit of measurement (up to 10 characters).
-
If the table supports grouping values, select the one you need for the column. By default, the Formula-based calculation value is used. See Grouping value for custom columns.
-
If you use the custom column to calculate duration, select how it should be displayed in the Conversion drop-down list. See the available conversion options.
-
Click Save.
If necessary, you can change the position of the created column and edit it.
Formula components
You can use the following components in the formula:
| Component | Description |
|---|---|
| Indexes of other columns | Column indexes are shown to the left of column names after clicking on the Custom column button and don’t change regardless of the column position in the list. Indexes are indicated in the CN format, for example, C0, C1, C24, and so on. To add an index to the formula, click on it in the list or enter it manually.Next to the indexes of some columns (see below), you can specify the name of a sensor so that its readings are used when calculating the column value. Indicate the sensor name in parentheses after the index. For example, to calculate the value of the column with index C44 using the readings of the sensor named FLS1, type C44(FLS1) in the formula. If the sensor name contains a closing parenthesis, replace it with a question mark. For example, to calculate the value of the column with index C54 using the readings of the sensor named (FLS2), type C54((FLS2?) in the formula. Instead of the sensor name, you can use its mask.Specifying the sensor name works only with the indexes of the following columns:
Duration values (engine hours, trip duration, and so on) are calculated in seconds. To convert them to hours in formulas, divide by 3600 using |
| Unit parameters | You can add the following unit parameters to the formula:
To add a parameter to the formula, enter its key or select it from the menu which opens after clicking on the three-dot icon. You can’t use the unique ID together with other components in the formula. Otherwise, a dash is displayed in the custom column in the report. |
| Unit profile properties | The profile properties of the unit are added to the formula in the profile_field(key) format. You can select them from the menu which opens after clicking on the three-dot icon in the Formula field. In addition to the properties from the Profile tab, you can also find the Unit type property here.If a profile property contains a text value, you can’t use it together with other components in the formula. Otherwise, a dash is displayed in the custom column in the report. |
| Data on the report interval | You can use the following data on the report interval in the formula:
To add this data to the formula, enter the required key or select it from the menu which opens after clicking on the three-dot icon. |
| Custom fields | Custom columns in reports can display data from general and administrative custom fields that are defined in the properties of system objects such as units, users, and drivers. Access rights The following access rights are required:
Functions for adding fields Depending on the type of field you want to display, use one of the following functions in the Formula field:
Formula input rules
Supported report types General custom fields are displayed in reports on units, drivers, trailers, passengers, users and their groups. Administrative custom fields are displayed in reports on units, unit groups and users. |
| Previous row value | The formula can contain a value from the previous row of any column formatted as #CN, where CN is the column index. |
| Constant values | You can use constant values formatted as constN where N stands for any number. For example, const-1.5, const10, and so on. |
| Mathematical operations | The following mathematical operations are allowed:
|
| Parentheses of priority | Parentheses are used to indicate the priority of an operation. For example, in the formula (C44+C54)/const2, the parentheses indicate that addition should be performed before division. |
Formula example: (C1+C2+C7)*const1.5/rcoef
Conversion of duration values
If the custom column calculates duration, you can select one of the following options in the Conversion drop-down list:
| Option | Description |
|---|---|
| Without conversion | Duration is displayed in seconds. |
| Duration format | The Duration format option from the table settings is used. If there is no such option, the result is displayed in the hours:minutes:seconds format. |
| Date and time format | The date and time format indicated in the user settings is used. |
If the value can’t be converted to the selected format, a dash is displayed in the custom column.
Grouping value for custom columns
If you add a custom column to unit report tables such as Engine hours, Fuel fillings and battery charges, Fuel drains, Sensor tracing, Events, Speedings, Parkings, Stops, Trips and to the Units table in reports on geofences, you can select a grouping value for the custom column. By default, the Formula-based calculation value is used. The value of the custom column in the grouping and Total rows is calculated in accordance with the selected grouping value. With the Formula-based calculation value, the result is calculated in the same way as for other rows of the column, that is, according to the specified formula.
In the tables where grouping values aren’t available, the value of the custom column in the Total row is always calculated according to the specified formula.
Editing custom columns
The created custom column automatically goes to the top of the list. However, you can change its position by dragging if necessary. Such columns are highlighted in blue and don’t have an index.
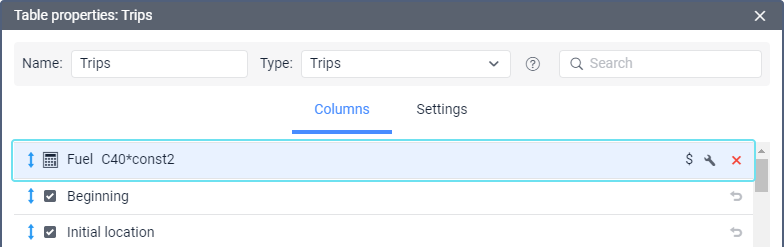
To edit the created column, click on the icon  , column name, formula, or unit of measurement, make the necessary changes and save them.
Table settings
For each table, in addition to selecting columns, there are additional settings, located in the same-name tab.
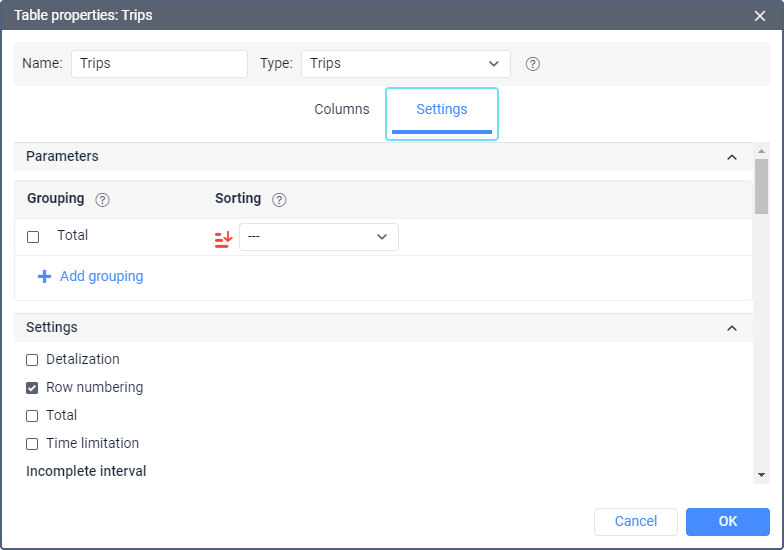
The tab is divided into three sections: