Units
A unit is a tracked vehicle, machinery (including stationary), person, or animal.
You can work with units in the monitoring system (the Units tab) and in the management system (the Units section).
The process of creating and configuring units is described in detail in this section of the documentation.
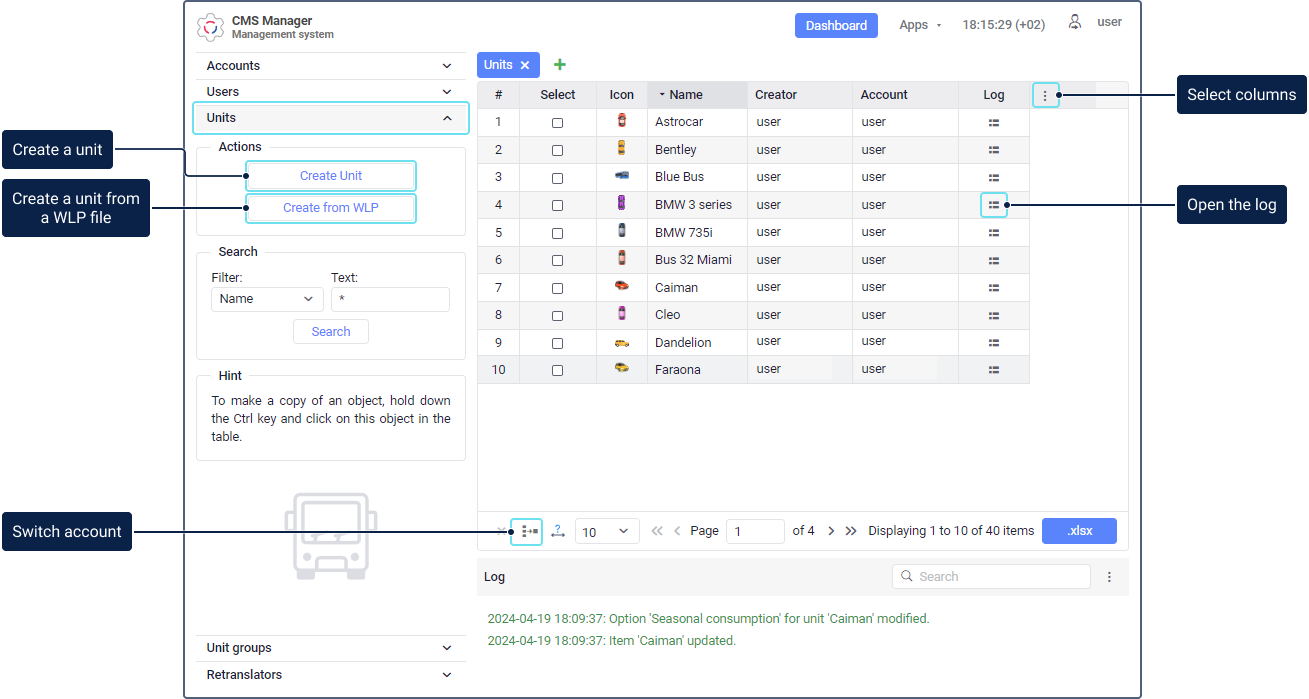
The table of the Units section contains all the created units which you can track in the monitoring system. It also shows deactivated units which are unavailable to users in the monitoring system. To quickly find units, use the dynamic filter.
In this section, you can perform the following actions with units: create, deactivate, transfer them from one account to another, etc.

Selecting columns
To select columns with additional information about units, click on the icon  in the table header. In the menu, the following columns are available:
| Column | Description |
|---|---|
| # | The sequence number of the unit in the table. |
| Select | The selection of the unit in the table. |
| Icon | The unit icon selected on the same-name tab of the unit properties. |
| Name | The unit name specified in the general properties of the unit. |
| Creator | The user on whose behalf the unit was created. |
| Account | The account to which the unit belongs. |
| Device type | The device type specified in the general properties of the unit. |
| Deactivation | The date and time of the unit deactivation in the system. They are displayed only in the lines of deactivated units. |
| Created | The date and time of the unit creation in the system. |
| Imported | The date and time of importing units into the system. It is shown only for units imported from CSV and XLSX files. The date and time of import of units may differ from the date and time of their creation in the system. |
| UID | The identification number of the device in the system, which is specified in the general properties of the unit. |
| Phone | The phone number of the SIM card installed on the device. Specified in the general properties of the unit. |
| Last message time | The information about the time of receiving the last message from the unit. |
| Groups | The groups to which the unit was added. |
| Custom fields | The custom fields created on the same-name tab of the unit properties. |
| Log | The icon which allows you to open the log of the unit. |
Actions with units
You can perform standard actions with units:
- create (the Create unit button);
- copy;
- view/edit properties;
- delete.
After clicking on the icon  , specify the reason for deleting the unit. If you select Lack of functions or Another reason, you should fill in the field with additional information (max. 256 characters). The information entered will be available to the user of the top account in the trash (the Unit deletion reason column in the table).
In addition, the following actions are available:
| Action | Description |
|---|---|
| Create a unit from a WLP file | To do this, click on the Create from WLP button, upload the file, select the required parameters, and click Next. For details, see the Creating a unit from a WLP file section. |
| Deactivate/Activate units | To do this, click on the Unit deactivation button, move units from the left list to the right one, and click OK. To activate units, move them from the right list to the left one and save the changes. The action is available only for top accounts and accounts with dealer rights for which the billing plan with charges for each unit is used. For details, see the Unit deactivation page. |
| Transfer units to another account | To do this, click on the icon (Switch account), move units from the left list to the right one, select the account in the drop-down list, and click OK. For details, see the Transferring units from one account to another page. |