Streamax AD PLUS 2.0: Configuration for use in Wialon
This guide describes how to configure the Streamax AD PLUS 2.0 device for use in Wialon.
You can request a Wialon trial account here.
Quick setup
The process of configuring the device consists of the following stages:
- connecting to the device;
- setting up the server;
- setting up Wi-Fi;
- setting up the cellular network;
- specifying video recording settings.
Read more about each stage below.
Connecting to the device
-
Enable the device Wi-Fi in access point mode: after powering on, the Wi-Fi access point will be available within 3 minutes. Alternatively, double-press the front panel button to activate access point mode.
-
Enable Wi-Fi on your mobile phone.
-
Open the Veyes app.
-
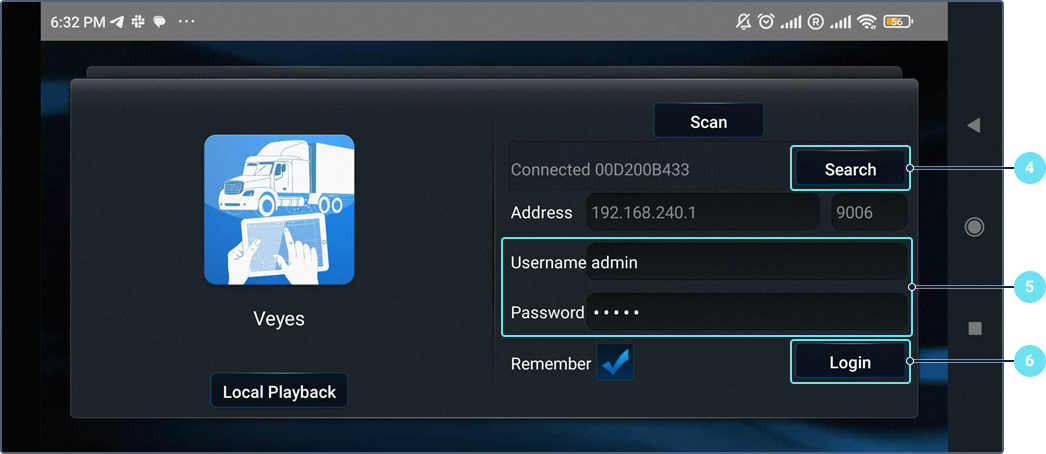
Tap Search to find the Wi-Fi hotspot. Initially, the hotspot name is the device serial number (specified on the device label) or the license plate number if it was configured previously.
-
Enter the username and password on the login screen. The default credentials are admin for both the username and password.
-
Tap Login.
Setting up the server
-
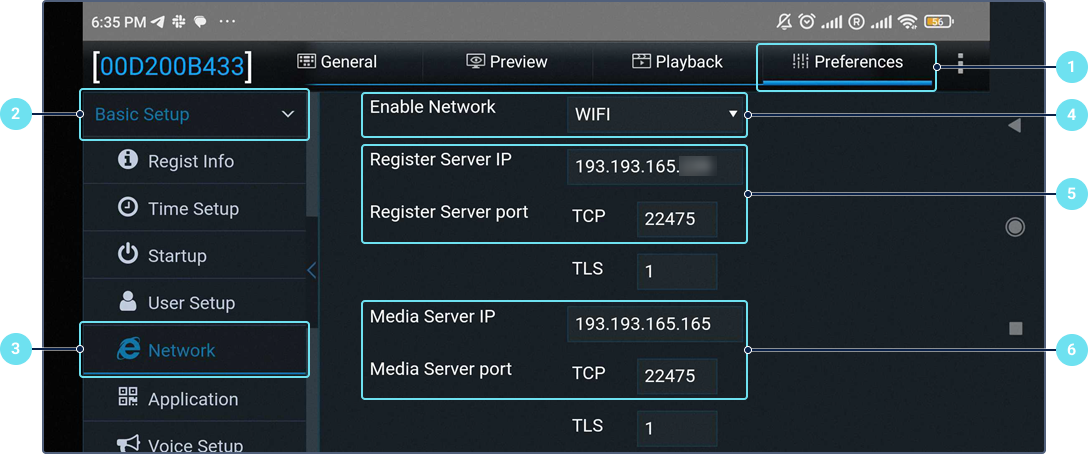
Open the Preferences tab.
-
Expand the Basic setup section.
-
Select Network.
-
On the Server setup tab, fill in the Register server IP and Register server port fields. For the port, specify 22475. You can find the required IP address and port in the unit properties.
-
In the Enable network field, select one of the available network types: local, Wi-Fi, communication module, or adaptive. For this guide, the Wi-Fi network type is used.
-
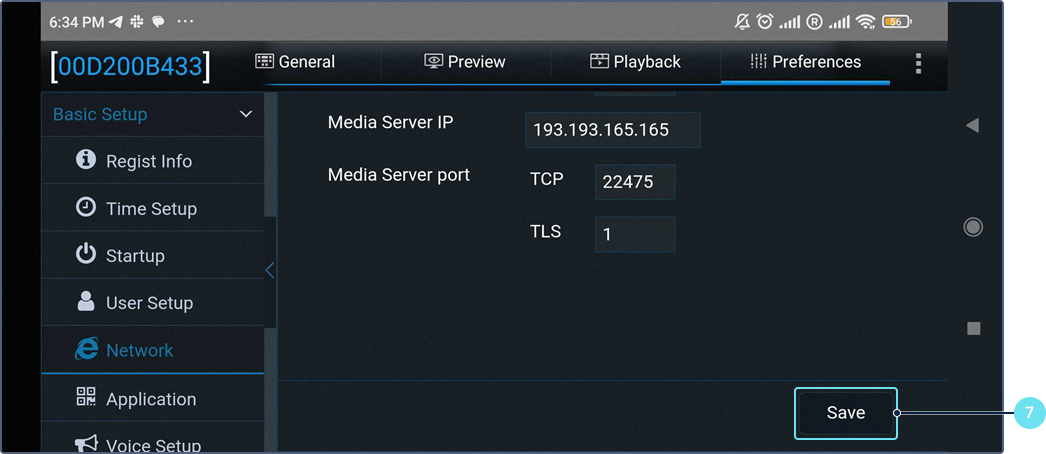
Set the Media server IP and Media server port fields to the same values as the Register server IP and Register server port fields.
-
Tap Save.
Setting up Wi-Fi
-
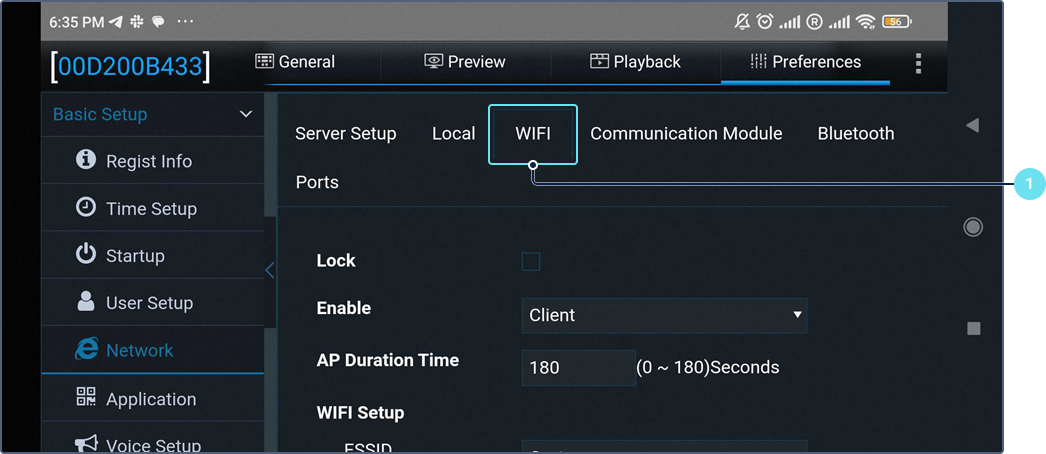
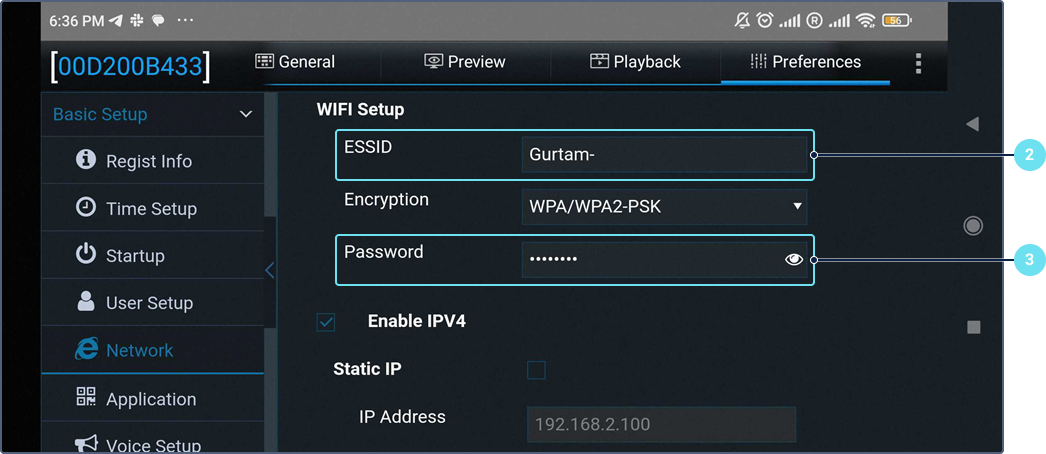
Go to the WIFI tab.
-
Enter the Wi-Fi point name in the ESSID field.
-
Enter the password in the Password field.
-
Tap Save.
Setting up the cellular network
-
Go to the Communication module tab.
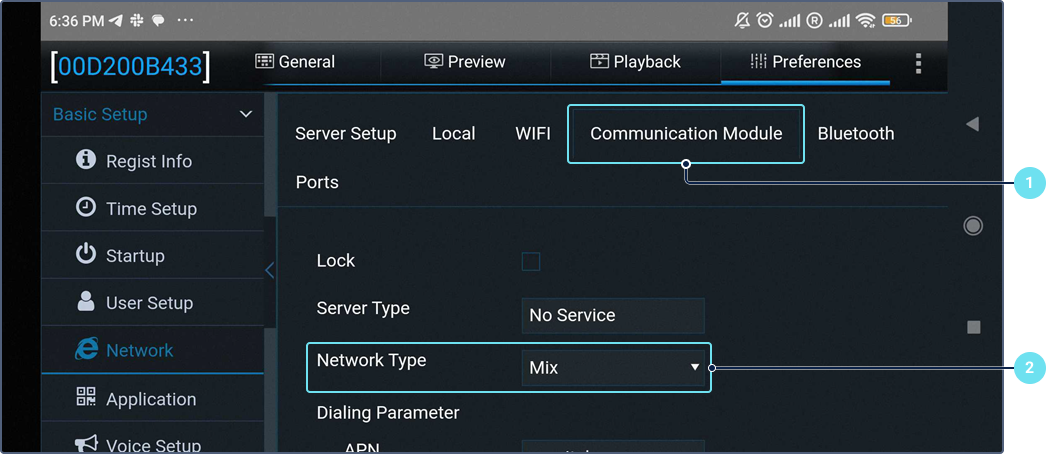
After inserting the SIM card, the server type is displayed automatically.
-
Select the network type as required. The available types are 2G, 3G, 4G, Mix.
-
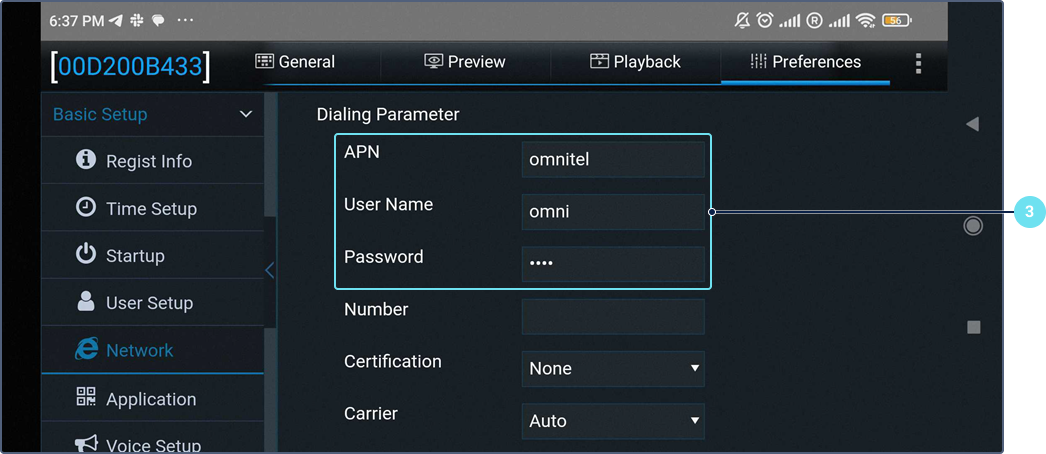
Specify the APN settings, including the APN, username, and password as provided by your mobile operator.
-
Tap Save.
Specifying video recording settings
To configure the recording mode, recording parameters and audio parameters, follow the steps below.
-
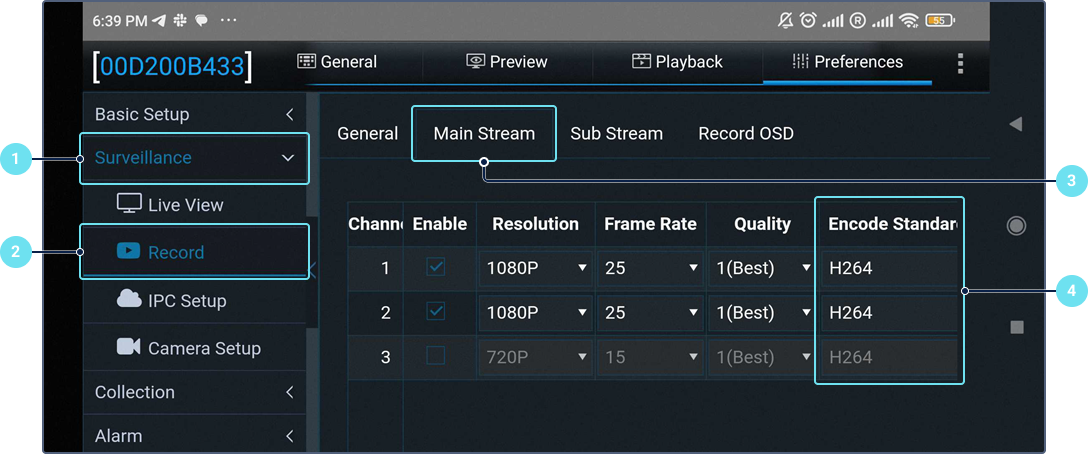
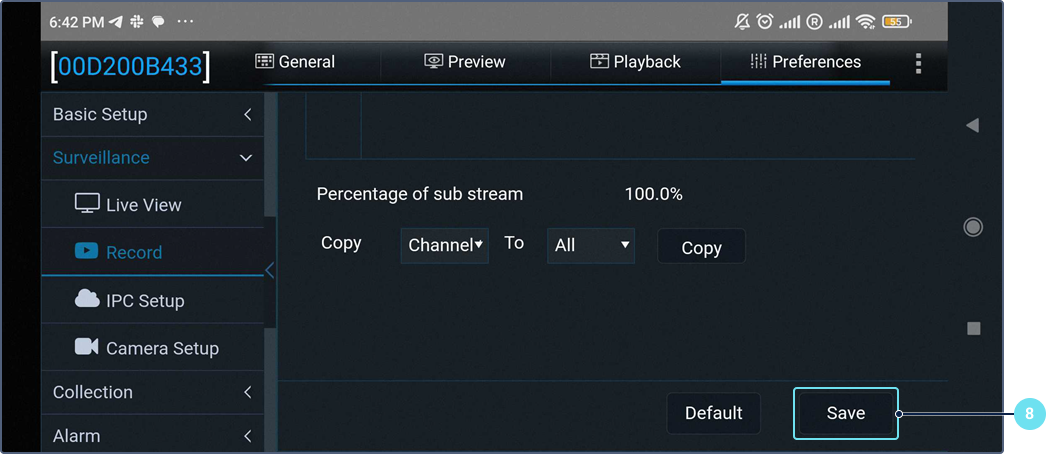
Expand the Surveillance section.
-
Select Record.
-
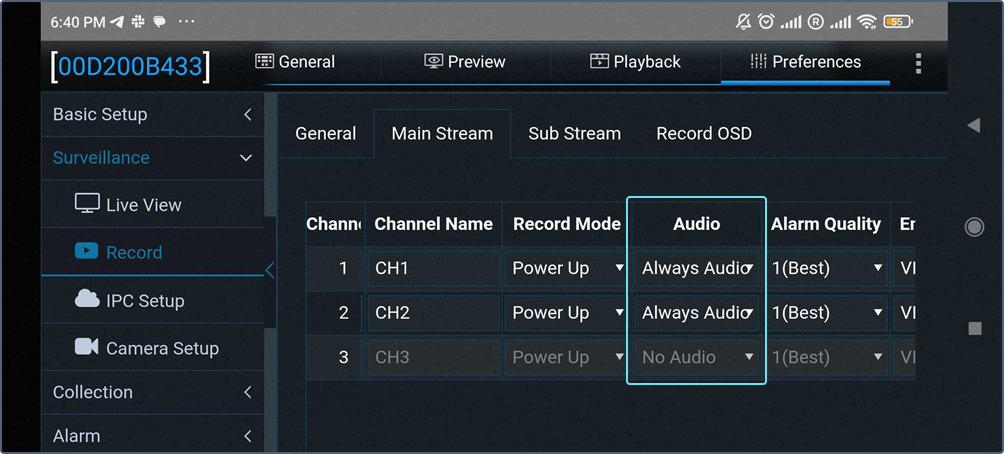
On the Main stream tab, configure video quality settings for the main stream. Audio options include Always audio and No audio, with Always audio as the default.
-
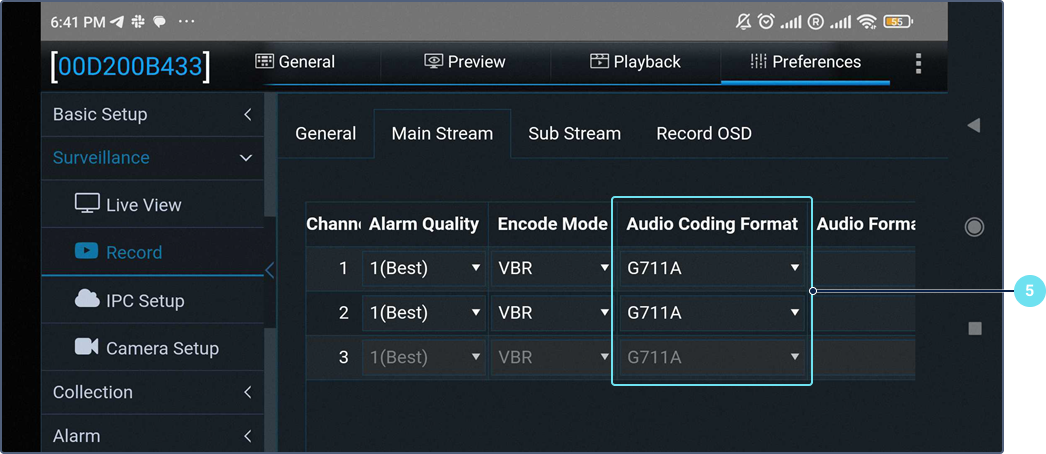
Set the audio coding format to G711A.
-
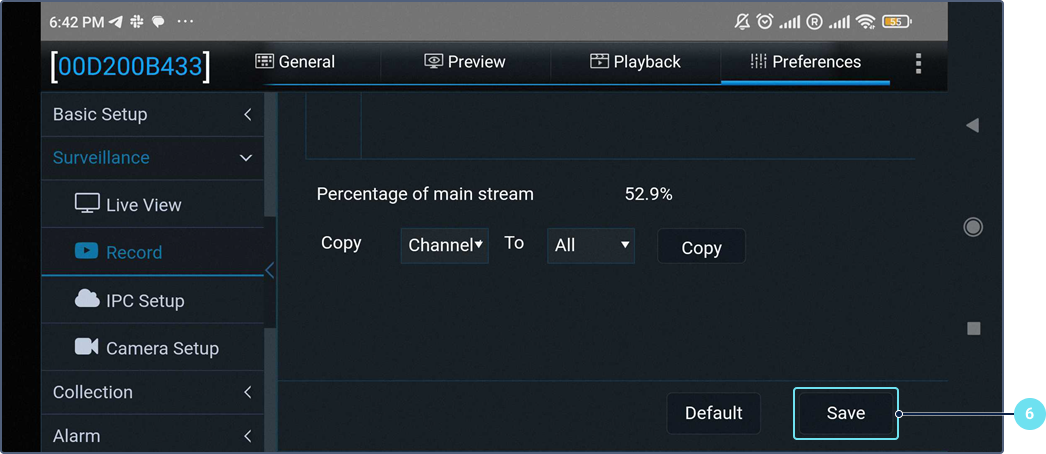
Tap Save.
-
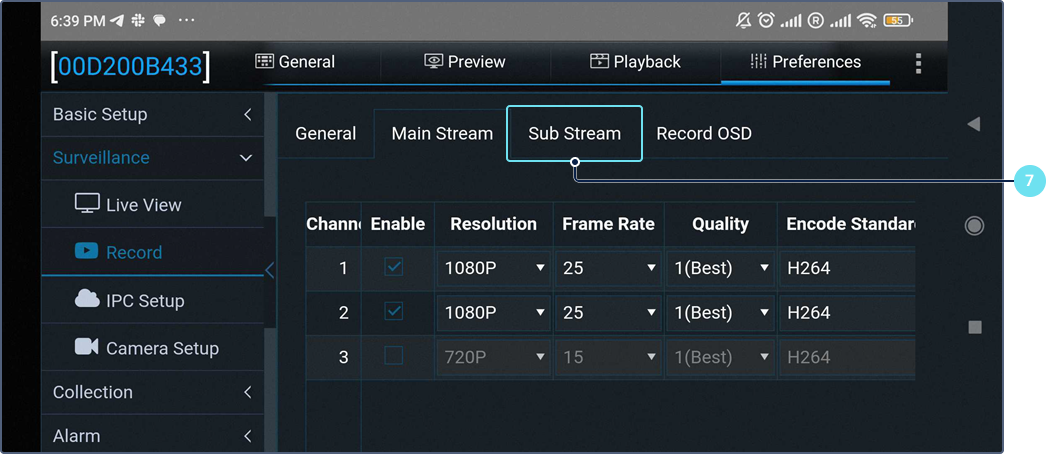
On the Sub stream tab, configure video quality settings for the sub stream.
-
Tap Save.
Additional settings
Additional device settings are available in the unit properties upon clicking on the icon  next to the Device type field.
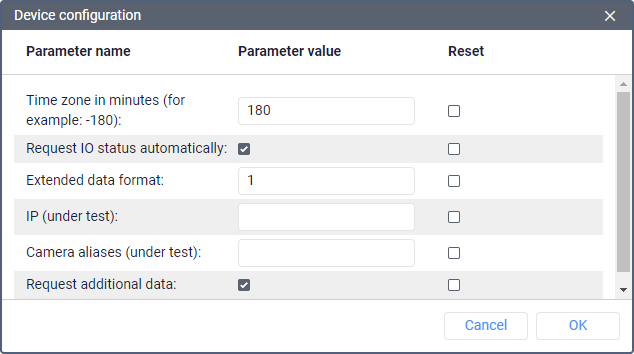
The available settings are as follows:
| Setting | Description |
|---|---|
| Time zone in minutes (for example: -180) | Here you can specify the time zone of the device in minutes. For example, for UTC+3 enter 180, and for UTC-5 enter -300. The time zone affects video playback requests and message registration. |
| Request IO status automatically | Enable this option to request the IO status automatically after every message with GPS data. |
| Extended data format | Here you can specify the format of the data sent by the device. The possible formats are described below. |
| IP (under test) | Deprecated setting. Leave this field blank. |
| Camera aliases (under test) | Deprecated setting. Leave this field blank. |
| Request additional data | Enable this option to query additional data using the QUERYDEVGENERALSTATUS and GETDEVINFOSTATUS reguests. A response to the QUERYDEVGENERALSTATUS request can include the following parameters:
A response to the GETDEVINFOSTATUS request can include spi_s_* parameters.The asterisk (*) indicates any combination of characters in a parameter name. |
Extended data formats
| Value | Description |
|---|---|
| 0 | Standard format. May not be supported by the firmware. |
| 1 | Extended format. It includes:
|
| 3 | Special extended format for concrete trucks. Includes the following parameters: ign, mileage, wash_state, water_volume, drum_direction, drum_speed. |
| 4 | Extended format which includes the following parameters:acc_state, mileage, hdop, rssi, obd_version, auth_status, analyse_status, obd_speed, obd_engine_rpm, obd_odometer, obd_average_oil_cons, obd_gear_position, obd_blinkers, obd_brake, obd_turning_angle, obd_battery_voltage, obd_seatbelt, obd_throttle_pos, obd_high_beam, obd_eng_working_hour, obd_eng_cool_temp, obd_hydraul_pressure, obd_eng_int_air_flow, obd_engine_load, obd_clutch, obd_remaining_oil, obd_ign_status, obd_inst_fuel_consum, obd_fuel_consumption, obd_error_code. |
If you have further questions regarding the device configuration in Wialon, send a request to support@wialon.com and specify the following details:
- device type and ID,
- issue description,
- screenshots of the configuration.
For ultimate technical support with hardware setup, we recommend contacting the device manufacturer.
Useful articles and links
Parameter description
Case studies with similar devices