Creating Routes
In order for the user to be able to create routes:
- the Can create objects option should be enabled in the user properties;
- the Routes: Access, Routes: Schedules, and Routes: Rides services should be enabled in the properties of the user’s account or billing plan.
To create a route, follow these steps:
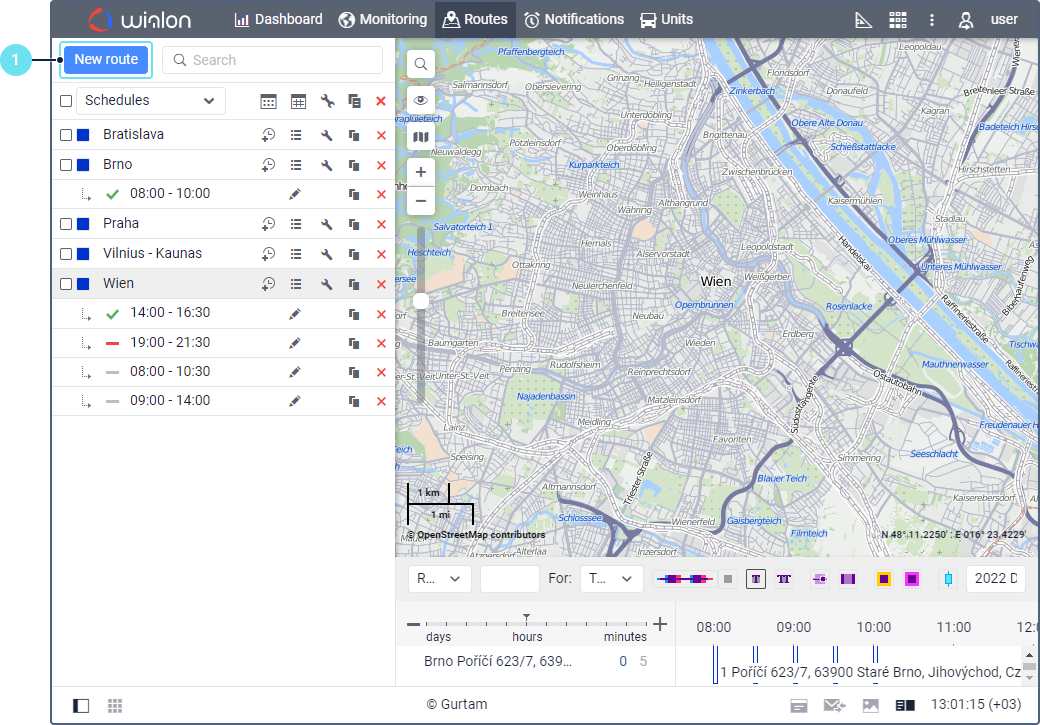
- Click New on the Routes tab.
- Specify the route name.
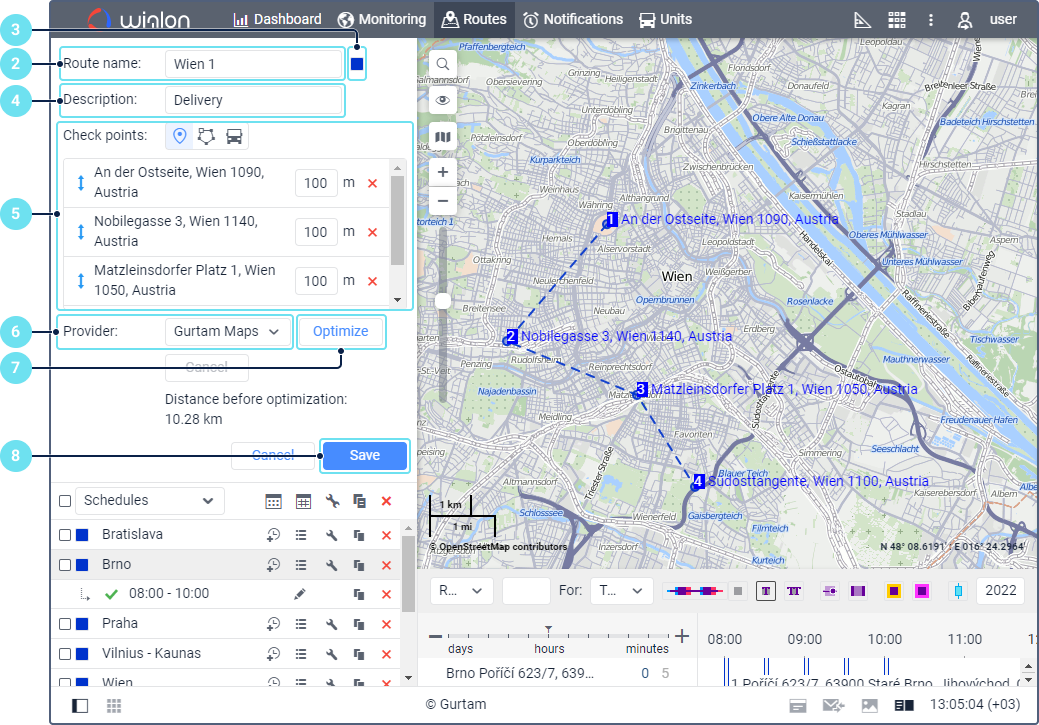
- If necessary, select the route color.
- If necessary, add a description.
- Add the check points of the route in one of the ways described below.
- Select the routing source.
- If necessary, enable the route optimization.
- Click Save.
To see the created route on the map, click on its name in the list. It is advisable to visually evaluate the route because after adding schedules, you cannot change the sequence of route points, as well as add or remove points. To make these changes, you should create a copy of the route. At the same time, you should recreate schedules and rides.
Adding check points
The following ways of adding check points are available:
| Action | Description |
|---|---|
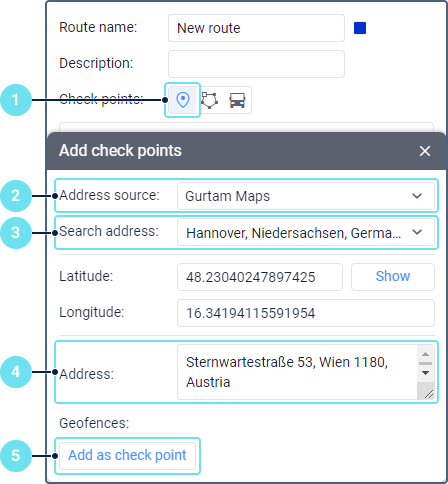
| Add check points from map | To add points, follow these steps:
|
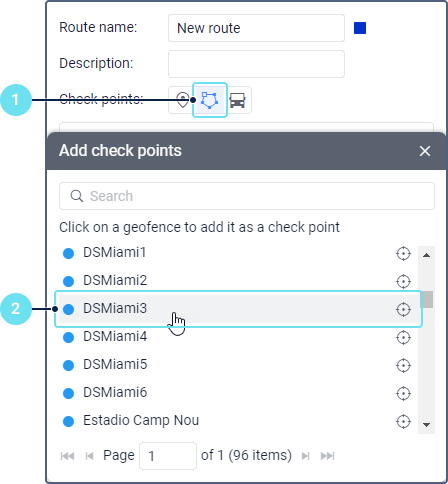
| Add check points from geofences | To add points, follow these steps:
To center the map on the geofence, click on the icon in its row. The geofence is shown only if it is selected on the Geofences tab. Copies of the selected geofences are used as points. Editing the original geofences doesn't affect the created route. |
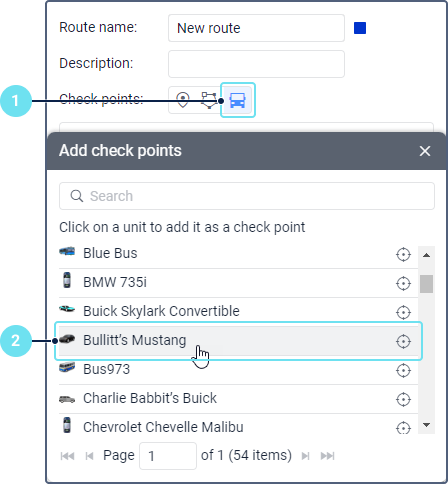
| Add check points from units | You can select a moving unit as a check point of the route. In this case, the point doesn't have specific coordinates and is considered visited when the unit approaches it within the specified radius. To add points, follow these steps:
When a unit selected as a check point is deleted, it is automatically deleted from the route. |
After adding points, you can change their sequence using the icon  . For points added using the map and from the unit list, you can additionally specify the radius. In points added using geofences, the shape and size of geofences are taken into account instead of the radius.
Optimizing routes
Optimization is available if the route has more than two points.
Before saving the route, you can optimize it to determine the most suitable order to go through all the added points. For example, this feature can be useful when creating routes for courier services.
The default map source used for route optimization is Gurtam Maps. However, you can select other sources: Google, HERE, Regional, Sygic, Trimble.
To optimize the route, select the map source and click Optimize. After that, you can see the route length before and after the optimization.
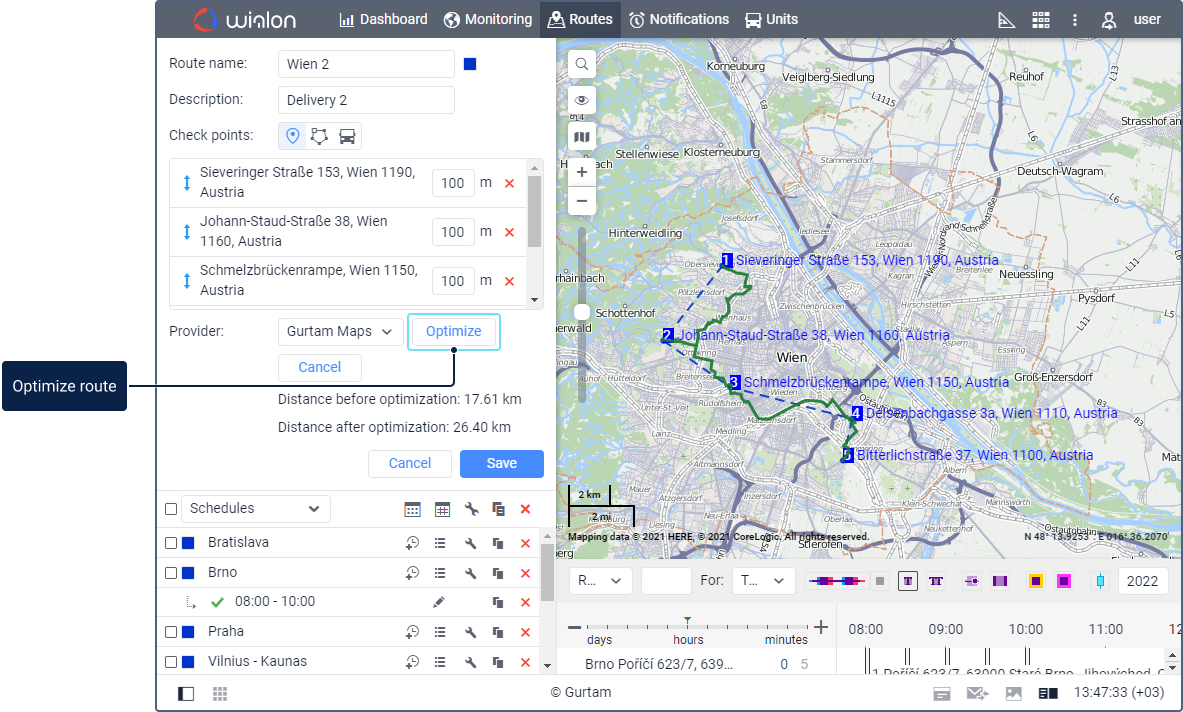
To return to the original route, click Cancel.
You can also use the Routing tool for creating routes.
