Code expiration notices
Code expiration notices allow you to alert users in advance when their unit activation codes are about to expire. When a user logs in to CMS Manager, a notice with the affected units is displayed. It helps the user to take action, for example, purchase and assign a new code to a unit.
To manage code expiration notices:
- You must be the creator of a top account or an account with dealer rights.
- You must have the Edit not mentioned properties and View detailed object properties access rights to the users you want to add as notice recipients.
Managing notices
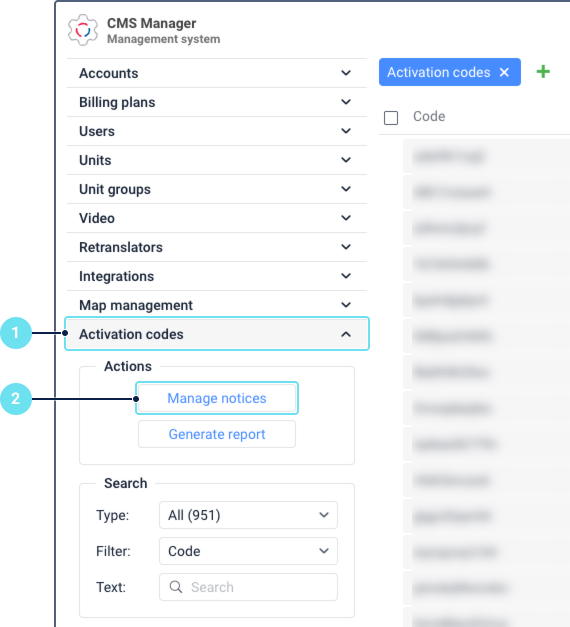
To open the notice management window, follow these steps:
-
In the CMS Manager navigation panel, select Activation codes.
-
Click Manage notices in the left panel.
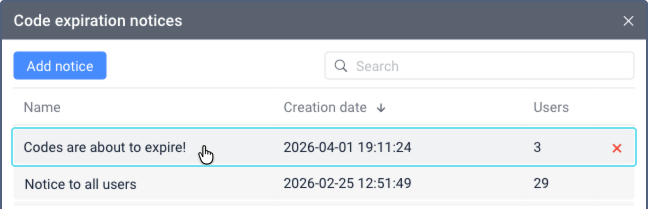
The Code expiration notices window opens. It contains a table of all created notices with the following columns:
| Column | Description |
|---|---|
| Name | The name of the notice. |
| Creation date | The date and time the notice was created. |
| Users | The number of users who receive the notice. |
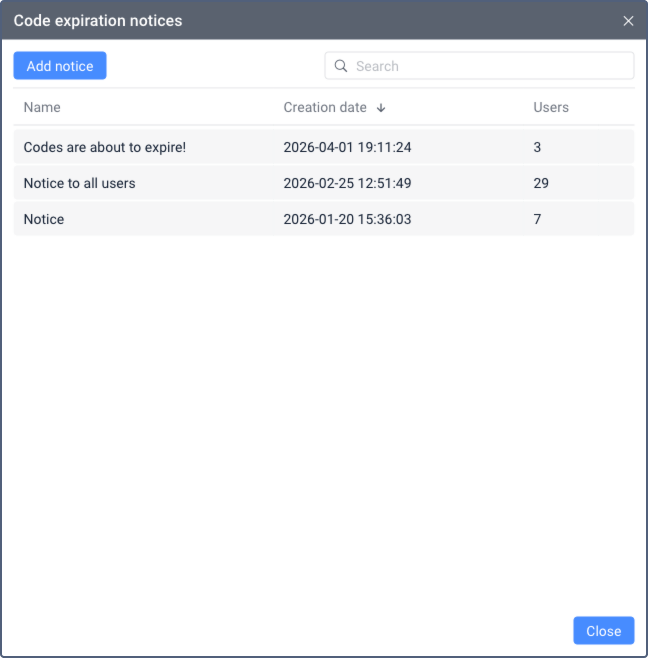
Above the table, the following elements are available:
- Add notice: opens the form for creating a new notice.
- Search: allows searching notices by name.
To sort the list, click on the Name or Creation date column header. Only one sorting option can be applied at a time.
Creating a notice
To create a code expiration notice, follow these steps:
-
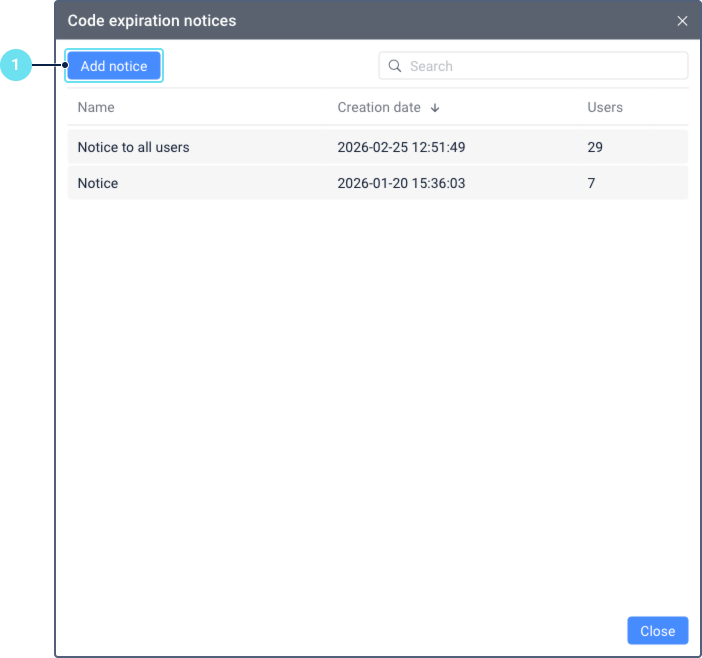
In the Code expiration notices window, click Add notice.
-
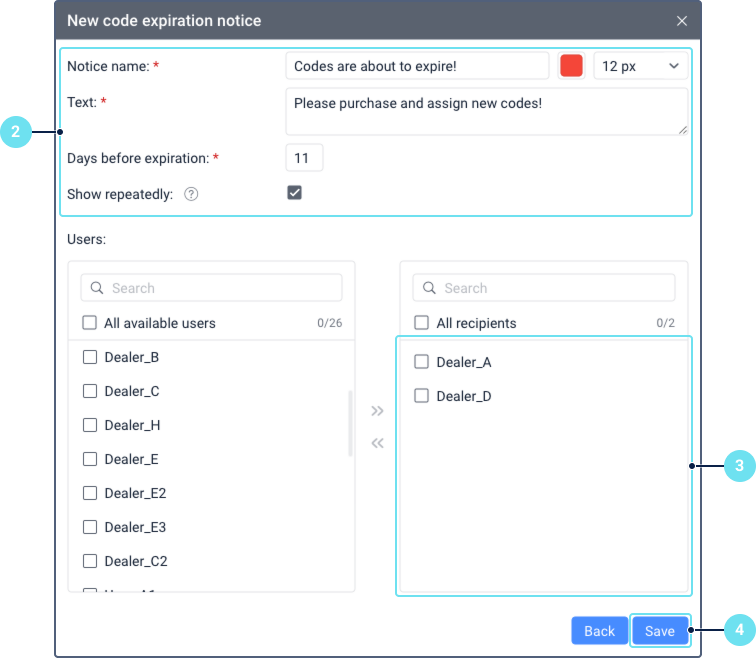
Fill in the following fields:
- Notice name: The name of the notice displayed to users. From 1 to 50 characters. You can select the font color and size using the palette and the dropdown list to the right of the name.
- Text: The notice text displayed to users. From 1 to 500 characters.
- Days before expiration: The number of days before the code expiration when the notice is sent to users. From 1 to 99.
- Show repeatedly: When enabled, the notice is shown every time the user logs in or reloads the page while units meet the expiration criteria. When disabled, the notice is shown only once.
-
In the Users section, select the users who should receive the notice. The left list contains all available users, and the right list contains the selected recipients.
- To add recipients, select users in the left list and click the icon
 to move them to the right list.
 - To remove recipients, select users in the right list and click the icon
 to move them back to the left list.
 - To search users, use the dynamic filter above each list. Filters by name, creator, account, billing plan, custom fields, or admin fields are available.
- To select all users at once, check the All available users or All recipients checkbox.
- To add recipients, select users in the left list and click the icon
-
Click Save.
All created notices are displayed in the management window.
Editing a notice
To edit a notice, click on it in the Code expiration notices window. The Notice properties window opens where you can modify the notice settings. After making changes, click Save.
Deleting a notice
To delete a notice, click the icon  in the row of the notice you want to remove.
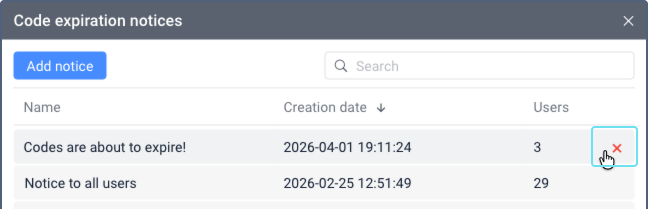
After deletion, the notice is removed for both the creator and all the recipients.
Viewing notices as a recipient
When a user logs in to CMS Manager and has units with activation codes expiring within the configured notification period, a notice window is displayed. It contains the number of units about to expire, grouped by account.
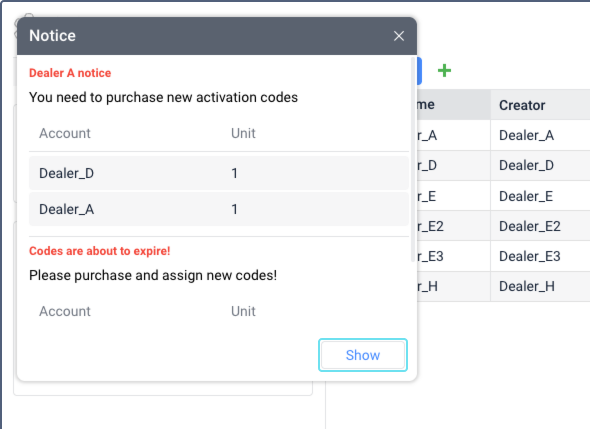
If the user receives multiple notices (for example, from different dealers), all notices are displayed in a single window.
Clicking Show redirects to the Units section in CMS Manager, where the affected units are sorted by the Deactivates on column.
Code expiration notices are displayed only in CMS Manager, not in the monitoring system.