Creating notifications
This page describes the redesigned notification system with updated combining logic, flexible condition building blocks, and a new full-screen interface. If your account hasn’t been upgraded to the new notification system yet, refer to the previous version of the Notifications documentation.
Follow these steps to create a notification from scratch. While configuring the steps, you can move back and forward, but consider that some depending settings may be lost or reset.
If after creating the notification the necessary access rights to the unit have been disabled or the unit has been deactivated, then the notification stops working for such units. In both cases, while editing it, you can see a warning about the lack of the required access rights to the unit.
Resource and unit selection
Before configuring the specific rules of the notification, you must define its basic properties: its name, where it will be stored, and the specific units or groups it will monitor.
-
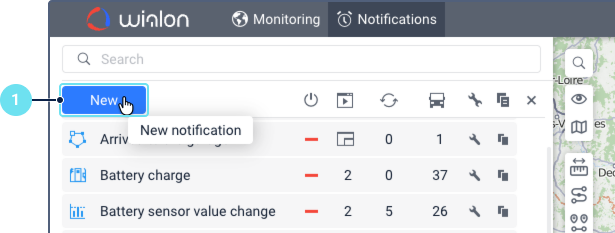
Click New on the Notifications tab.
-
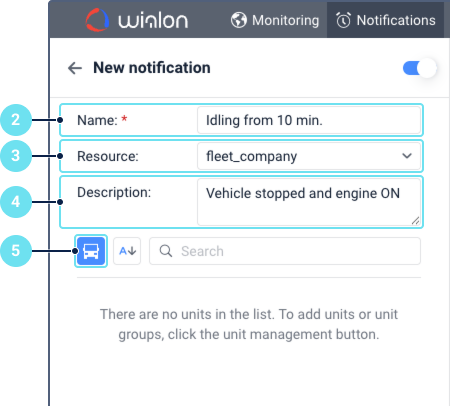
Enter a descriptive name for the notification.
-
Select the resource in which the notification should be stored if you have more than one resource available.
-
Optionally, add a description for the notification to provide more details about its purpose or settings.
-
Click the icon
 to open the Select units or unit groups window.
 -
In this window, switch between the Units and Groups tabs to find your required items. Use the All available toggle: enable it to make all units and unit groups available for selection, or disable it to show only those currently added to your monitoring list.
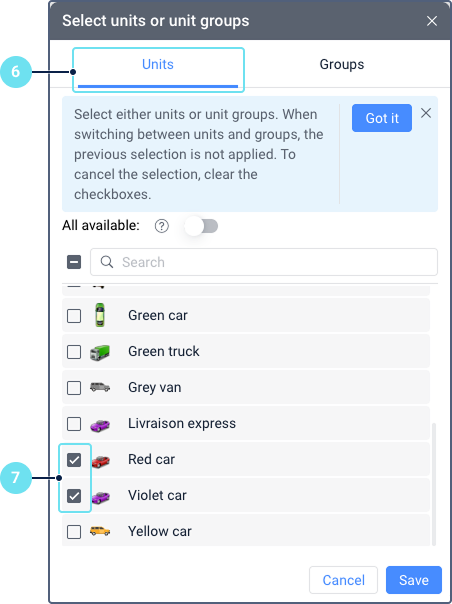
You can select either units or unit groups, but not both simultaneously. When switching between the Units and Groups tabs, any selection made on the previous tab is canceled. Only the selection on the currently active tab will be saved.
-
Check the boxes next to the required units or groups and click Save.
Step 0. View conditions and their combinations
After selecting units, the page with condition overview is displayed. On this page, you can see all conditions categorized by their ability to be combined with one another. Click on section titles to view specific combination rules.
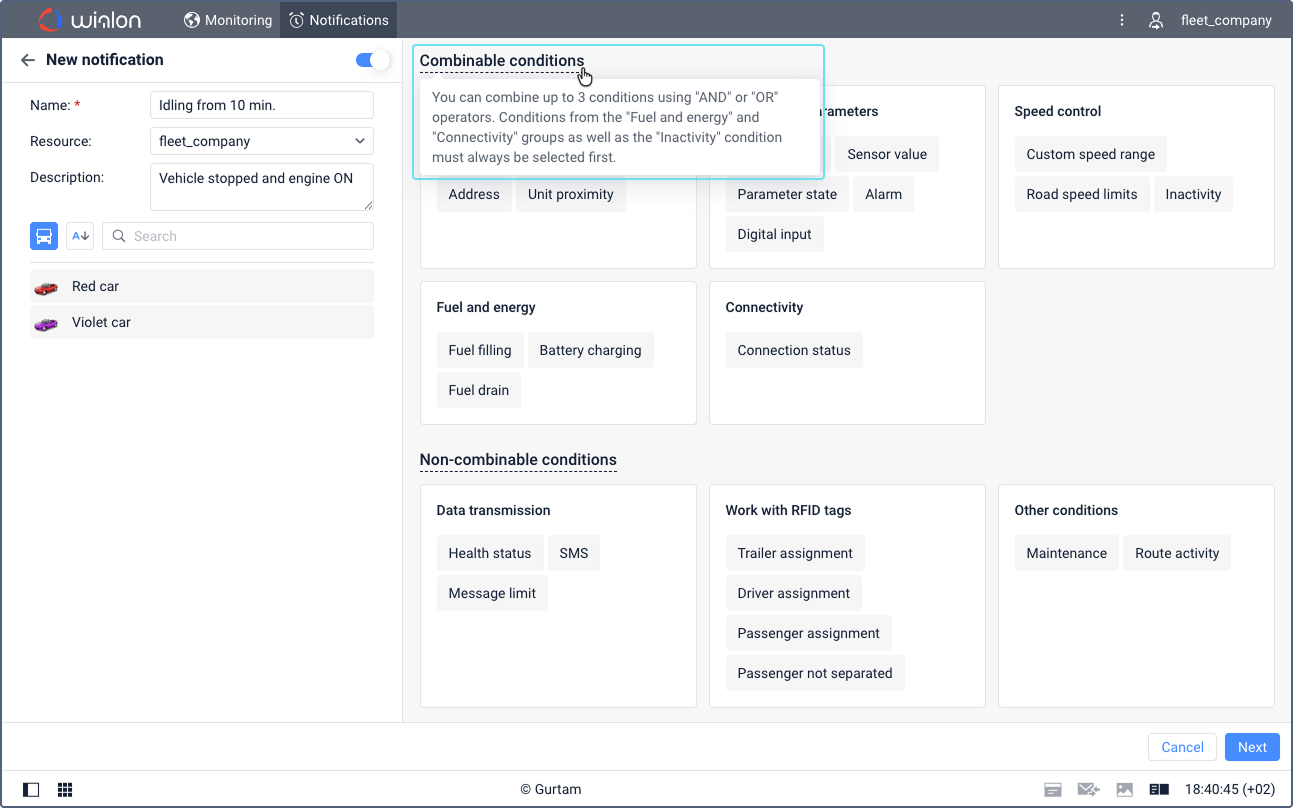
You can select your first condition here by clicking on its name, though detailed configuration occurs in Step 1.
Unlike other configuration steps, you can’t return to this overview screen once you move forward. It is shown only when you start to create a new notification.
Step 1. Configure conditions
- Select a condition when a notification should be triggered. See Configuring notification conditions for the full list, their settings and additional access right requirements.
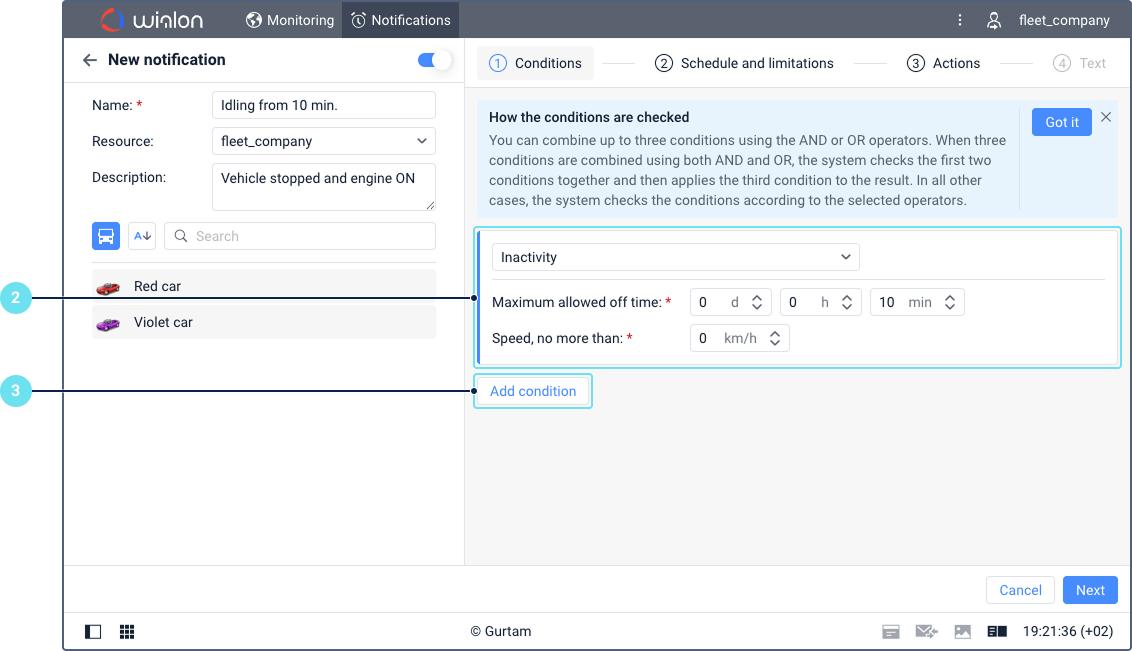
- Configure specific settings for this condition type. Some of them are required and some are additional. If a required setting is missing, the icon is displayed next to the step title.
- If you need to add a second condition, click Add condition. You can add up to three conditions to a notification.
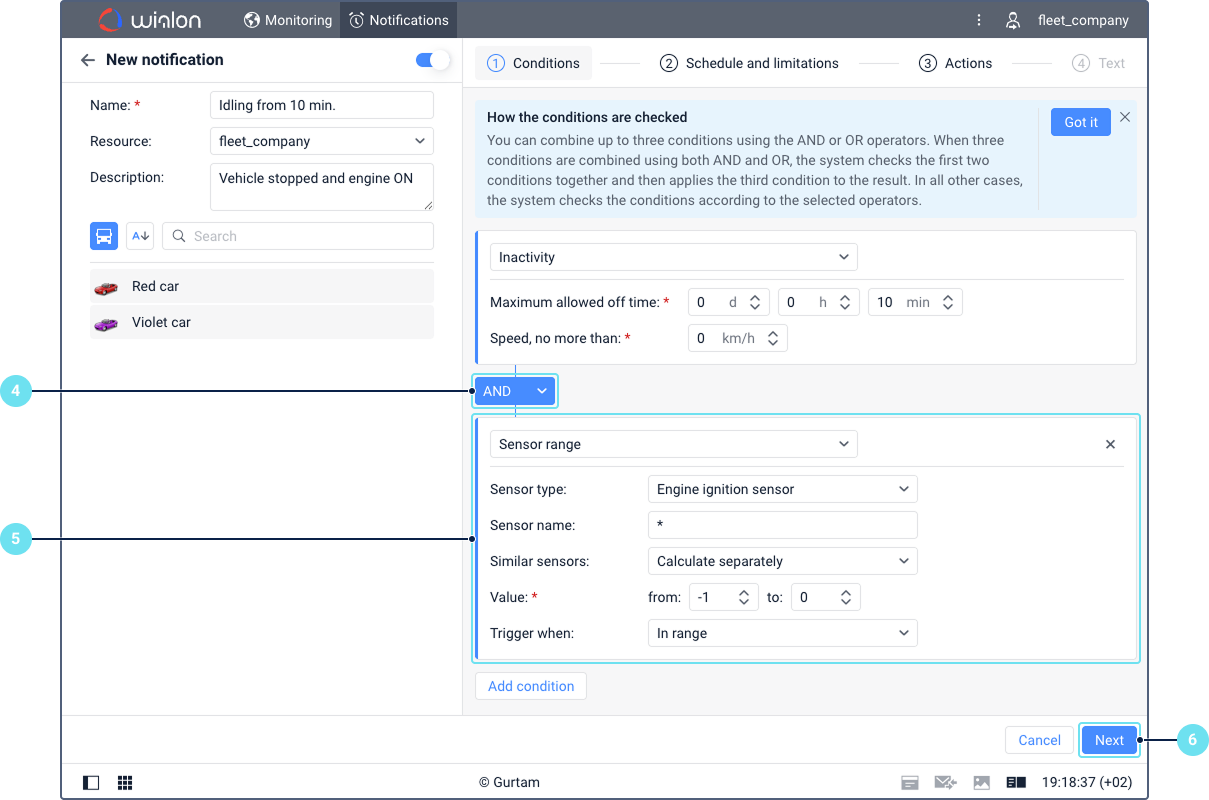
- Select
ANDorORoperator. If theANDoperator is selected, both conditions must be met for notification triggering. If theORoperator is selected, any of the two conditions must be met for notification triggering.
See Condition types and combination rules. - If you have added a second condition, configure it as well. If you have added a third condition, select the operator for it and configure it too.
- Click Next.
When multiple triggering conditions are configured with a logical
AND, the notification is triggered only when all specified conditions are met at the same time. Specifically, the notification triggers when at least one of the configured conditions changes its state from not met to met, while the other conditions are already satisfied.Example: You have configured a notification with the Geofence and Sensor value conditions. For notification triggering, the unit must leave the geofence AND the ignition sensor value must be ON. The notification triggers in the following cases:
- The unit is already outside the geofence, and the ignition sensor turns ON.
- The ignition is already ON, and the unit leaves the geofence.
Step 2. Set limitations or schedule (Optional)
You can restrict when and how many times the notification is triggered. See Setting notification limitations and schedule for a detailed description.
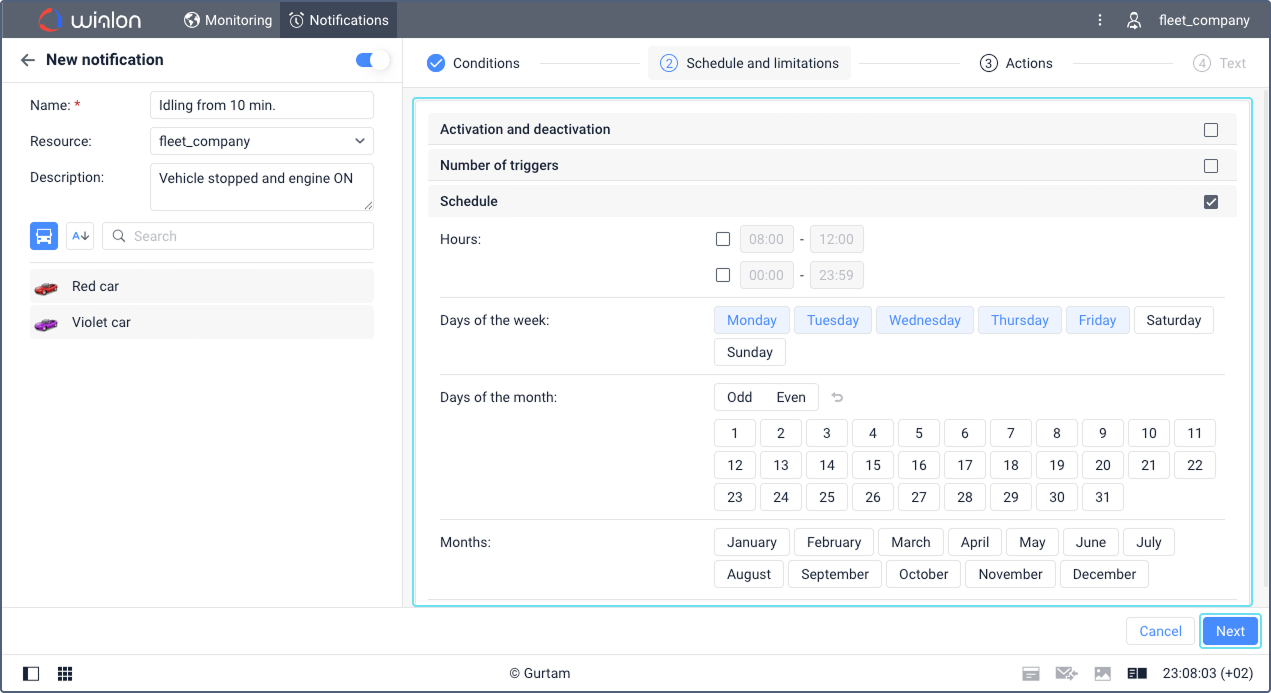
Go to the next step by clicking Next.
Step 3. Configure actions
Select and configure one or several actions that should be performed automatically when the notification is triggered. Some actions require additional access rights. See Configuring notification actions for a full list of actions, their settings and required access rights.
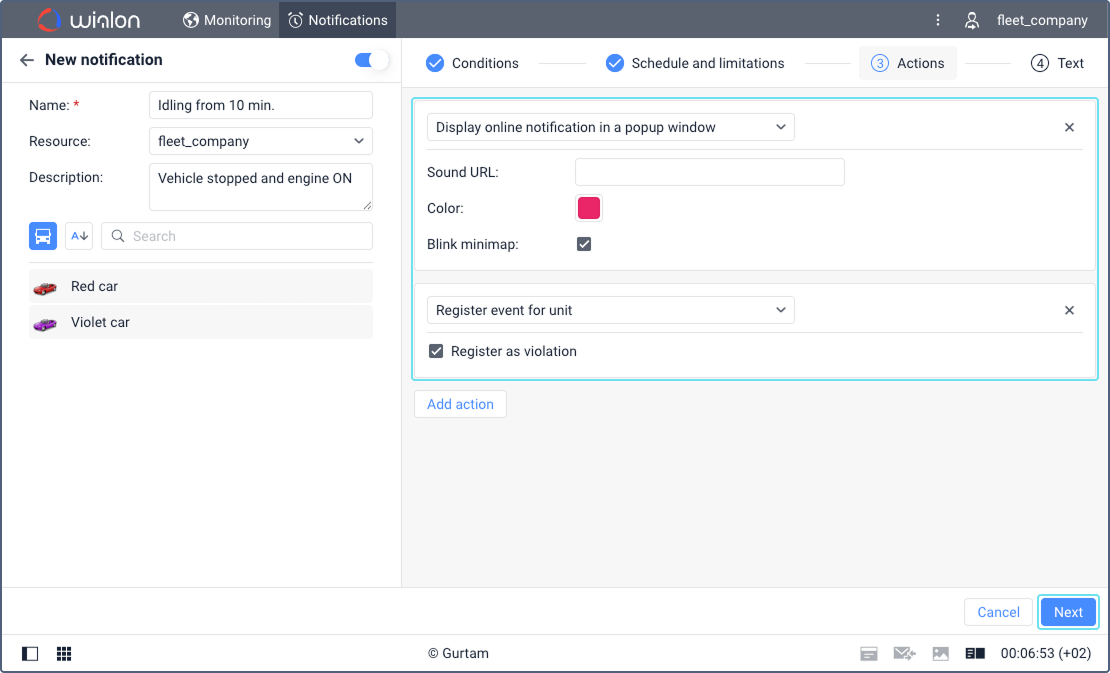
Go to the next step by clicking Next.
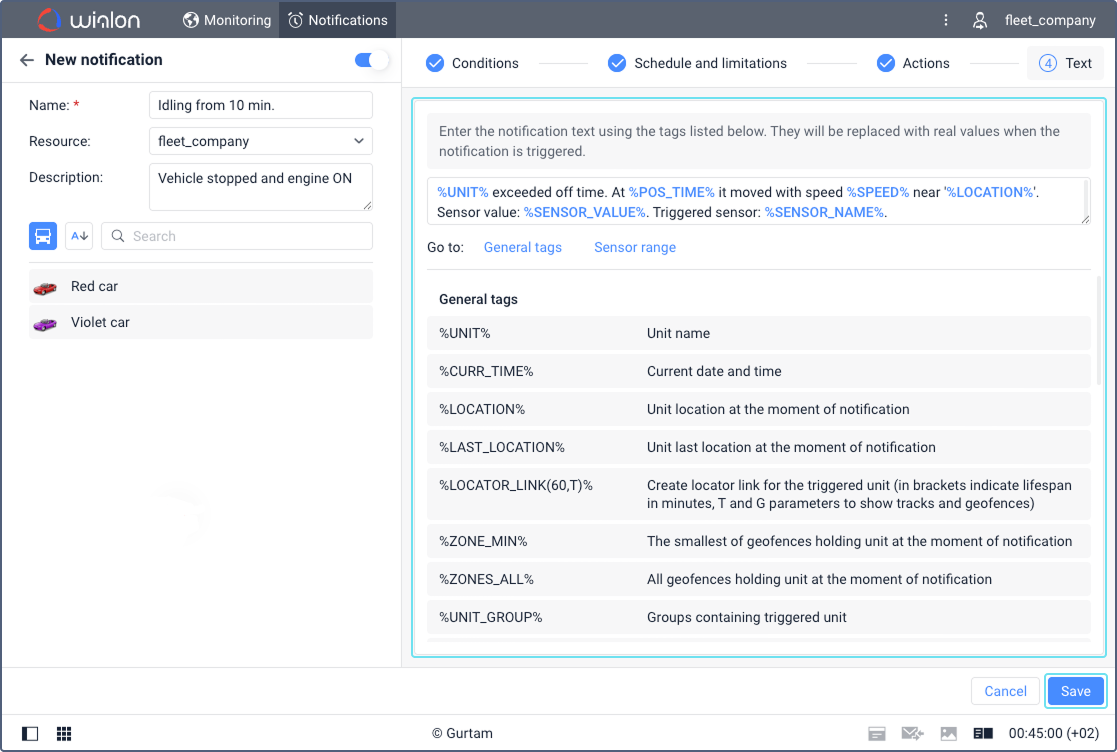
Step 4. Add notification text (if applicable)
Enter the message text to include in delivered notifications, if the selected action supports custom text. You can add tags (variables) that will be replaced with real values when the notification is triggered. Available tags depend on the notification conditions. See Configuring notification text for details.
Save the notification.
After saving, you can view the notification details, edit it, or create a copy. See Managing notifications on the tab for more information.