How to configure sending unit data from the High Mobility system to Wialon using flespi
This guide describes how to set up data retransmission from the High Mobility system to Wialon using flespi.
The configuration process consists of the following steps:
- Creating a High Mobility account.
- Configuring a High Mobility project.
- Setting up data transfer from High Mobility to flespi.
- Configuring a flespi stream to Wialon.
- Receiving device data in Wialon.
Each of these steps is described below.
Creating a High Mobility account
To create a High Mobility account:
- Sign up on the High Mobility console.
- In your account, click New data project.
- Select the Fleet option, or another available option depending on your use case.
- Specify the project name.
- Click Create project.
After that, a project with the specified name is created in your account.
Configuring a High Mobility project
To configure a High Mobility project in your account:
- Open the created project.
- Go to the Car Data tab.
- Select the brands of your vehicles and the data packages that meet your needs. For testing purposes, it’s enough to select a few brands and packages. All selected packages are displayed under Project Details → Selected Brands & Data.
- Go to the API Credentials tab. For testing, use Sandbox mode.
- Open the Streaming sub-tab.
- Select the MQTT V2 (Enterprise) method.
- Click Save and update.
- Add an MQTT certificate chain by clicking the plus button. This downloads an archive containing the certificates.
- Go to the OAuth Client sub-tab and keep it open because you’ll need this information in the next step.
Setting up data transfer from High Mobility to flespi
To set up data transfer from High Mobility to flespi:
-
In a new browser tab, go to https://flespi.io and log in to your account.
-
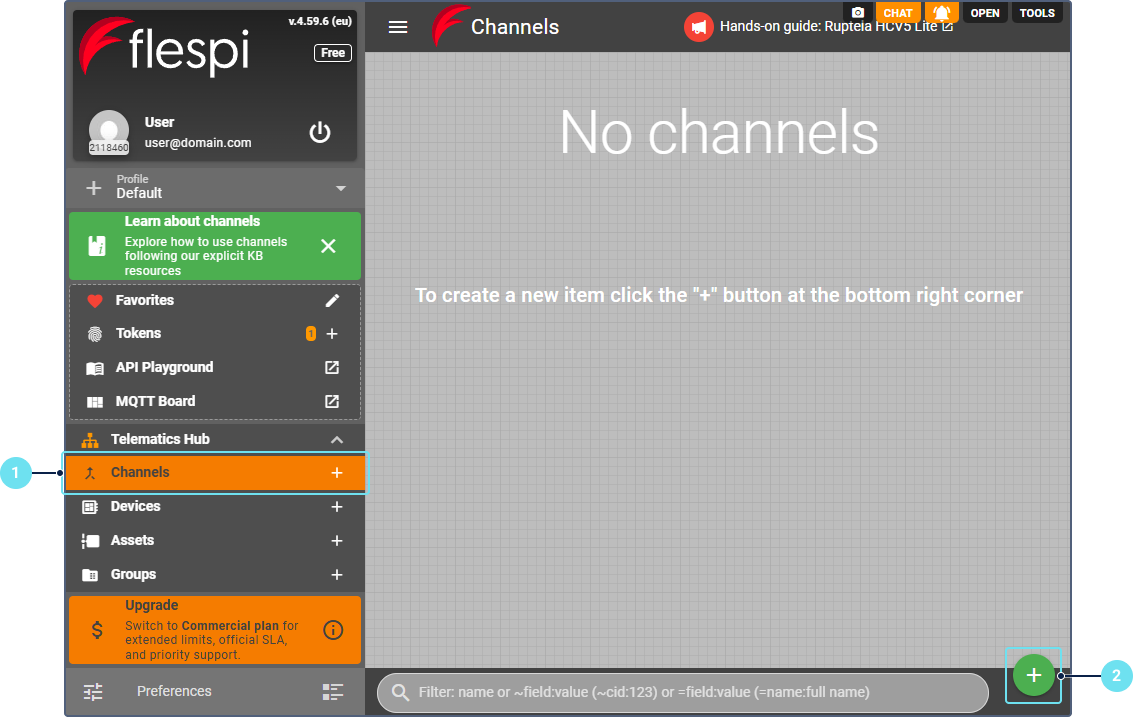
In the Telematics Hub, select Channels.
-
Click the button
 .
. -
Enter the channel name. For example, High Mobility vehicles.
-
From the Protocol id dropdown list, select high-mobility.
-
Copy the CLIENT ID from High Mobility (OAuth Client tab) and paste it into the OAuth Client ID field on flespi.
-
Copy the CLIENT SECRET from High Mobility and paste it into the OAuth Client Secret field on flespi.
-
Open the
snippet.txtfile from the archive you downloaded in step 8 of the previous instruction and do the following:- copy the
idvalue and paste it into the Client ID field; - copy the
topicvalue (without quotes) and paste it into the Topic to subscribe field.
- copy the
-
Open the
ca_crt.pem,client_crt.pem, andclient_key.pemfiles from the same archive and paste their contents into the CA Certificate, Client Certificate and Private Key fields, respectively. -
Double-check the specified data and click **Save.
Testing with the simulator
-
Go back to your High Mobility project and open the Simulation Studio tab.
-
Click Create new simulator.
-
Open the created simulator.
-
In the Telematics Hub on flespi, select the Devices tab.
-
Click the button
 and create a new device:
- In the Device type ID field, select High Mobility (high-mobility).
- In the Device identifier field, paste the VIN from the High Mobility simulator.
- Click Save + Open.
-
Navigate to the Commands & Settings tab.
-
Click New command and do the following:
- Select the Provision device command type.
- Enable the Vehicle brand field and specify the desired vehicle brand. See the High Mobility documentation for the input format, or check with HighMobility support. For the test simulator, leave it as sandbox.
- Click Send.
The command response should contain
"status": "pending". If the status is different, verify the specified data or unlink the vehicle using the Deprovision device command and try again. -
Go back to the High Mobility simulator and open the Simulations tab.
-
Click Create new and create a new simulation:
- Specify the simulation name.
- Optionally, enter a description.
- Click Create new simulation.
-
Run the simulation.
If everything is configured correctly, you will see messages on the Logs & Messages tab of the device on flespi.
Configuring a flespi stream to Wialon
To create a stream for transmitting device data to Wialon Hosting, follow these steps:
-
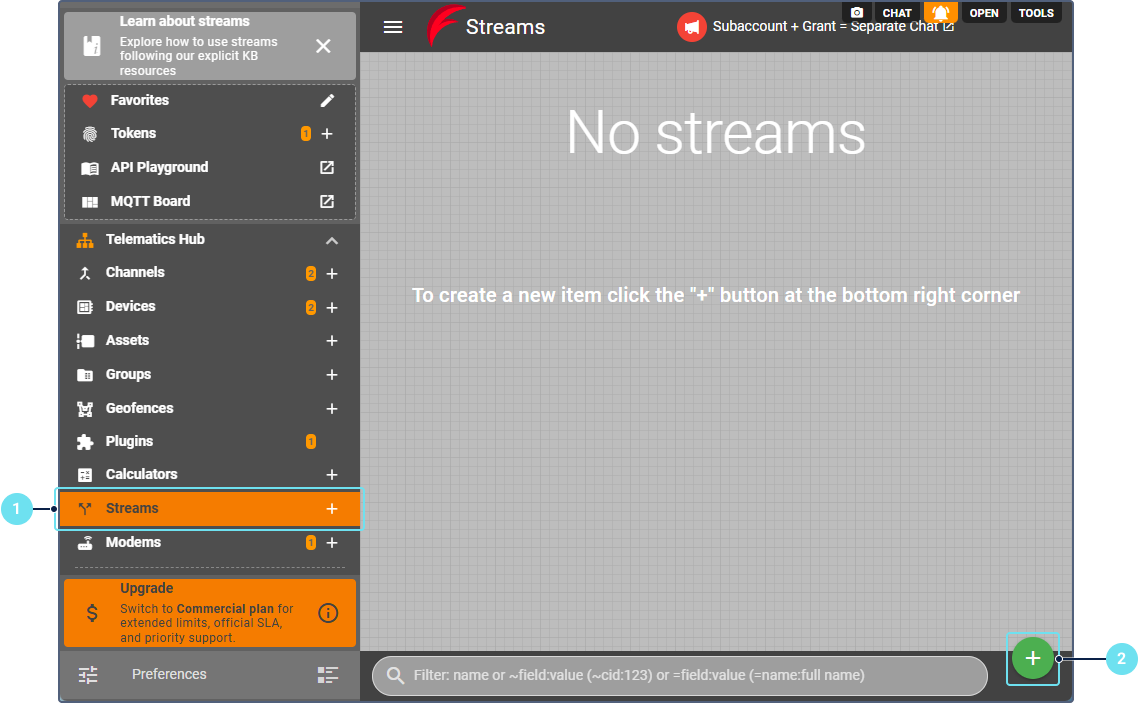
In the Telematics hub, select Streams.
-
Click the button
to create a new stream to Wialon Hosting. -
Specify the stream name.
-
In the Protocol id field, specify wialon_retranslator.
-
In the Configuration section, specify your Wialon server address. You can find it in the Server address field on the General tab of the unit properties.
-
Click Save + Open.
-
Open the Devices tab.
-
Click the clip button in the lower-right corner.
-
Select the device configured earlier.
Now you have a stream to Wialon Hosting with your device assigned to it.
Receiving device data in Wialon
To receive the device data in Wialon, create a unit in Wialon with the following properties:
- Device type: your device type.
- Unique ID: the same value as the device identifier on flespi.
If everything is configured correctly and the simulation is running, the unit in Wialon starts receiving messages from the High Mobility system. To view them, you can request data messages from the unit in Wialon.
Useful articles and links
For further information, see the following articles in the flespi knowledge base: