User group properties
The window of the user group properties is shown when creating, editing, and copying a user group. In this window, you can specify the name of the group, add users to it, grant the group access rights to system objects, and create custom fields.
To open the properties of an existing group, go to the User groups section of the management system and click the name of the required group in the table. To do this, you must have the View object and its basic properties access right to the group.
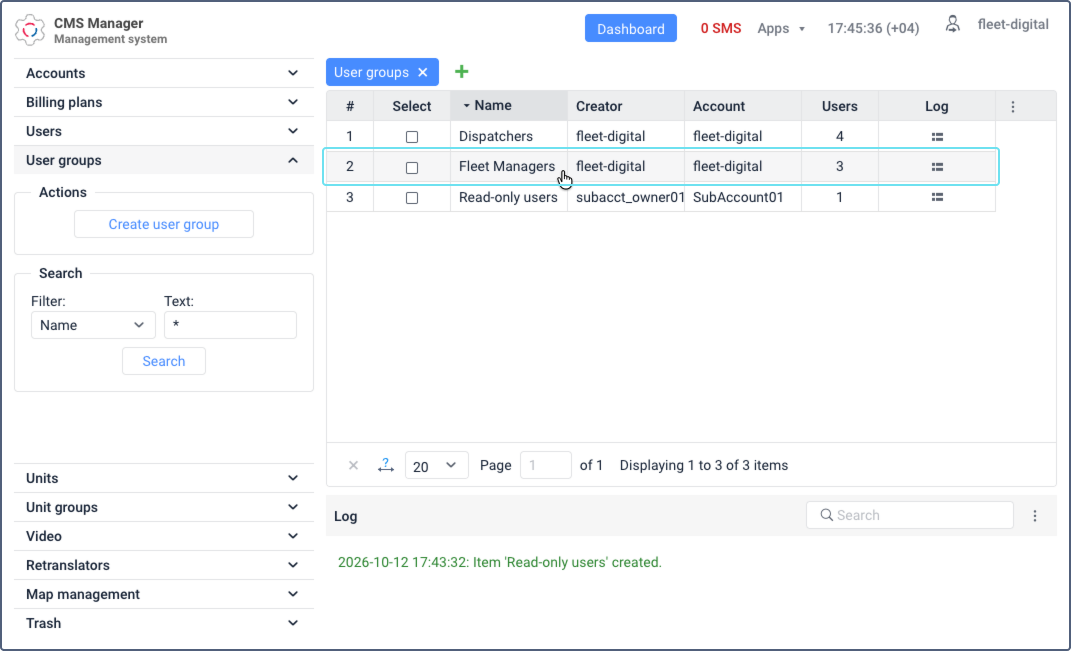
Depending on your access rights, the window may contain up to three tabs:
General
On this tab, you can specify the basic properties of the group and add or remove its users.
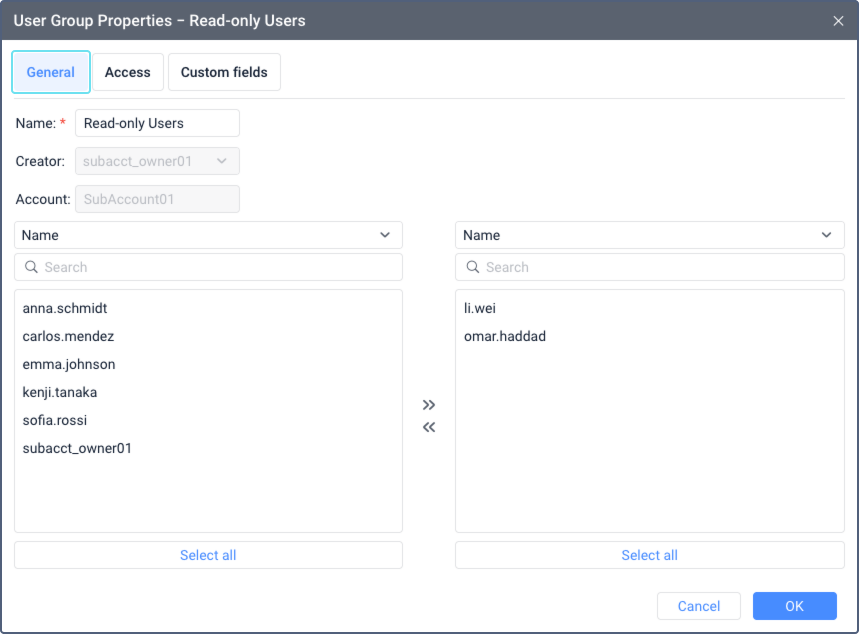
The required fields are marked with an asterisk (*).
| Property | Description |
|---|---|
| Name* | The name of the user group (4–50 characters). It mustn’t contain " (double quotes), { } (curly braces), and \ (backslash).Read more about the rules in Input rules. |
| Creator | The user on whose behalf the group has been created. You can’t change this property after saving a new group. Read more about the creator in Creator. |
| Account | The account to which the group belongs. You can’t change the account because it is specified automatically. |
| Users | The left list shows all the available users. The right list shows the users which have already been added to the group. To quickly search for users by name, use the dynamic filter. To add a user to the group, move the user from the left list to the right one; to remove, vice versa. To move users, use the icons  / / or double-click the selected users. or double-click the selected users.To select several users, hold down Ctrl and select the required ones. To select all the users in the list at once, click Select all. |
Access
To work with this tab, you must have the Manage access to this object access right to the group and to each macro-object to which you grant the group access.
On this tab, you can grant the group access rights to other macro-objects of the system: units, unit groups, users, resources, and routes. Select the required type in the dropdown list above the left list.
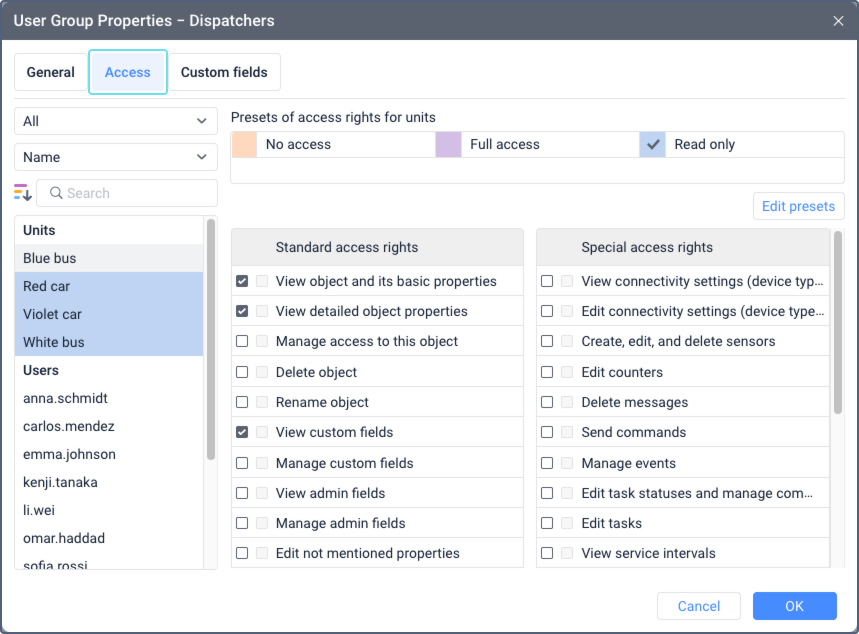
All the users added to the group receive these rights in addition to their own ones.
Read about granting access rights in Granting access rights.
Custom fields
To work with the tab, you must have the following access rights to the group:
- View custom fields to view general custom fields;
- Manage custom fields to create, edit, and delete general custom fields;
- View admin fields to view administrative fields;
- Manage admin fields to create, edit, and delete administrative fields.
On this tab, you can create custom fields with additional information about the group.
To create a custom field, fill in the Name and Value fields and click the icon  . The Value field is optional. After saving the changes on the tab, all custom fields are displayed in alphabetical order.
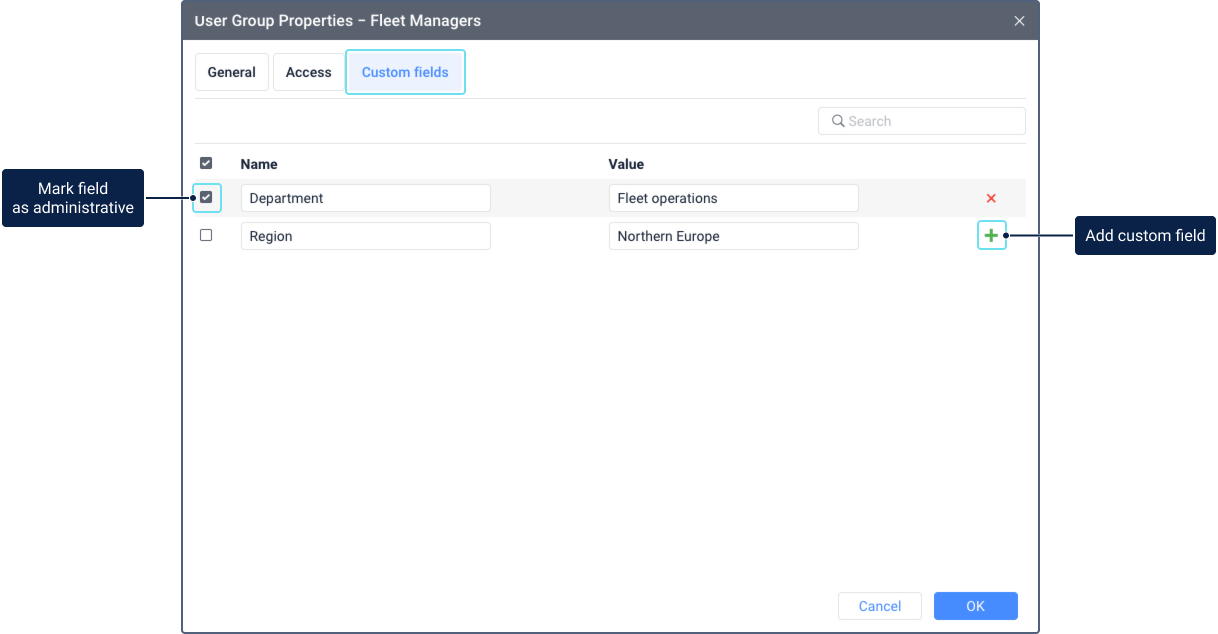
To restrict access to custom fields, you can mark them as administrative. In this case, they are available only to the users that have the View admin fields and Manage admin fields access rights to the user group. Check the box to the left of the required field to make it administrative.
To delete a custom field, click the icon  next to it.