Creating an action template
Who can do it: Service provider
Where: Wialon Platform Studio
Action templates are pre-configured actions that can be used within automations to perform specific tasks, such as sending notifications, assigning labels, or executing commands.
To create an action template:
-
In Wialon Platform Studio, navigate to the Customers page.
-
Select a customer from the list to open their details.
-
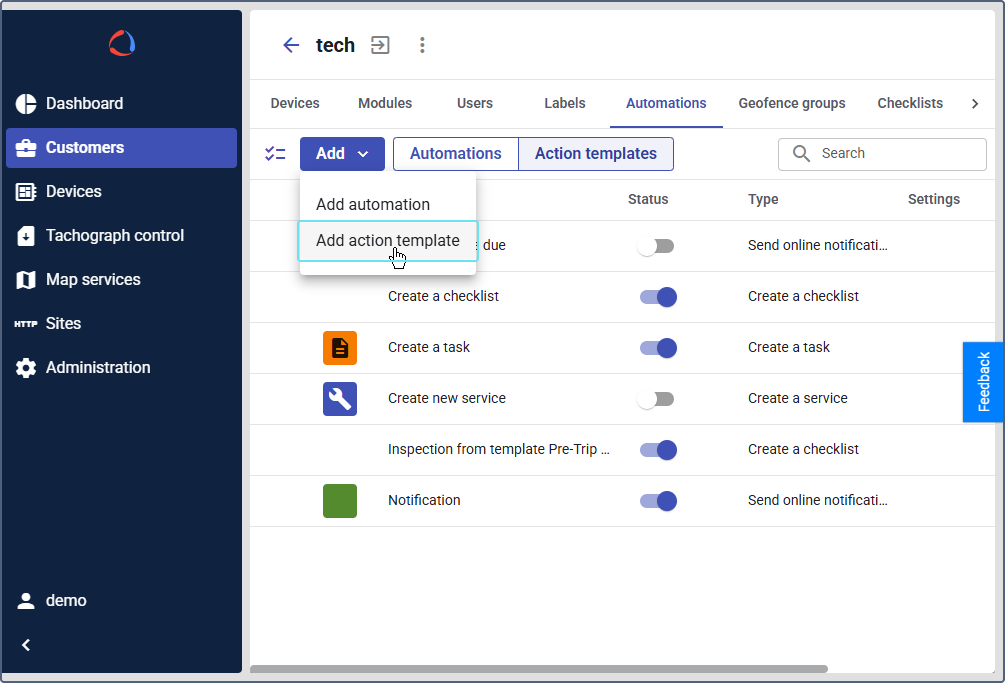
Go to the Automations tab.
-
Click on the Action templates sub-tab.
-
Click the New action button.
-
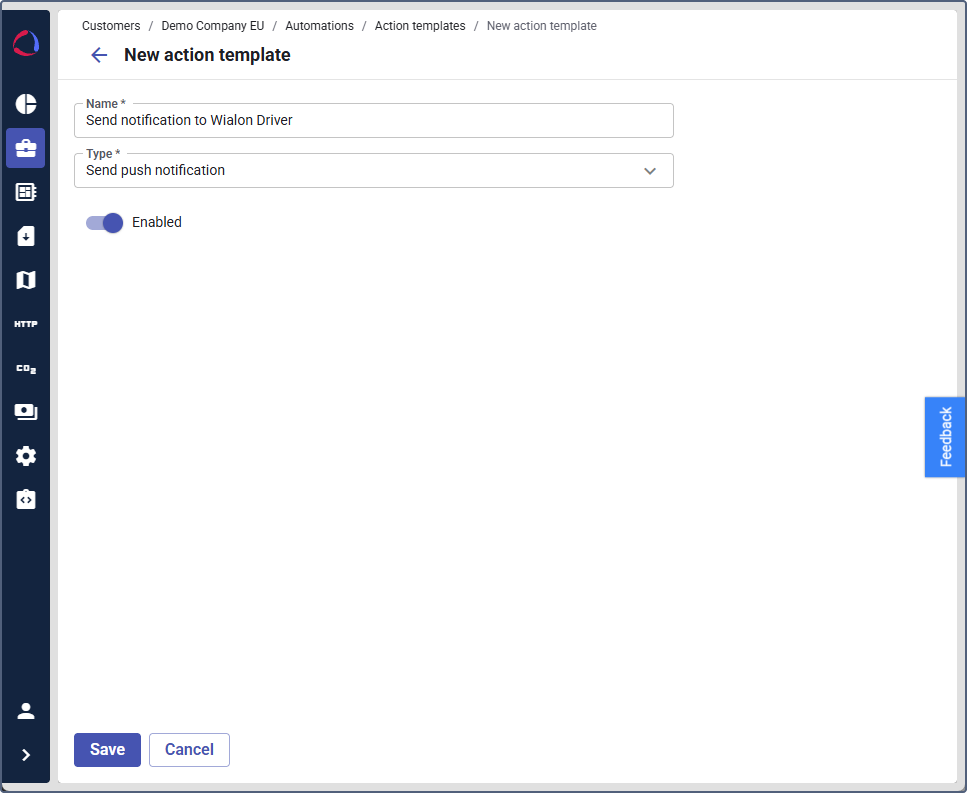
In the name field, enter a descriptive name for the action template. For example,
Alert, if the action sends a notification. -
Set the toggle to Enabled to activate the template immediately, or Disabled to keep it inactive.
-
Select the Action template type from the dropdown list. The available parameters will change based on your selection.
-
After configuring all necessary parameters for the selected action template type, click Save.
Action template types and their parameters
Send online notification
This action displays a pop-up notification within the web or mobile application.
When linking the action template to the automation, in the Text field, use the available placeholders to include dynamic information in the text, such as speed, time, and geofences.
Send an email
The action sends an email to the indicated addresses. To do this, enter one or more email addresses to which the message will be sent. Click the icon  to add more addresses, or the icon
  to delete an address.
Linking the “Send an email” action to an automation
When linking the action template to the automation, you can add the email text and attach a report.
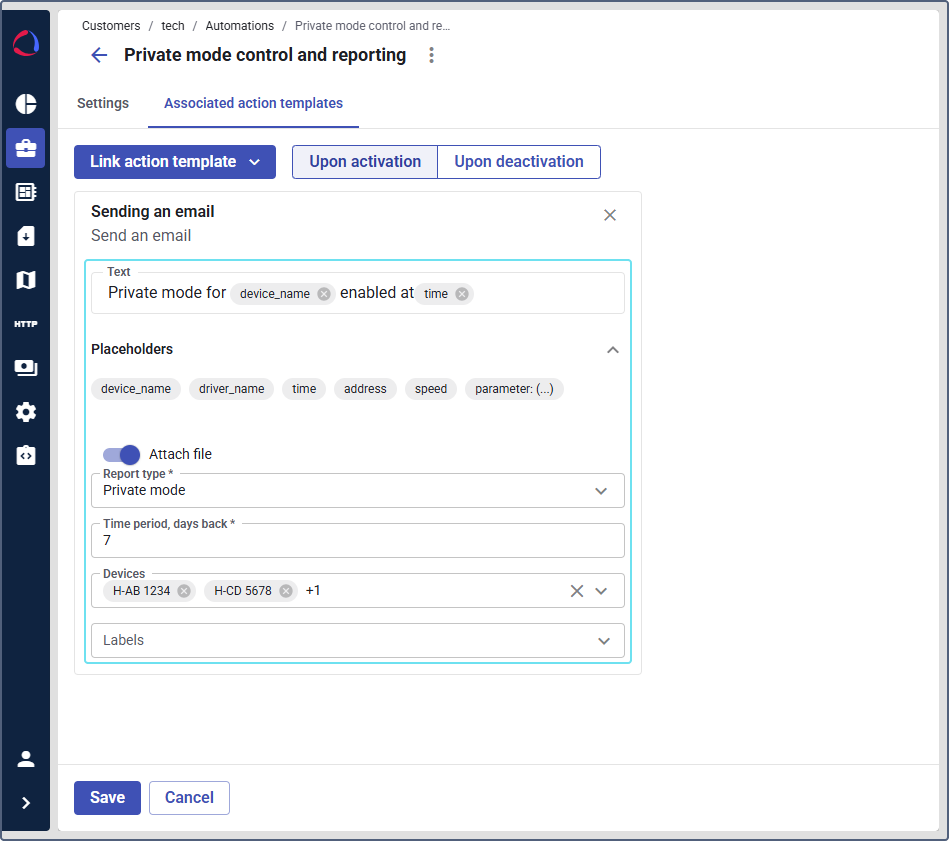
In the Text field, use the available placeholders to include dynamic information in the text, such as speed, time, and geofences.
Enable the Attach file toggle to select the report to include in your file. To do this, fill in the following fields:
- Report type: Select a report type from the dropdown list.
- Time period, days back: Enter a number of days for which you want to generate a report. The number of days is counted from the day when the automation was triggered.
- Devices: Select the devices you want to include in the report. The attached report will include these devices. If you select devices and labels below, both devices and devices with the labels are included in the report. To generate a report for the devices selected in the automation settings, leave this field blank.
- Labels: Select the labels you want to include in the report. The attached report will include the devices with these labels. If you select labels and devices above, both devices and devices with the labels are included in the report. To generate a report for the labels selected in the automation settings, leave this field blank.
Send Telegram message
The action sends an email to a Telegram chat. Indicate the following parameters:
- Telegram Channel ID: Enter the ID of the Telegram chat or channel. See how to connect a Telegram channel to Wialon in Wialon Hosting instructions.
- API Key: Enter the API key for Telegram integration.
When linking the action template to the automation, you can add the message text and attach a report the same way as for the Send an email action.
Execute a command
This action executes a command for the selected devices. Indicate the following parameters:
- Devices: Select the devices to which the command will be sent.
- Command template: Select a pre-configured command template to send to the device’s tracking unit.
Assign a label
The action assigns a label to the selected devices. Indicate the following parameters:
- Labels: Select the pre-configured labels to apply to the device that triggers the automation.
- Devices: Select the devices to which this action applies.
Remove a label
The action removes a label from the selected devices. Indicate the following parameters:
- Label: Select the specific label to remove from the device that triggers the automation.
- Devices: Select the devices from which this action removes a label.
Start private mode
The action enables private mode for the selected devices. It is supported for Sensor value, Schedule and Logical expression automation types. Indicate the following parameters:
- Devices: for the Schedule automation type, select the devices for which the action enables private mode. Don’t select any devices for the Logical expression and Sensor value automations.
- Duration: specify how long private mode must stay enabled. In the right field, select the unit (hours or minutes). In the Duration field, enter the value up to 720 hours or 43200 minutes.
If private mode is already active when a new trigger occurs, the original duration has priority. For example, if the private mode was enabled for 2 hours and an automation triggers the Start private mode action with a 1-hour duration, the private use will expire based on the original 2-hour duration.
See examples of using the action template on the pages Enabling private mode automatically according to schedule and Configuring private mode automation based on logical expressions.
End private mode
The action disables private mode. It is supported for Sensor value, Schedule and Logical expression automation types.
For the Schedule automation type, select the devices for which the action disables private mode. Don’t select any devices for the Logical expression and Sensor value automations.
Create a checklist
This action creates a checklist for the selected devices. Indicate the following parameters:
- Devices: Select the devices for which the checklist will be created.
- Template ID: Select the ID of the checklist template to use.
- User ID (assignee): Select the user to whom the checklist will be assigned.
See the detailed instructions on creating a whole automation workflow using this action on the Configuring automatic checklist assignment page.
Create a task
This action creates a new task in Task desk. It is supported for the Connection loss, Sensor value, Logical expression and Private mode enabled automation types.
When linking the action template to the automation, in the Text field, use the available placeholders to include dynamic information in the text, such as speed, time, and geofences.
Create a service
This action creates a service for the selected devices. Indicate the following parameters:
- Priority level: Select the urgency level for the new service task: Urgent, High, Normal, or Low.
- Days to complete: Enter the number of days within which the service should be completed.
When linking the action template to the automation, in the Text field, use the available placeholders to include dynamic information in the text, such as speed, time, and geofences.
See the detailed instructions on creating a whole automation workflow using this action on the Creating a service automatically page.
Send push notification
The action sends a notification to the Wialon Driver mobile app. The notification is delivered to the driver assigned to the device that triggers the automation.
To receive push notifications, the driver must have the Push notifications toggle enabled in the Wialon Driver app profile. See Managing your profile for details.
Use this type of action to send notifications that appear on mobile lock screens when drivers aren’t actively using the app.
This action type is compatible with all automation types except Schedule.
When linking the action template to an automation, configure the notification text and title using placeholders.