Setting up notifications for timely maintenance
Who can do it: Service provider
Where: Wialon Platform Studio
Configure automatic notifications for customers about upcoming or overdue services based on time, mileage, or engine hours remaining. To do this, follow the next procedure:
- Configure the action template to notify the customer when the automation conditions are met
- Fill in the conditions of the Service due info automation
- Link the automation to the action templates
Configuring the action template to notify the customer
You can notify your customers via the following channels:
- In-app notification
- Telegram message
In-app notification
To configure the action template:
- In the Customers tab, choose the customer for whom you want to set up notifications.
- Navigate to the Automations tab.
- Switch to the Action templates mode.
- Click New action.
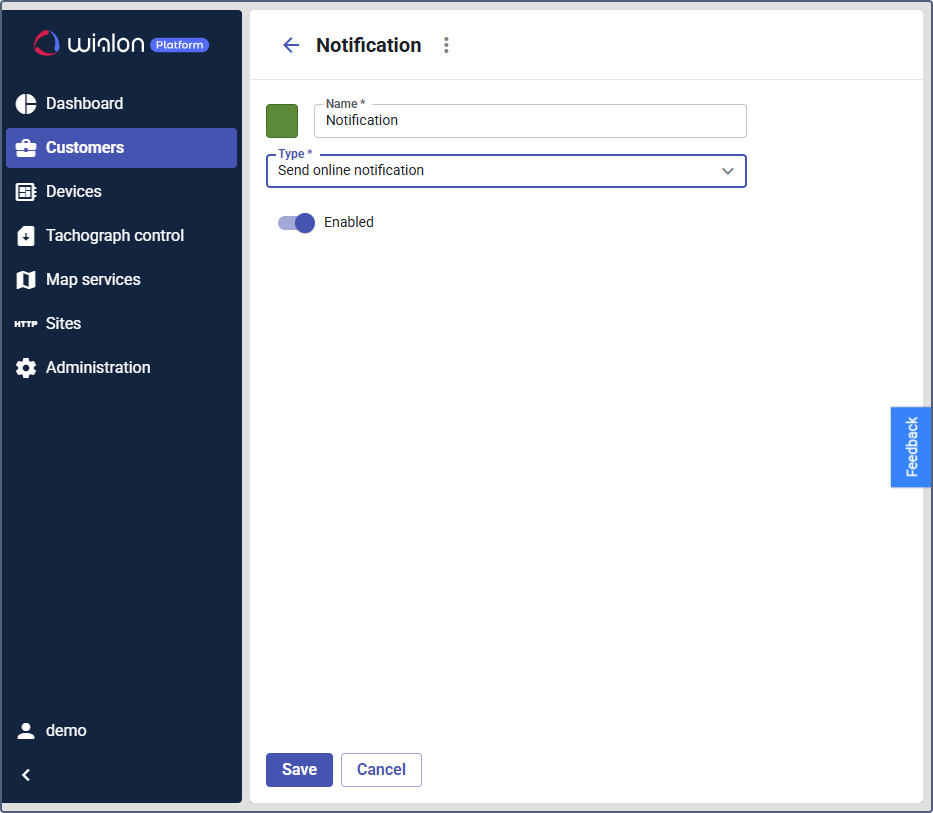
- In the Name row, enter a name for the action. For example,
Annual reminder. - In the Type row, select Send online notification.
- Move the Enabled toggle to enable the action template.
- Follow the steps 1-5 from the previous instructions.
- In the Type row, select Send an email.
- Choose the address from the available recipients. Use the search.
- Click on the icon
 to add another address. To delete the address, click on the icon
  .
. - Move the Enabled toggle to enable the action template.
Telegram message
- Follow the steps 1-5 from the in-app notification instructions.
- In the Type row, select Send Telegram message.
- Indicate the Telegram channel ID. See how to connect a Telegram channel to Wialon in Wialon Hosting instructions.
- Enter the API key.
- Move the Enabled toggle to enable the action template.
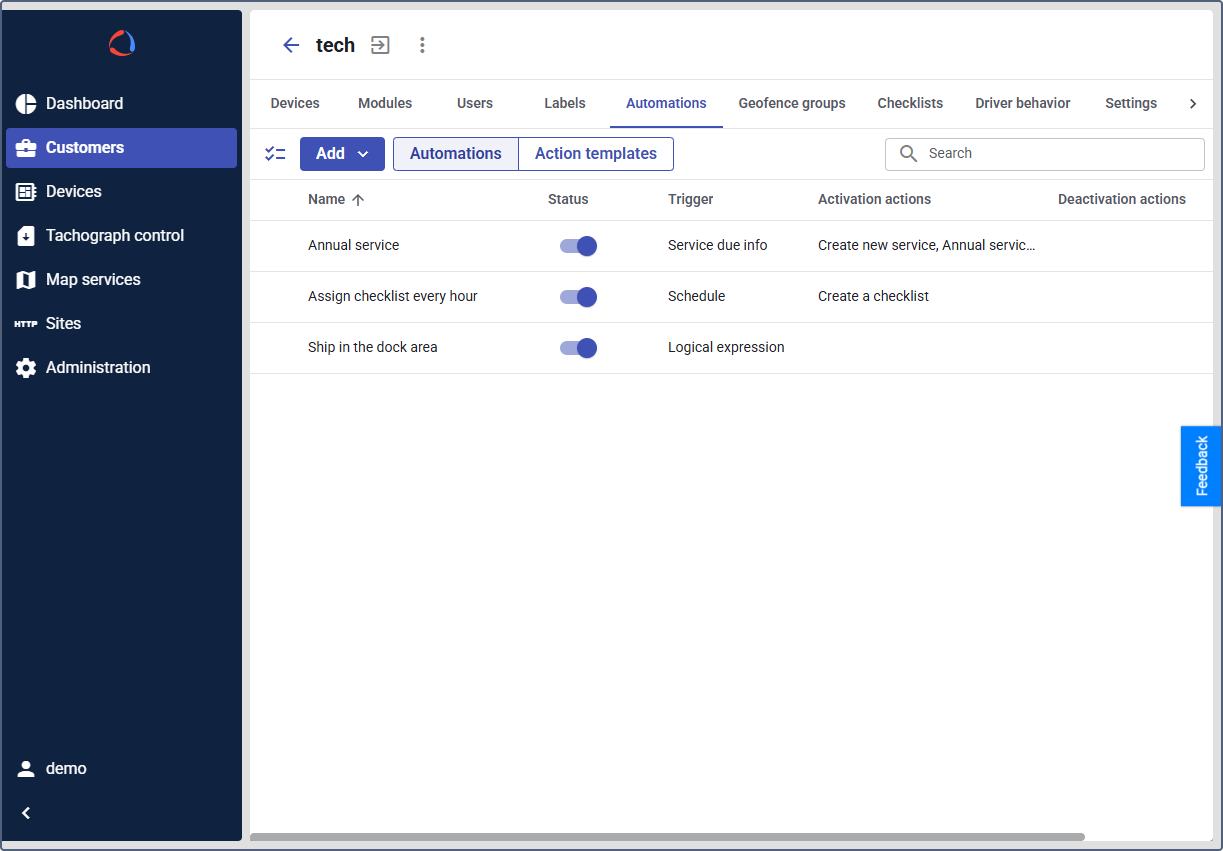
Configuring the “Service due info” automation
The Service due info automation defines the conditions for monitoring device service, including the specific device, service plan, and counter data that indicate when service is due.
-
On the Automations tab, click New automation.
-
On the Settings tab, enter a descriptive name for the automation (for example,
Annual service).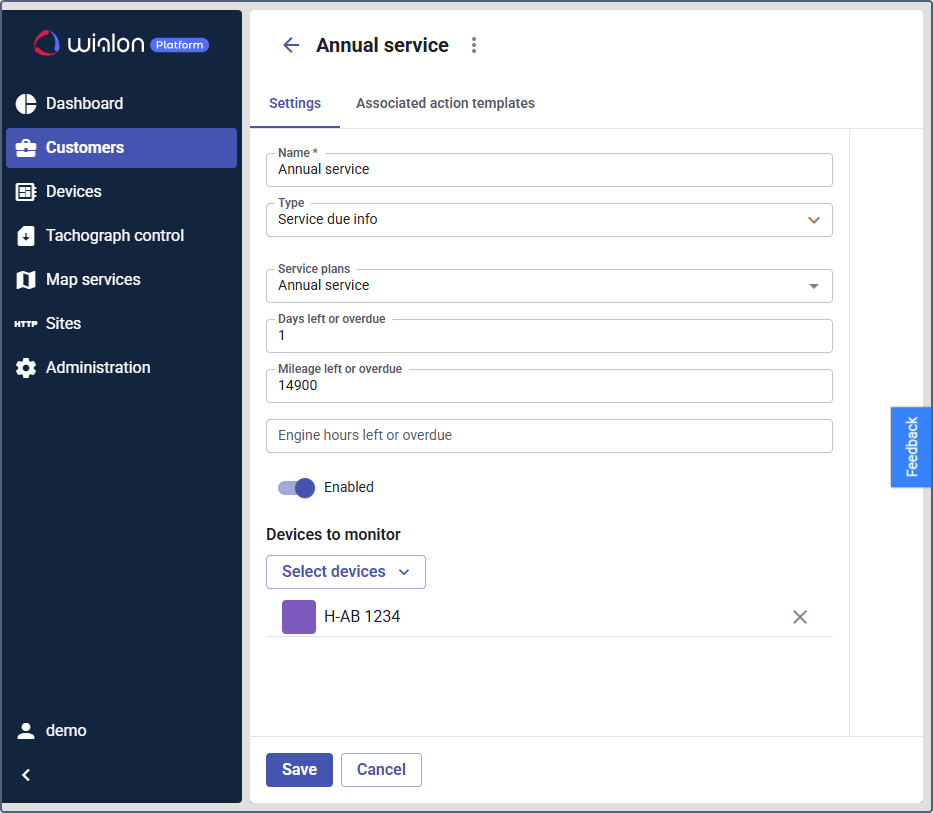
-
Select the
Service due infotype from the dropdown menu. This type triggers actions based on a service plan’s schedule. -
In the Service plans, choose the relevant service plan to track (for example,
Annual service).
Next, define the notification triggering conditions using the counters.
Defining counter values for notification triggering
The Service due info automation uses three counters to track service information: Days left or overdue, Mileage left or overdue and Engine hours left or overdue. If you specify values for multiple conditions in this automation, the notification will trigger as soon as one of these conditions is met. It will not trigger again if other conditions are met later.
To define the value in one or several counter fields:
- In the Days left or overdue row, enter the number of days:
- Enter a positive number to be notified in advance. For example,
15, to be notified 15 days before the service is due. - Enter a negative number to be notified about a delay, For example,
-15, to be notified when the service is 15 days overdue.
- Enter a positive number to be notified in advance. For example,
- In the Mileage left or overdue row, enter a positive or negative number of kilometers. Enter a positive number to be notified in advance or a negative number to be notified about a delay.
- In the Engine hours left or overdue row, enter a positive or negative number of engine hours. Enter a positive number to be notified in advance or a negative number to be notified about a delay.
After setting the counter values, complete the automation setup.
Completing the automation setup
- Ensure the Enabled toggle is active.
- In the Devices to monitor section, select the specific devices this automation will monitor.
Now, associate the automation with the action template.
Linking the action templates to the automation
After indicating the conditions on the Settings tab, you must link the automation to the notification via the preferred communication channel. To do this:
-
Navigate to the Associated action templates tab.
-
Click Link action template.

-
Select the preconfigured action template from the dropdown list.
-
Enter the text of the notification message to display to the customer. Use the available placeholders to include dynamic information in the text, such as device and service name. For example,
You have 15 days left to complete the annual service for the <device_name>. -
Click Save.
The system will now automatically send a reminder via the configured communication channel. The customer will receive it 15 days before the annual service is due for the selected device.