Managing tasks on the “Task desk” page
Who can do it: Service provider, Customer
Where: Wialon Platform FleetSpace
This page describes how to manage and resolve incidents, referred to as tasks, that are automatically generated by the system based on predefined triggers. The Task desk page in Wialon Platform FleetSpace allows users to track, update, and document the resolution of these tasks, ensuring efficient fleet operations and timely responses to critical events.
Viewing tasks
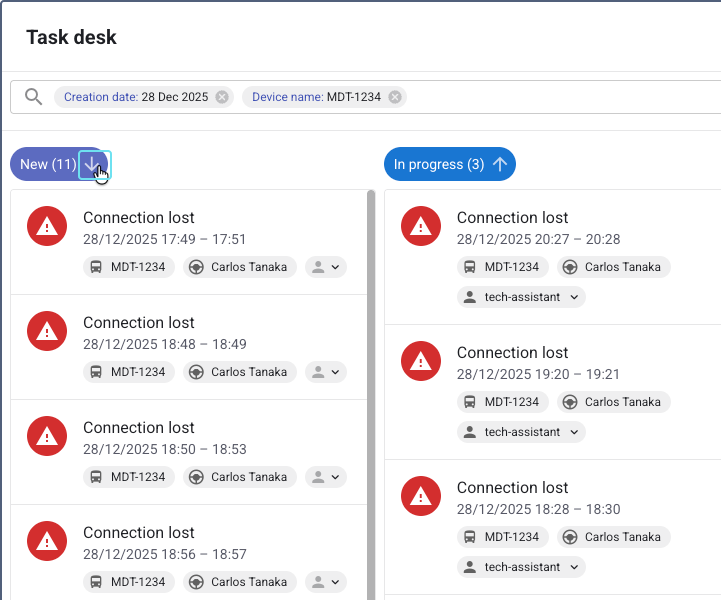
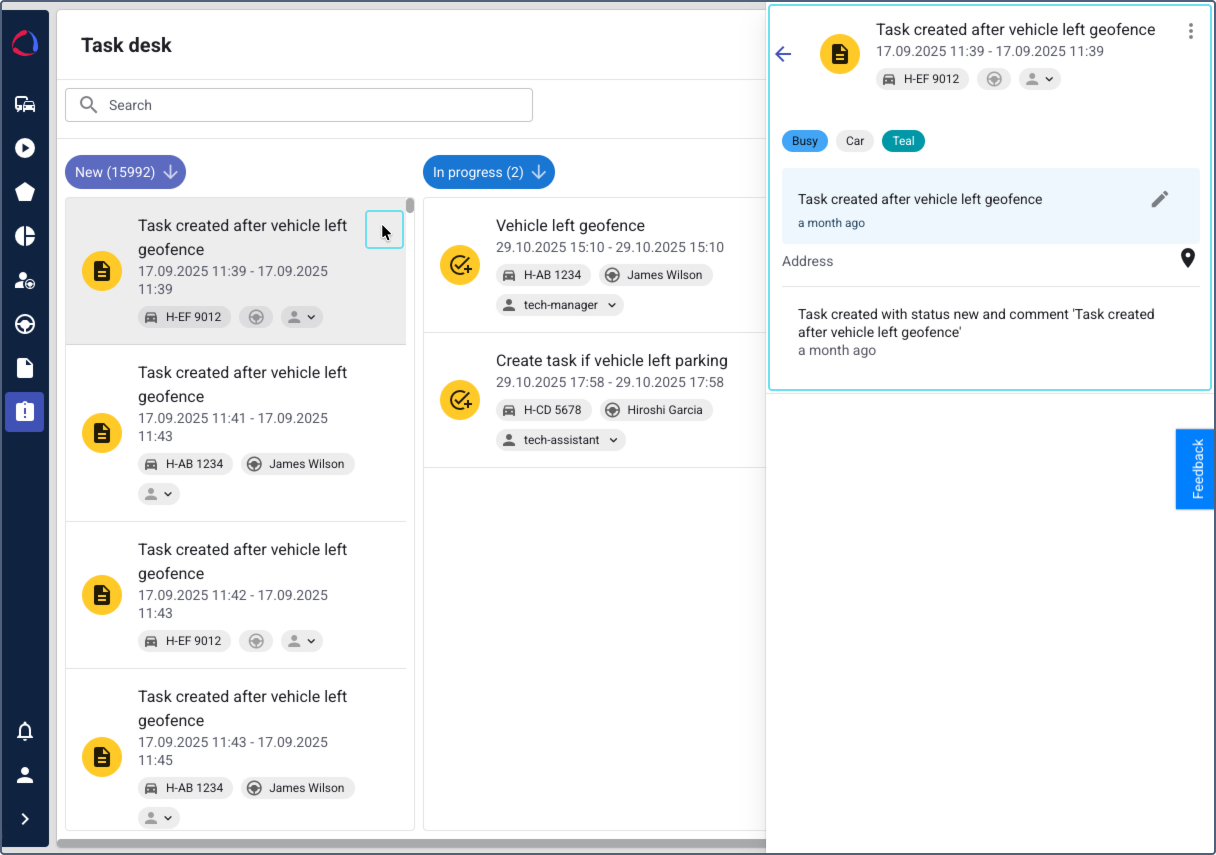
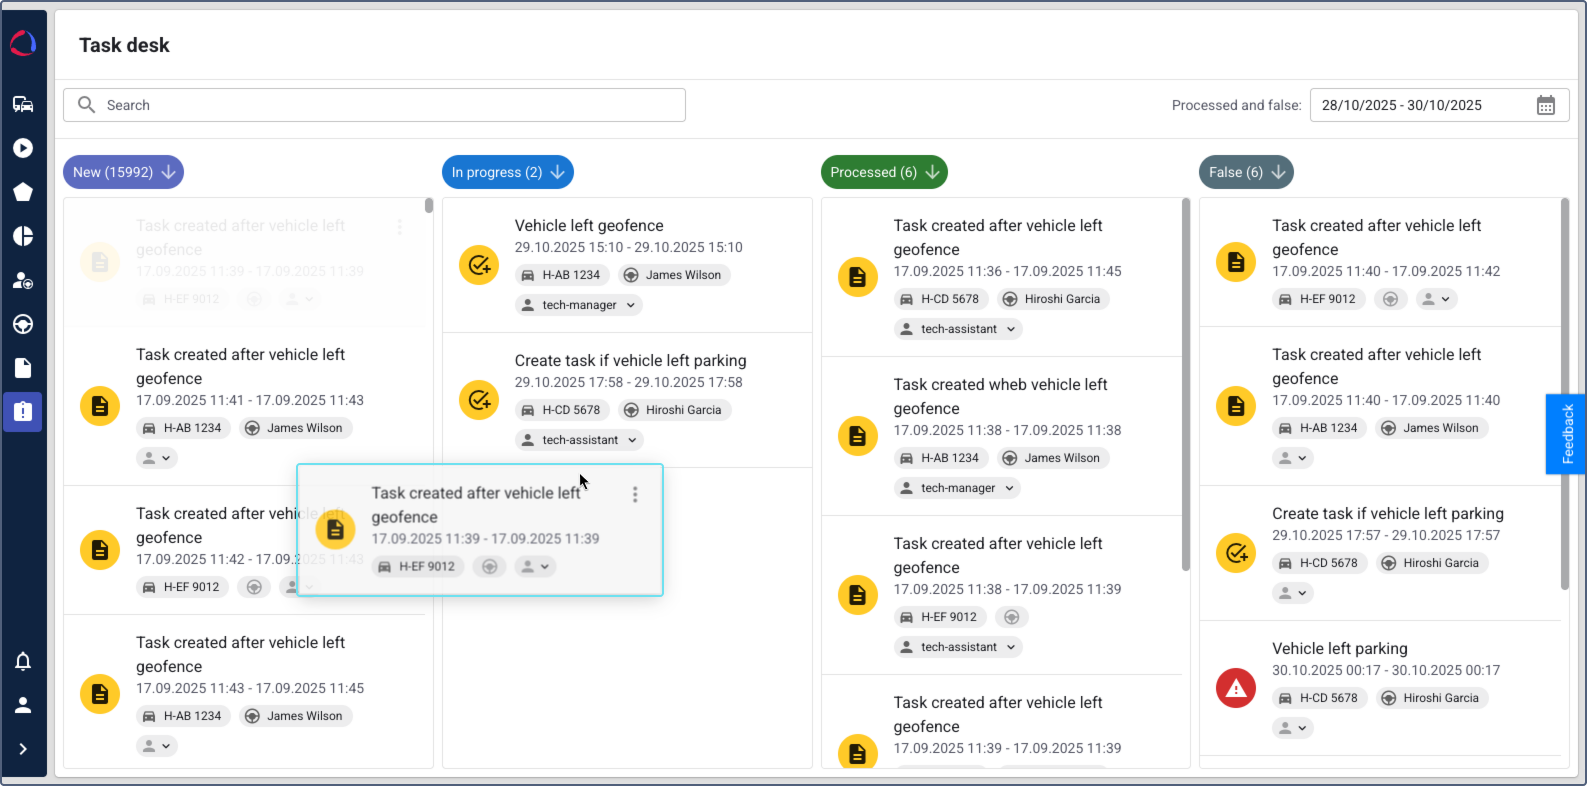
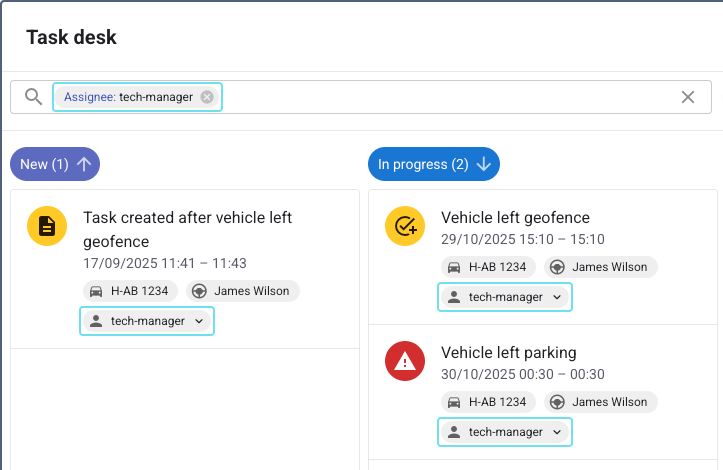
To view tasks, navigate to the Task desk page in Wialon Platform FleetSpace. The page displays tasks organized into columns: New, In progress, Processed, and False.
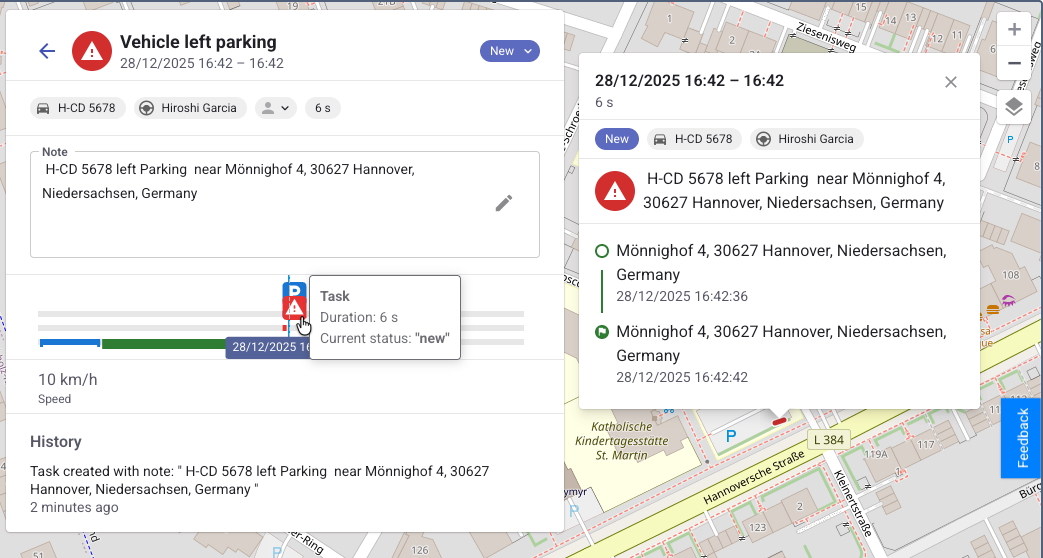
Click on a task to view its details and see the associated event on the map.
Task information
For each task, you can see the following information:
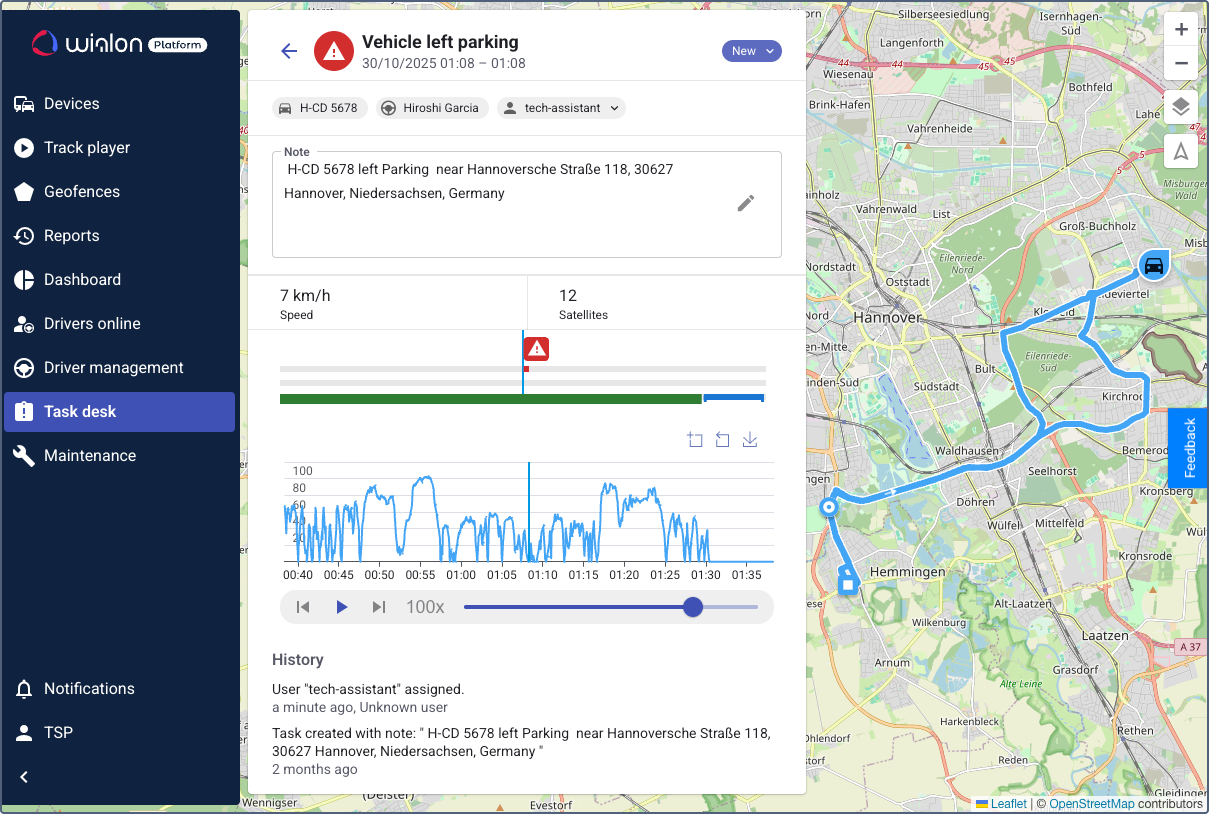
- Task name: Taken from the automation that created it.
- Automation icon: The icon of the automation that created the task.
- Start and end time: The start and end time of the event that triggered the task. If the event is still active, Ongoing is displayed instead of the end time.
- Duration: The duration of the event that triggered the task.
- Status: The current status of the task: New, In progress, Processed, or False. By clicking on this field, you can update the status (requires Update permission for tasks).
- Device name: The device associated with the event.
- Driver name: The driver who was assigned to the device when the task was created (requires Read permission for drivers).
- Assignee: The user to whom the task is assigned (requires View permission for users). By clicking on this field, you can assign or reassign the task (requirers Update permission for users).
- Notes: Notes containing the automation text (by default) or information added by users (requirers Update permission for tasks).
- Address: Address of the incident, if available.
- History: A log of all changes made to the task, such as status updates, assignments, and note edits. Each entry includes the action, the user who performed it, and the time.
- Map: Displays the track of the device during the task time interval. For ongoing tasks, it shows the device’s current location.
Widgets for analyzing task events
The task details page can be customized by the service provider with various widgets to help you analyze the event that triggered the task.
-
Counter (cell), Sensor (cell), Telemetry (cell): Show sensor readings and other device data for the task period.
-
Media: Displays photos or videos received from the device during the incident period.
-
Telemetry chart: Visualizes sensor data over the task duration.
-
Timeline: Shows the task interval plus a 30-minute buffer before and after the event (only 30 minutes before for ongoing tasks). When you click on an event marker on the timeline, an information window appears with key details about the event that generated the task, including:
- Start and end times
- Duration
- Automation text and icon
- Initial and final addresses
- Chips for the task status, device, and driver
-
Track player: Allows you to play back the device movement during the incident. For finished tasks, the cursor is set by default to the beginning of the event. You can move it to review data throughout the incident period. For ongoing tasks, it is set by default to the current time and has a LIVE chip enabled. This chip is disabled automatically when you navigate in the timeline. To enable it again, click on it.
Synchronization across widgets: All interactive widgets share cursor synchronization. When you move the cursor in one widget, the position updates across all others, along with the device position on the map and the displayed data.
Assigning a task to a user
You can assign a task to a user to designate responsibility for its resolution. This requires the Update permission for users.
- On the Task desk page, locate the task you want to assign.
- Click on the user icon
 on the task section.
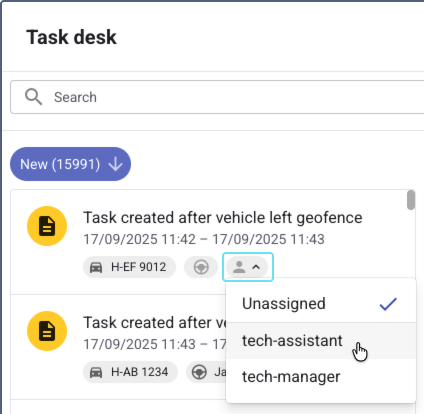
- Select a user from the list. You can also use this list to reassign the task to a different user or unassign it.
You can also assign a task to a user from task details.
Changing a task status
You can update the status of a task to reflect its current stage of resolution.
- In the navigation menu, go to the Task desk page.
- Locate the task you want to update.
- You can update the task status by one of the following methods:
-
Drag it to the required column: New, In progress, Processed, or False.
-
Click on the task to open its details. Click on the current status and select the required status in the menu.
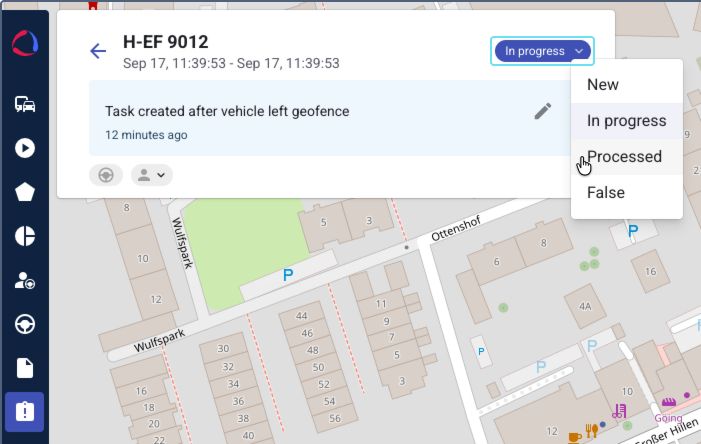
-
This action is recorded in the task history within the task details.
Adding or modifying a note for a task
You can add or edit notes for a task to provide additional information or document actions.
- In the navigation menu, go to the Task desk page.
- Locate the task for which you want to add or modify a note.
- Click on the task to open its details.
- In the note field, enter or edit the text. By default, it contains the text of the automation that triggered the task creation. The note can be up to 1000 characters long.
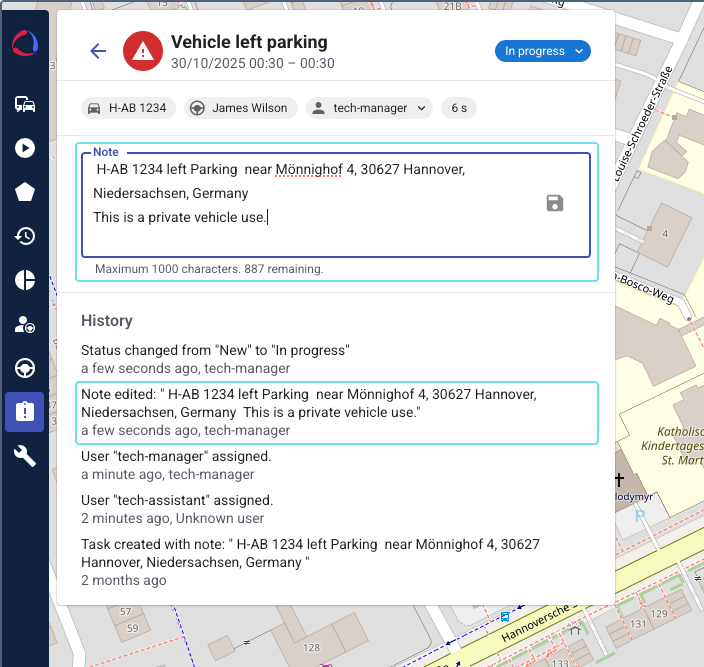
- Click the icon
 to save the note.
This action is recorded in the task history.
Finding and organizing tasks
To find specific tasks on the Task desk, you can use the search and filter options, apply a time filter for resolved tasks, and sort tasks within columns.
Searching and filtering tasks
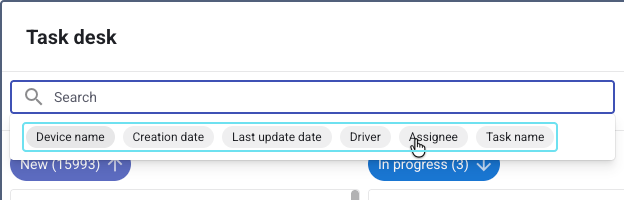
You can filter the list of tasks by the following criteria:
- Device name: The device that triggered the automation with the Create a task action.
- Creation date: The time the task was created.
- Last update date: The time the task was last updated.
- Driver: The driver assigned to the device when the task was created.
- Assignee: The user to whom the task is assigned. You can also select Unassigned to find tasks that have no assignee.
- Task name: The name of the task.
To find a task, use one of the following methods:
Method 1: Quick search
This method is best when you know the name of the device, the user or date you are looking for.
- Start typing in the search field. As you type, the system will suggest matching criteria.
- Select a criterion from the list.
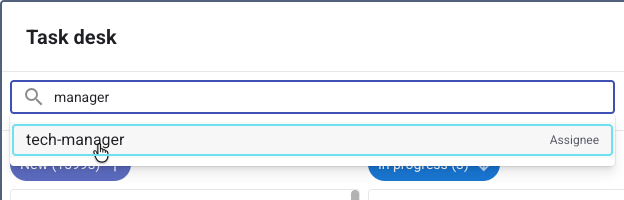
The list is filtered to show all results that match your selection.
Method 2: Filtered search
In this method, you start searching by filtering the list first.
- Click on the search field to open the filter options.
- Select a filtering criterion, for example, Assignee.
- Choose the specific value. For the Assignee filter, you can select one or more users from the list.
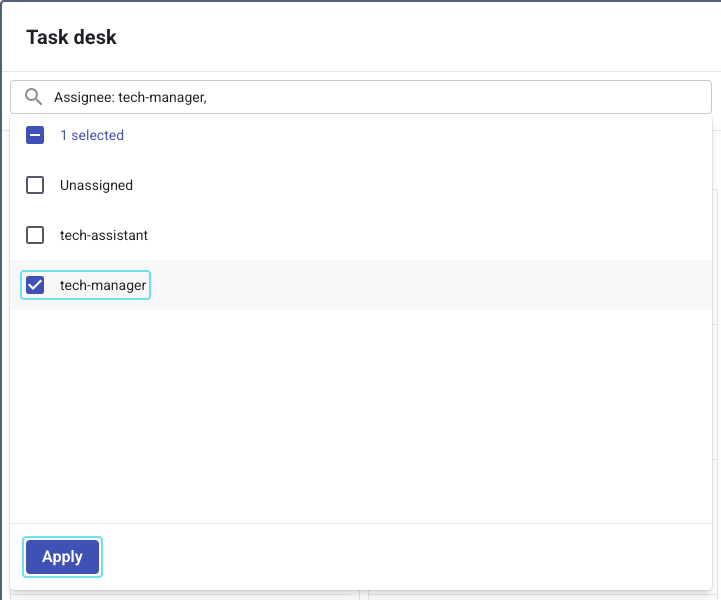
- Click Apply to see all the results matching the selected filter.
- To add another filter, click on the search field again and select an additional criterion.
Filtering resolved tasks by time
You can filter the Processed and False columns to show only tasks that were resolved within a specific time period.
- On the Task desk page, locate the Processed and false filter field.
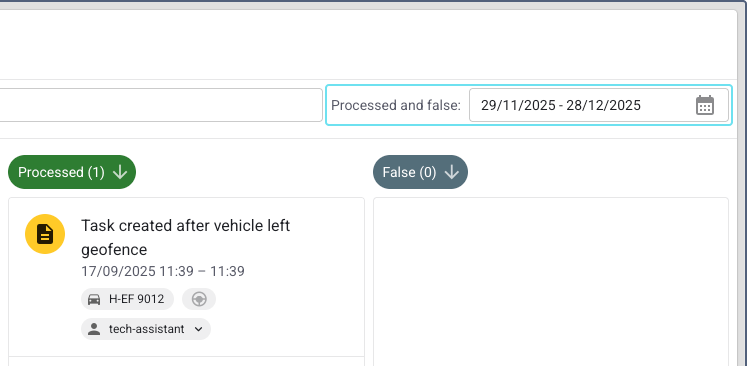
- Select the required time interval.
- Click Apply.
The tasks in the Processed and False columns will update to show only those matching the selected period. The New and In progress columns will remain unchanged.
Sorting tasks
You can sort tasks in the New, In progress, Processed, and False columns by their creation time. By default, the oldest tasks are shown at the top. To change the sorting order, click the icons  and
and  at the top of the column. Your sorting preference will be saved for your current session.