Setting up widgets on the Dashboard
Who can do it: Service provider
Where: Wialon Platform FleetSpace
Dashboard widgets enhance your view by presenting key fleet metrics, trip statistics, and utilization data.
Dashboard widgets are arranged into the sections corresponding to the module they belong to. This page describes how to configure Fleet BI widgets. See the guide for widgets of other modules:
- Checklist widgets
- Driver behavior widgets
- Drivers widgets
- Emissions widgets
- Geofences widgets
- Maintenance widgets
- Trips widgets
After adding all the necessary widgets, you can preview the changes in the workspace. To do this, switch to Preview mode using the button  in the editor mode toolbar and select a user from the user preview dropdown to simulate their session.
You can edit the Dashboard widget names after saving them and closing the editor mode.
Fleet BI widgets
These widgets provide numerical summaries and bar chart breakdowns of your fleet’s performance.
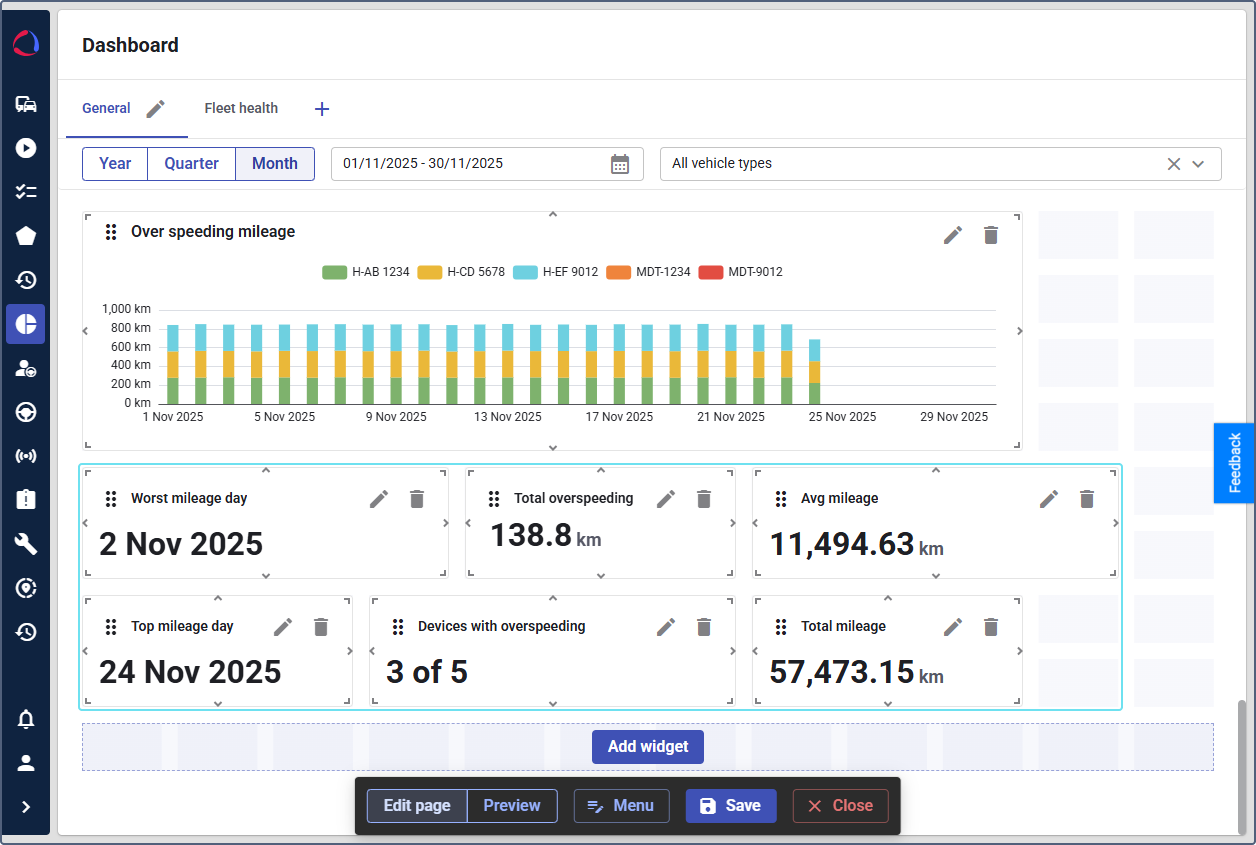
Fleet metric (value card)
This widget displays a single metric displayed as a numerical value. To configure the widget, follow these steps:
-
In the editor mode, click the Add widget button.
-
In the Add to dashboard panel, locate Fleet BI. You can also use the search to find the widget by name.
-
In the View value dropdown of the Fleet metric widget, select the metric you want to display. You can add the following metrics:
- Avg mileage
- Total mileage
- Total overspeeding
- Devices with no overspeeding
- Top mileage day
- Worst mileage day
-
Click the icon
 next to Fleet metric (value card).
 -
(Optional): Repeat the actions to add other metrics as separate widgets.
The selected metric will be added to your Dashboard, showing the current value.
Click the widget to see details for each device for the selected metric. You can also go to the Trips report from the details.
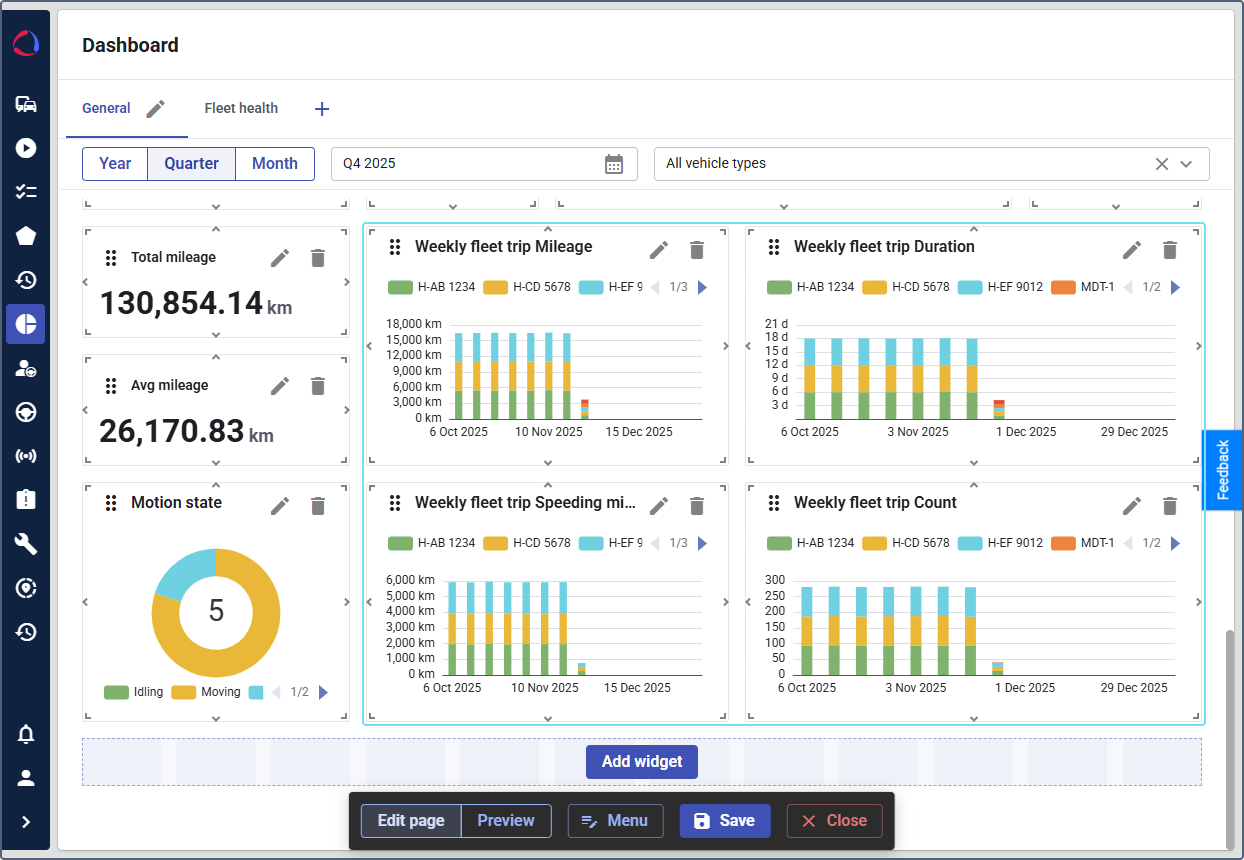
Fleet trip stats (bar chart)
This widget shows a daily bar chart comparing different trip-related values over the selected period. To configure the widget:
-
In the editor mode, click the Add widget button.
-
In the Add to dashboard panel, locate Fleet trip stats (bar chart).
-
In the widget settings, use the View value dropdown to select the trip statistic to be visualized:
- Duration
- Mileage
- Speeding mileage
- Count
-
Click the icon
next to the widget. -
(Optional): Repeat the actions to add other charts as separate widgets.
The selected charts will be added to your Dashboard.
Click a chart bar to view detailed mileage information for the selected device. You can also go to the Trips reports from the chart details.
Mileage by vehicle (bar chart)
This widget displays the total mileage accumulated by each vehicle in your fleet. To configure the widget:
- In the editor mode, click the Add widget button.
- In the Add to dashboard panel, locate Fleet BI.
- Click the icon next to Mileage by vehicle (bar chart).
A bar chart comparing the mileage of all vehicles will be added to the Dashboard.
Click a chart bar to view detailed mileage information for the selected device. You can also go to the Trips reports from the chart details.
Top devices with speeding (bar chart)
This widget displays a horizontal bar chart ranking devices by their share of mileage with overspeeding. The chart shows two categories: Mileage without overspeeding and Mileage with overspeeding.
To configure the widget:
- In the editor mode, click the Add widget button.
- In the Add to dashboard panel, locate Fleet BI.
- Click the icon next to Top devices with speeding (bar chart).
After disabling the editor mode, click a chart bar to see detailed overspeeding information for the selected device, including speeding mileage, mileage share, and violation count. You can also go to the Driver behavior violations report from the details.
In all widget details views, you can sort the data by clicking a column header and download it in CSV format.
Analysis period options
When customers view the Dashboard, they can select the analysis period using the toggle at the top of the page.
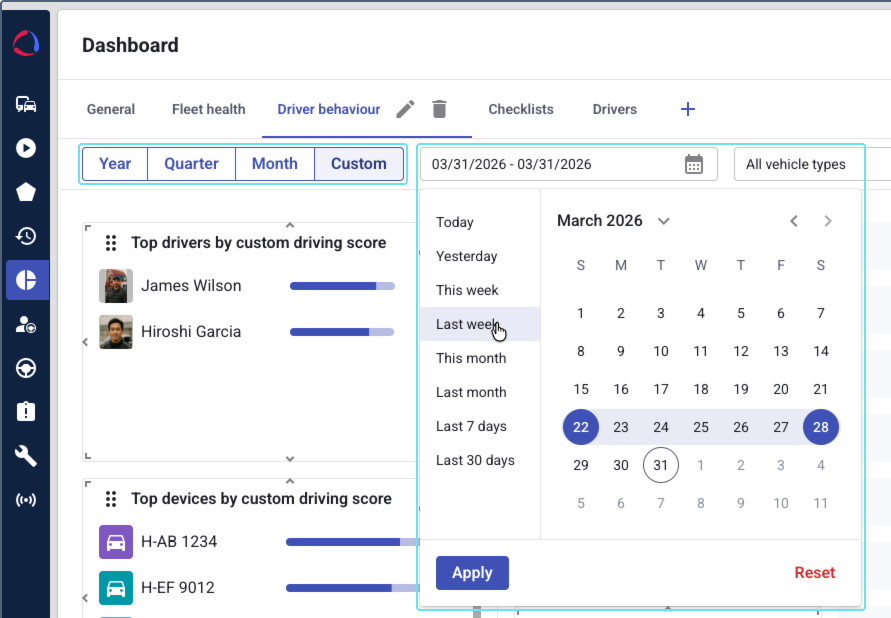
The following period options are available:
| Period | Description |
|---|---|
| Year | Displays data for the current calendar year. |
| Quarter | Displays data for the current quarter. |
| Month | Displays data for the current month. |
| Custom | Allows the customer to define a custom date range using the calendar. The maximum selectable range is 1 year. Future dates can’t be selected. |
All dashboard widgets display data for the selected period. Value cards and totals show the accumulated number for the entire range, while time-based charts (bar charts, line charts) break down data into intervals. When Custom is selected, the system automatically determines these intervals based on the length of the selected range:
| Date range | Data grouped by |
|---|---|
| Up to 31 days | Day |
| 32–93 days | Week |
| More than 93 days | Month |
When previewing the workspace, you can test different period options to verify the widget behavior.
Device filter
When customers view the Dashboard, they can filter the displayed data by specific devices using the device selector at the top of the page.
This filter groups devices by vehicle type. Customers can select:
- All devices (default option) — expand the device list and check the box above it.
- All devices of a certain vehicle type — click the vehicle type name to include all devices of this type.
- Select individual devices — check the boxes next to the naes of the required devices.
- Select devices without any type — use the Without types group to include devices that aren’t assigned to any vehicle type.
Selected devices appear as chips in the filter field. To remove a device from the filter, click the close icon on its chip.
All dashboard widgets are updated to display data only for the selected devices.