Managing access and creating clients
This page explains how to manage access to the service provider account and the client accounts.
The service provider account helps you manage your business operations, including billing plans, client oversight as well as configure interfaces and devices for your clients (customers). This account can be accessed by multiple service provider users, who are assigned specific roles. Depending on the user role, these users help you manage your clients (customers) on different levels.
Customer accounts are the accounts belonging to your clients. Within these accounts, you can create customer users and grant them access to specific features and assets relevant to their daily operations.
The accounts configuration includes the followings steps:
- Managing users in your service provider account in Wialon Platform Studio.
- Create a customer template.
- Create customers using the template.
- Create customer users and grant them permissions to access features.
Managing users in your service provider account
Once you log in to Wialon Platform Studio as a service provider, ensure you have the Administrator role to be able to invite other users to manage this account and assign billing plans to your customers.
To invite a new user and assign them a role, follow the next steps:
-
In Wialon Platform Studio, go to the Team page in the Access and logs section. To see or hide the names of the pages, expand and collapse the sidebar using the icons
 and
and  . The current user role is shown in the Role column for the user with the email you used to log in.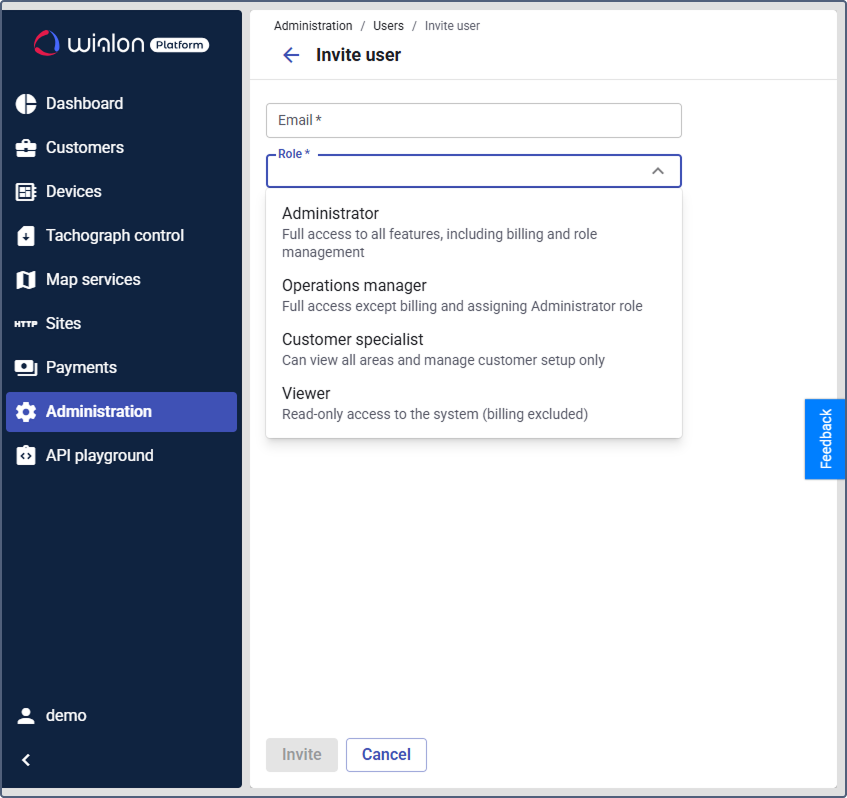
-
Click New user.
-
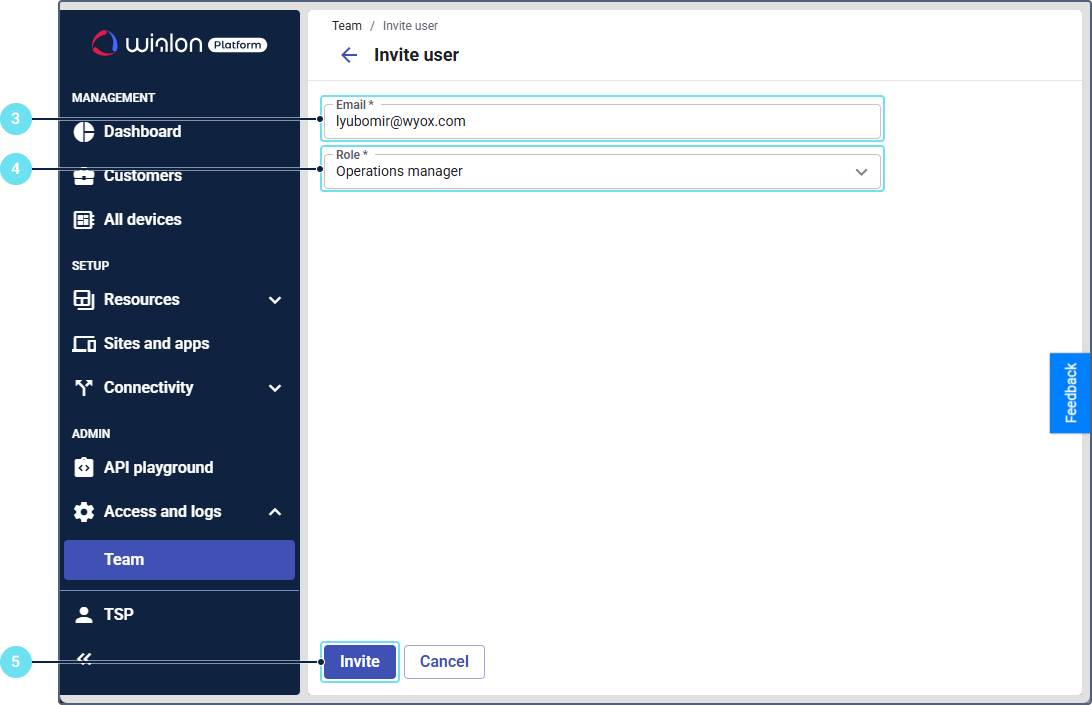
Enter the user’s email address.
-
Select the required role.
-
Click Invite. The invited user receives an email with a link to set a password and sign in to this service provider account.
Under the Administrator role you can create and assign new administrators and users with auxiliary roles, such as Operations manager, Customer specialist and Viewer. After the users accept your invitations, you can assign other roles to them clicking on their name in the list.
For the full instruction and role descriptions, see Inviting users with specific roles to Wialon Platform.
Creating a customer template
Customer templates help you standardize configuration of client accounts and speed up onboarding.
-
In Wialon Platform Studio, open Resources.
-
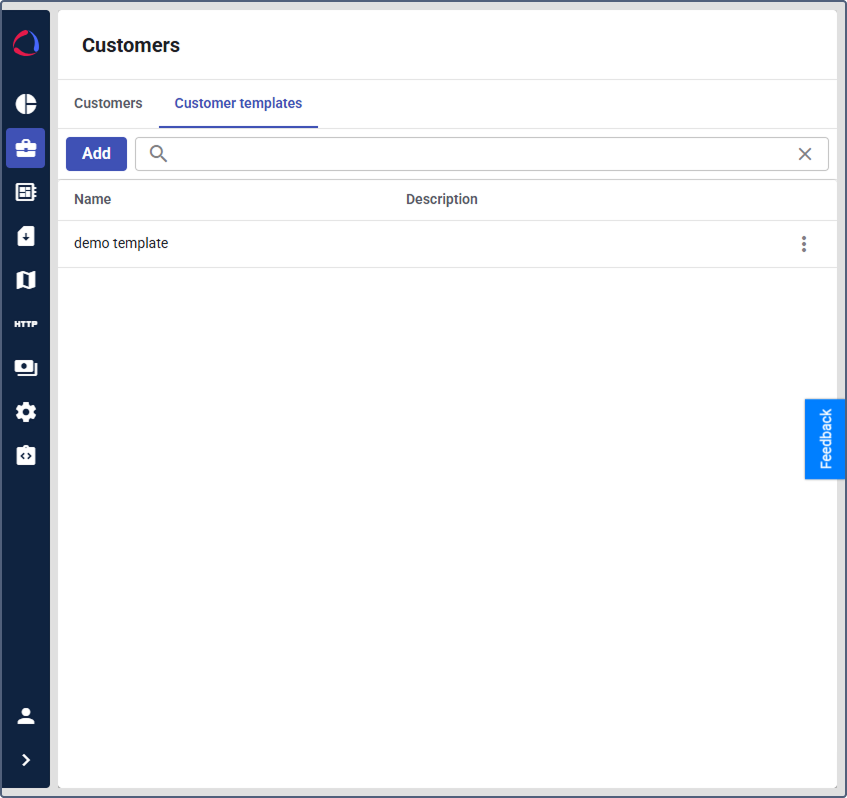
Select Customer templates.
-
Click Add first template on the empty page, or New template if you already have templates.
-
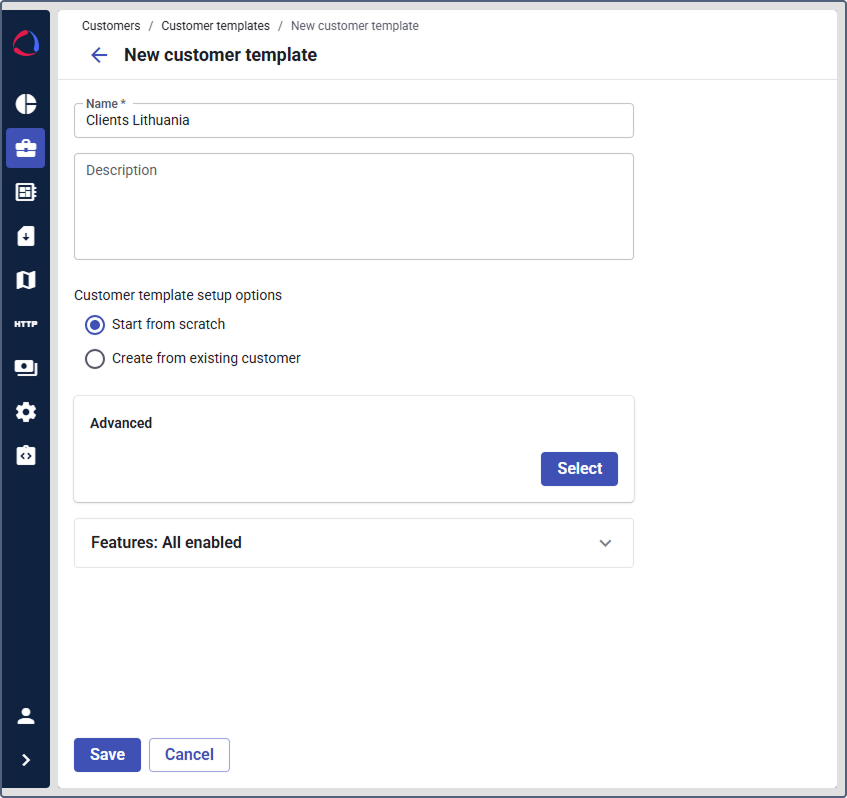
Enter a template name (and a description, if needed).
-
Select Start from scratch.
-
Select the initial billing plan: Fleet digitalization or Indoor asset tracking.
-
Expand the Features section to enable or disable the features for the template.
-
Click Save.
-
Open the created template from the list and configure the required tabs (for example, Labels, Automations, Geofence groups, Forms, Driver behavior, Settings).
-
Click Save to apply changes.
Now you are ready to create client accounts using the customer template. You can also create a single customer following the next instruction.
For details, see the documentation section Customer templates and the billing plans description on the page Assigning billing plans to customers.
Creating a customer (client) using a template
-
Open the Customers page.
-
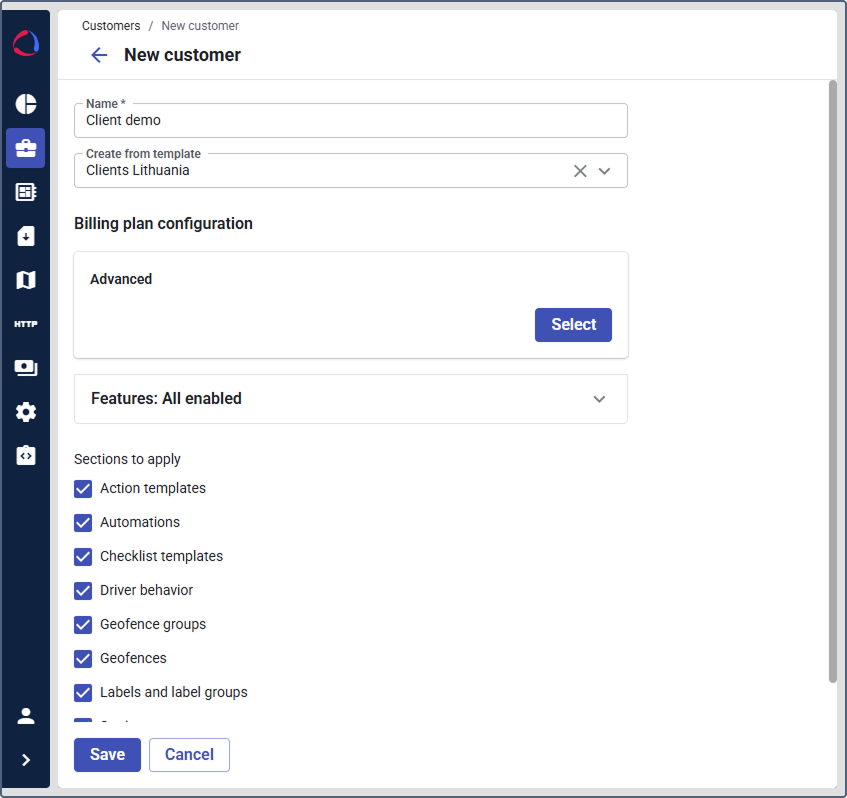
Click Add first customer, or click New customer if you have already created customers.
-
On the General step, enter the customer name, select the locale (language, region, and date and time format) and the time zone, and add the contact email, if needed. You can change the locale and the time zone later in the customer settings.
-
Click Next.
-
On the Plan step, click Select on the required plan.
-
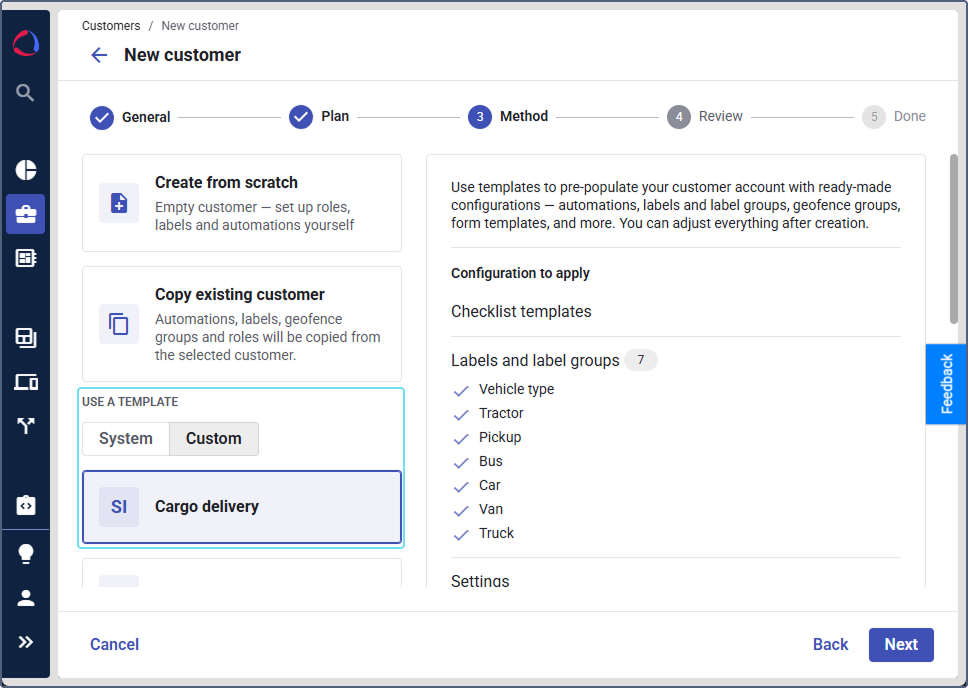
On the Method step, find the Use a template section and select the template you created on the Custom tab. On the System tab, you can find the templates provided by Wialon.
-
Click Show configurations and check which configuration to apply from the template (for example, action templates, automations, geofence groups, labels and label groups, settings). All the areas are selected by default, and at least one of them must stay selected.
-
Click Next.
-
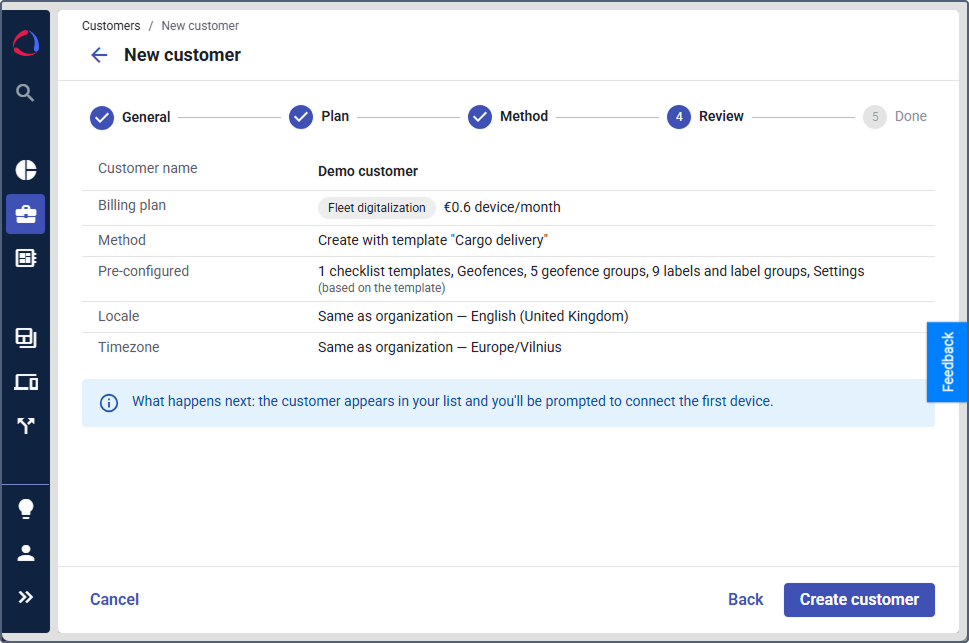
On the Review step, check the summary of the account and click Create customer.
-
On the Done step, open the new customer to connect the first device, or close the wizard and return to the Customers page.
For details, see Creating customers.
Now that you have a client account (customer), you must create users of this account and grant them permissions.
Creating customer users and granting them permissions
After creating a customer, create at least one user so your client can log in to Wialon Platform FleetSpace.
-
In Wialon Platform Studio, open the Customers page.
-
Select the created customer.
-
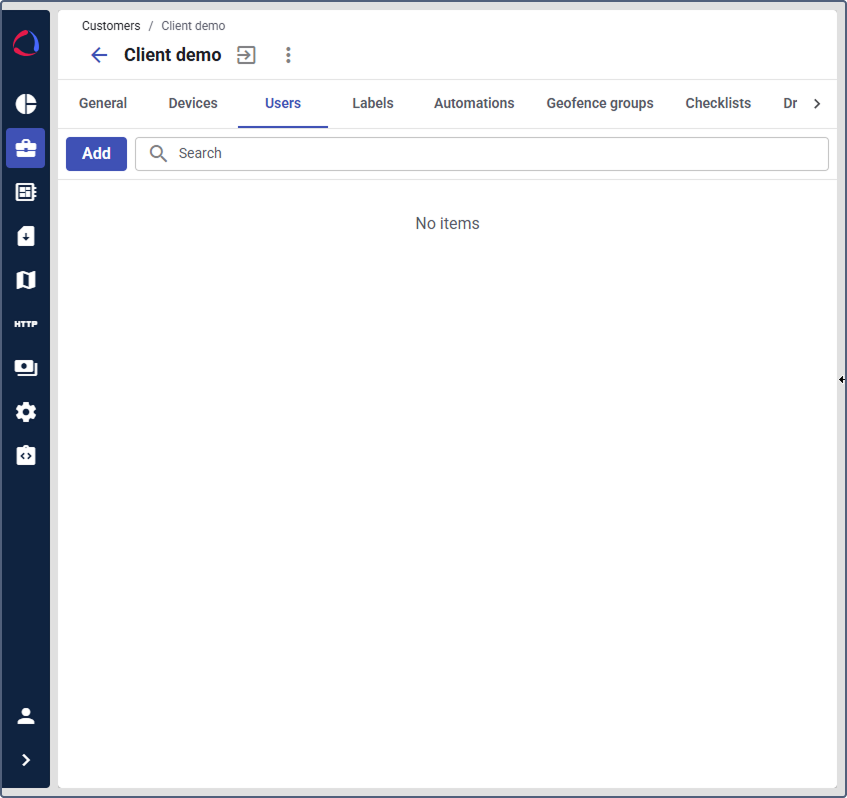
Open the Users tab.
-
Click Add first user on the empty page, or New user if you have users aready.
-
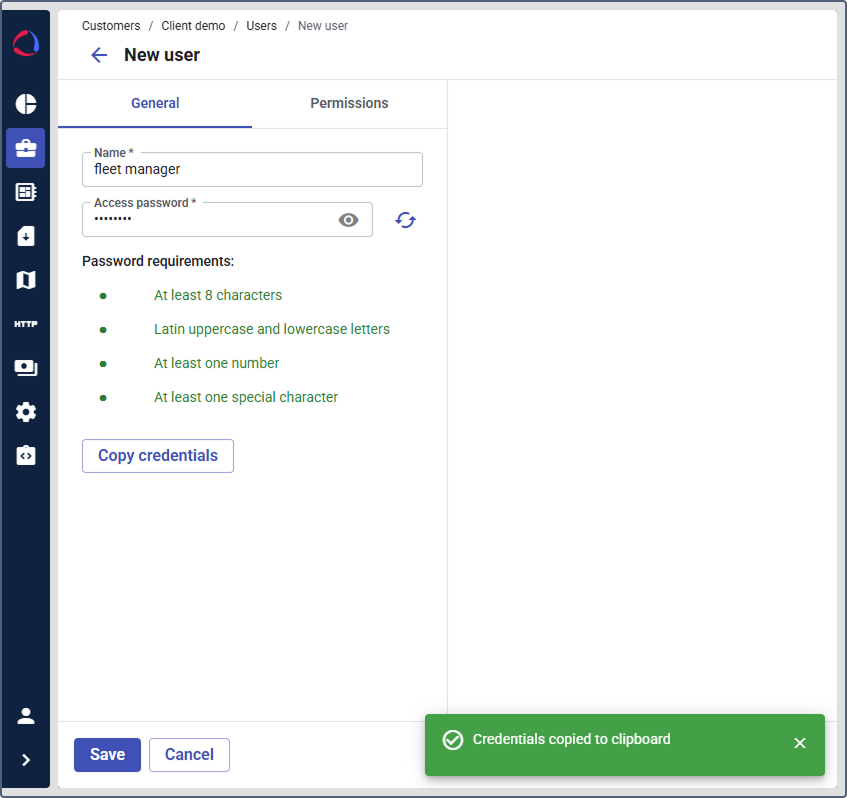
On the General tab, enter a name and set a password (or generate it using the icon
 ).
).
-
Click Copy credentials to share login details with the user. The copied text contains the user name and password for logging in to Wialon Platform FleetSpace.
-
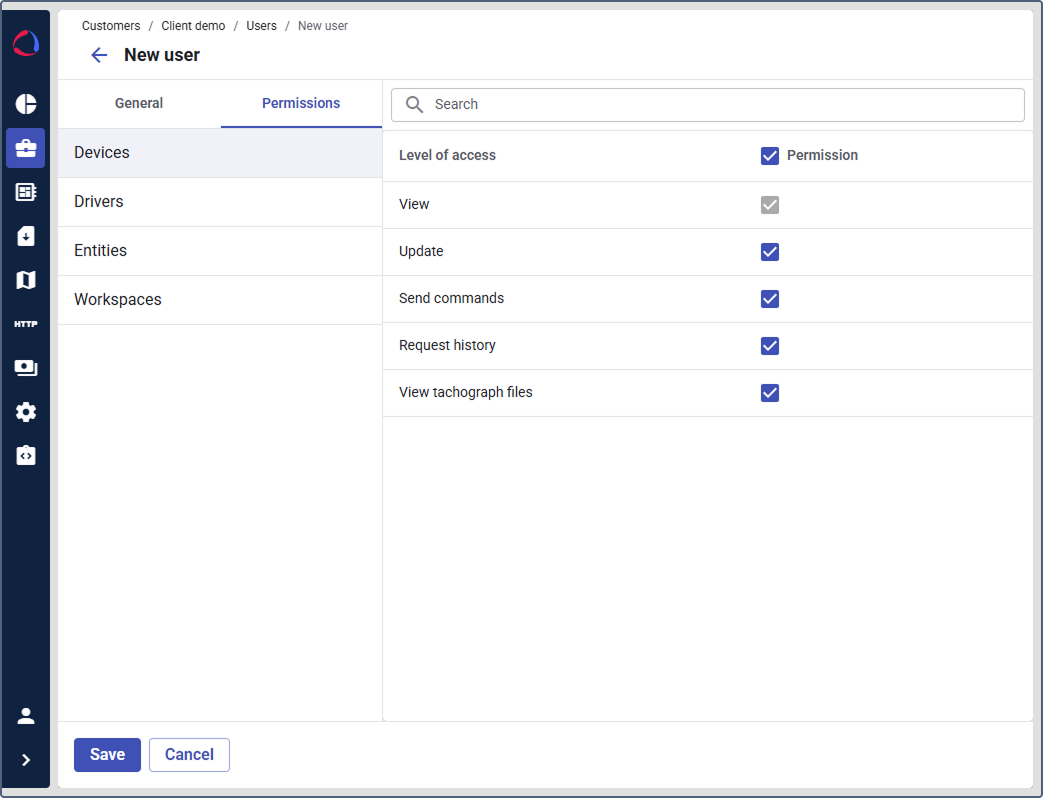
Open the Permissions tab and configure access:
- Devices: Define the level of access the user needs to manage their fleet.
- Drivers: Define the level of access the user needs to manage drivers.
- Entities: Grant permissions for modules the user needs (for example, Geofences, Forms, Tasks, Services).
- Workspaces: Select which workspaces the user can access in Wialon Platform FleetSpace.
-
Click Save.
For details, see Creating customer users and Managing user permissions.