Managing user roles
Who can do it: Service provider
Where: Wialon Platform Studio
A role is a reusable set of permissions that you can assign to one or more customer users. Instead of configuring permissions individually for each user, you can create a role once and apply it to multiple users across different customers. When you update a role, the changes apply to all users who have that role.
A user can have either a role or individual permissions, but not both at the same time. When you assign a role to a user, the role replaces any previous role or individual permissions.
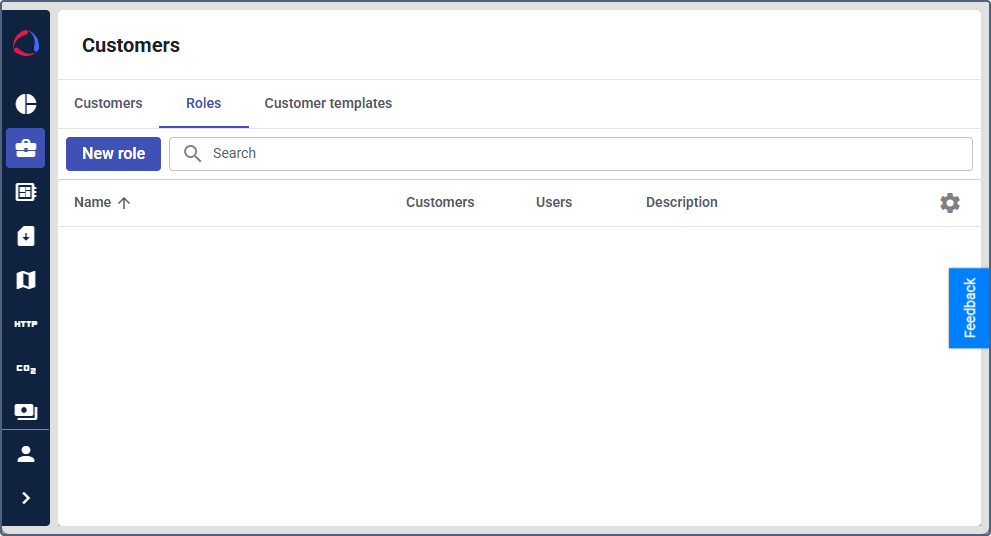
Roles are managed on the Roles tab of the Customers page.
Creating a role
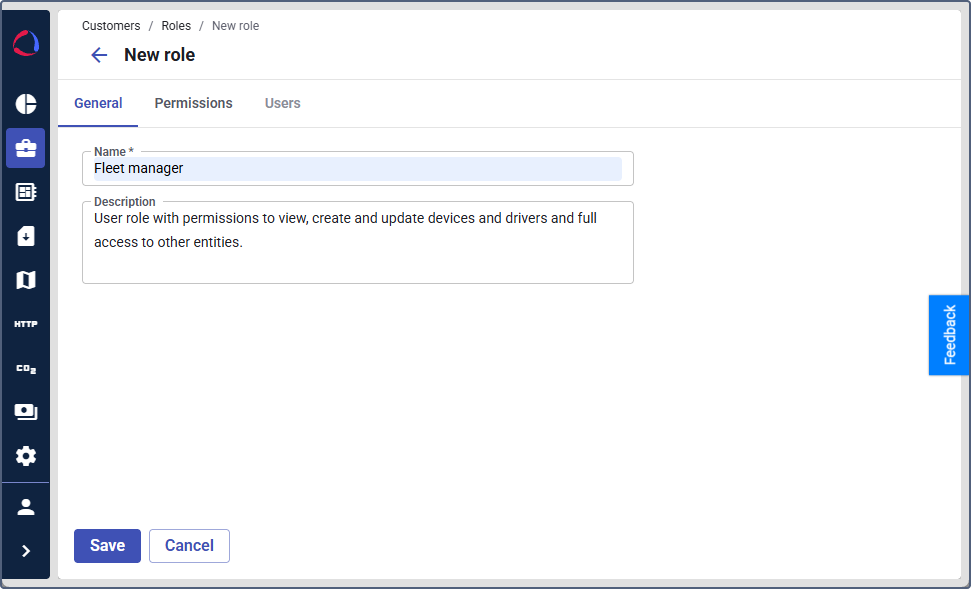
To create a role:
-
In Wialon Platform Studio, go to the Customers page.
-
Open the Roles tab.
-
Click New role.
-
On the General tab, enter a role name and an optional description.
-
Click Next.
-
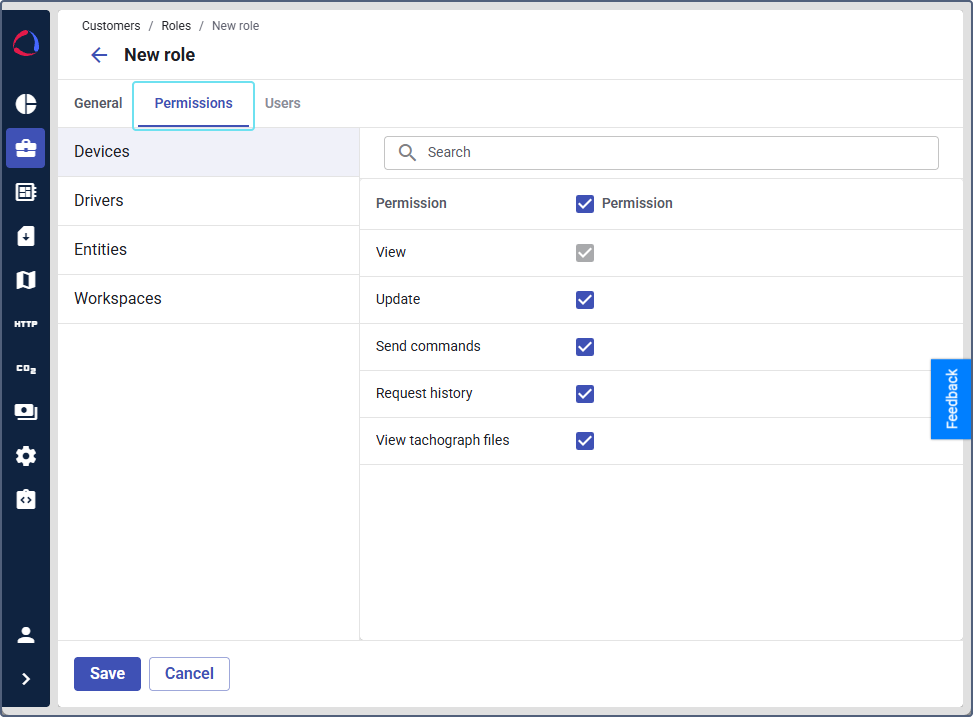
Open the Permissions tab.
-
Set the permissions for the role in the four main categories: Devices, Drivers, Entities, and Workspaces. The available permissions are the same as for individual user permissions.
-
Open the Users tab.
-
Assign the role to the users who must have the selected permissions. To do this, follow the guide to assigning roles from step 3.
-
Click Save.
After saving, the role appears in the roles table and becomes available for assignment to users. The Users tab of the role also becomes available.
Assigning a role to users
You can assign a role to users in two ways: from the Roles tab or from the Users tab.
Assigning a role from the “Roles” tab
Use this method to assign a role to multiple users at once.
- On the Roles tab, click the role you want to assign.
- Open the Users tab.
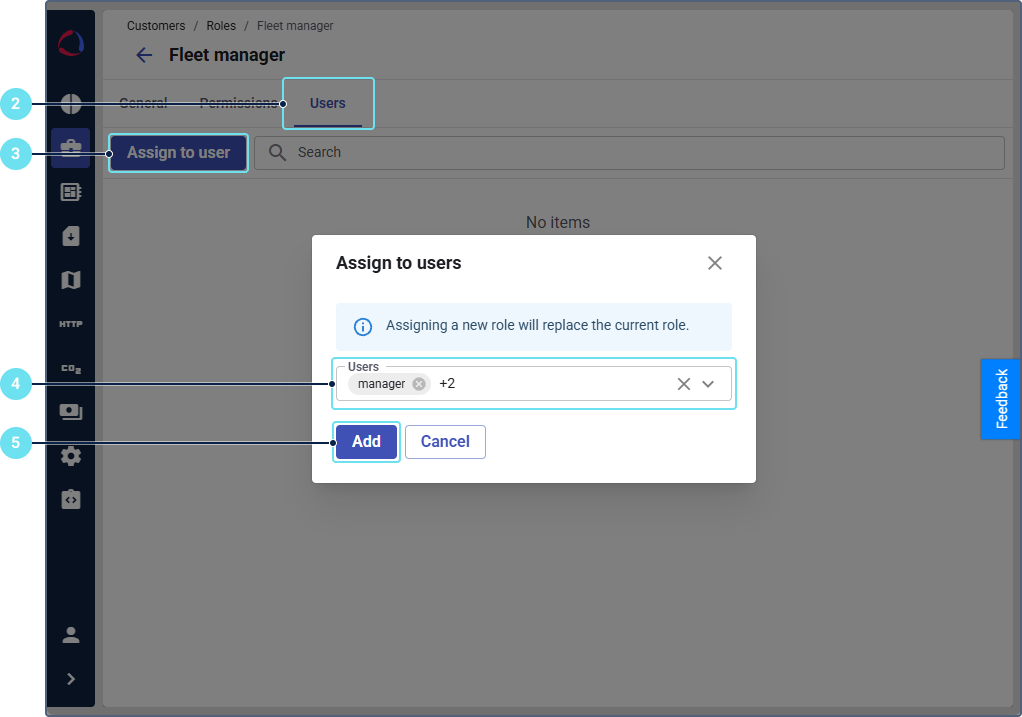
- Click Assign to user.
- Click the Users field to open the list of customer accounts and their users. Select the users you want to assign this role to.
- Click Add.
The selected users now have this role, and their permissions match the role configuration.
Assigning a role from the “Users” tab
Use this method to assign a role to a specific user.
- On the Customers page, select the customer account.
- Open the Users tab and click the user you want to configure.
- Go to the Permissions tab.
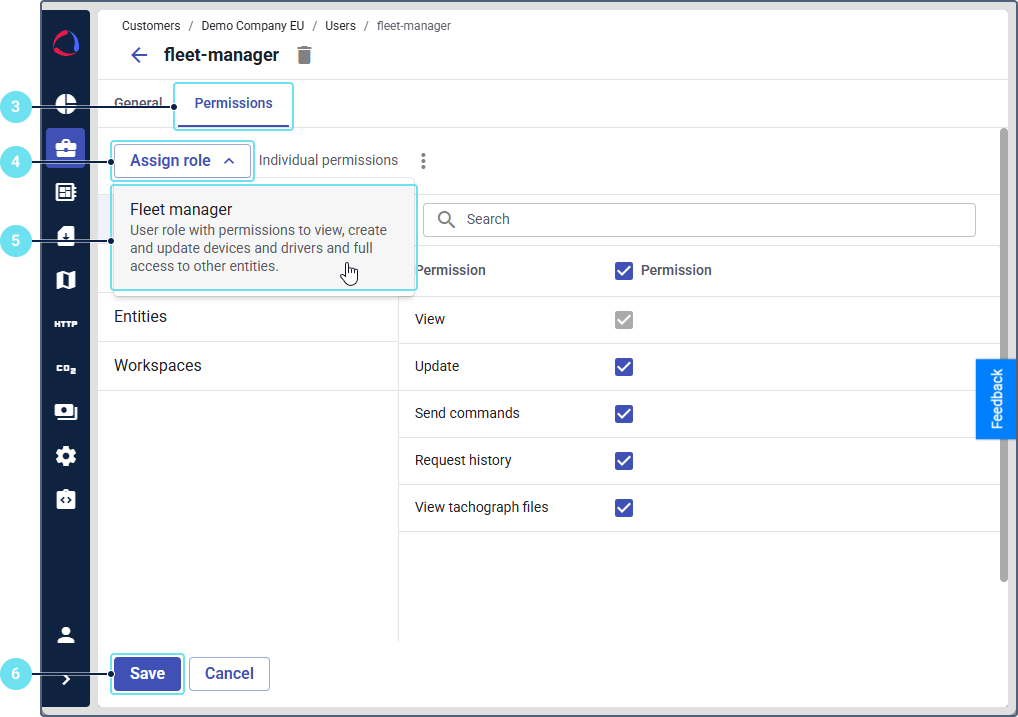
- Click the Assign role button.
- Select the role from the list. The dropdown shows the role name and description you’ve added.
- Click Save.
After saving, the role name appears as a label next to the Assign role button. The user’s permissions now match the role configuration.
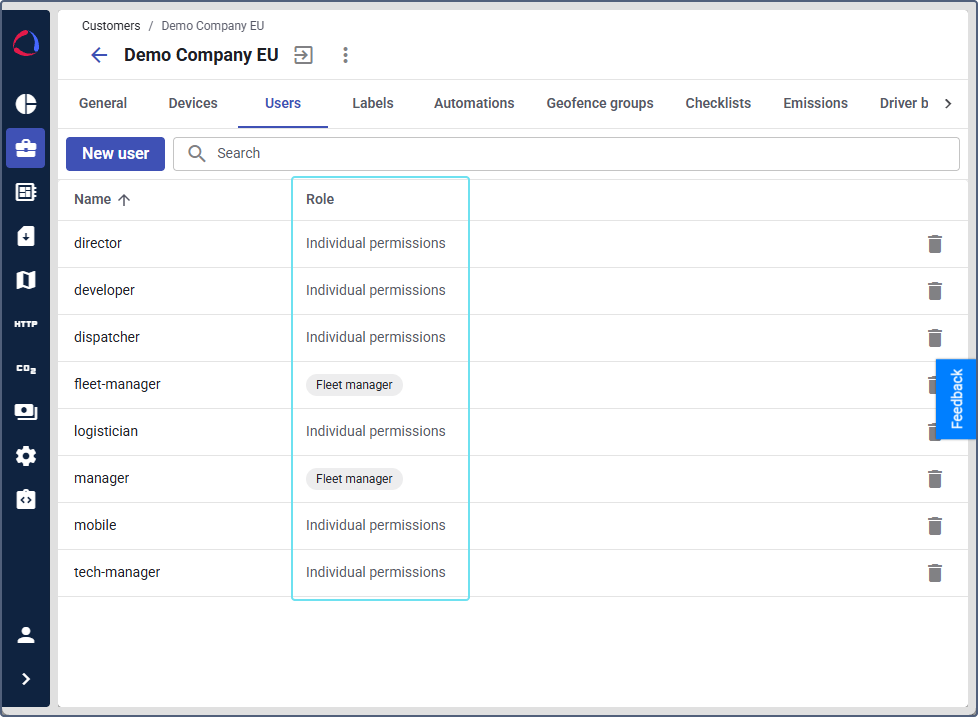
Viewing users with roles
You can see which role is assigned to each user on the Users tab on the Customers page. The Role column shows the role name as a label or displays Individual permissions if the user doesn’t have a role.
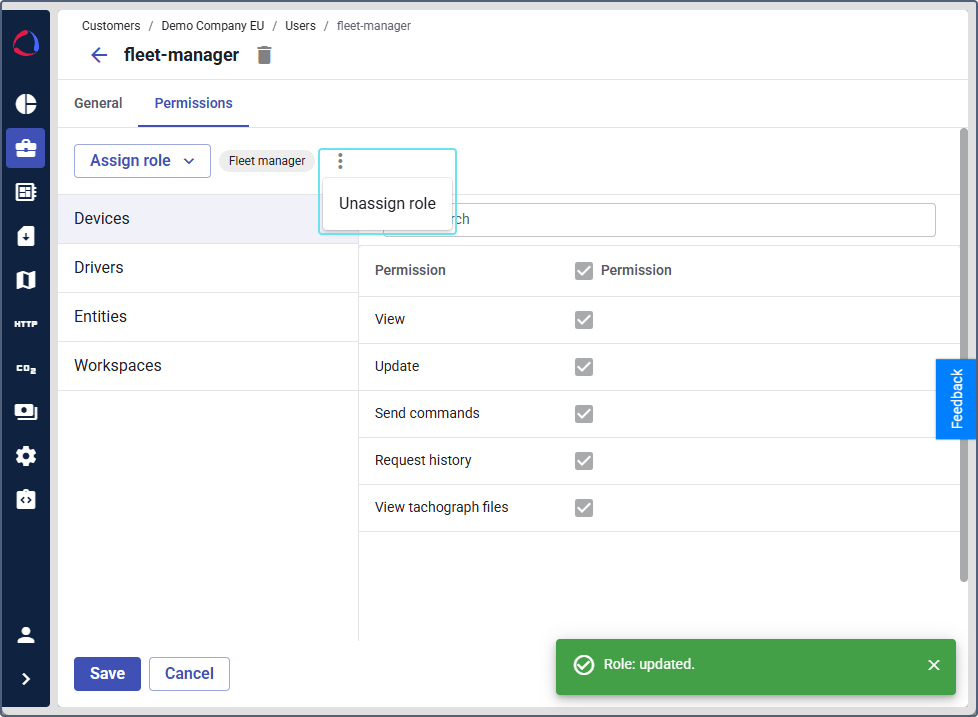
Unassigning a role
To remove a role from a user without changing their current permissions:
-
On the Users tab, select a user.
-
Go to the Permissions tab.
-
Click the icon
 next to the role name.
 -
Click Unassign role.
-
Click Confirm to unassign a role and switch to individual permissions.
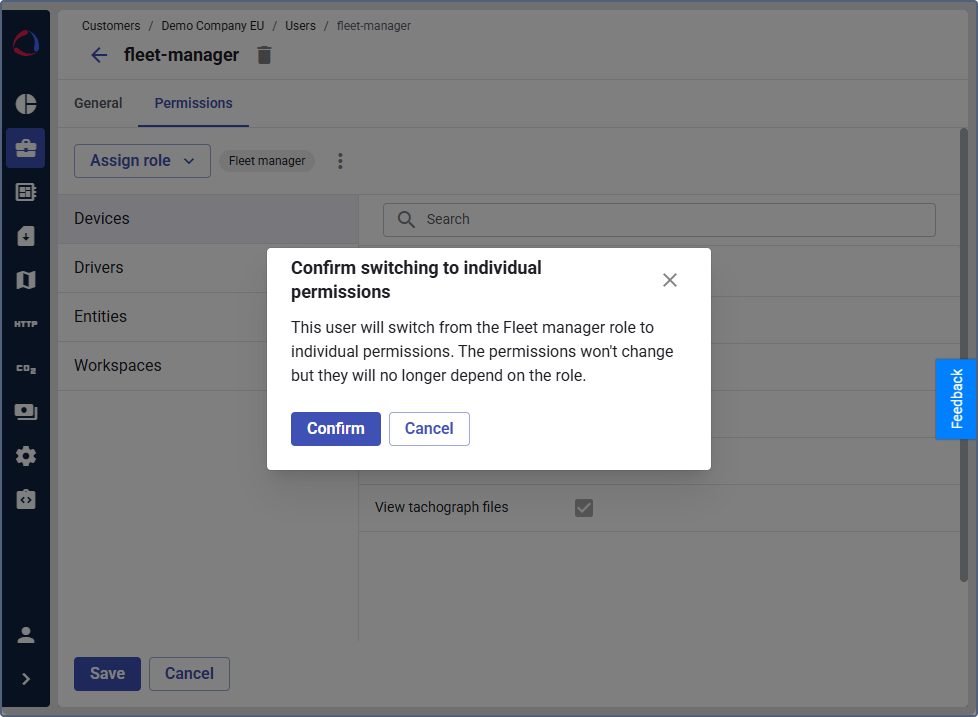
After you unassign a role, the user keeps the same permissions but they become individual and are no longer linked to the role. You can now customize this user’s individual permissions. The changes in the user settings won’t affect the role.
Saving individual permissions as a new role
If you have customized a set of individual permissions for a user and you want to reuse it, you can save your setup as a new role:
-
On the Users tab, select a user.
-
Go to the Permissions tab. The user must have individual permissions (not an assigned role).
-
Click the icon
. -
Select Save as new role.
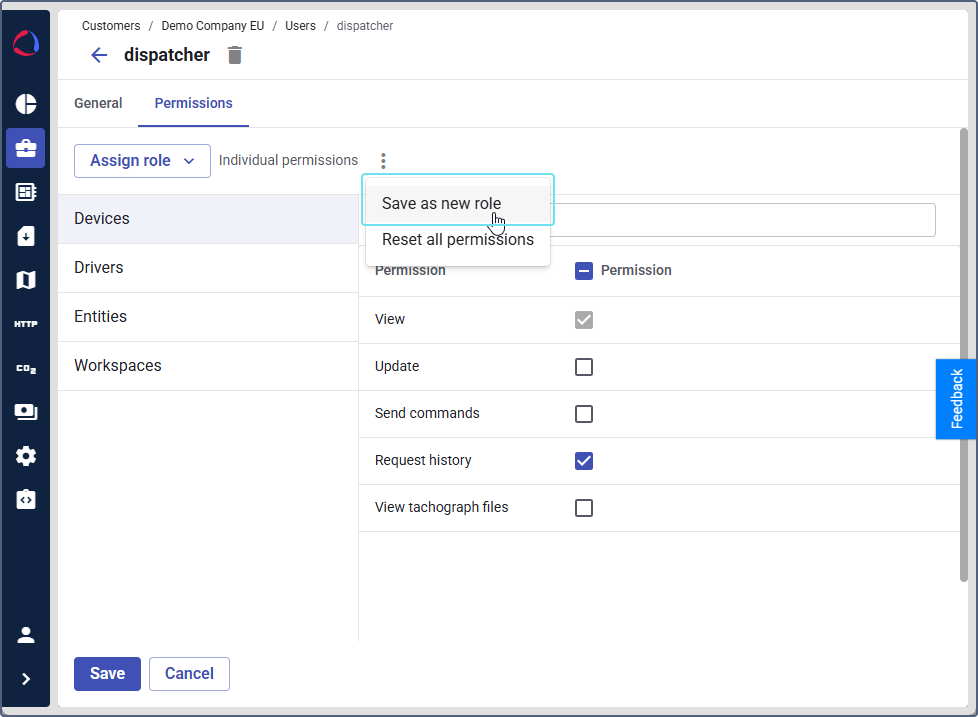
-
Enter a name and a description for the new role and click Save.
The new role is created with the user’s current permission configuration and is automatically assigned to the currect user. You can view and edit this role on the Roles tab.
Editing a role
You can edit permissions in the existing role without creating a new one.
Changes to a role apply immediately to all users who have this role assigned.
To edit an existing role:
- On the Roles tab, click the role you want to edit.
- Update the name, description, or permissions as needed.
- Click Save.
Deleting a role
To delete a role, click the icon  in the role row on the Roles tab and confirm the deletion.
You can’t delete a role if there are assigned users. To delete a role, unassign users first.
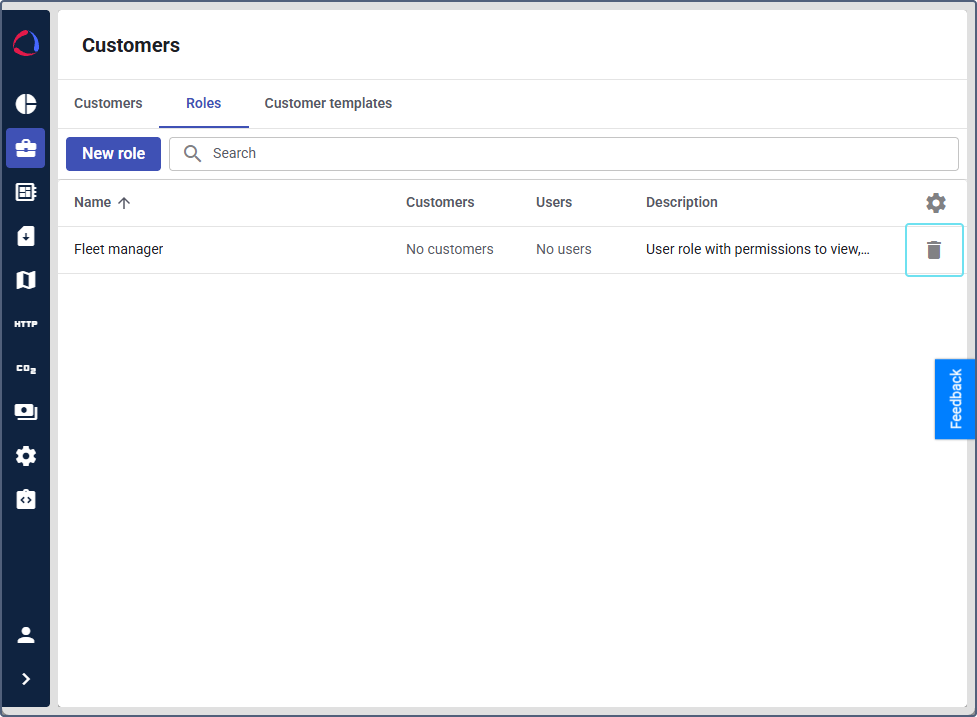
Managing the roles table
The roles table on the Roles tab displays the following columns:
- Name: The role name.
- Customers: The number of customer accounts that have users with this role.
- Users: The number of users this role is assigned to.
- Description: The role description.
You can sort the table by clicking a column header. To manage column visibility or change column order, click the icon  above the table. Use the checkboxes to show or hide columns, and drag them to change the order. Click Reset to restore the default settings.
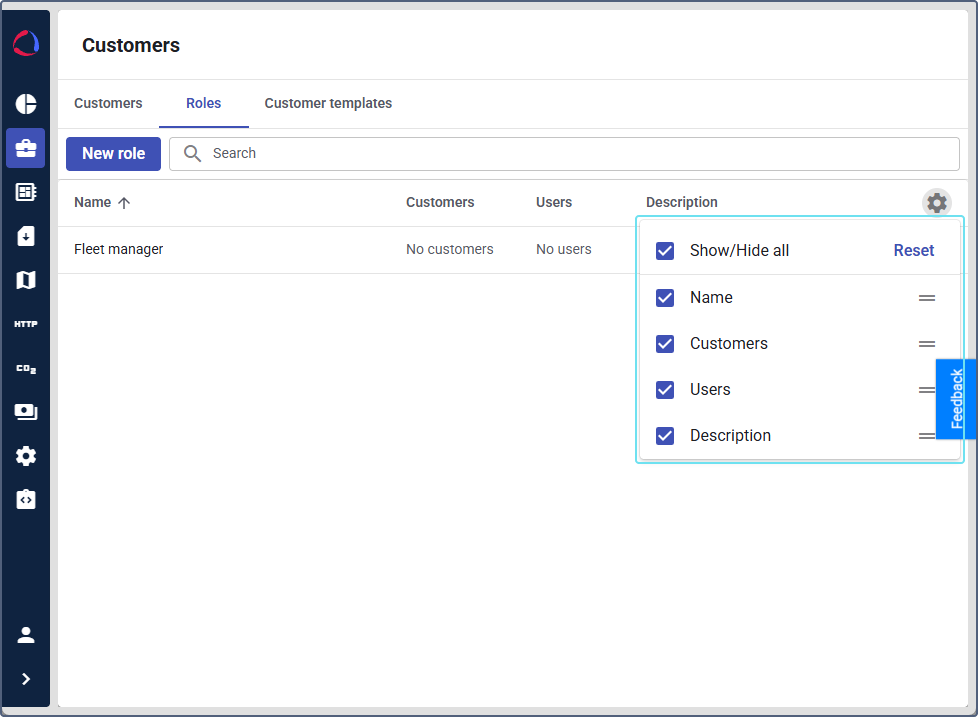
Use the search field to filter roles by name.