Adding label chips and widgets
Who can do it: Service provider
Where: Wialon Platform FleetSpace
The Labels module includes the following widgets:
To add the label chips in the devices list, enable the editor mode on the Devices page.
Adding the “Labels” chip
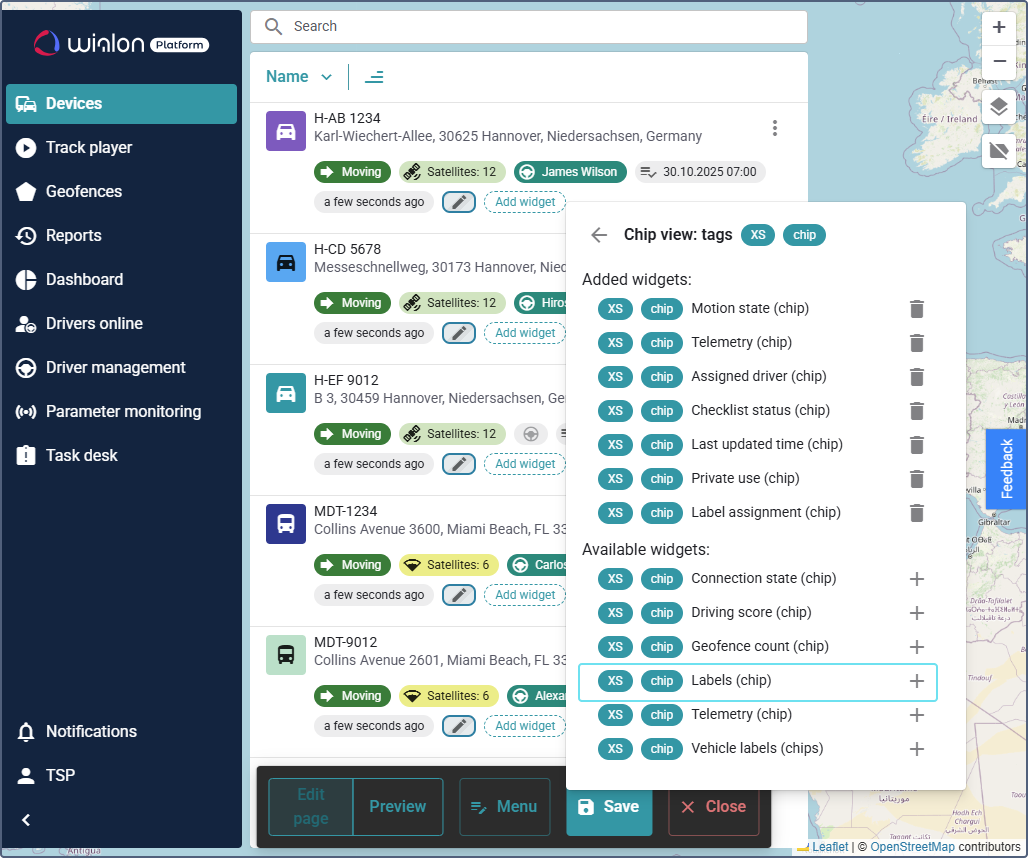
The Labels chip displays the selected assigned labels or label groups. To add it, follow these steps:
-
Click Add widget in any device card in the list.
-
In the Chip view: tags window, locate the Labels chip in the list. To quickly find the widget in the list, start typing its name in the Search bar.
-
Click the icon
 next to the Labels chip.
 -
In the chip settings, enter comma-separated masks for individual labels or label groups you want to display as chips.
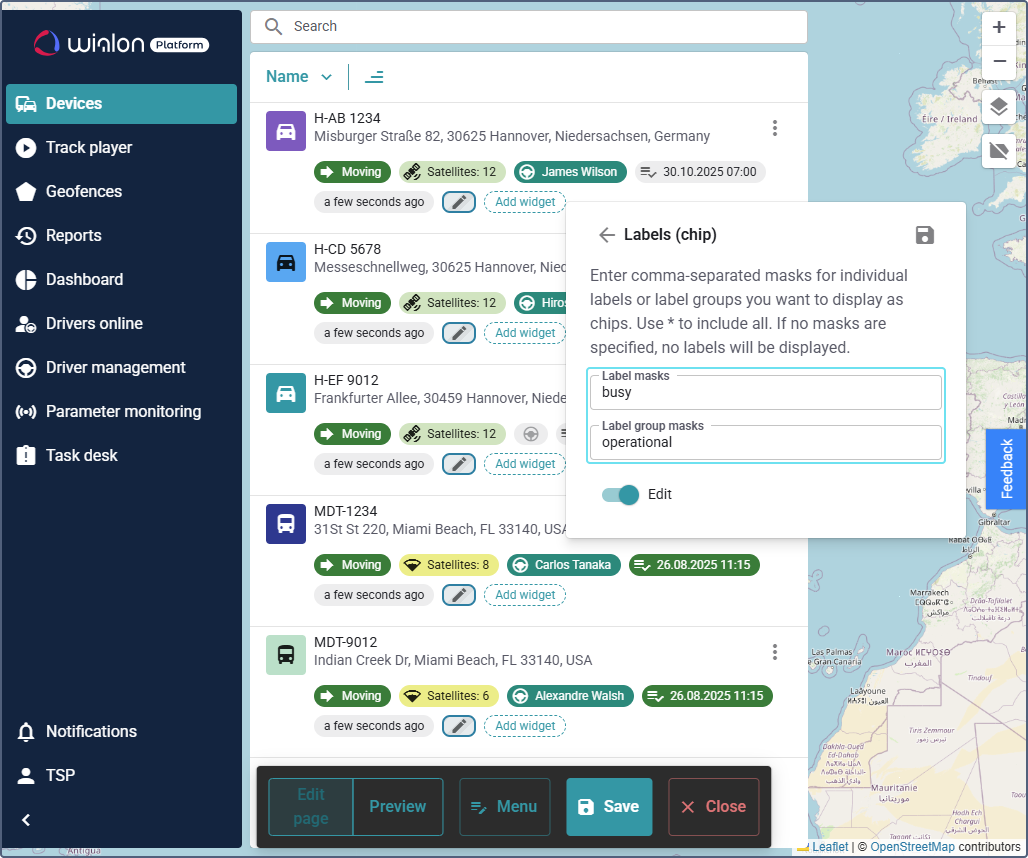
If no masks are specified, no labels will be displayed. If you want to display all the assigned labels, enter an asterisk (*).
- You can enter a part of the label name or label group name. For example, if you type
operationin the Label group masks field, the labels included in the groups calledoperation modeoroperation statuswill be displayed. - If both the label name and label group fields contain filter criteria, labels matching either the specified names or belonging to the specified group will be displayed. For example, if you enter
bluein the label name field andoperationin the group name field, two chips will be displayed:blueand a label from theoperationgroup.
- You can enter a part of the label name or label group name. For example, if you type
-
(Optional): Enable the Edit toggle to allow selecting the label from the dropdown list.
-
Click the icon
 in the chip settings.
 -
Click the button
in the editor mode toolbar to apply the changes.
You have now successfully added the label chip, allowing you to monitor vehicle statuses in the device list. The added chip is applied to all the devices in the list.
Adding the “Labels” cell widget
The Labels (cell) widget displays assigned labels or labels from selected label groups in a table format. It works similarly to the Labels (chip) but it must be added to the Table view widget. For instructions on adding the cell widgets, see Setting up widgets in the device details.
Adding the “Set label” widget
You can add the Set label action widget to the device menu in the list. The configured widget allows manually assigning a label to a device.
To add the widget, follow these steps:
-
In the device list, click the icon
 or
or  next to any device.
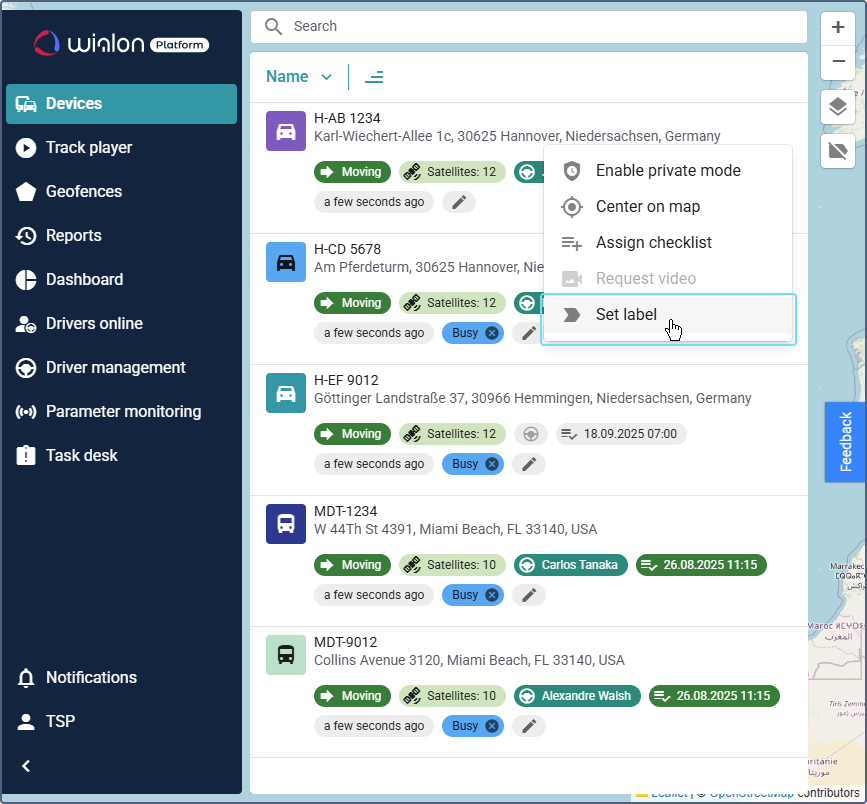
-
Click the icon
in the Set label chip row. To quickly find the widget in the list, start typing its name in the Search bar. -
In the Set label window, enter comma-separated masks for specific labels or label groups that should be available for manual assignment using the dropdown menu. Use an asterisk (*) to include all available labels.
- You can enter a part of the label name or label group name. For example, if you type
operation, the labels included in the groups calledoperation modeoroperation statuswill be displayed. - If both the label name and label group fields contain filter criteria, labels matching either the specified names or belonging to the specified group will be displayed.
- You can enter a part of the label name or label group name. For example, if you type
-
Click the icon
 .
. -
Click the button
in the editor mode toolbar to apply the changes.
Using the “Set label” widget
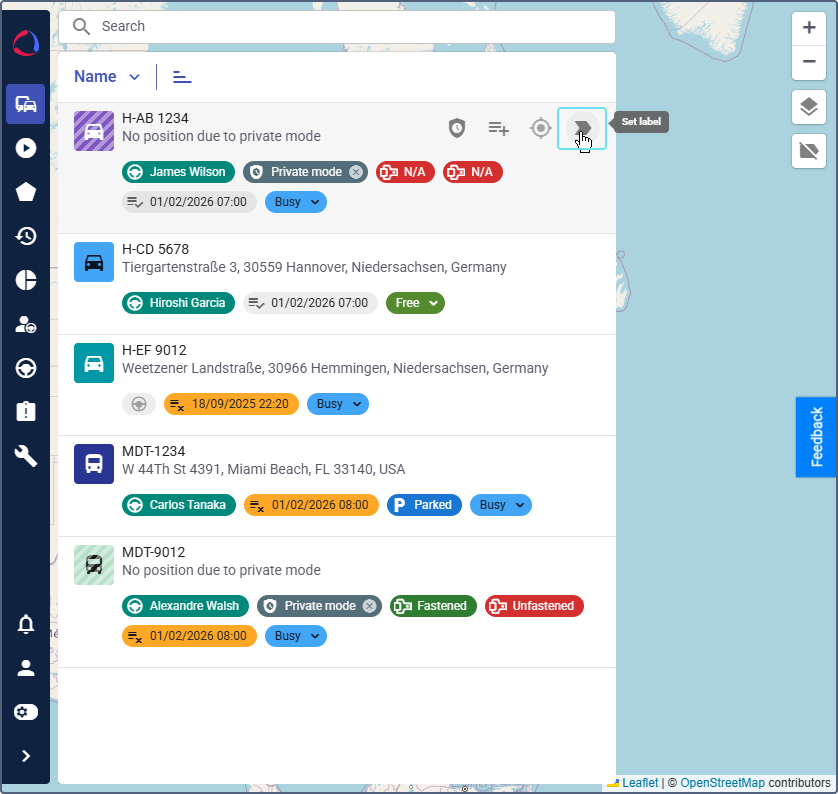
After setting up the widget and disabling the editor mode, you can see it in the device list menu. To use the widget:
-
Locate the Set label action icon
 . If you are using the action menu icon , click on it to open the action menu next to a device you want to configure.
 -
Select Set label.
-
In a popup window, select the desired label from the dropdown.
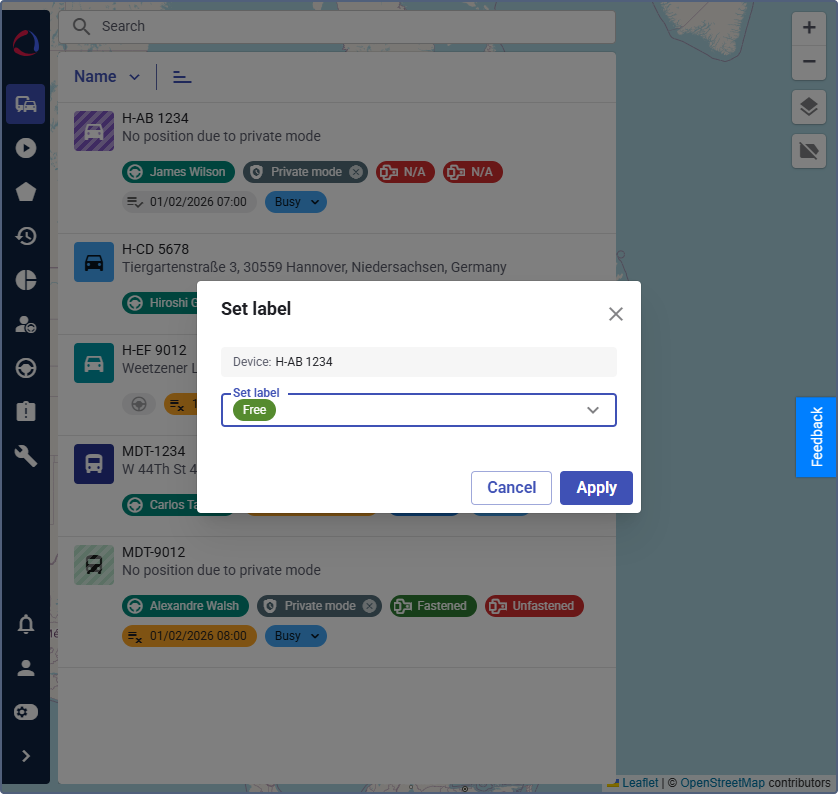
-
Click the Apply button in the popup to assign it to the device.
You have successfully added a label to the device manually.