Managing geofences
Who can do it: Service provider, Customer
Where: Wialon Platform FleetSpace
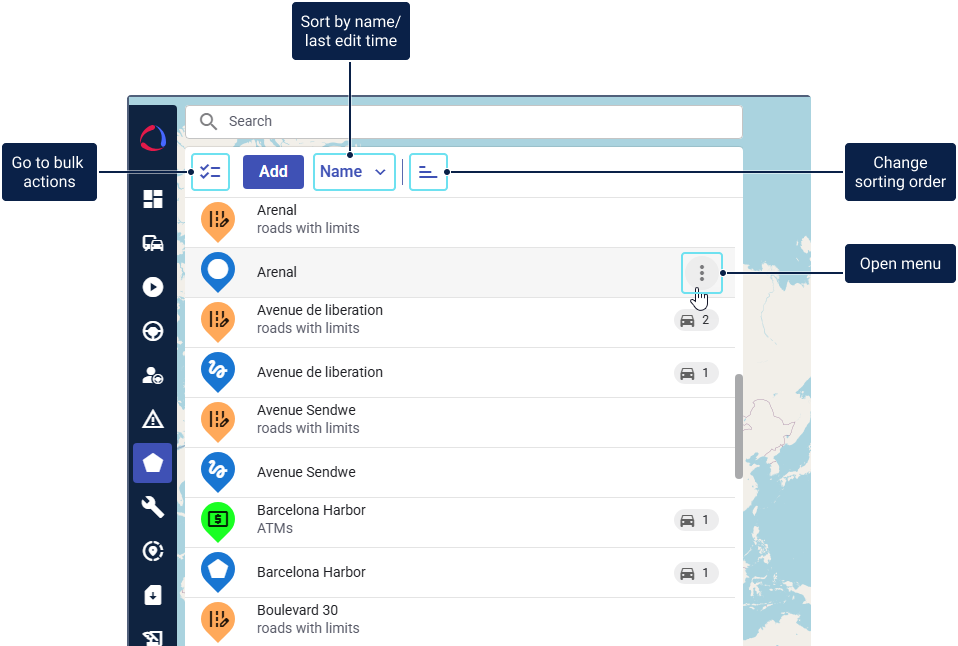
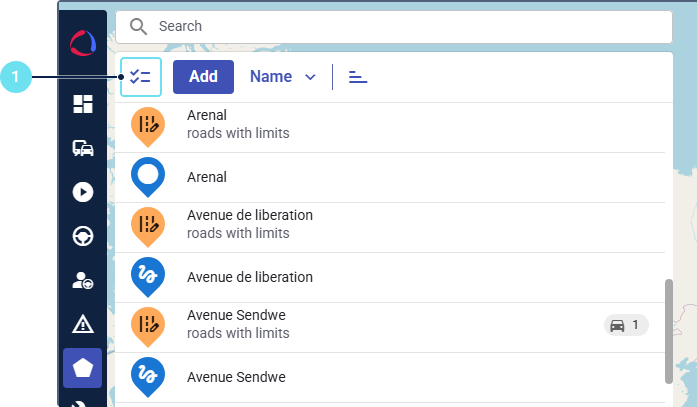
The created geofences are displayed in the list. You can perform the following actions with them:
- Search by name, geometry type, and group
- Sort by name or last modifications time
- Go to the geofence details
- View the geofence location
- Edit geofences
- Add geofences to groups (in bulk)
- Delete geofences (individually and in bulk)
Searching geofences
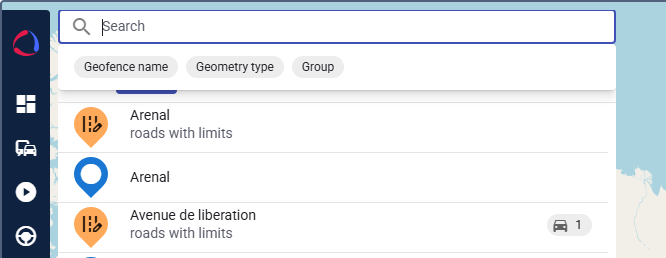
You can search geofences by name, geometry type, and group. To do so, click on the search field and select the required criterion.
| Criterion | Description |
|---|---|
| Geofence name | Use this criterion to open the list of geofence names. Select the geofences you want to see in the list and click Apply. |
| Geometry type | Use this criterion to select the type of geofences you want to see in the list: corridor, circle, polygon. |
| Group | Use this criterion to open the list of geofence groups. Select the groups you want to see in the list and click Apply. |
You can combine several search criteria to narrow down the results.
Alternatively, you can start typing in the search field without using any criteria and select the required items from the suggested ones.
Sorting geofences
You can sort the geofences in the list by name or by the time of last modification. To switch between ascending and descending order, use the icon  .
.
Going to geofence details
To open the geofence details, click on the necessary geofence row in the list.
The geofence details depend on the geometry type and include the following data:
- For corridors: width (m) and length (m)
- For circles: radius (m), perimeter (m), area (m²)
- For polygons: perimeter (m) and area (m²)
Here you can also see additional properties if they are configured and specified.
The following actions are available in the geofence details:
- Viewing the geofence location
- Editing the geofence
- Deleting the geofence
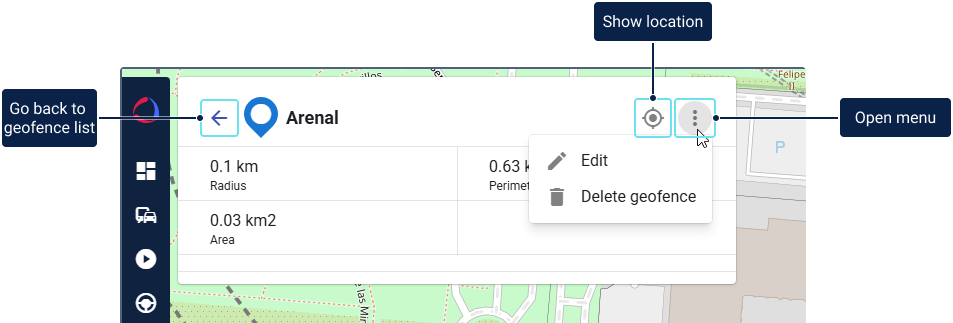
To return to the list of geofences, use the arrow icon in the geofence details header.
Viewing the geofence location
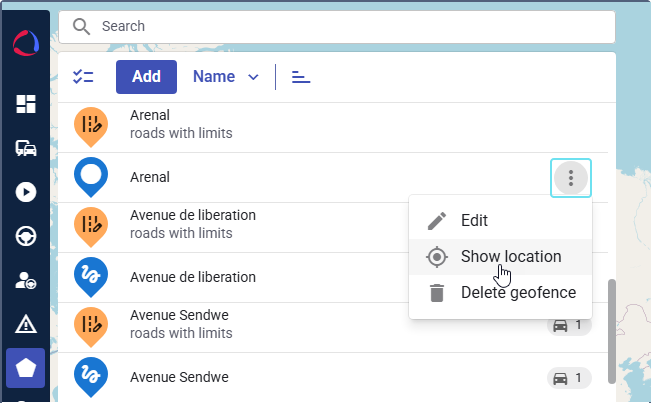
The Show location feature allows you to zoom in and center the map on the geofence location. The feature is available in the geofence list and in the geofence details.
To use this feature in the list, hover over the necessary geofence row, click the icon  , and select Show location.
In the geofence details, click the icon  .
.
Editing geofences
You can edit the geofence name and geometry, change its location and the group it belongs to, as well as modify additional properties (if configured).
You can switch to the geofence editing mode from the geofence list or from the geofence details.
From the list:

- Hover over the necessary geofence row.
- Click the icon .
- Select Edit.
From the geofence details:
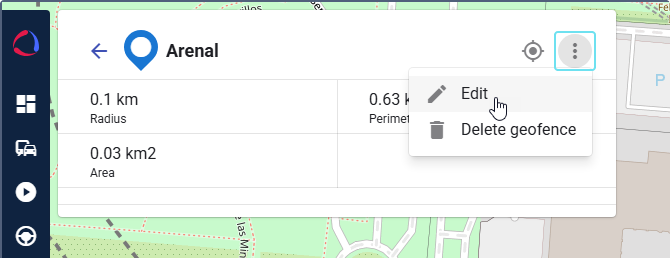
- Click the icon .
- Select Edit.
After making the necessary changes, click Save.
Adding geofences to groups
To add geofences to a group, follow these steps:
-
Click the icon
 .
.
-
Select the necessary geofences.
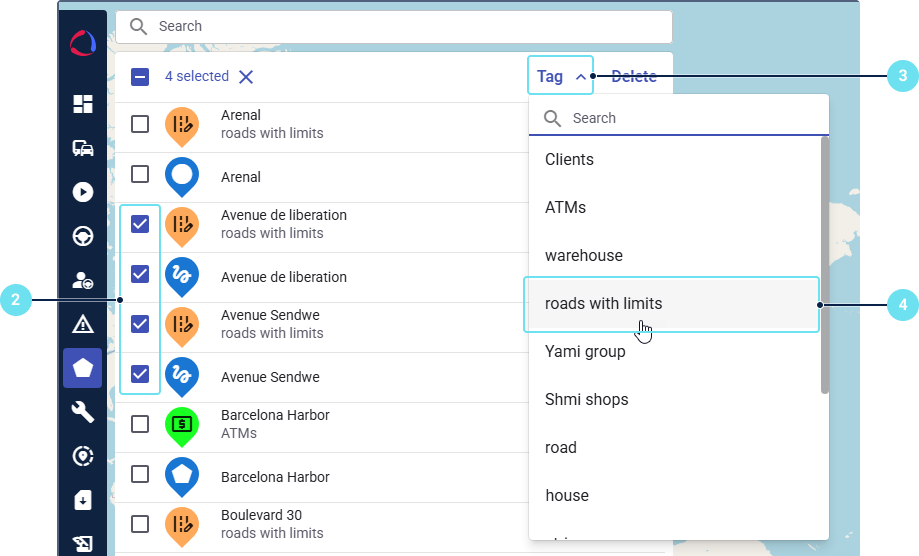
-
Expand the Tag list.
-
Select the group to which you want to add the geofences.
After that, the group icon, color and additional properties are applied to the added geofences.
Deleting geofences
You can delete geofences in bulk or individually.
To delete a geofence individually, follow these steps:
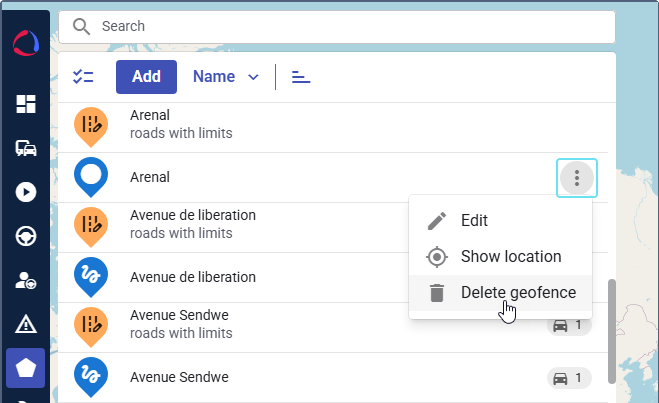
- Hover over its row in the list or go to the geofence details.
- Click the icon .
- Select Delete.
- Confirm the action.
To delete geofences in bulk, follow these steps:
-
Click the icon
. -
Select the geofences you want to delete.
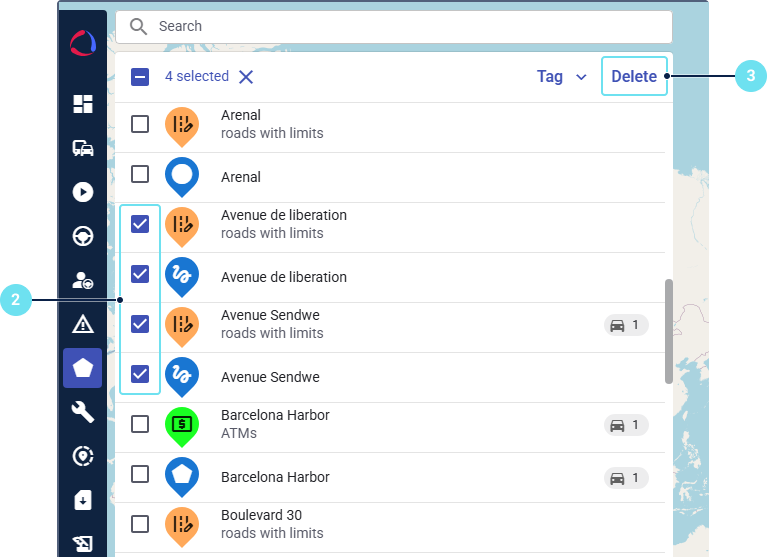
-
Click Delete in the list header.
-
Confirm the action.
The deleted geofences are removed from the list.