Connecting devices to a channel
Who can do it: Service provider
Where: Wialon Platform Studio
This guide shows how to connect your tracking devices to Wialon Platform. The process has two main steps: creating a channel and directing devices to that channel.
Creating a channel
A channel is a configuration that serves as a data entry point for receiving information from your telematics devices. A single channel is typically created to support multiple devices from the same manufacturer. You may need separate channels for one manufacturer if you require distinct settings, such as one channel with TLS encryption and another for specialized devices like tachographs.
In this guide, we will connect Teltonika devices to Wialon Platform using the corresponding channel. To create a Teltonika channel:
- In Wialon Platform Studio, navigate to the Devices page.
- Open the Channels tab.
- Click New channel to create a new channel.
- In the configuration window, enter the following information:
-
Protocol. Select the required protocol from the dropdown list (for example,
teltonika). See the list of supported protocols. -
Name. The system automatically fills in a name based on the selected protocol. You can edit this name if necessary (for example,
Teltonika devices).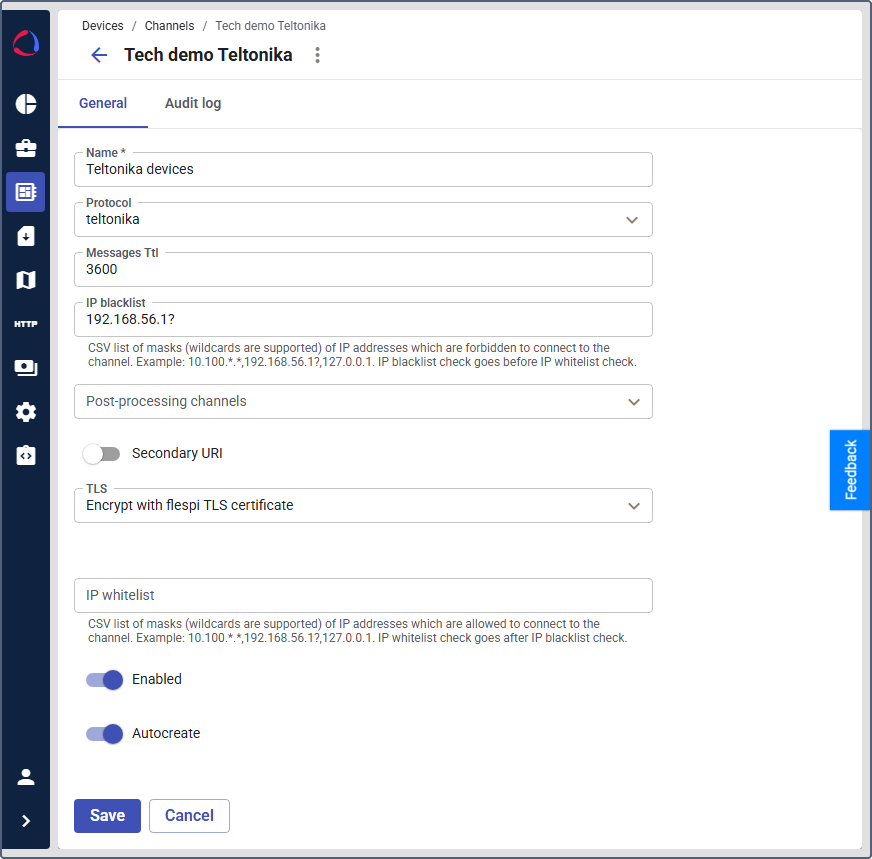
-
Messages Ttl. Enter the number of seconds that defines how long the messages must be stored in the queue before their expiration. For example,
3600(1 hour). After 1 hour, the messages will disappear if they haven’t been processed. -
IP blacklist. Specify a list of IP addresses that are not allowed to connect to the channel or service on the device. For example,
127.0.0.1,192.168.56.11. You can use special characters, such as an asterisk (*) or a question mark (?) to block entire ranges of IP addresses instead of just one. For example,10.100.*.*blocks all connections from the10.100network, or192.168.56.1?blocks192.168.56.10through192.168.56.19. -
Post-processing channels: Select the channels for secondary processing. When your GPS tracker acts as a hub for external sensors (temperature probes, BLE beacons, tire pressure monitors, passenger counters), the base protocol often stores this data in generic parameters like
payload.hexorcustom.param.XXXXX. Post-processing channels extract meaningful information from these generic containers and transform them into specific, usable parameters. Example: A Teltonika device with a connected freezer unit might sendcustom.param.11131with raw bytes. A post-processing channel can parse this intofreezer.comp1.mode,freezer.comp1.temperature, and so on.
The comma-separated channels are applied sequentially in the order you specify. For example,2, 3. -
TLS. Select how you want to encrypt the channel: Encrypt with flespi TLS certificate or Encrypt with custom TLS certificate. The Encrypt with custom TLS certificate option requires filling in the Server certificates chain and Server private key fields. Both values must be in the text PEM format and contain at least 64 characters
-
IP whitelist field: specify a list of IP addresses that are allowed to connect to the channel or service on the device. All the other IP addresses will be blocked. Use the same format as for the IP blacklist field.
-
- If you want this channel to be used by auxiliary device modules, such as tachographs or cameras, enable the Secondary URI toggle. For example, in the Teltonika protocol, secondary URI is used for tachograph functionality.
- Turn on the Enabled toggle to enable the channel.
- To allow creating the devices in Wialon Platform Studio automatically, turn on the Autocreate toggle once the device data is directed to this channel.
- Click Save.
Once the channel is saved, the system will assign a unique URI to it. You must configure your physical tracker to send data to this URI.
To delete the chanel, click the button  in its row in the list.
Directing device data to the channel
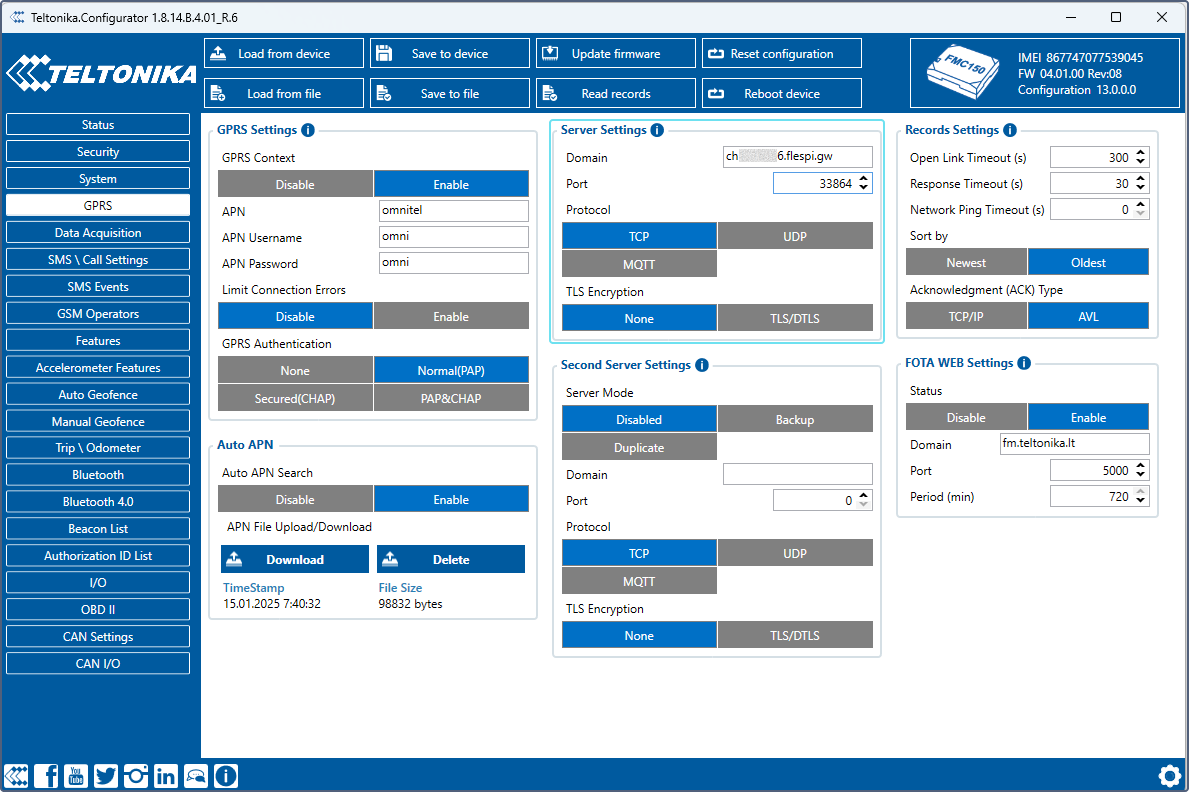
To direct the device data to the created channel, use the configuration method supported by the device manufacturers. This can be a manufacturer configuration tool or SMS commands. Below you will find the steps to direct Teltonika devices using Teltonika Configurator:
-
Click the icon
 . to copy the URI of the created channel.
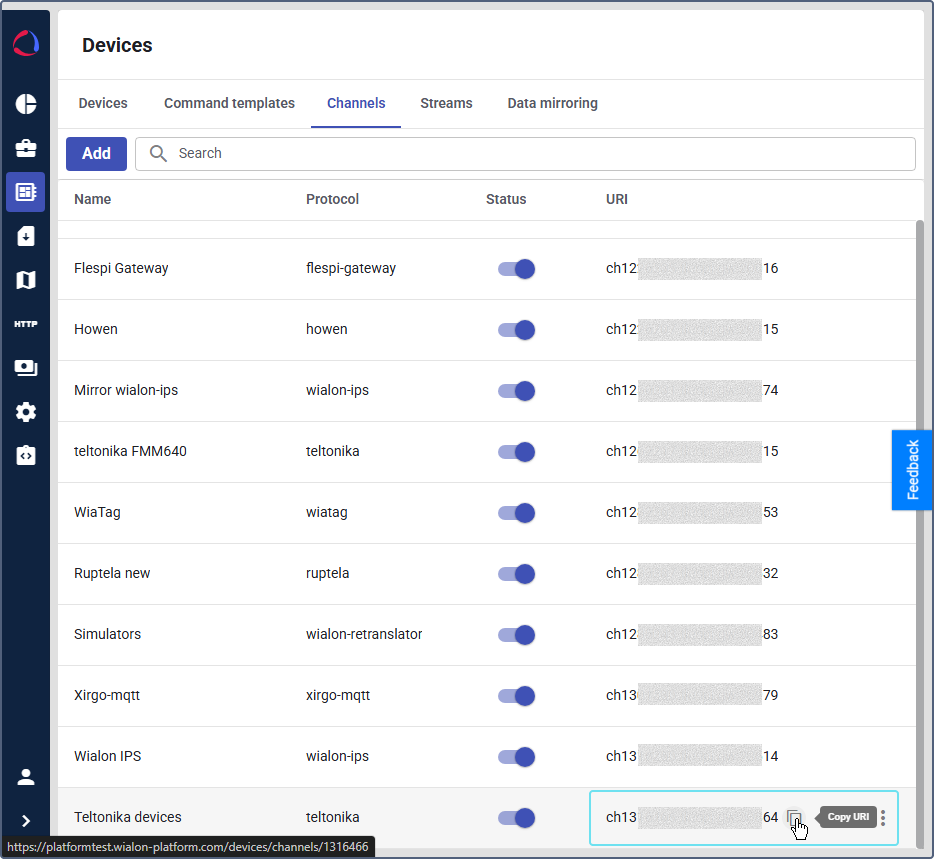
-
In Teltonika Configurator, on the GPRS tab, locate the Server settings section.
-
In the Domain field, paste the channel number from the copied URI.
-
In the Port field, enter the port number indicated in the right part of the URI.
Now, finish the configuration using the device documentation.