Setting up widgets in the device list
Who can do it: Service provider
Where: Wialon Platform FleetSpace
Widgets enhance the device list by providing quick-access actions or displaying real-time data directly on the device row. In the device list, you can add chips and widgets.
- Chips: Display specific information or status (for example, speed, connection status).
- Action widgets: Provide clickable buttons to perform a function (for example, Center on map, Send a command).
The list of available widgets depends on the modules enabled for the customer.
If a widget was previously added but its module is now disabled, it remains visible as unavailable (greyed-out text). You can reorder or delete such widgets, but to restore them later, enable the corresponding module (by assigning a suitable billing plan and making sure the feature is enabled in the Features section) or switch to a customer that has it enabled.
After adding all the necessary widgets, you can preview the changes in the workspace. To do this, switch to Preview mode using the button  in the editor mode toolbar and select a user from the user preview dropdown to simulate their session.
See the complete list of available device widgets on the Customizing devices in Wialon Platform FleetSpace page.
The widgets described below are available in web and mobile versions.
Adding the “Center on map” widget
The Center on map widget creates a button to focus the main map view on the current location of the selected device. To add the widget:
-
In the device list, click the icon
 or
or  in any device row.
-
Under the Available widgets section, locate the Center on map widget.
-
Click the icon
next to it. -
Click the icon
 to add it to the Added widgets list.
Adding the “Execute command” widget
The Execute command widget creates a button to quickly send a pre-configured command to the device.
-
In the device list, click the icon
or in any device row. -
Under the Available widgets section, locate Execute command.
-
Click the icon
next to it.
-
In the Command dropdown, select the specific command you want the button to execute, for example, Request photo. Select an icon for the widget button.

-
Click the icon
 to add the widget to the list.
Adding the “Telemetry” chip
The Telemetry chip displays dynamic data from the device, such as its current speed or specific sensor values.
-
Click Add widget in any device row.
-
Under the Available widgets section, locate Telemetry (chip).
-
Click the icon
next to it. -
In the configuration window, enter the Parameter system name you want to monitor (for example,
position.satellites).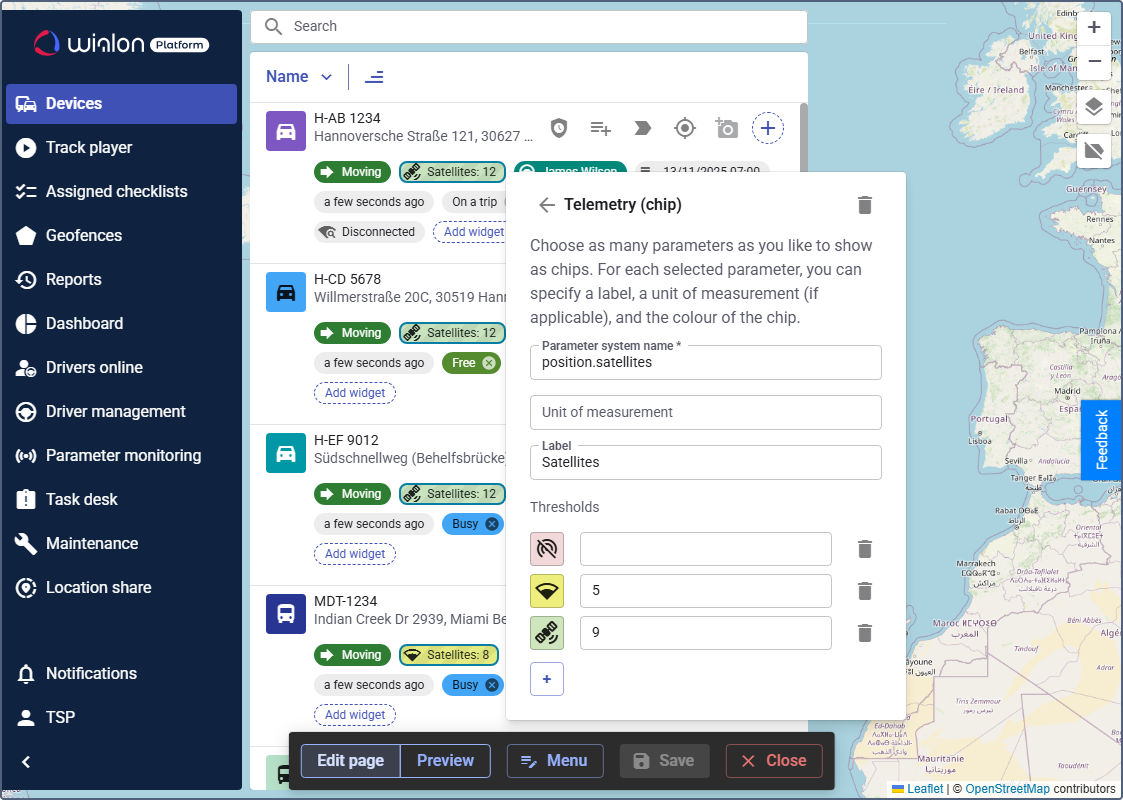
-
In the Label field, provide a title for the chip (for example,
Satellites). -
If applicable, fill in the Unit of measurement field.
-
(Optional): Use the Thresholds section to define specific values that will change the color or icon of the chip to indicate different states (for example, if the value is 5, use a warning icon, if it’s 9, use a different color).
-
Click the icon
to add the chip to the list.
Adding the “Sensor” chip
The Sensor chip displays data from the sensors configured for the device. You can add several chips to display data of different sensors. To visualize the sensor data:
-
Click Add widget in any device row.
-
Under the Available widgets section, locate Sensor (chip).
-
Click the icon
next to it to open the configuration window.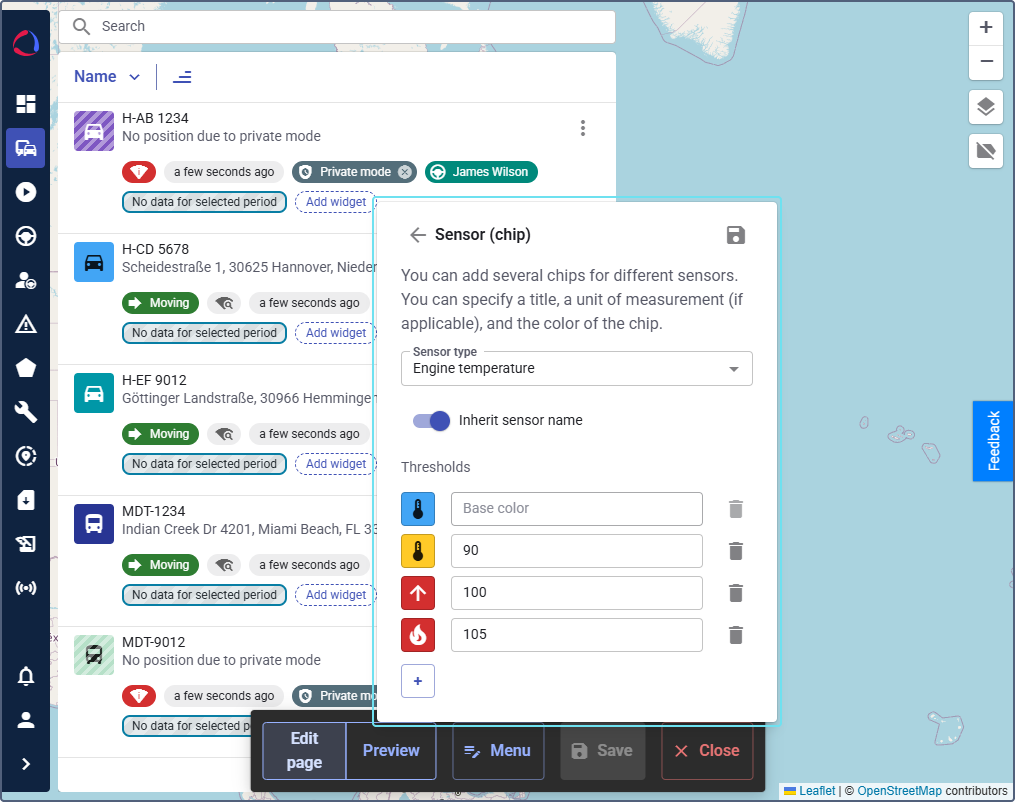
-
Select the Sensor type from the dropdown list, for example, Engine temperature.
-
(Optional): Switch on the toggle Inherit sensor name to use the default name, or disable it to manually enter a custom title and unit of measurement. For the sensors that have multiple parameter expressions, use the option Inherit multiparameter names to display the names you defined in the sensor template.
-
(Optional): Use the Thresholds section to define value ranges that change the color or icon of the chip.
-
Click the icon
to add the chip to the list.
All sensor values are rounded to one decimal place. You can also add this chip to the chip view in the device details, driver details and driver list.
Adding the “Connection state” chip
The Connection state chip displays the current connection status of the device.
-
Click Add widget in any device row.
-
Under the Available widgets section, locate Connection state (chip).
-
Click the icon
next to it.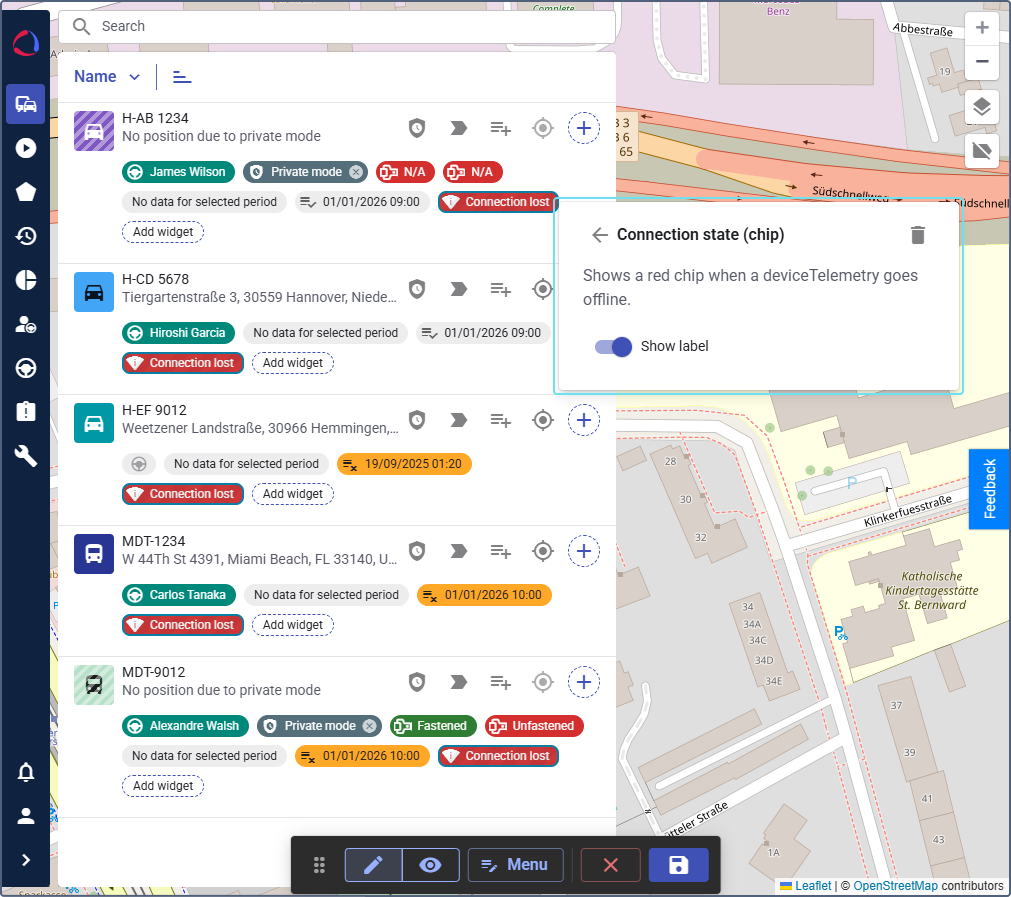
-
Switch on the Show label toggle to display the connection state title.
-
Click the icon
to add the chip to the list.
The Connection state chip can display the following statuses:
- Connection lost: the red chip is shown if the device detects a connection loss. The duration for the connection loss to be registered is specified in the Minimum connection loss duration field of the Trip detection settings.
- Connected: the green chip is shown if the device is currently connected.
- Disconnected: the gray chip is shown if the device is not connected and the connection loss is not registered.
Adding the “Motion state” widget
The Motion state chip displays whether the vehicle is moving or stopped.
- Click Add widget in any device row.
- Under the Available widgets section, locate Motion state (chip).
- Click the icon next to it.
- Switch on the Show label toggle to display the motion state title.
- Click the icon to add the chip to the list.
Adding the “Last updated” time widget
The Last updated time chip displays the timestamp of the last data message received from the device.
- Click Add widget in any device row.
- Under the Available widgets section, locate Last updated time (chip).
- Click the icon next to it.
- Switch on the Show ago format toggle to display the motion state title.
- Click the icon to add the chip to the list.
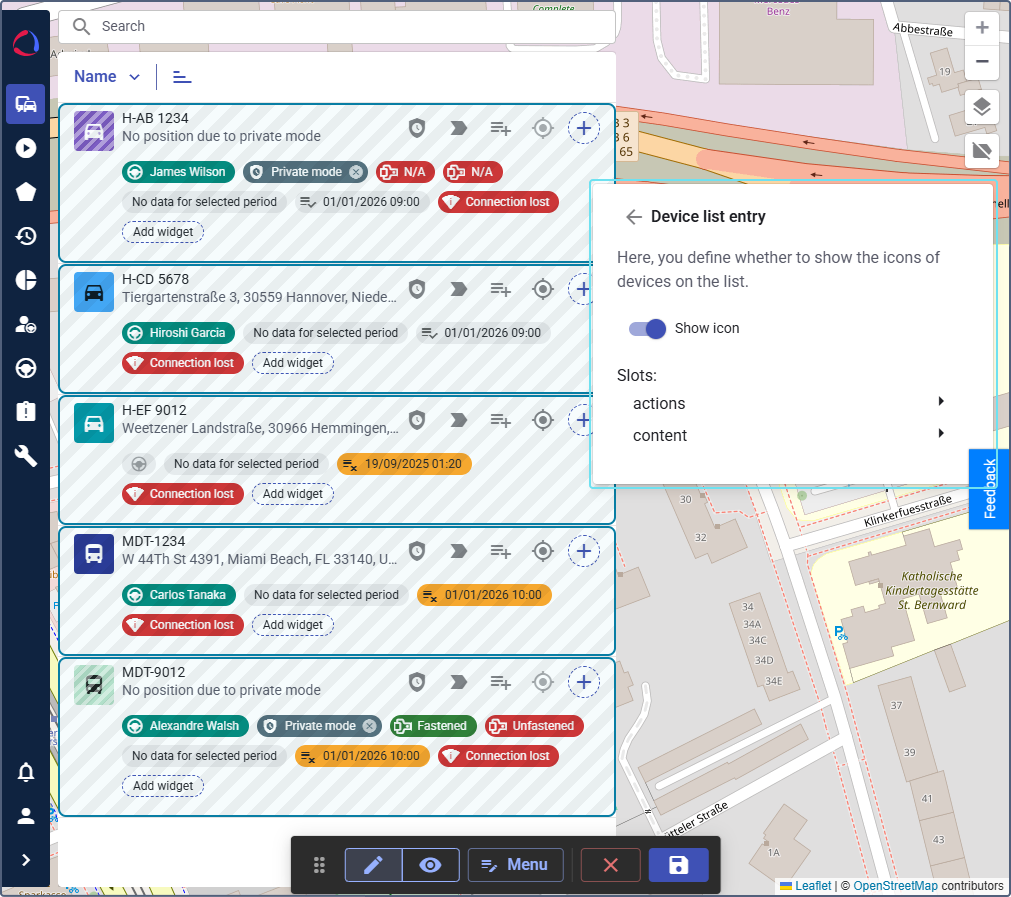
Managing widgets in the device list
To find the necessary widget by name, use the Search bar in the list of widgets.
You can customize the visibility, order and the layout of elements using the settings in the editor mode:
-
Click on the devices list to enter the Devices page settings. Enable the Show geofences on map toggle to display your defined geofence boundaries on the map alongside your devices.
-
Click on any device row to customize the appearance of individual entries in the device list via the Device list entry settings. Enable or disable the Show icon toggle to control the visibility of the specific device type icon.
-
Change the order of the added widgets by dragging and dropping them using the icon
 in the settings.
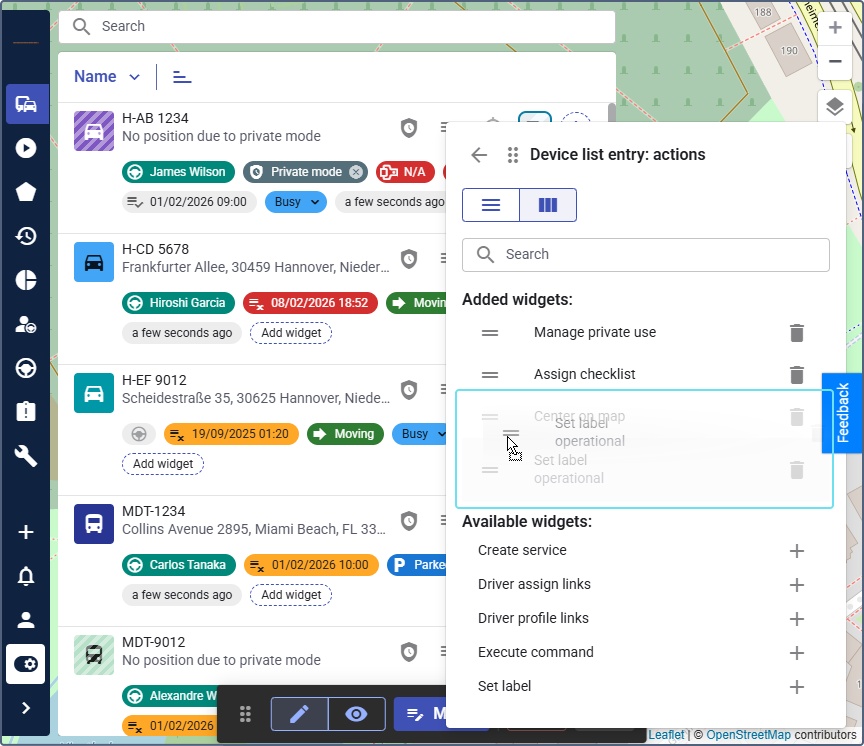
If a widget is outdated, the icon
will appear next to it in the editor mode. Once you delete a deprecated widget, you will not be able to add it again.