Uploading builds to app stores
Who can do it: Service provider
Where: Google Play Console, App Store Connect
After you build your white-labeled Wialon Driver app and download the build files from Wialon Platform Studio, you must upload and submit them to the app stores manually. This guide explains how to upload the AAB file to Google Play and the IPA file to the Apple App Store.
The steps for Google Play Console and App Store Connect are accurate as of the publication date. These external platforms may update their interfaces. For the most current instructions, refer to the official Google Play Console Help and App Store Connect Help.
Uploading the AAB to Google Play
Use the Google Play Console to upload your Android build and publish it to the Google Play Store. The steps below use the Wialon Driver application as an example.
Step 1: Create an app listing
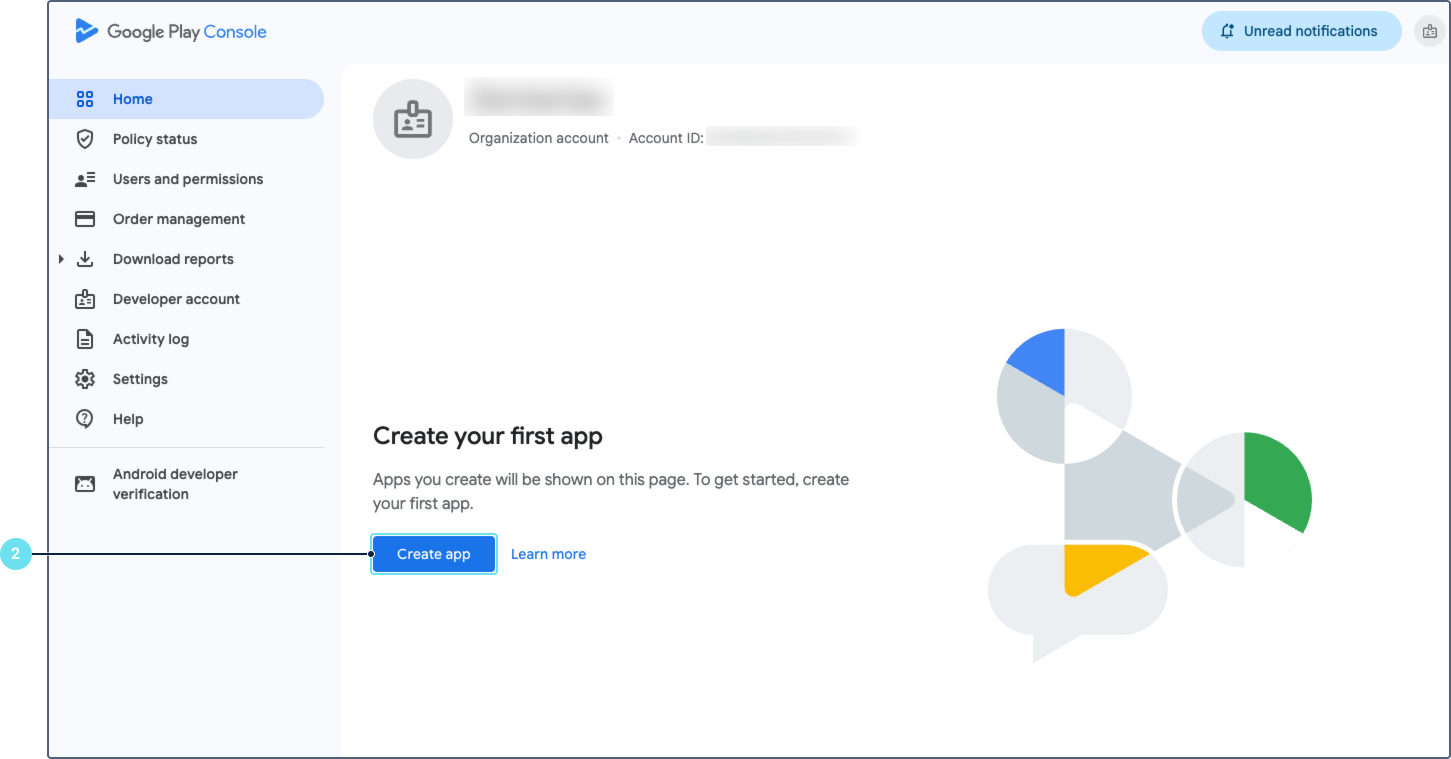
If this is your first time publishing the app, you must create a new app listing.
- Go to Google Play Console and sign in with your developer account.
- Click Create app.
- Fill in the required app details:
- App name: Enter the same app name you used in the Android app configuration.
- Default language: Select the primary language for your app listing.
- App or game: Select App.
- Free or paid: Select the pricing model. In this guide, the Free option is used as an example.

- In the Declarations section, accept the three required declarations:
- Developer Program Policies: Confirm that the app meets the Developer Program Policies.
- Play App Signing: Accept the Play App Signing Terms of Service.
- US export laws: Accept the US export laws.
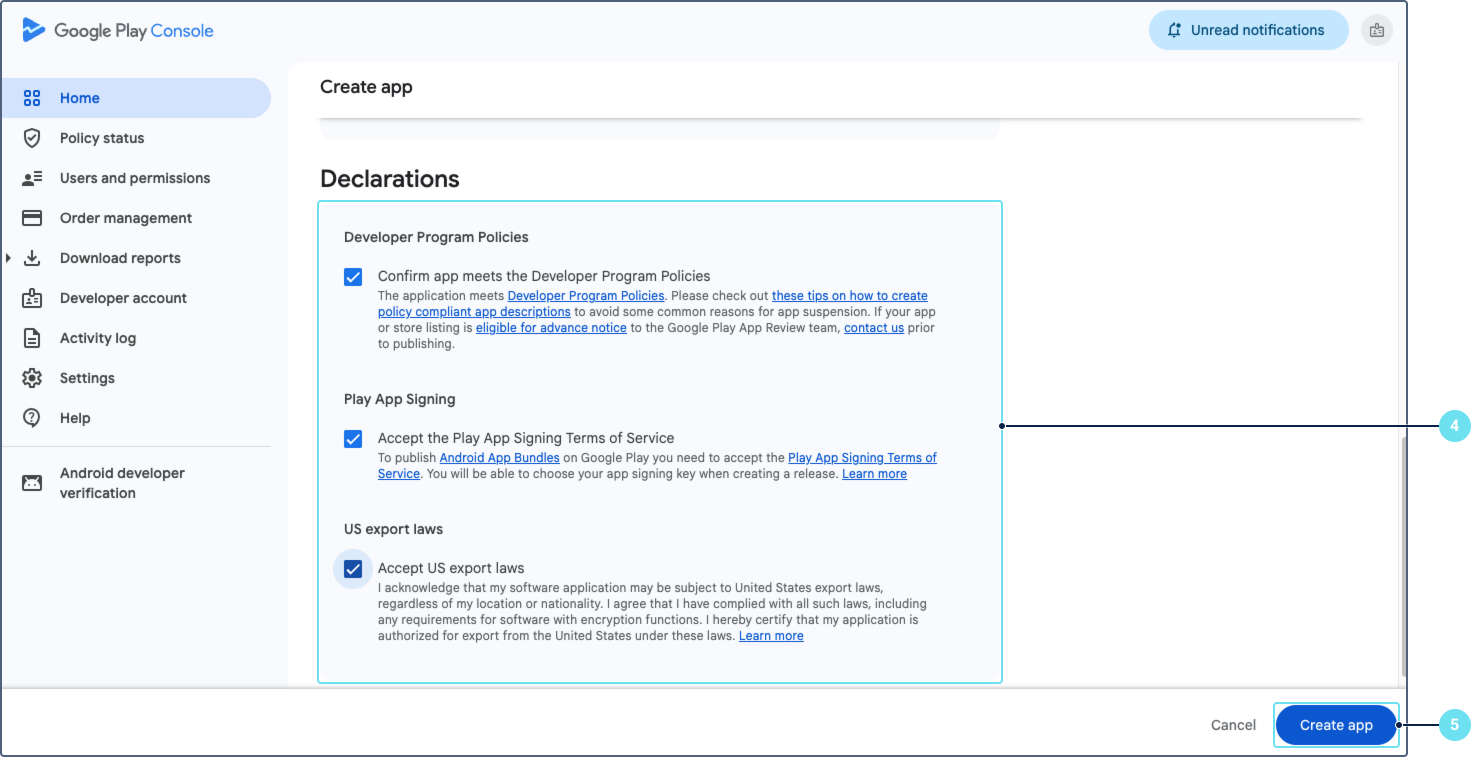
- Click Create app.
Step 2: Set up the store listing
Before you can submit the app for review, you must complete the store listing and store settings.
-
In Google Play Console, open your app.
-
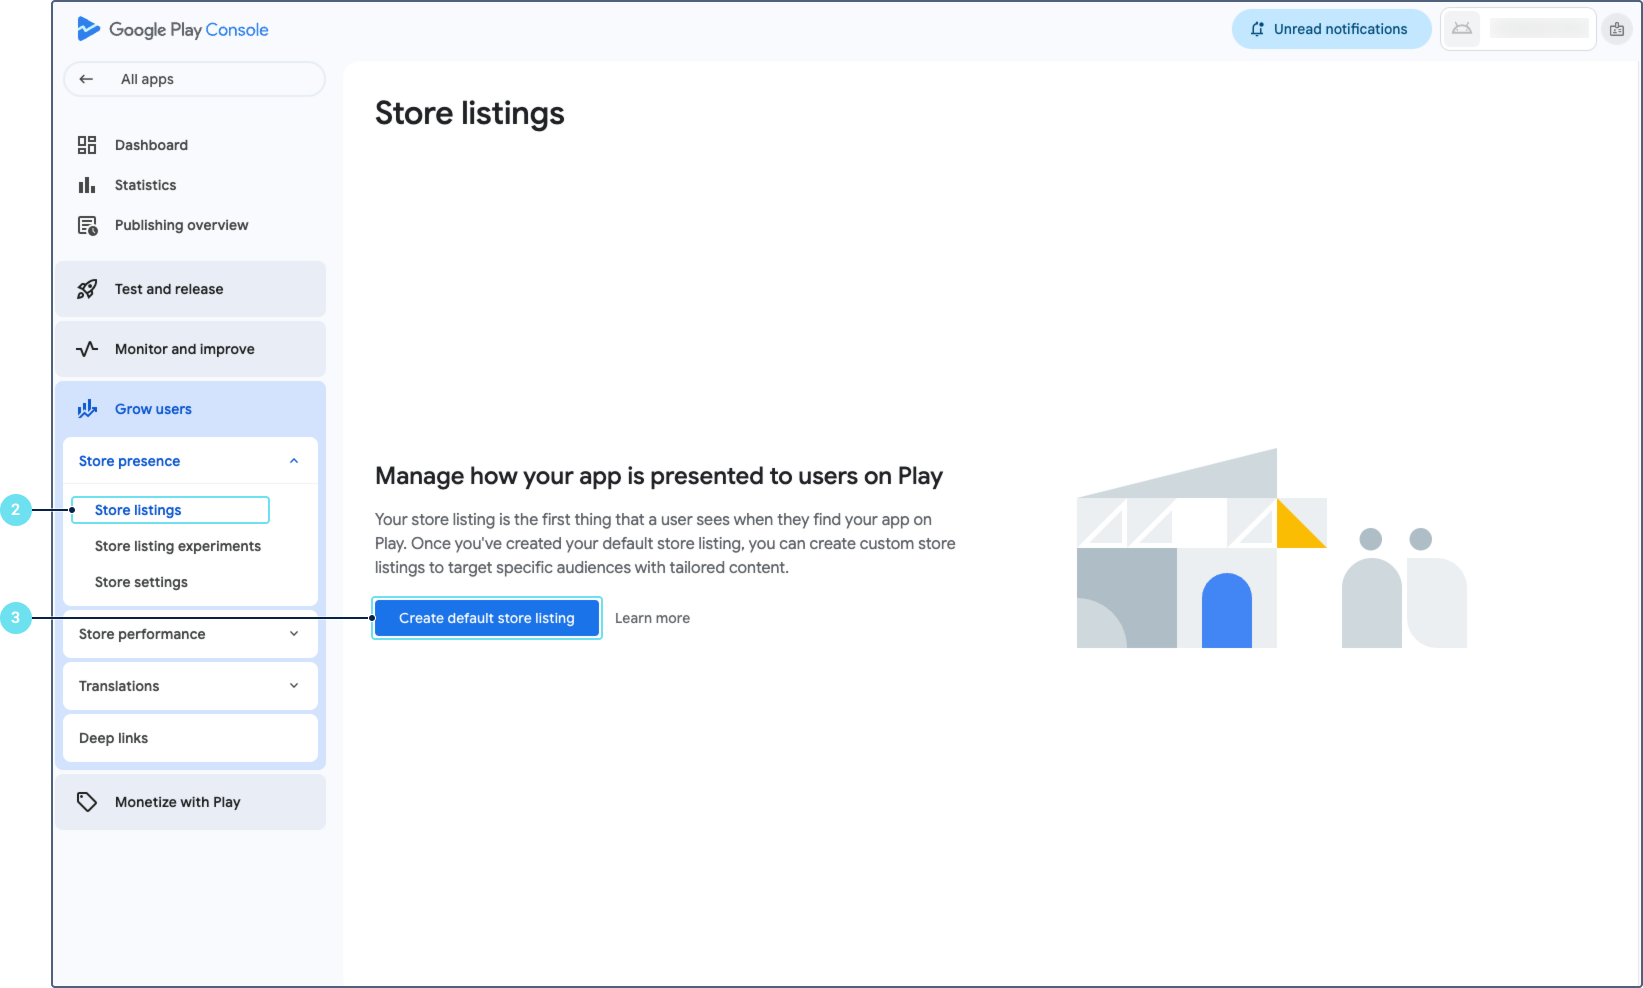
Navigate to Grow users > Store presence > Store listings.
-
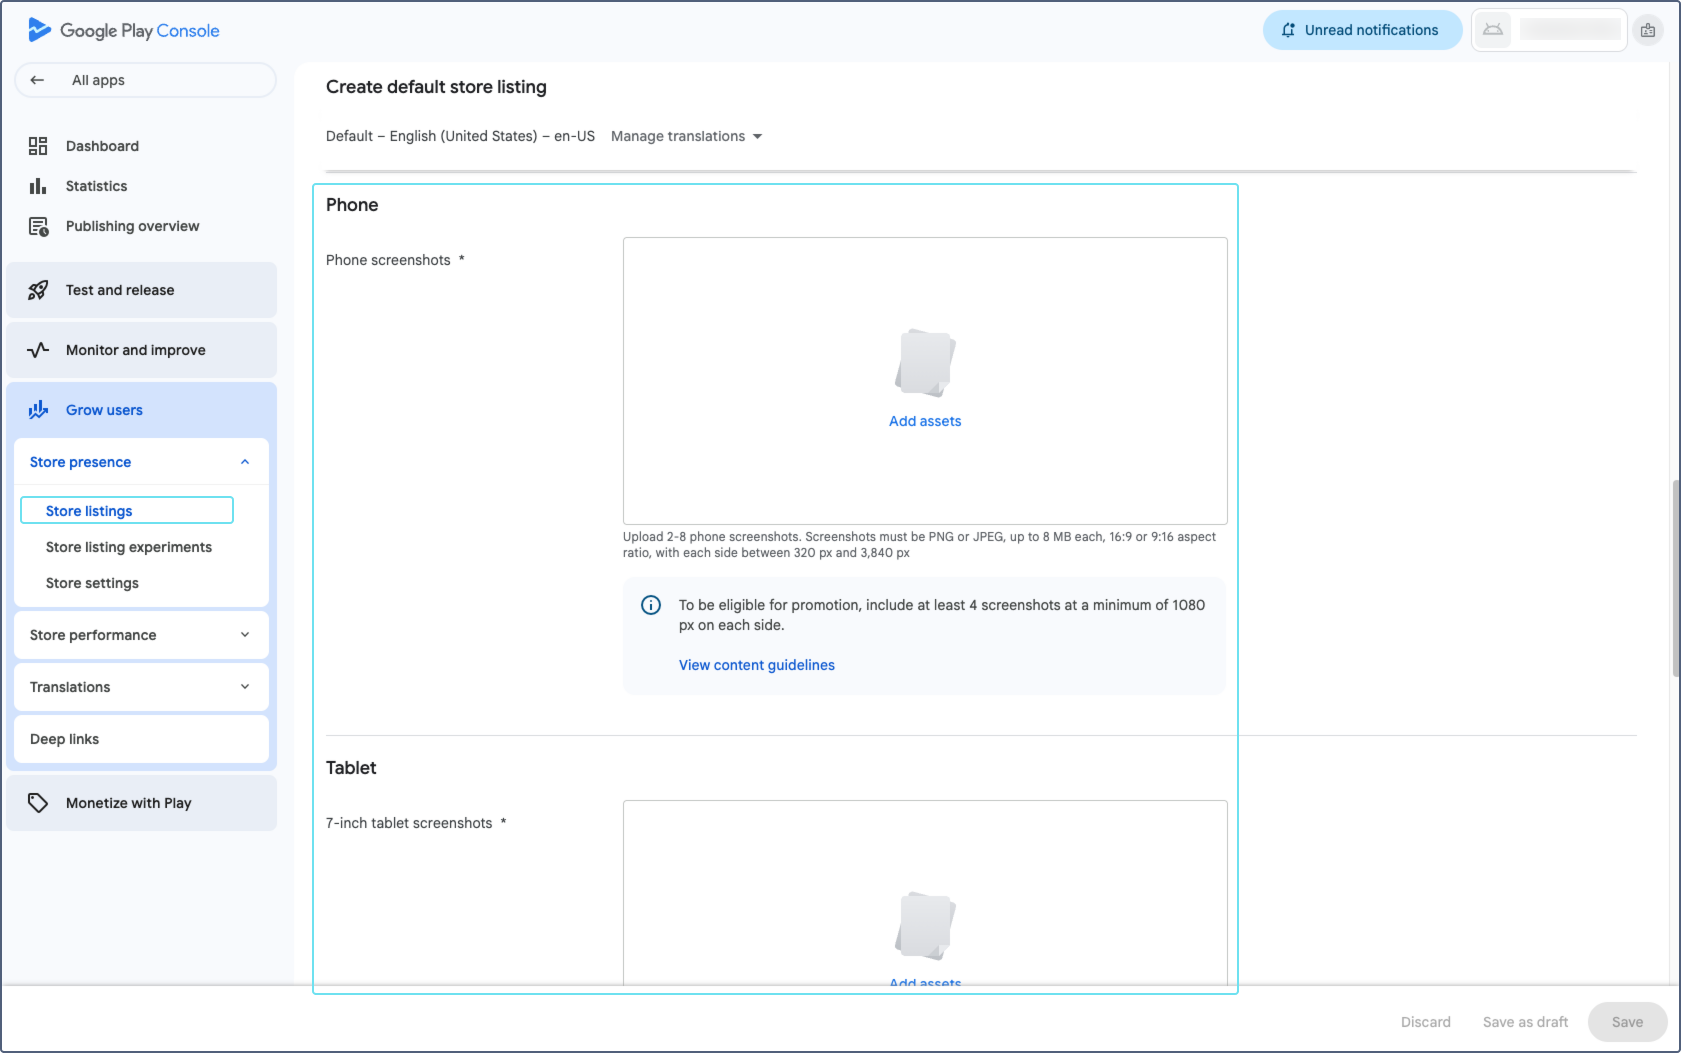
Click Create default store listing.
-
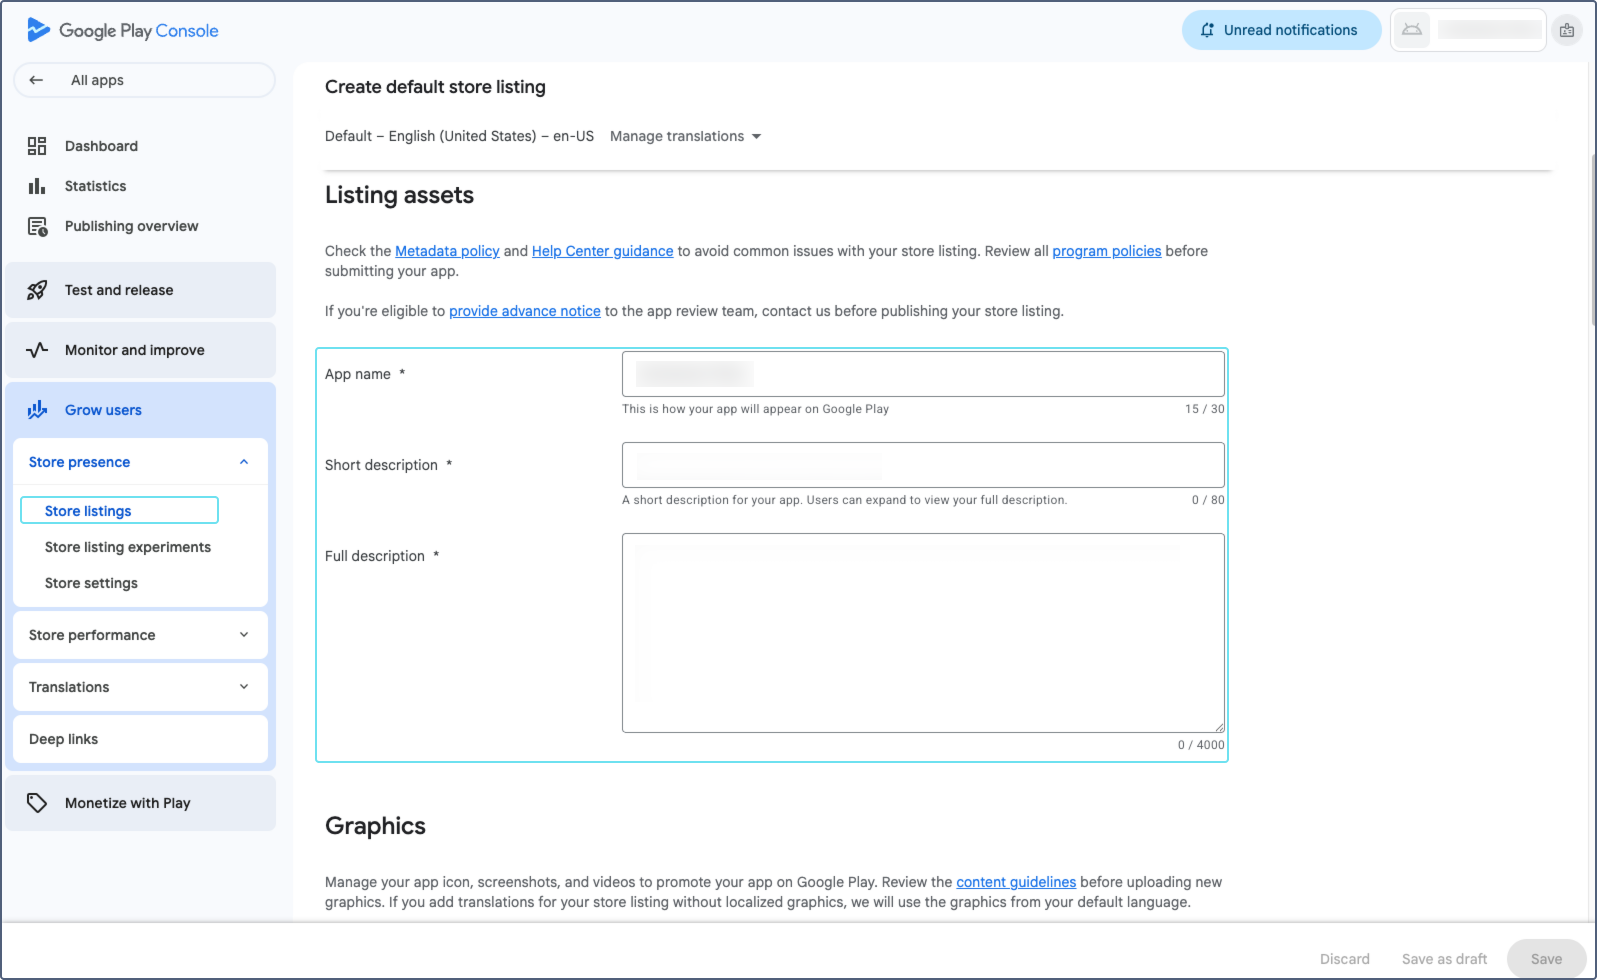
Fill in the required fields:
-
App name: The app name as it appears on Google Play.
-
Short description: A brief description of the app (up to 80 characters).
-
Full description: A detailed description of the app (up to 4,000 characters). It must differ from the short description.
-
App icon: The app icon. Requirements: PNG or JPG, up to 1 MB, 512×512 px.
-
Feature graphic: A banner image displayed at the top of the store listing. Requirements: PNG or JPG, 1024×500 px, up to 15 MB.
-
Screenshots: At least 2 screenshots for each supported device type (phone, tablet). Recommended: upload screenshots showing the login screen, checklist screens, and key features. The screenshots must be in the same language as the default language specified in Step 1. If your app supports multiple languages, add screenshots for each language in the corresponding store listing translation.

-
-
Click Save.
-
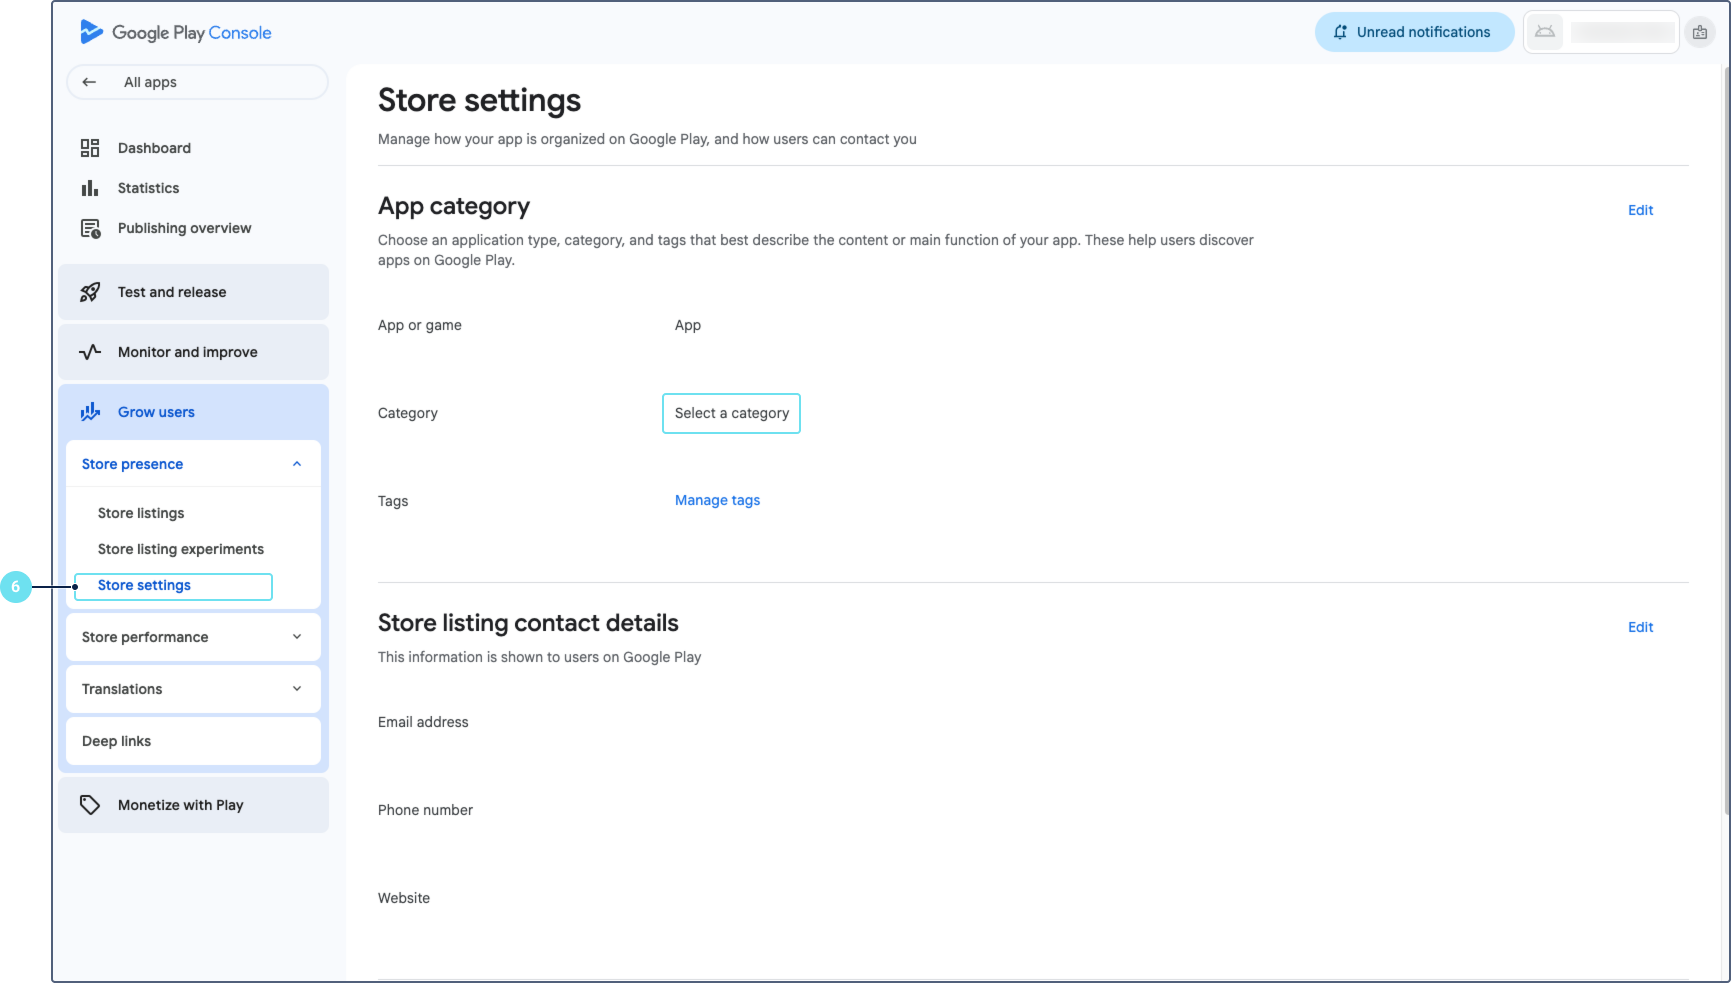
Navigate to Grow users > Store presence > Store settings.
-
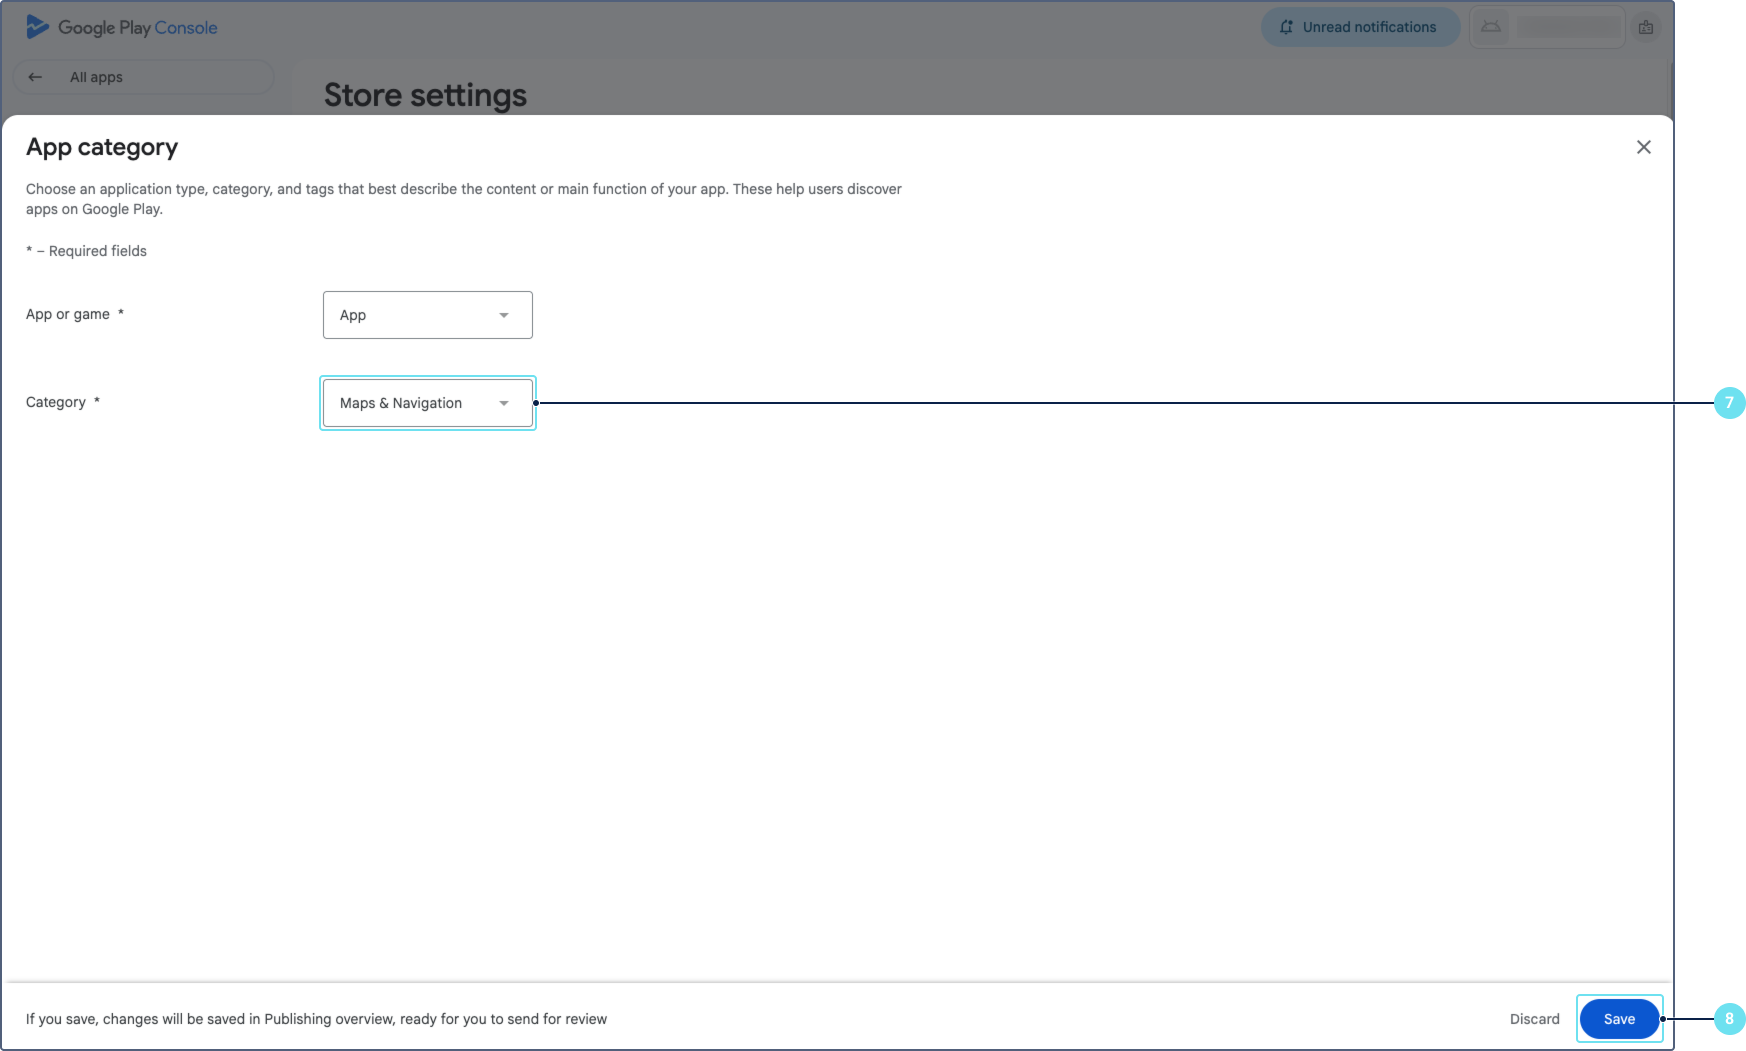
In the App category section, select the category that best matches your app. For the white-labeled Wialon Driver app, select Maps and navigation.
-
Click Save.
-
In the Store listing contact details section, enter your contact email address.
-
Click Save.
Step 3: Complete the app content section
Before submitting the app for review, you must complete all required declarations in the App content section.
- In Google Play Console, open your app.
- Navigate to Policy > App content.
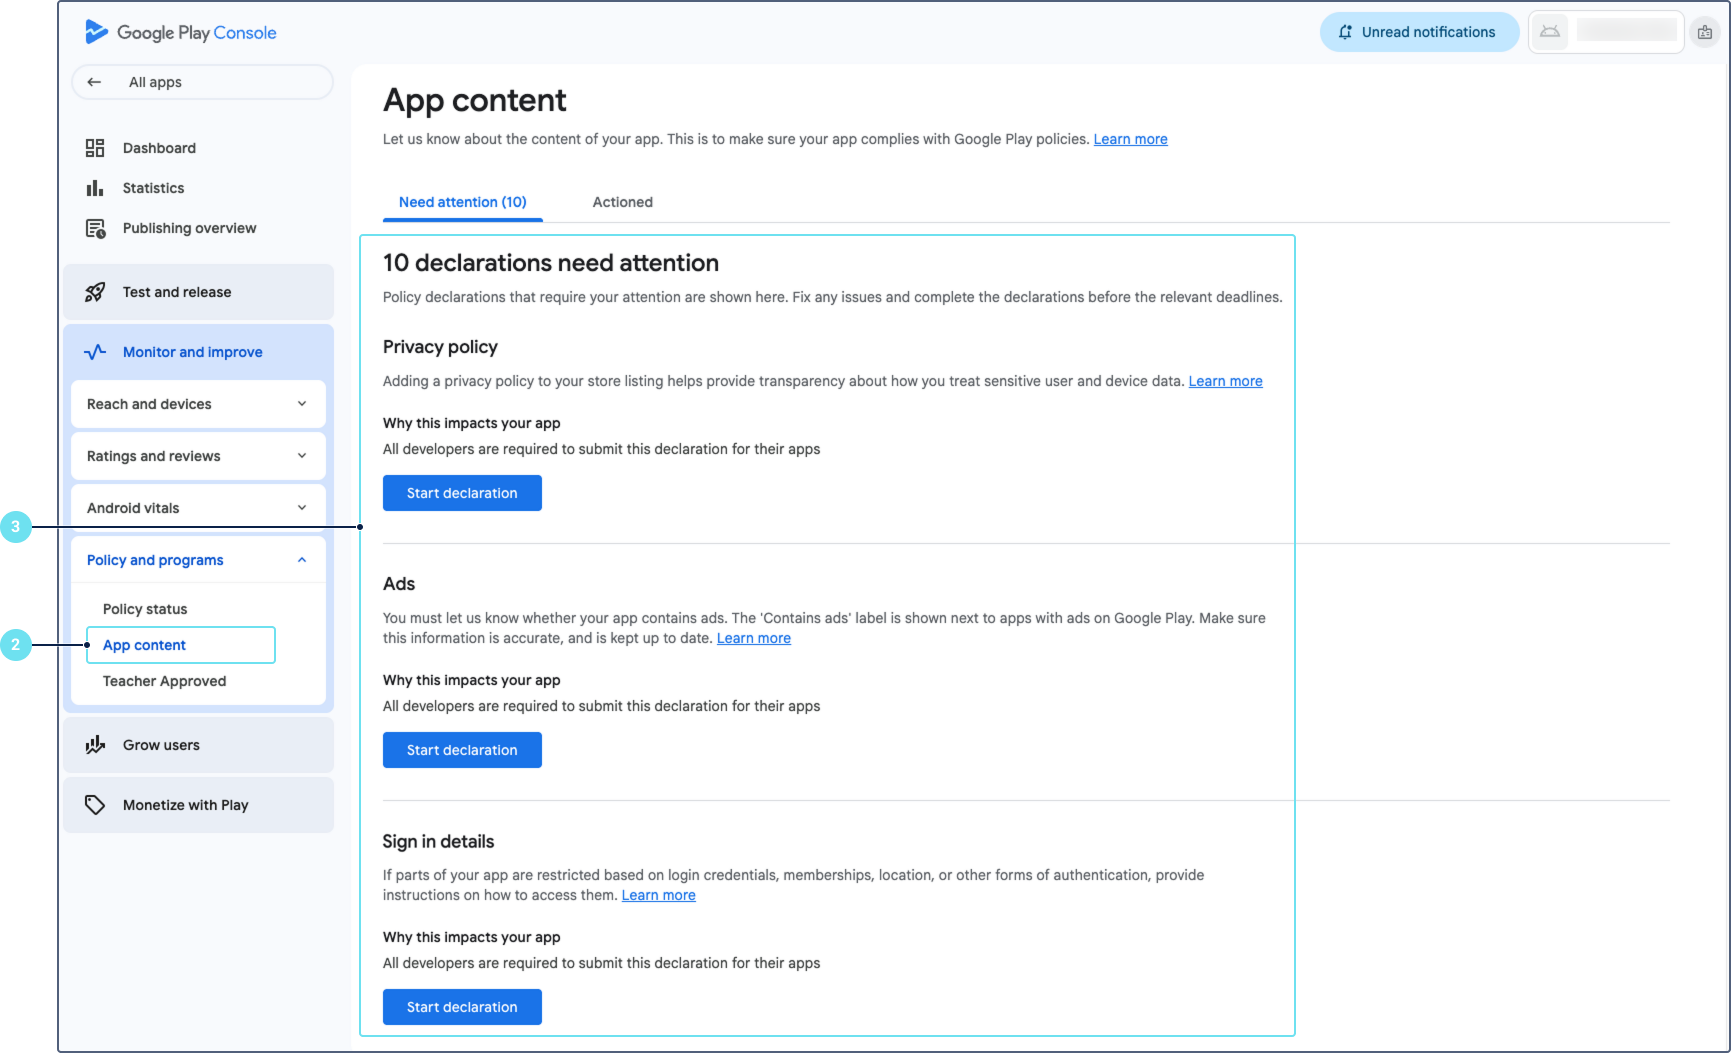
- Complete all the required declarations. Each declaration has a Start or Manage button. Click it, fill in the required information, and save.
- Privacy policy: Enter the URL of your company’s privacy policy. The URL must use HTTPS and point to a publicly accessible web page (not a downloadable file). Click Save.
- Sign in details: Select Yes to indicate that some functionality is restricted. Click Add details and provide the login credentials for a demo account so that the Google review team can access the app. Click Save.
- Ads: Indicate whether your app contains ads. For the white-labeled Wialon Driver app, select No, my app doesn’t contain ads. Click Save.
- Content rating: Click Start questionnaire, select the appropriate category, and answer the questions. After completing the questionnaire, click Save and then Submit.
- Target audience: Specify the target age group for your app. Click Save.
- News apps: Indicate whether your app is a news app. For the white-labeled Wialon Driver app, select No. Click Save.
- Data safety: Describe what user data the app collects and how it is used. After completing the form, click Save.
- Advertising ID: Indicate whether your app uses the advertising ID. By default, Wialon Driver doesn’t use the advertising ID. Click Save.
- Government apps: Indicate whether the app is developed by or on behalf of the government. For the white-labeled Wialon Driver app, select No. Click Save.
- Financial features: Indicate whether the app provides financial features. For the white-labeled Wialon Driver app, select No. Click Save.
- Health apps: Indicate whether the app provides health-related features. For the white-labeled Wialon Driver app, select No. Click Save.
- Verify that all the declarations show a green checkmark, indicating they are complete.
Step 4: Upload the AAB and submit it for review
-
In Google Play Console, open your app.
-
Navigate to Test and release > Production.
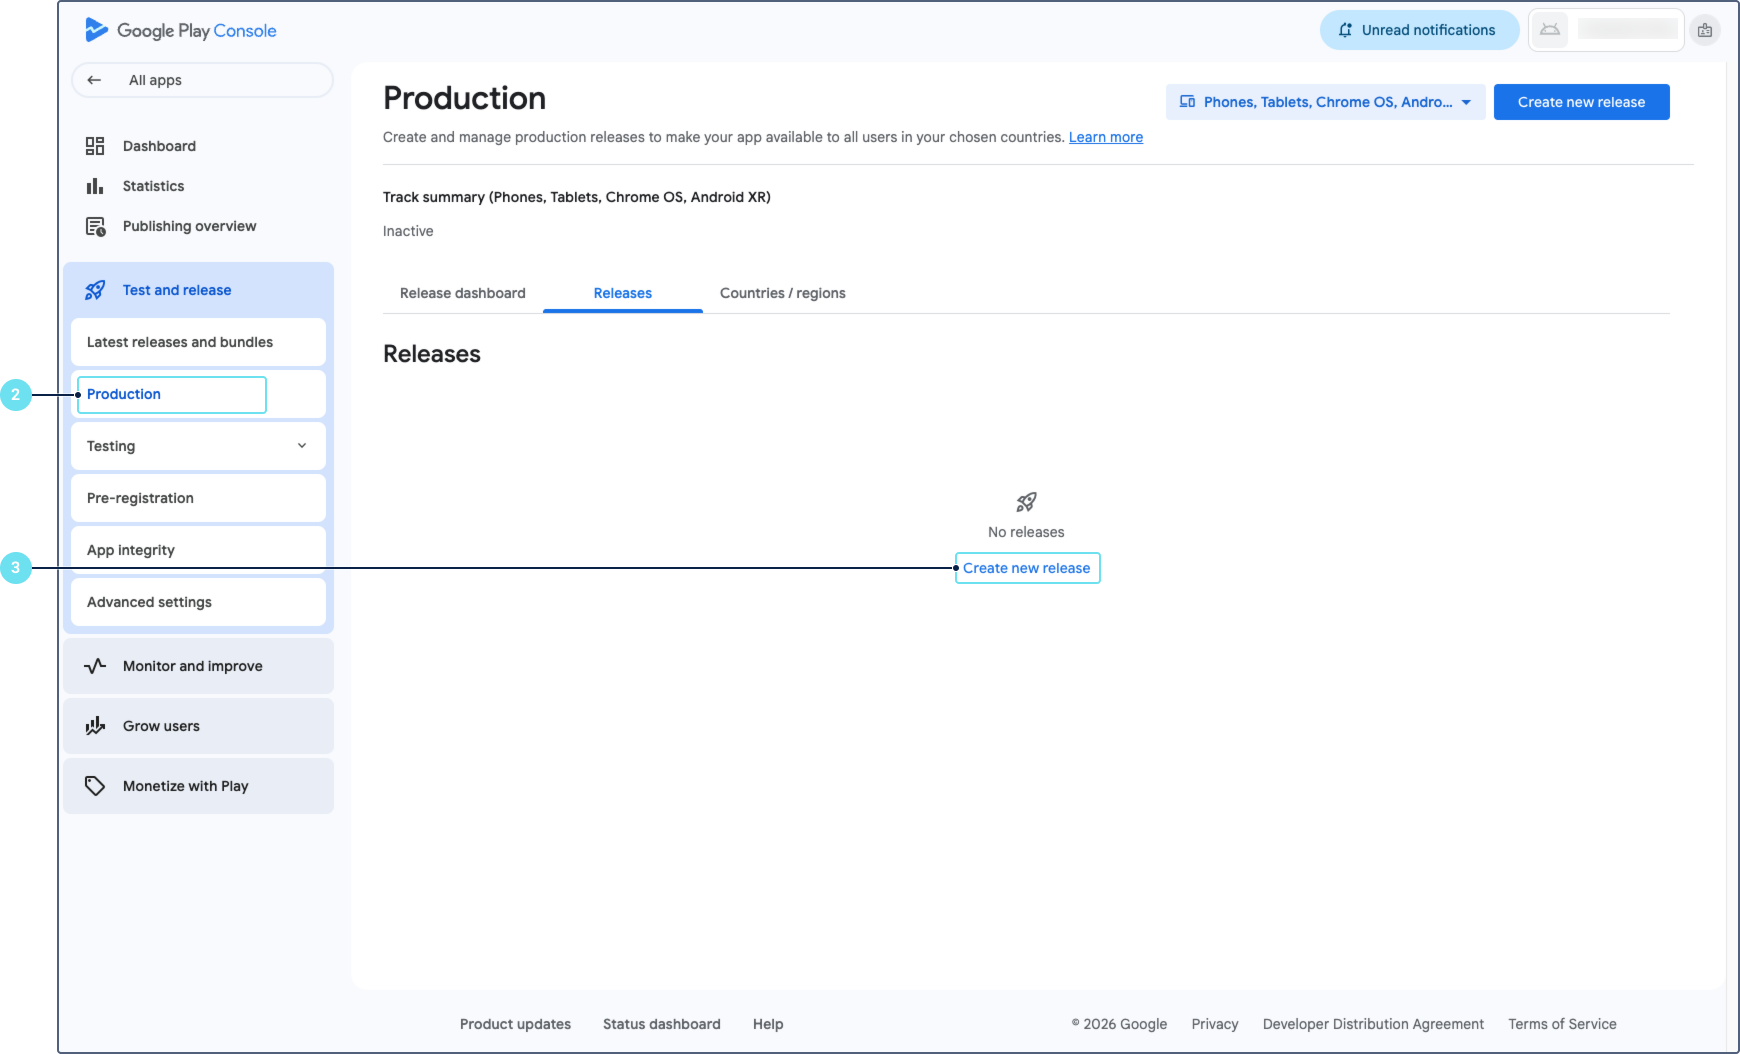
-
Click Create new release.
-
In the App bundles section, click Upload and select the AAB file downloaded from Wialon Platform Studio.
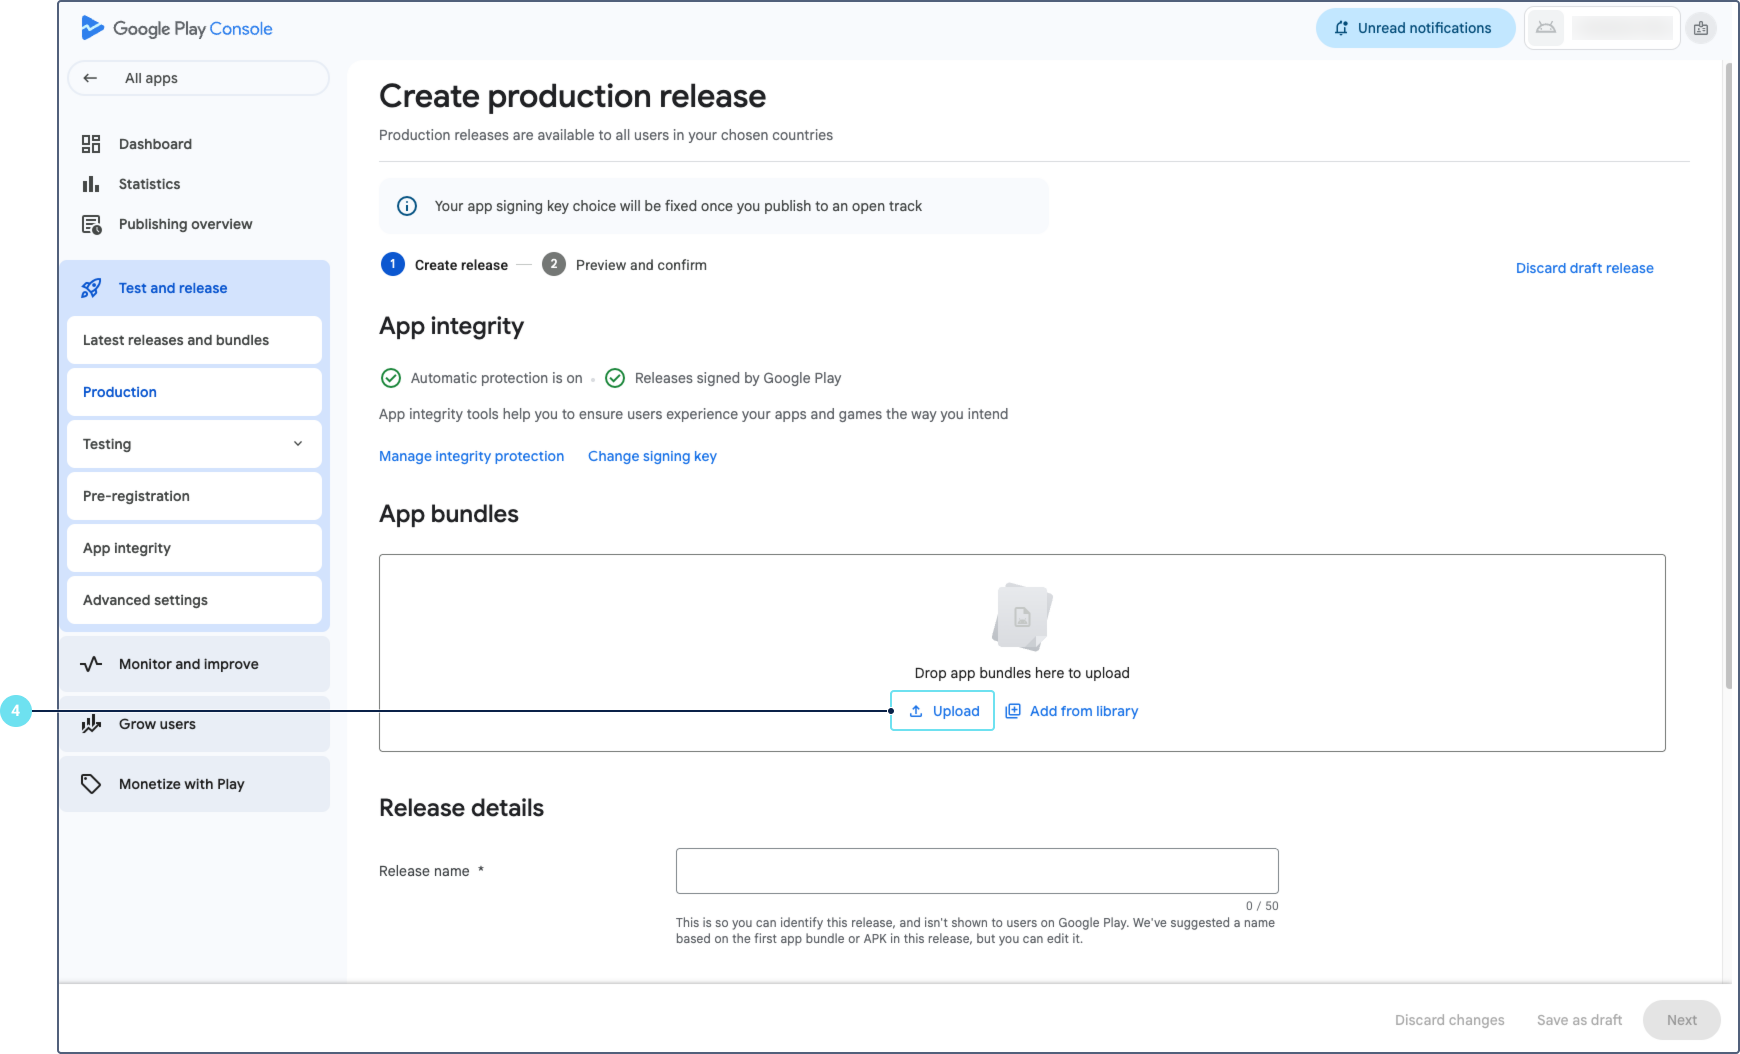
-
(Optional) In the Release notes section, add release notes. Release notes are not required for the first release.
-
Click Save to save the release as a draft.
-
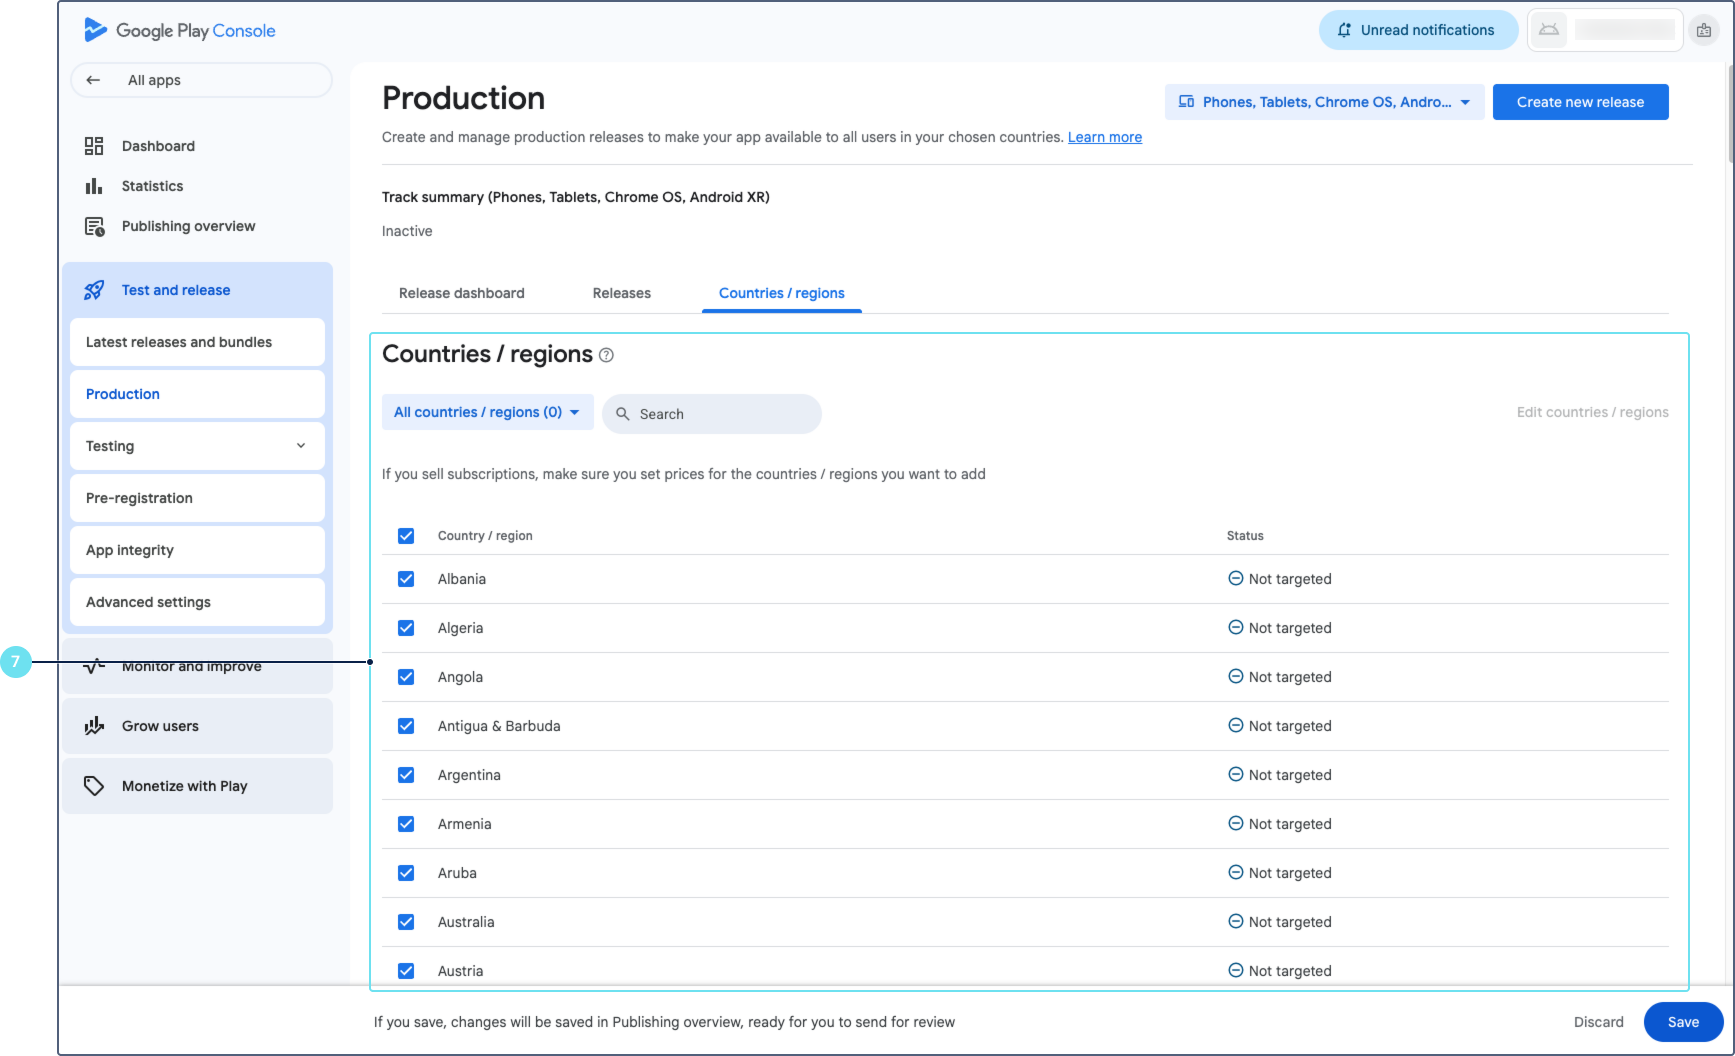
Select the countries or regions where you want to distribute the app.
-
Review the release details. Fix any issues marked in red. You can skip items marked with yellow warnings.
-
Click Send for review.
Google’s review process typically takes from a few hours to several days. You will receive an email notification when the review is complete.
Uploading the IPA to the Apple App Store
Use App Store Connect and Transporter to upload your iOS build and publish it to the Apple App Store.
Step 1: Create an app record
-
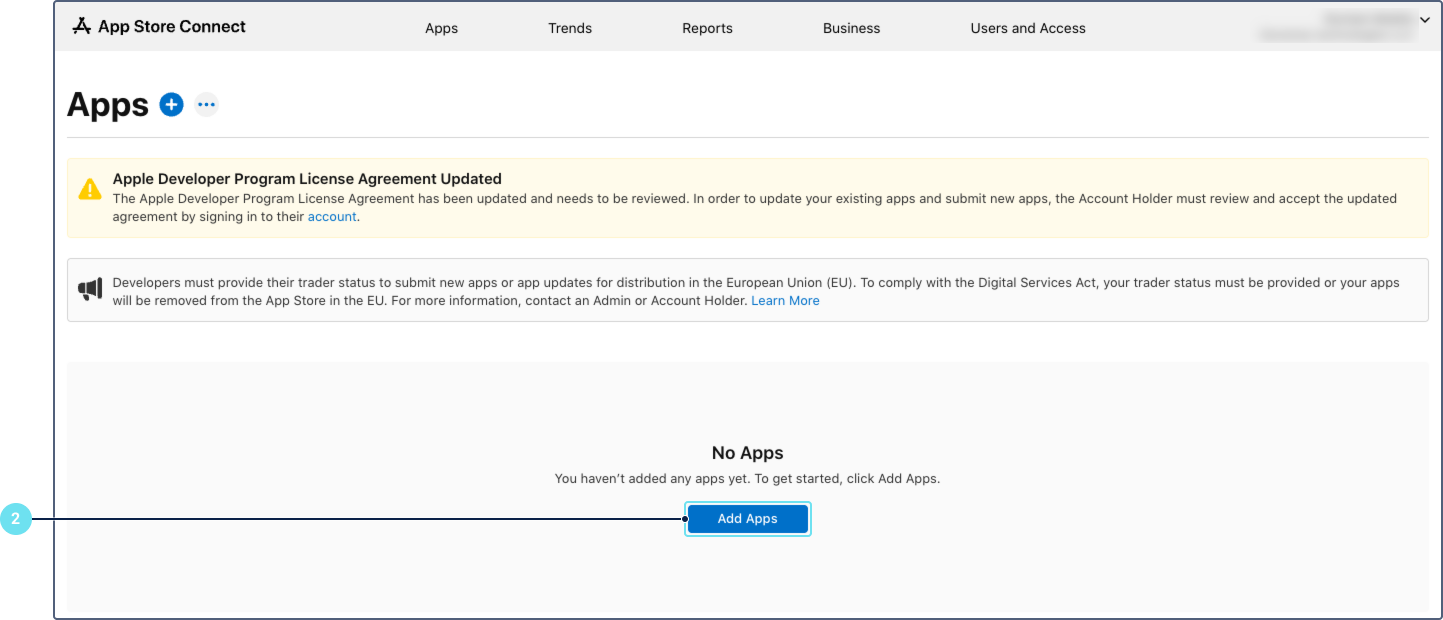
Go to App Store Connect and sign in with your Apple Developer account.
-
Click Apps, then click Add apps.
-
Fill in the app details in the New app window:
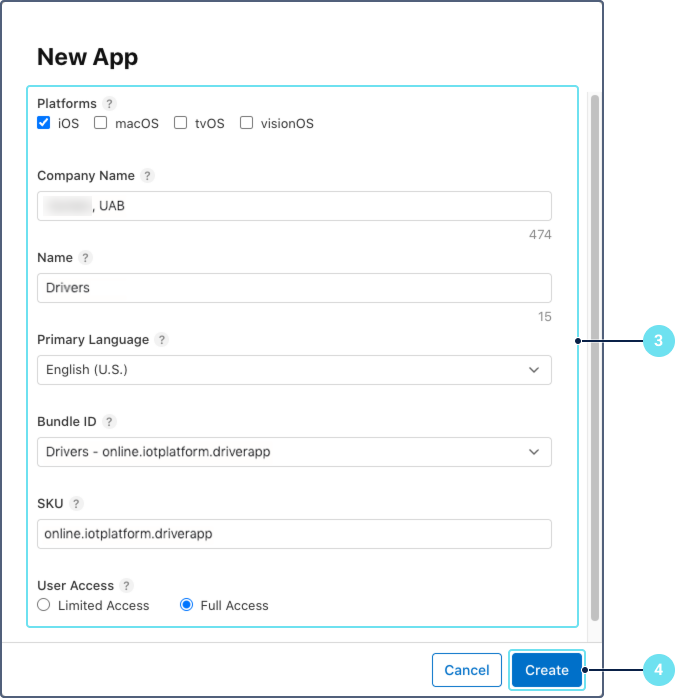
- Platform: Select iOS.
- Name: Enter the same app name you used in the iOS app configuration.
- Primary language: Select the primary language. If your app description is in English, use U.S.
- Bundle ID: Select the Bundle ID matching the one configured in your iOS app configuration. The Bundle ID must be registered in your Apple Developer account.
- SKU: Enter a unique identifier for your app. It can be the same as Bundle ID (for example,
wialon-driver-whitelabel). - User access: Select the access level. By default, you can set Full access.
-
Click Create.
For details, see Add a new app in the Apple documentation.
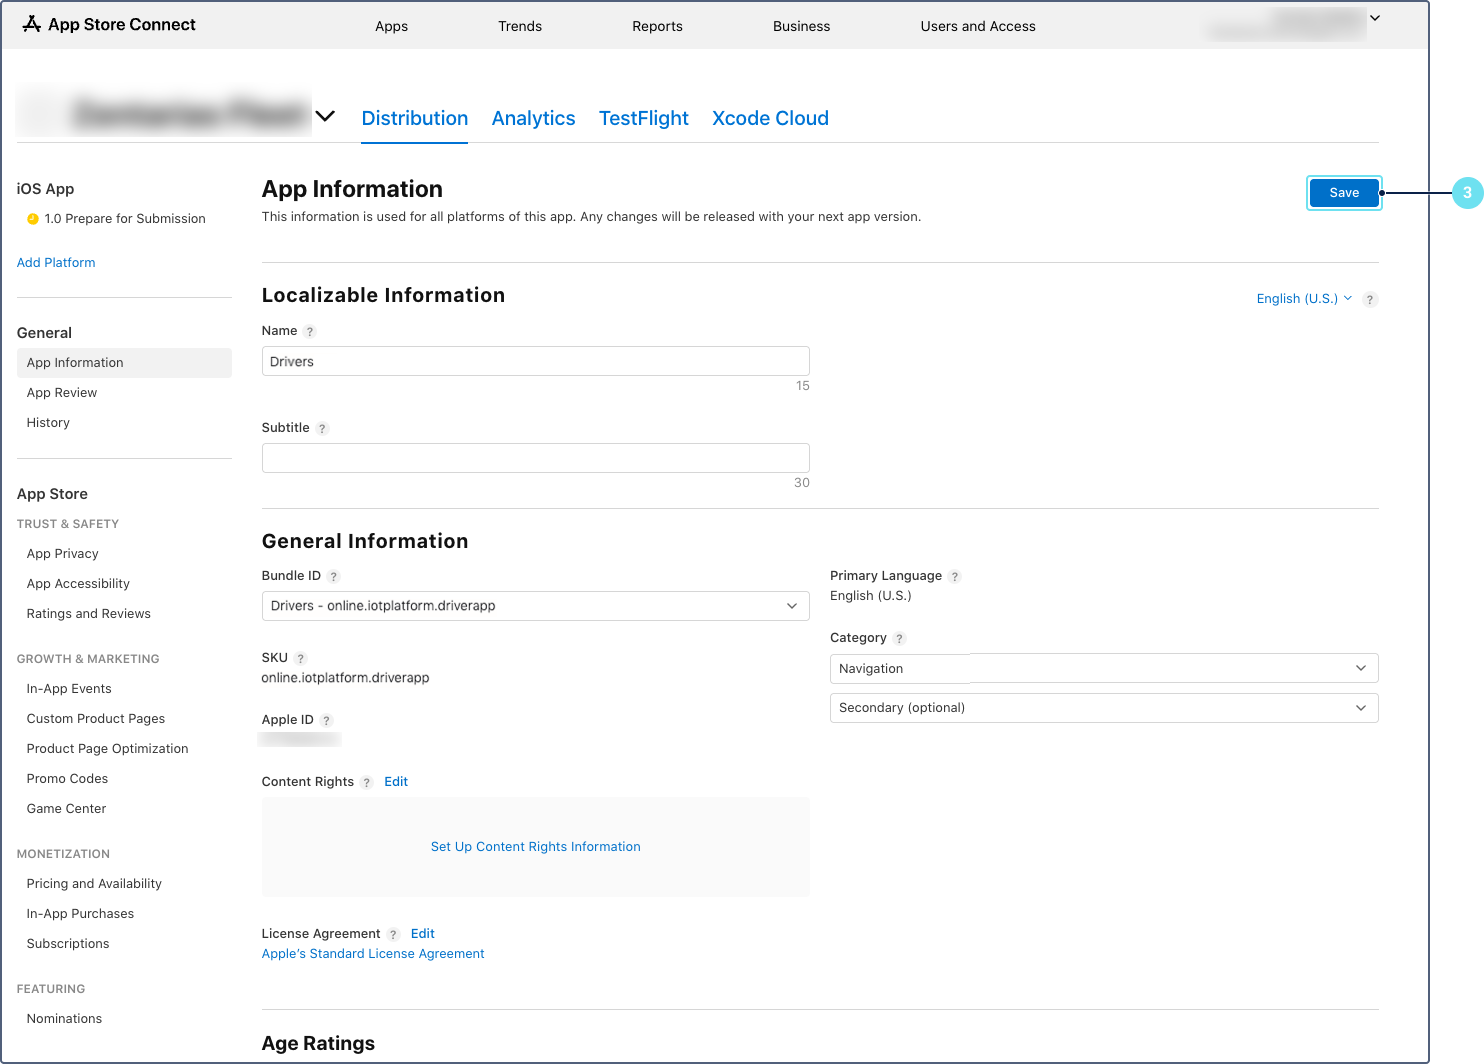
Step 2: Set up the app information
-
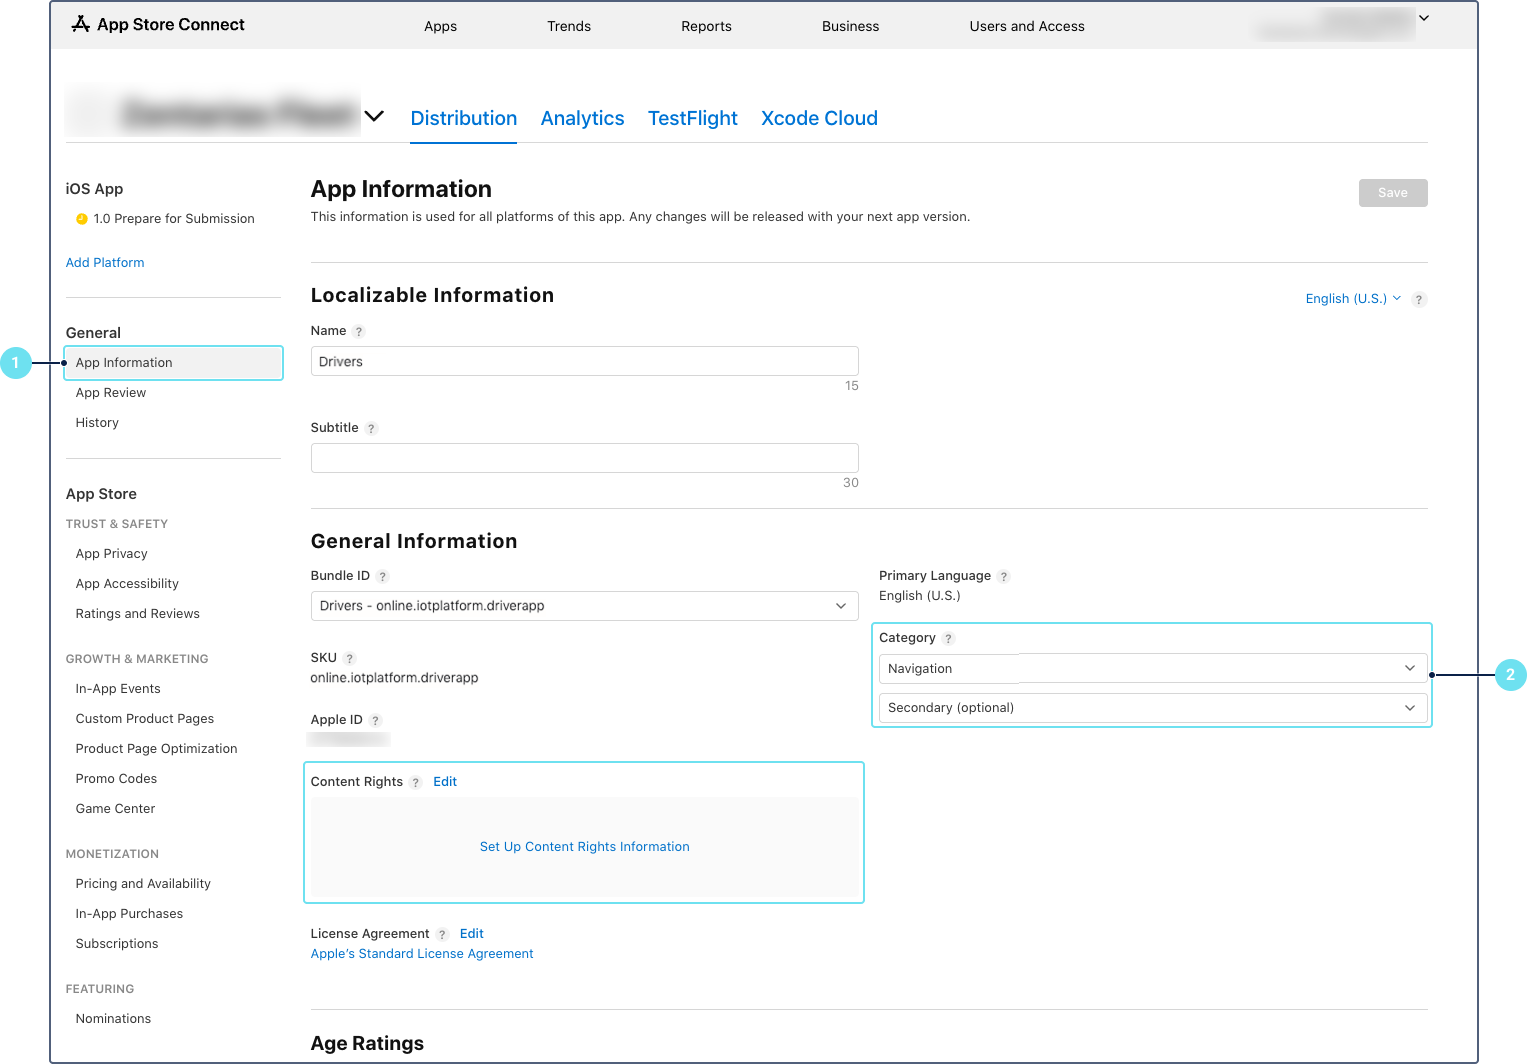
In App Store Connect, open your app and navigate to General > App information in the left sidebar.
-
Fill in the required fields:
- Category: Select the category (for example, Navigation).
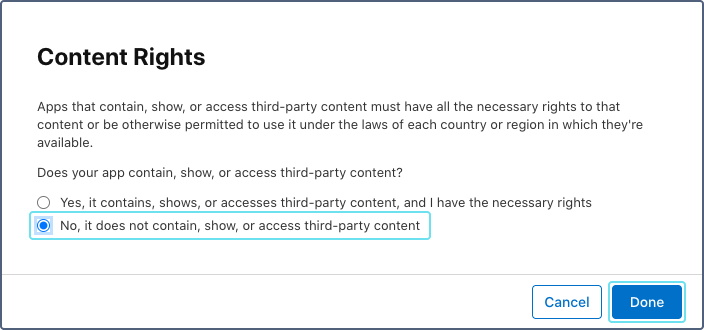
- Content rights: Select No. Click Done.
-
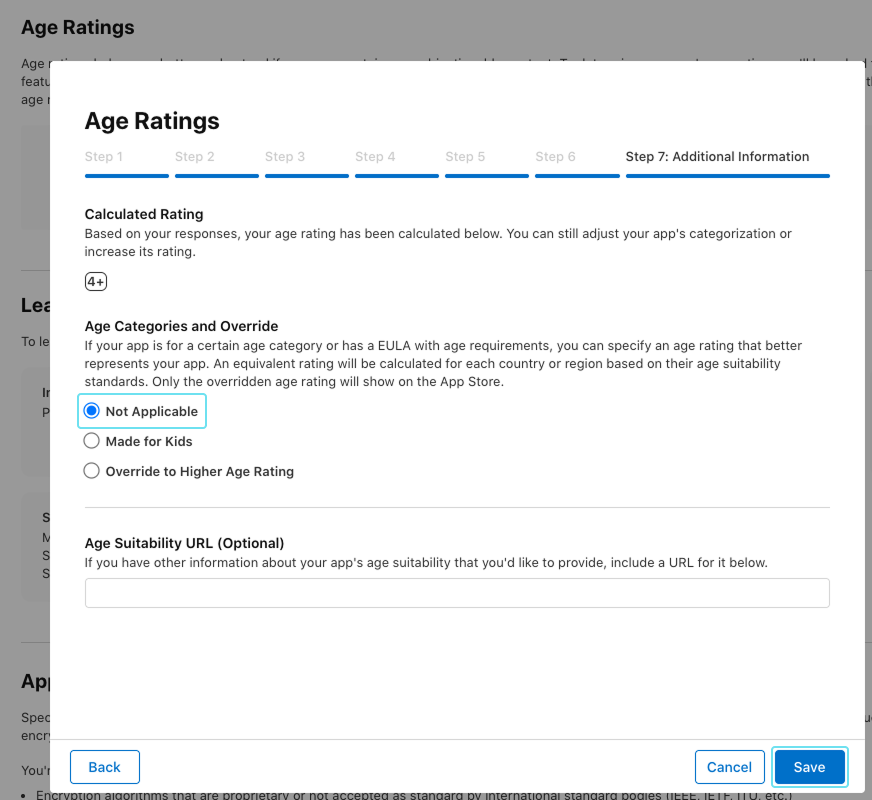
Age ratings: Click Set Up Age Rating, select No for all content descriptions. In the final step, select Not applicable for the app environment. Click Save.
-
Click Save.
Configuring app privacy (data collection)
-
In the left sidebar, click App Privacy.
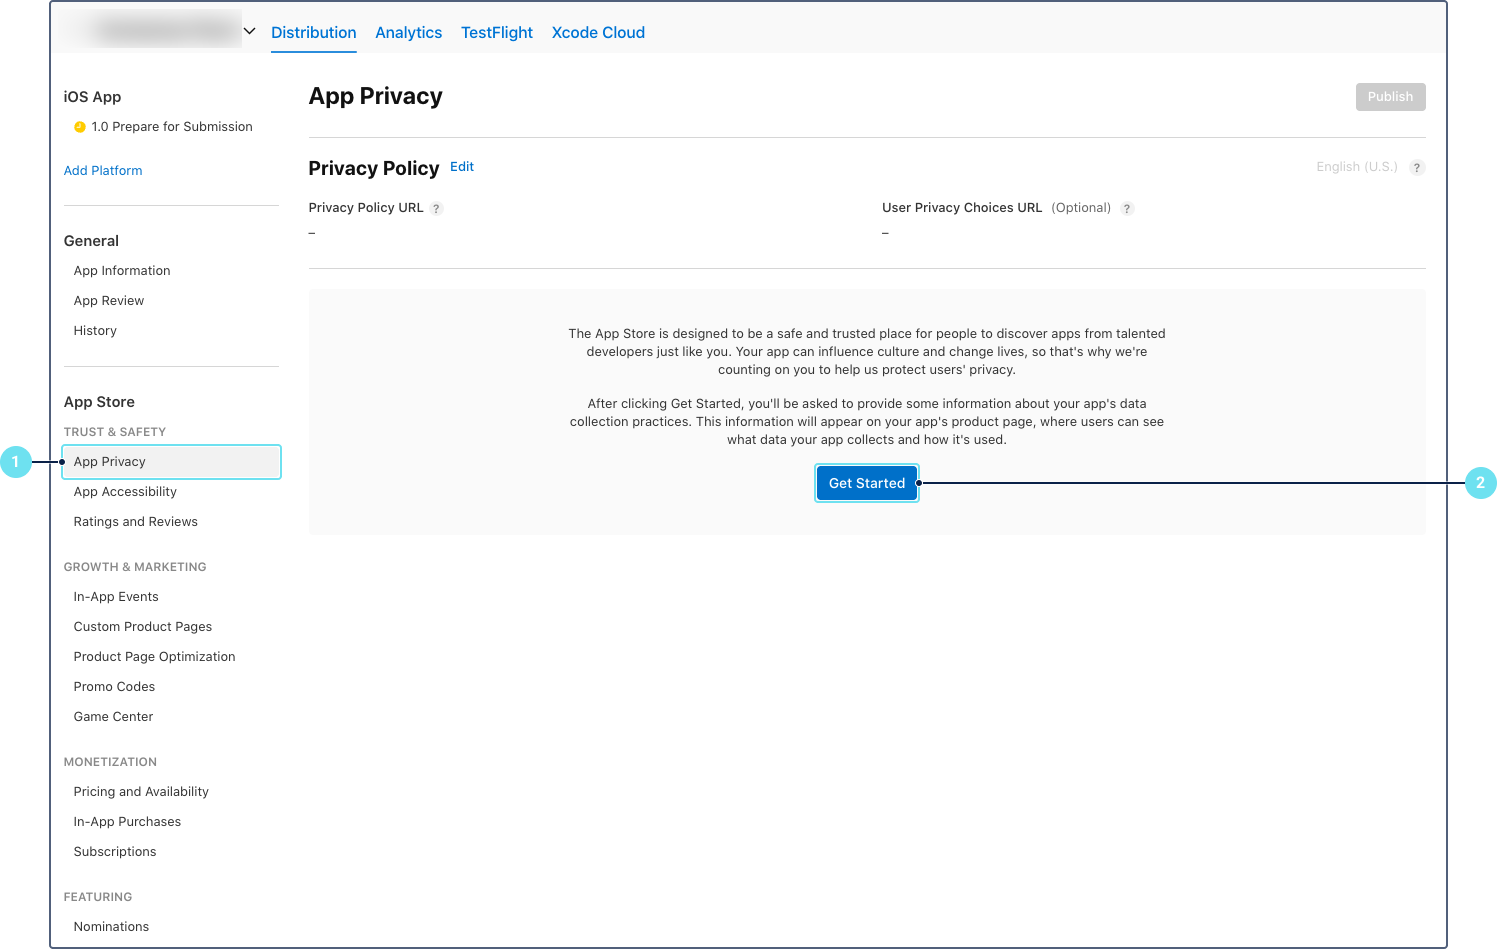
-
Click Get Started.
-
Select whether the app collects data. The white-labeled Wialon Driver app doesn’t collect data beyond what is necessary for its functionality.
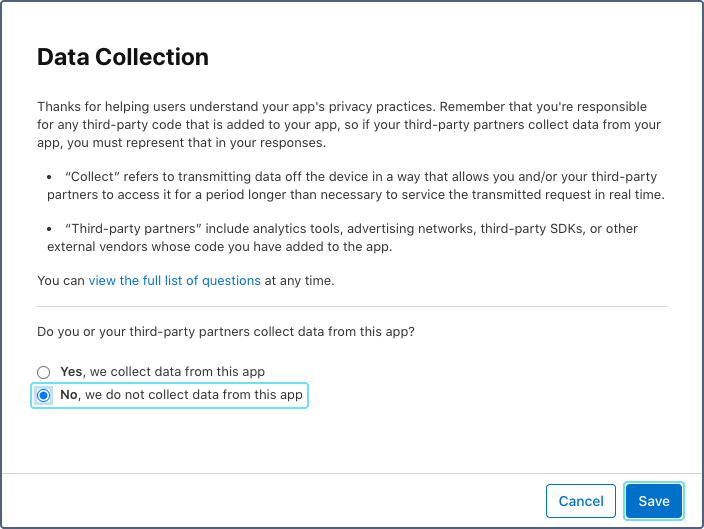
-
Click Publish.
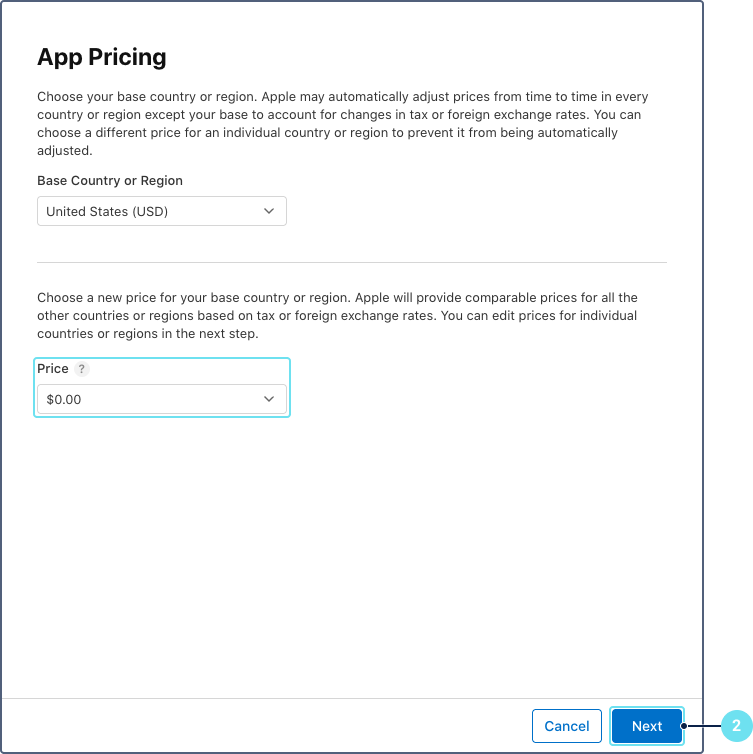
Step 3: Configure pricing and availability
-
In the left sidebar, navigate to Monetization > Pricing and Availability.
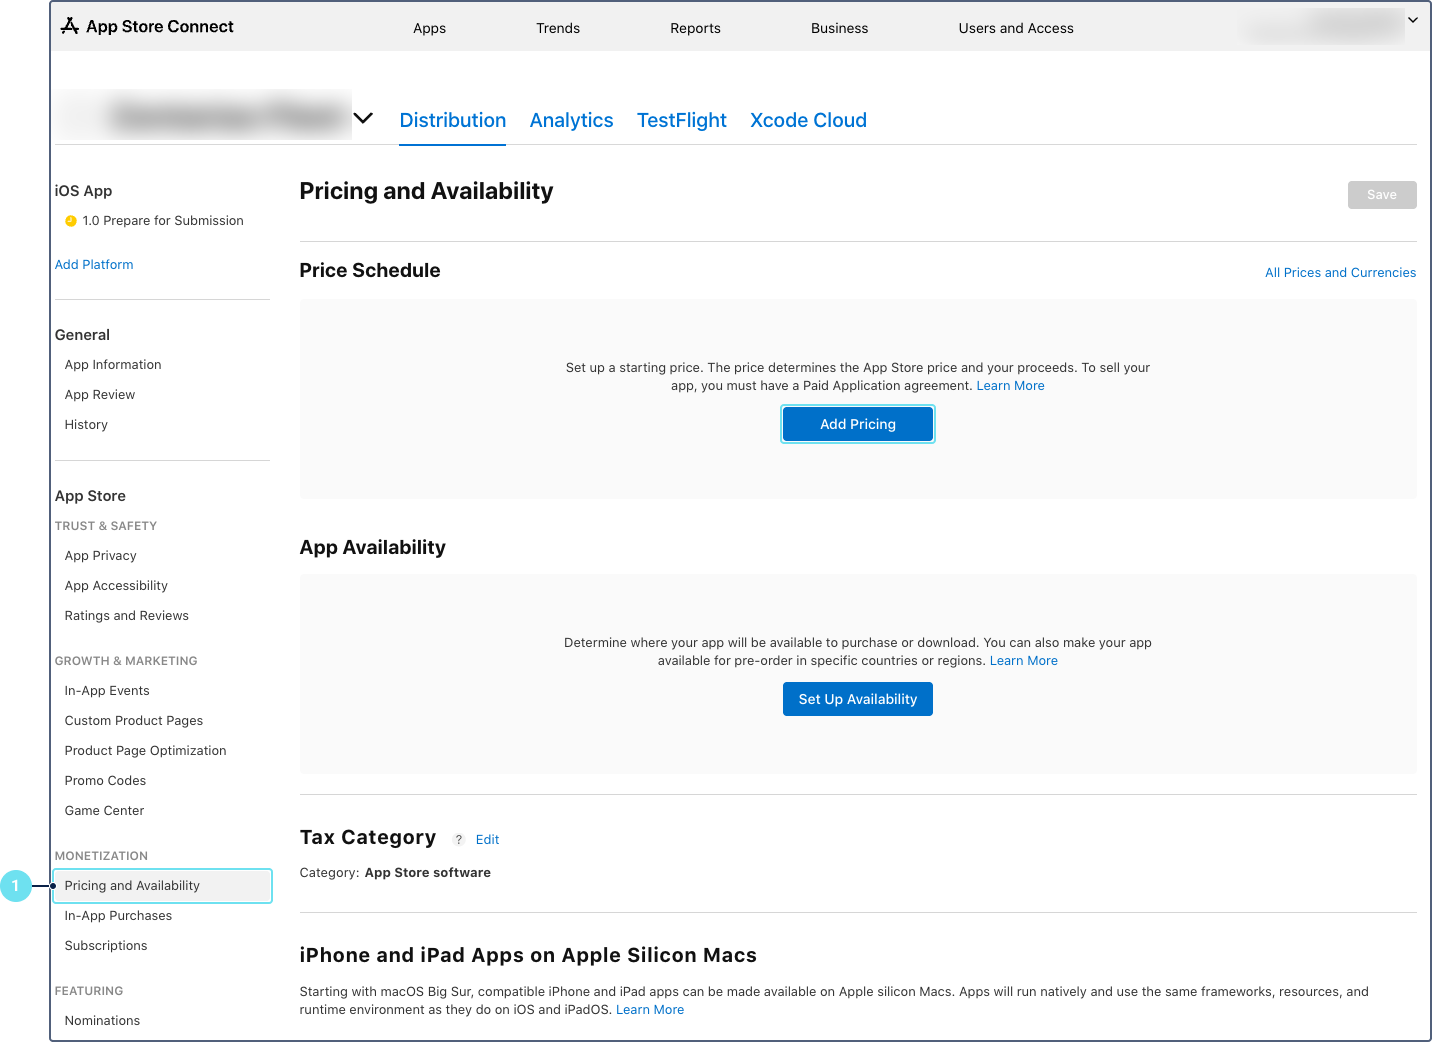
-
In the Price Schedule section, set the base price to 0 (free). Click Next.
-
Review the pricing summary and click Next.
-
Click Confirm to save the price schedule.
-
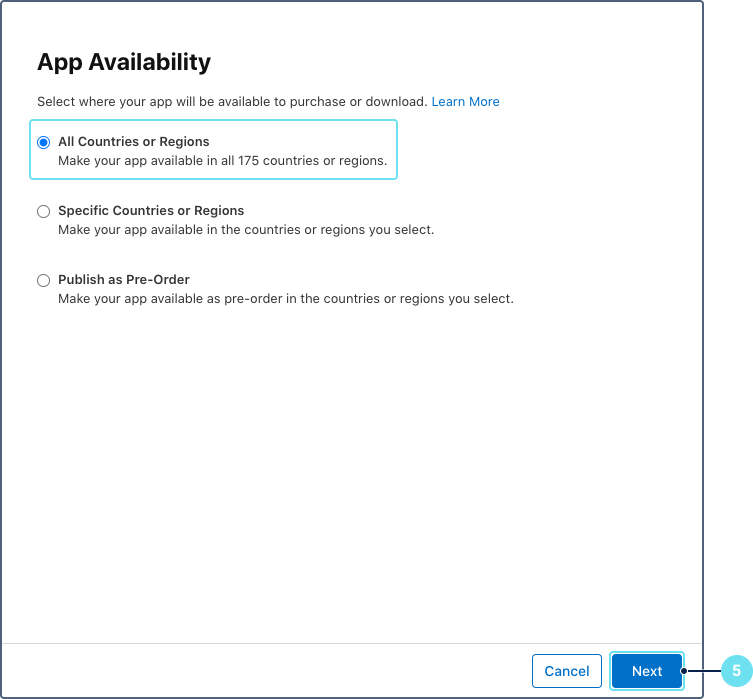
In the Availability section, select All countries and regions to make the app available worldwide. Alternatively, select specific countries or regions based on your business needs. Click Next.
-
Click Confirm.
-
Click Save.
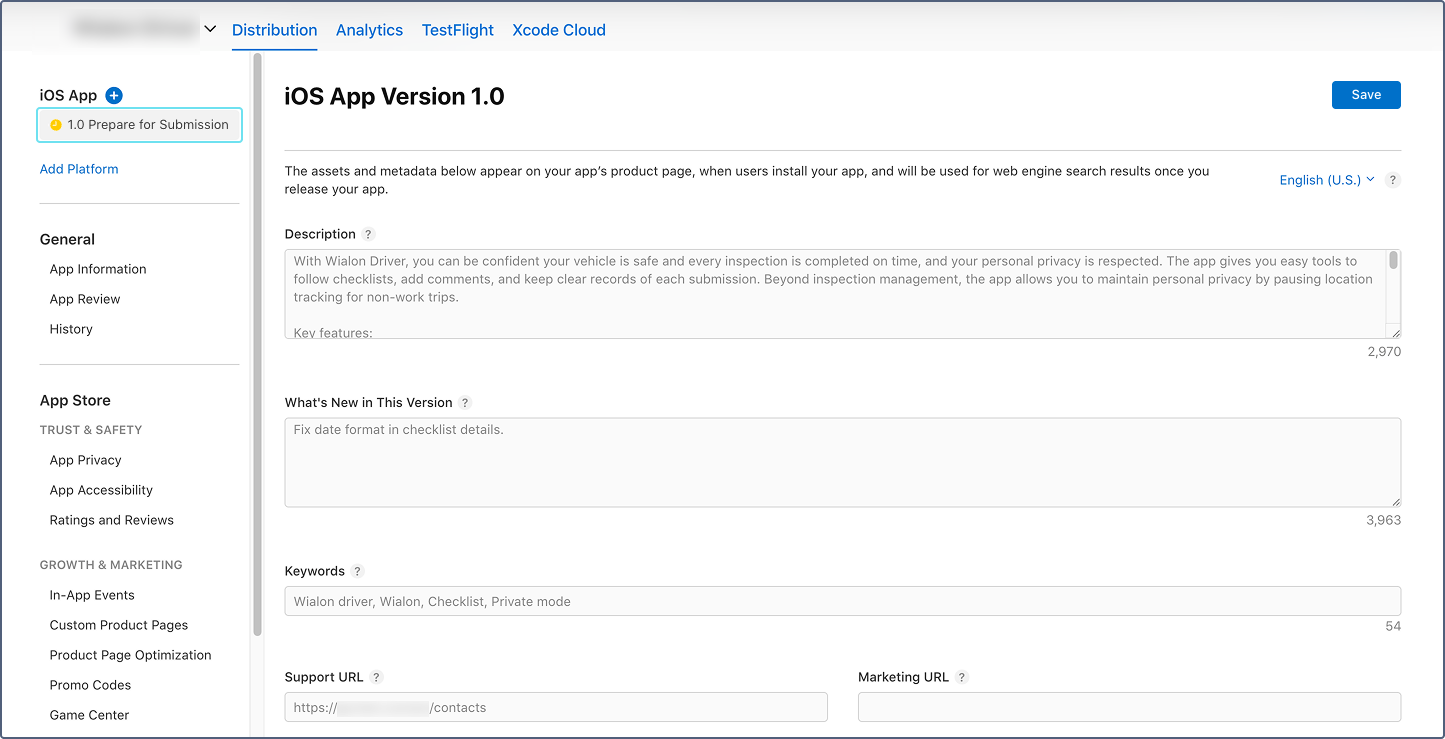
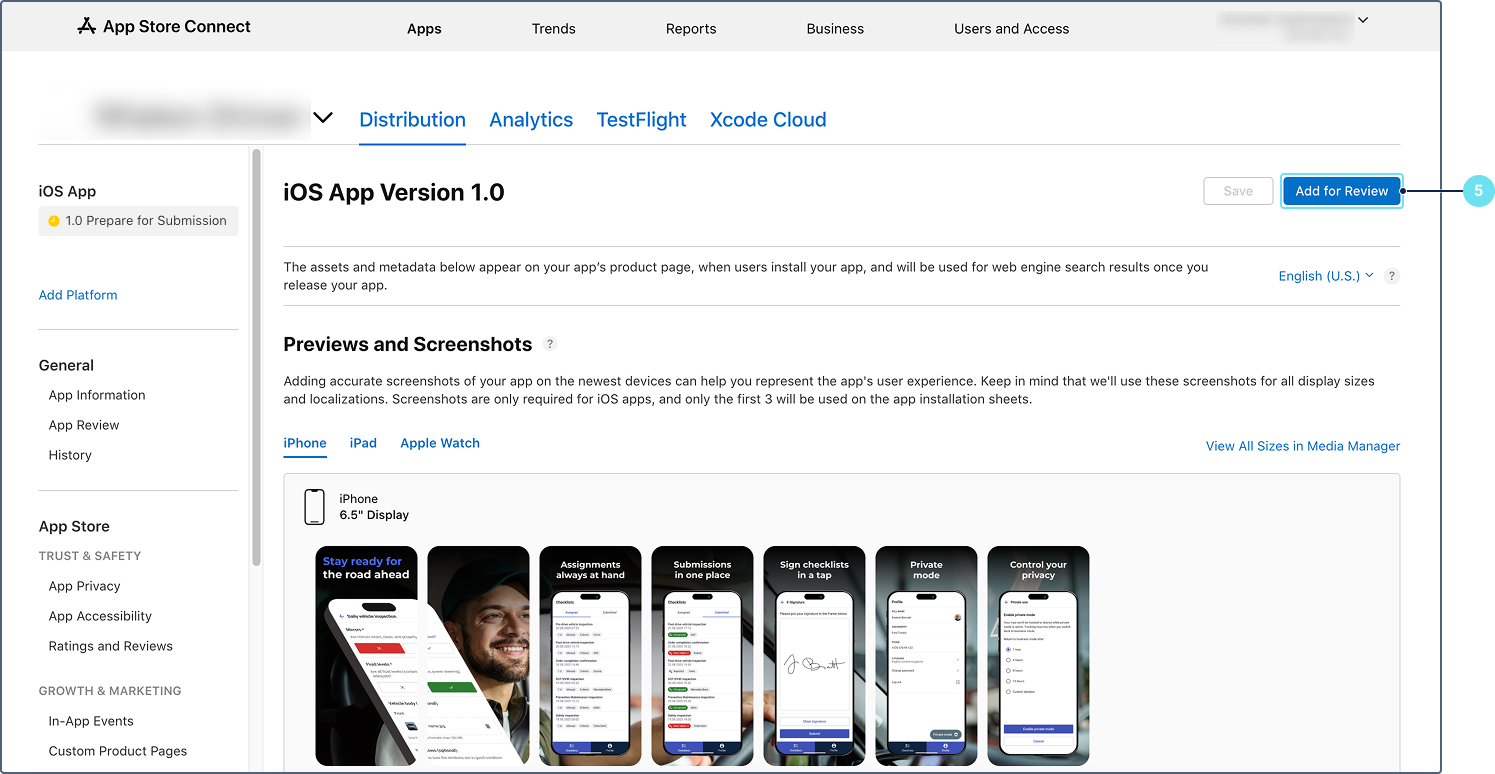
Step 4: Prepare the version for submission
-
In the left sidebar, navigate to the iOS version page (for example, 1.0 Prepare for Submission).
-
In the App Screenshots section, upload at least 3 screenshots for each required device size (for example, iPhone 6.5"). Upload screenshots that show the main features of the app (for example, the login screen, checklist list, checklist completion screen, driving score screen, and the private mode screen). The screenshots must be in the same language as the primary language specified in Step 1. If your app supports multiple languages, add screenshots for each language in the corresponding App Store localization.
-
Fill in the following fields:
- Description: Enter a detailed description of the app (up to 4,000 characters). Describe the key features: checklists, private mode, driver behaviour assessment, and so on.
- Keywords: Enter search keywords separated by commas (up to 100 characters total). For example:
driver, checklist, private mode, driving score, driving violations. - Support URL: Enter the URL of your customer support page.
- Version: The version number is set automatically based on the uploaded build (for example,
1.0). Verify that it matches the build version. - Copyright: Enter the copyright holder’s name preceded by the year (for example,
2026 Your Company Name).
-
Click Save.
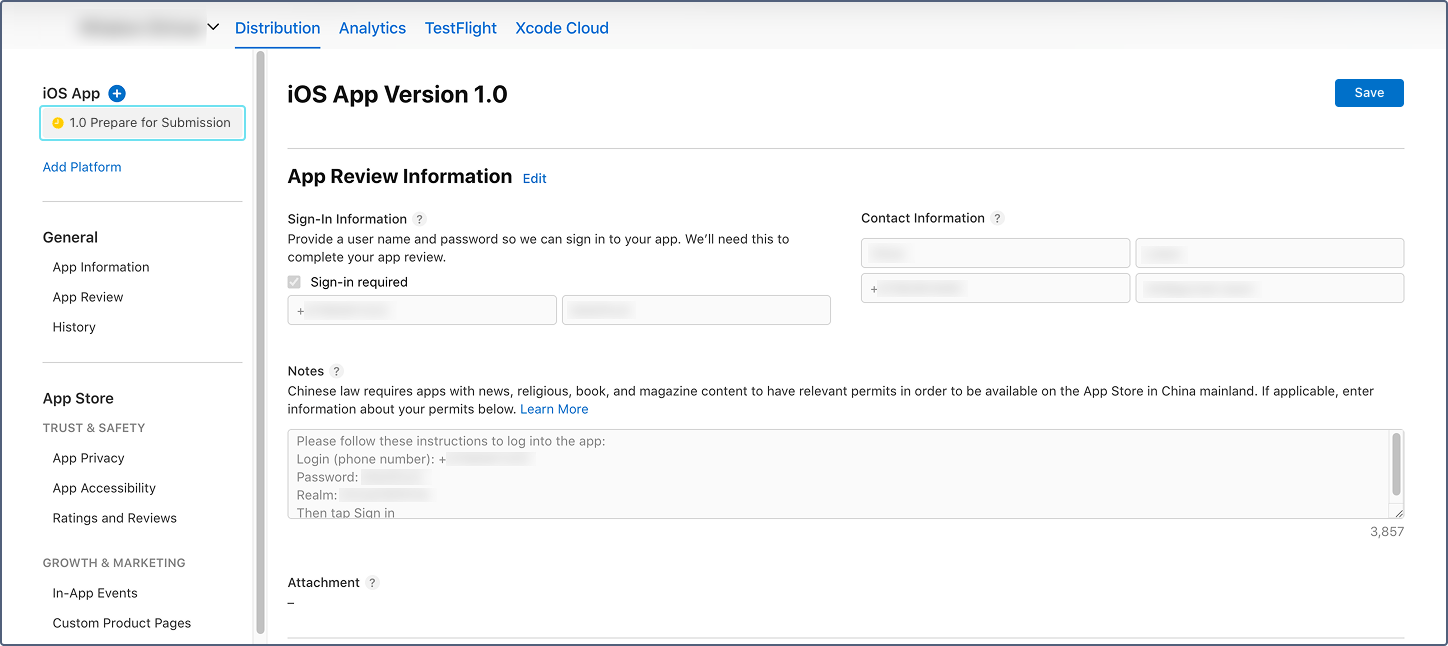
Step 5: Fill in the app review information
Apple requires a demo account and contact details so that the review team can test the app during the review process.
-
On the version page, scroll down to the App Review Information section.
-
In the Sign-in information subsection, provide demo credentials for a test driver account:
- Sign-in required: Enable this option.
- Username: Enter the phone number of the demo driver account.
- Password: Enter the password of the demo driver account.
Create a dedicated demo driver account in Wialon Platform FleetSpace before submitting. The account must be active and functional during the entire review period. Make sure the demo driver is assigned to a device and has at least one checklist assigned.
-
In the Notes field, provide any additional instructions for the reviewer. For example, specify the realm ID required for login or basic steps for using application features.
-
In the Contact Information subsection, provide the details of the person Apple can contact if there are questions during the review:
- First name: The contact person’s first name.
- Last name: The contact person’s last name.
- Phone number: A phone number for Apple to reach the contact person.
- Email: An email address for review-related communications.
-
Click Save.
Step 6: Upload the IPA
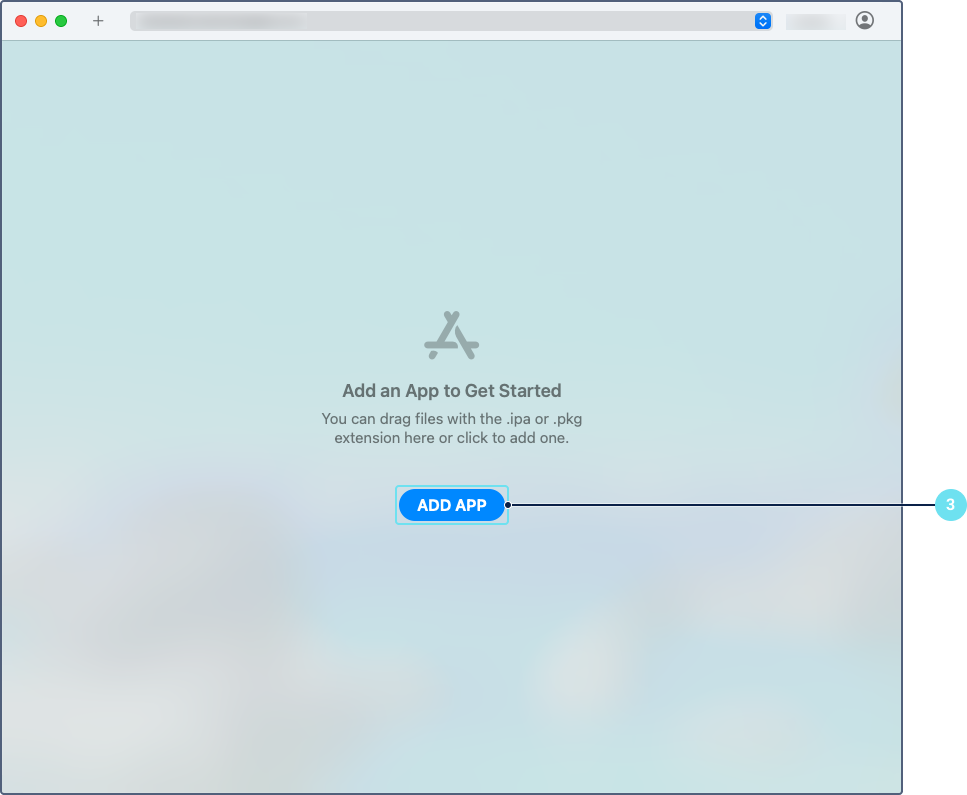
You can upload the IPA file using Transporter or Xcode. We recommend using Transporter for an easier delivery process. Transporter is a free macOS app from Apple for uploading builds to App Store Connect.
-
Download and install Transporter from the Mac App Store.
-
Open Transporter and sign in with your Apple Developer account.
-
Click Add app and select the IPA file downloaded from Wialon Platform Studio.
-
Click Deliver.
-
Wait for the upload and processing to complete. Transporter displays the status and any validation errors.
Step 7: Submit for review
-
In App Store Connect, open your app and navigate to the version page (for example, 1.0 Prepare for Submission).
-
In the Build section, click Select a build before you submit your app (or the + button), and choose the uploaded build.
-
Verify that all required fields are filled in: screenshots, description, keywords, support URL, copyright, pricing, and app review information.
-
Select the release method:
- Manually release this version: You control when the app goes live after approval.
- Automatically release this version: The app goes live immediately upon approval.
-
Click Add for Review.
-
Click Submit to App Review.
Apple’s review process typically takes 24 to 72 hours. You receive an email notification when the review is complete. If the app is rejected, the notification includes the reasons and guidance for resubmission.