Creating form templates
Who can do it: Service provider
Where: Wialon Platform Studio
Form templates are reusable configurations for forms that you can assign to one or more devices. You can create templates to match regional legal requirements or specific customer needs.
Creating a new form template is a process organized into three tabs: General, Assignment rules, and Form items. To create a functional template, you must configure the General and Form items sections. The Assignment rules section is for automatic assignment and can be configured later.
You can create up to 20 form templates for one customer.
Step 1: Navigating to the “Forms” tab
-
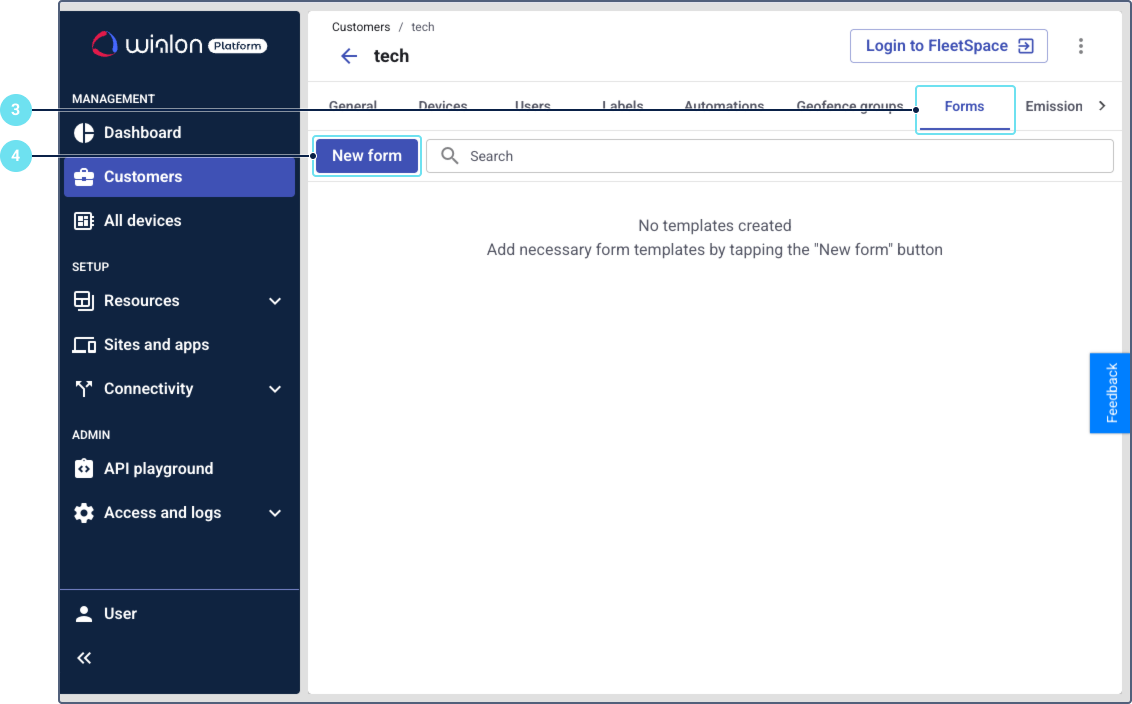
In Wialon Platform Studio, open the Customers page.
-
Select the customer you want to create the template for.
-
Navigate to the Forms tab.
-
Click New form.
If you haven’t created any form templates yet, click Add first form template on the empty page.
This will open the template editor with the three tabs.
You can also create a form template in a customer template and then update the necessary customer accounts or create new ones using this customer template. However, the assignment rules can be configured only for each customer individually.
Step 2: “General” tab
This tab defines the basic properties and settings of the form.
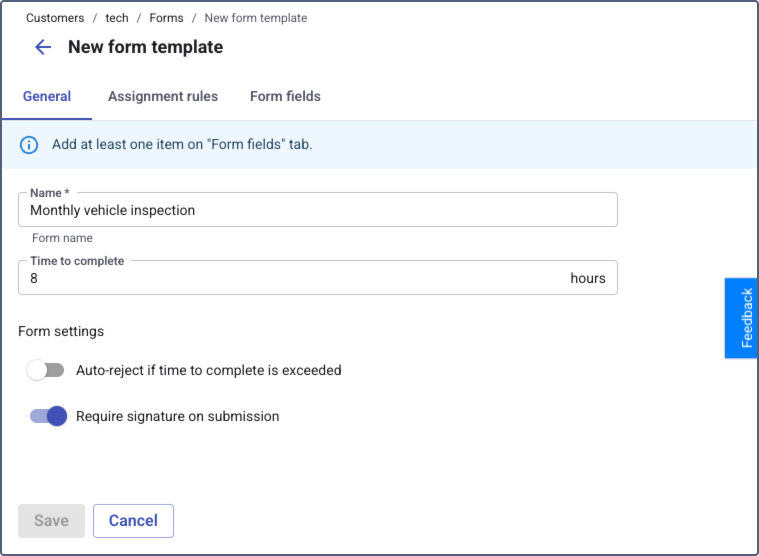
- Name *: Give the template a descriptive name (for example, “Daily pre-trip inspection (EU Standard)”). This is a mandatory field.
- Time to complete: Specify the maximum expected time for a driver to complete the form, entered in hours (for example, enter
0.25for 15 minutes). This time starts counting from the assignment time. If the time to complete expires without a submitted form, the form is flagged as Overdue. If the Auto-reject if time to complete is exceeded option is enabled, the form is automatically rejected and flagged as Rejected. - Auto-reject if time to complete is exceeded: Enable this option if you want the system to automatically flag as Rejected a submission that takes longer than the time you specified above.
- Require signature on submission: Enable this option to add a mandatory electronic signature field that the driver or user must sign to complete the form. The signer draws their signature directly on the device touchscreen.
Step 3: “Assignment rules” tab (optional)
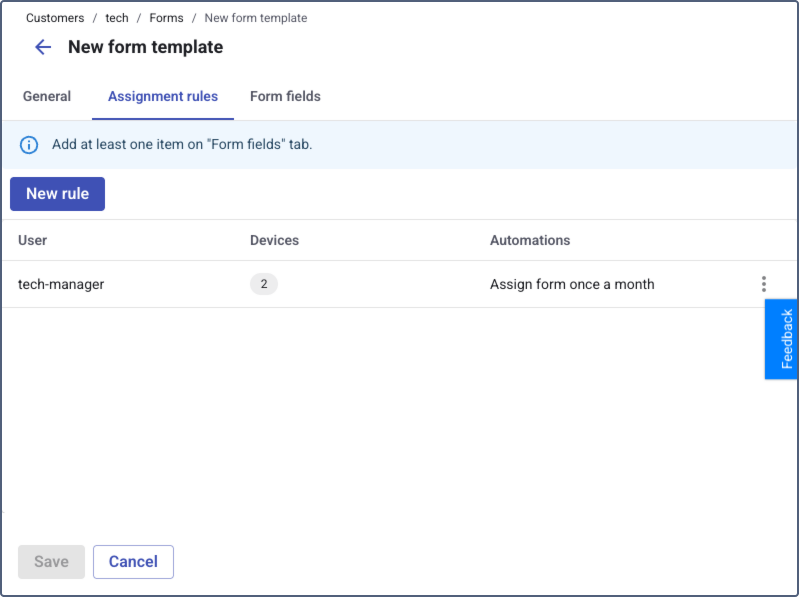
This tab controls which users or drivers receive this form and under what conditions. You can create specific rules for different users and devices. You must have a preconfigured automation for this step.
You can create a form template without configuring assignment rules. Omit this step if you want to assign forms manually or configure the assignment rules later.
-
Click the New rule button to open the Create rule window.
If t you haven’t created any assignment rules yet, click Add first assignment rule on the empty page.
-
Configure the rule by specifying the conditions for assignment:
- Select user: Choose the specific users this rule applies to by selecting them from the list. Alternatively, activate the Assign to current driver toggle to assign the form to the driver currently assigned to the device at the moment the automation is activated. When this toggle is active, the user selection becomes unavailable.
- Select devices: Assign the form to specific devices.
- Select automations: Link the form to preliminary created automation. This automation will assign the form based on the defined triggers and conditions.
-
Click Save to add the rule. You can add multiple assignment rules to a single template (for example, one rule for truck drivers, another for van drivers).
When creating automation linked with a form template, this automation automatically appears on the Assignment rules tab of this form template.
Step 4: “Form fields” tab
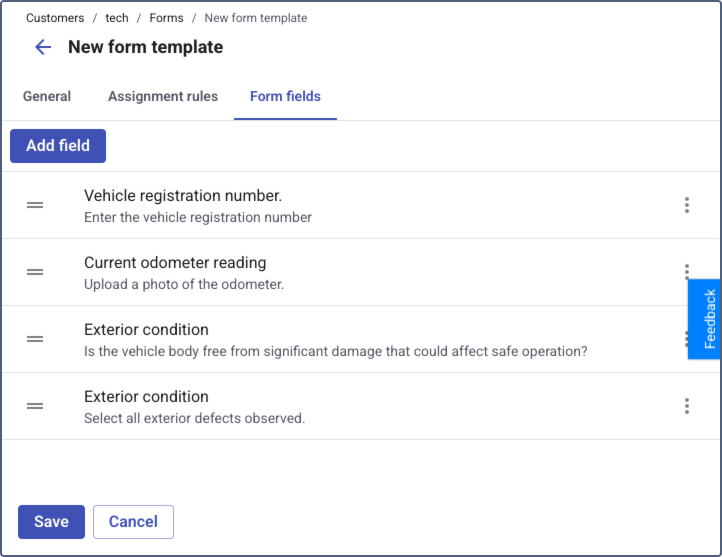
This is where you will build the actual list of questions for the driver or user to answer. The template can’t be saved without at least one question.
If you haven’t created any form fields yet, click Add first form field on the empty page.
-
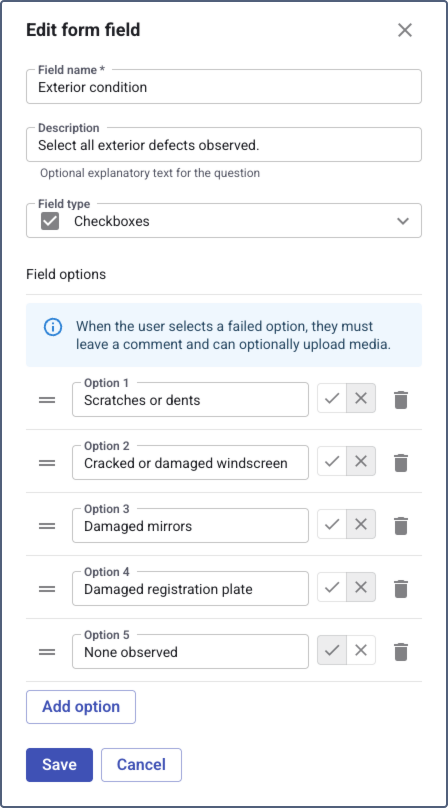
On the Form fields tab, click the Add field button. Configure each item as needed:
- Field name *: Enter the question for the driver or user who performs the inspection.
- Description: Provide optional instructions.
- Field type: Select the format for the driver’s or user’s answer.
- Binary check
 : For simple pass/fail or yes/no questions.
 - Checkboxes
 : Allows selecting multiple options from a list.
 - Media upload
 : Requires the driver or user to upload a photo (for example, of the odometer).
 - Multiple choice
 : For selecting one option from a list of three or more.
 - User input
 : A free-text field for the driver or user to type an answer.
- Binary check
- Field options: Define the answer choices for “Binary check” or “Multiple choice” items and set their outcome (
 for pass,
  for fail).
 - Click Save or Save and continue to save your field.
-
Repeat this process for all fields in your form.
After you have added a name and added at least one field, you can save the entire template.
If automatic assignment is not configured, you can assign a form to devices, users, or drivers manually.