Managing customer user access
Who can do it: Service provider
Where: Wialon Platform Studio
On the Users tab of a customer, you can check whether each user has accepted the invitation and help users who can’t log in. You can resend invitations, reset passwords, and change the email that a user logs in with. All emails go to the email address of the user. Users don’t need to share their password with you.
User statuses
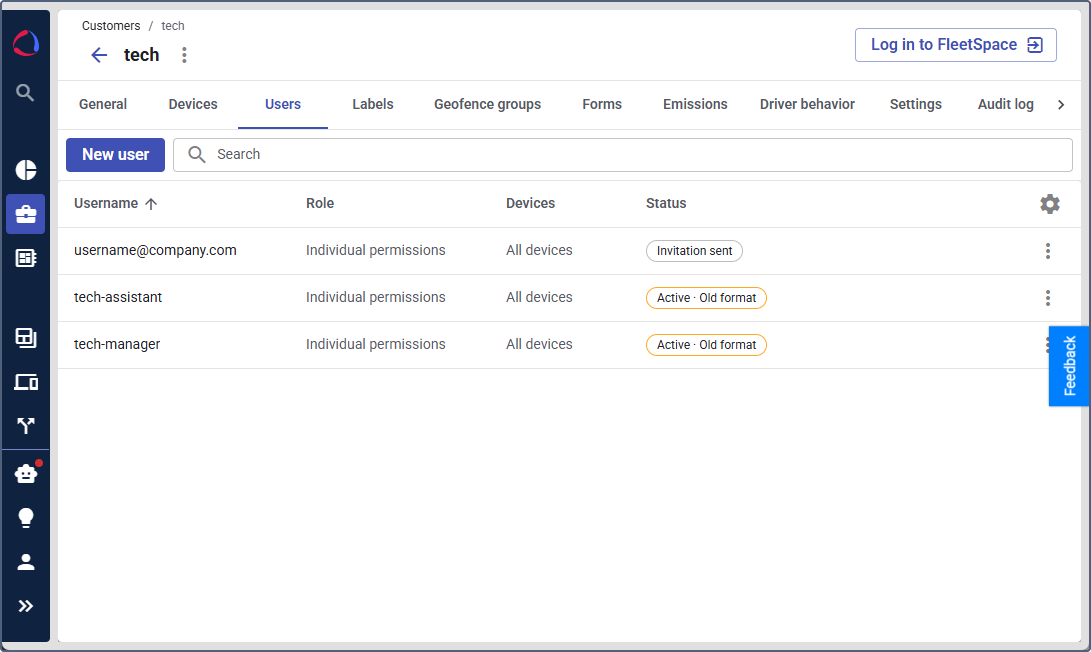
The Status column of the users list shows where each user is in the invitation and login process. Hover over a status to see its description.
| Status | Description | Available actions |
|---|---|---|
| Active | The user has set a password and can log in with their email. | Send access details, Reset password, Delete |
| Active · Old format | The user still logs in with a username, not an email address. Emails can’t be sent to this user until you add an email. | Delete |
| Invitation sent | The invitation email is sent. The user hasn’t set a password yet. | Resend invitation, Delete |
| Invitation expired | The user didn’t set a password within 24 hours, and the invitation link no longer works. | Resend invitation, Delete |
| Password reset | The password is reset. The user hasn’t set a new password yet. | Resend password link, Delete |
| Password link expired | The user didn’t set a new password within 24 hours, and the password link no longer works. | Resend password link, Delete |
You can delete a user with any status.
The status changes automatically when the user sets a password or when a link expires. After you resend an invitation, reset a password, or send access details, the status changes at once. The users list is reloaded each time you open the Users tab.
For the Password reset and Password link expired statuses, the user page shows an alert that the user can’t log in until they set a new password.
If a user was created before statuses were introduced and there is no record of their invitation, the user is shown as invited at the time of creation. If such a user hasn’t set a password, resend the invitation.
The Devices column shows whether the user’s access is limited to specific devices. For details, see Viewing which users have limited access.
To find users with a specific status, filter the table by the Status column. To reorder, show, or hide the table columns, or reset them to the default settings, click the gear icon in the table header.
Actions with users
To perform an action, open the row menu  of the user in the list. The menu shows only the actions available for the current status of the user.
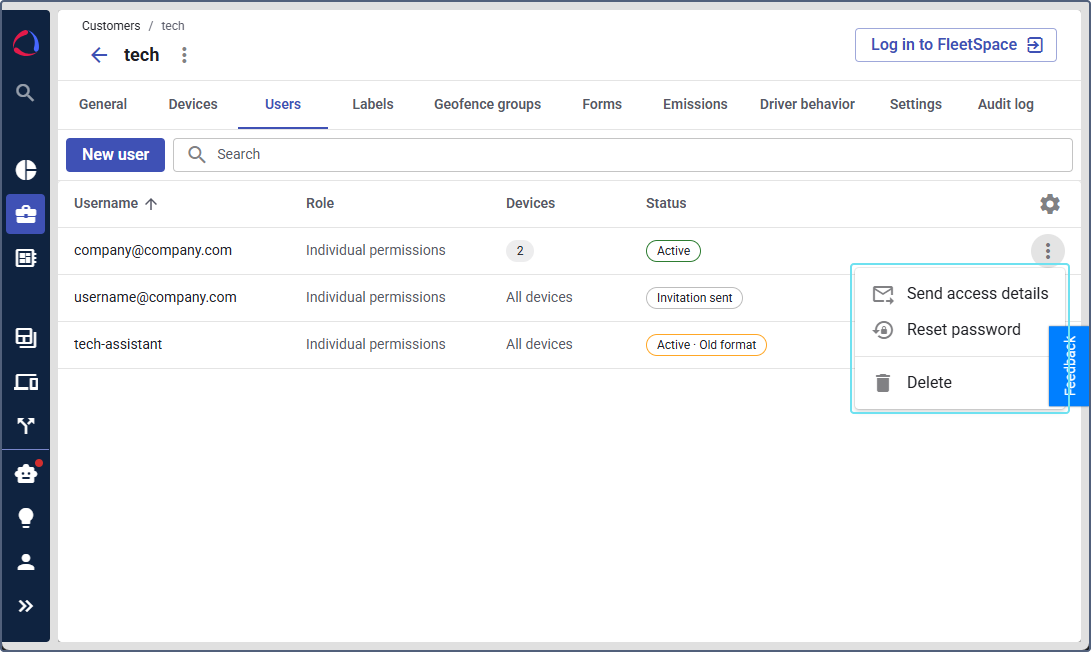
After an action, a message shows the email address the system sent the email to. If the email can’t be sent, the error message shows the reason.
These actions are available to the Wialon Platform Studio users with the Administrator, Operations manager, or Customer specialist role. Users with the Viewer role don’t see them. For details on roles, see Inviting users with specific roles to Wialon Platform.
Resending an invitation
Resend the invitation if the user lost or didn’t receive the email, or if the link has expired.
In the row menu of the user, select Resend invitation. The user receives a new invitation email with a link to set a password. The new link is valid for 24 hours.
If the user already has a password, it’s removed, and the user can’t log in until they set a new one from the link.
Sending access details
Send access details if an active user needs the links to the web and mobile apps again.
In the row menu of the user, select Send access details. The email is sent immediately, without confirmation.
The email states that the password hasn’t changed and contains an optional link for setting a new one. The current password keeps working, and the status of the user doesn’t change.
Resetting a password
Reset the password if the user forgot it or it must be changed for security reasons.
-
In the list of users, click
on the user row and select Reset password. Alternatively, open the user and click Reset password at the bottom of the page.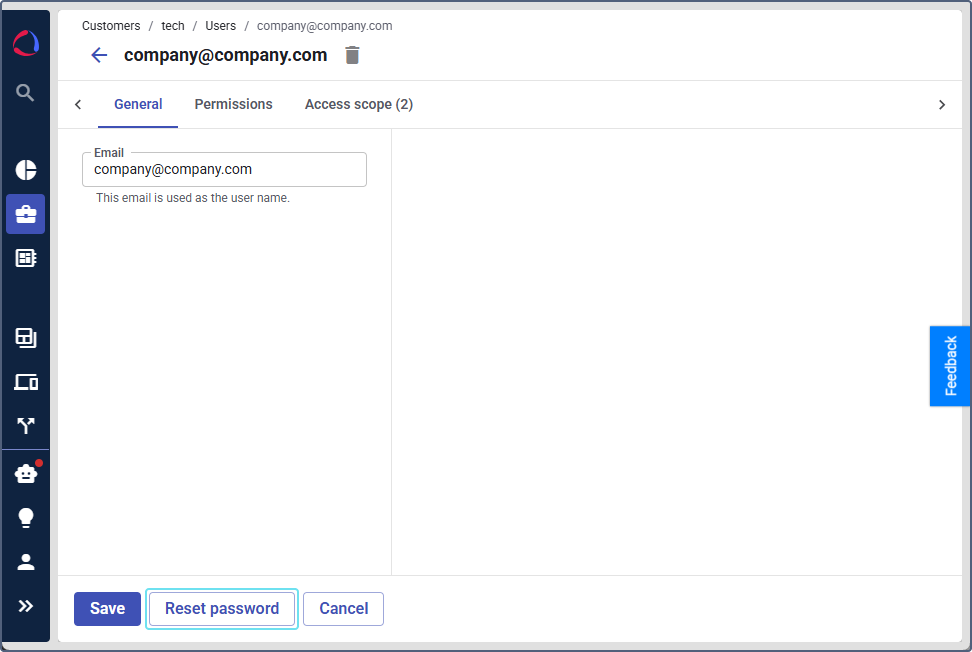
-
Confirm the action.
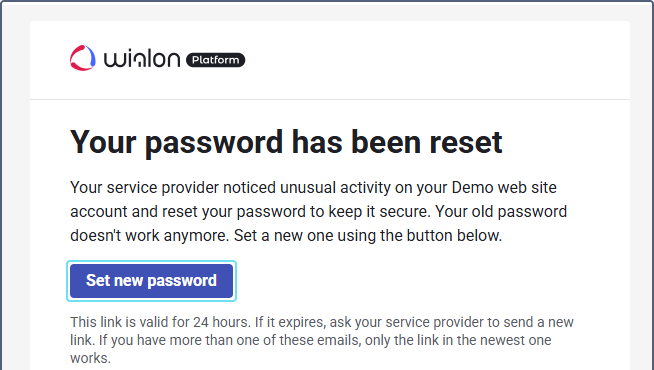
The old password stops working immediately. The user receives an email with a link to set a new password. The link is valid for 24 hours. The status of the user changes to Password reset.
On the user page, the Reset password button is unavailable if the form has unsaved changes. Save the changes first, so that the link goes to the current email address.
If the user doesn’t set a new password in time, select Resend password link in the row menu. The user receives a new link.
Users can also reset their password themselves from the login page. See Resetting a forgotten password.
Changing the email of a user
If the email of the user is wrong or has changed, update it:
- Open the user.
- On the General tab, enter the new email address.
- Click Save.
The user logs in with the new email from now on.
Users with old format usernames
Users created before email-based login was introduced log in with a username, not an email address. These users have the Active · Old format status. They can still log in with their username and password, but you can’t send them invitations, access details, or password reset links.
To switch such a user to email-based login:
- Open the user. On the General tab, a warning says that the user has no email address. The username is shown as read-only.
- Enter the email address of the user. A message reminds you that the user will log in with this email from now on, and the old username will stop working.
- Click Save.
The user now logs in with the email and the same password. To send them the links to the apps, use Send access details.